モジュールにブロック定義を記述して、画面に表示するところまでの手順
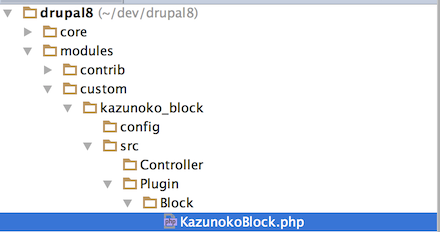
1.BlockBaseを継承したクラスを以下の場所に配置
modules/custom/{モジュール名}/src/Plugin/Block/{ブロック名(クラス名)}.php
2.@Block のアノテーションを定義
このアノテーションが重要です。この記述をしないと管理画面で選択できなかったです。
・id ・・・ 管理キー
・admin_label ・・・管理画面でブロックを配置する画面でこの情報が表示される
3.build()の中身を定義
表示情報を定義します。キャッシュの単位も定義可能。
実際のコード
KazunokoBlock.php
<?php

/**
 * @file
 * Contains \Drupal\kazunoko_block\Plugin\Block\KazunokoBlock.
 */

namespace Drupal\kazunoko_block\Plugin\Block;

use Drupal\Core\Block\BlockBase;
use Drupal\Core\Form\FormStateInterface;

/**
 * Provides a Kazunoko block.
 *
 *
 * @Block(
 *   id = "kazunoko_block",
 *   admin_label = @Translation("sample kazunoko block"),
 * )
 */
class KazunokoBlock extends BlockBase {

  /**
   * Builds and returns the renderable array for this block plugin.
   *
   * If a block should not be rendered because it has no content, then this
   * method must also ensure to return no content: it must then only return an
   * empty array, or an empty array with #cache set (with cacheability metadata
   * indicating the circumstances for it being empty).
   *
   * @return array
   *   A renderable array representing the content of the block.
   *
   * @see \Drupal\block\BlockViewBuilder
   */
  public function build() {
    return array(
      '#type' => 'markup',
      '#markup' =>'Drupal!!!!',
      '#cache' => array(
        'contexts' => array('user'),
      ),
    );
  }
}
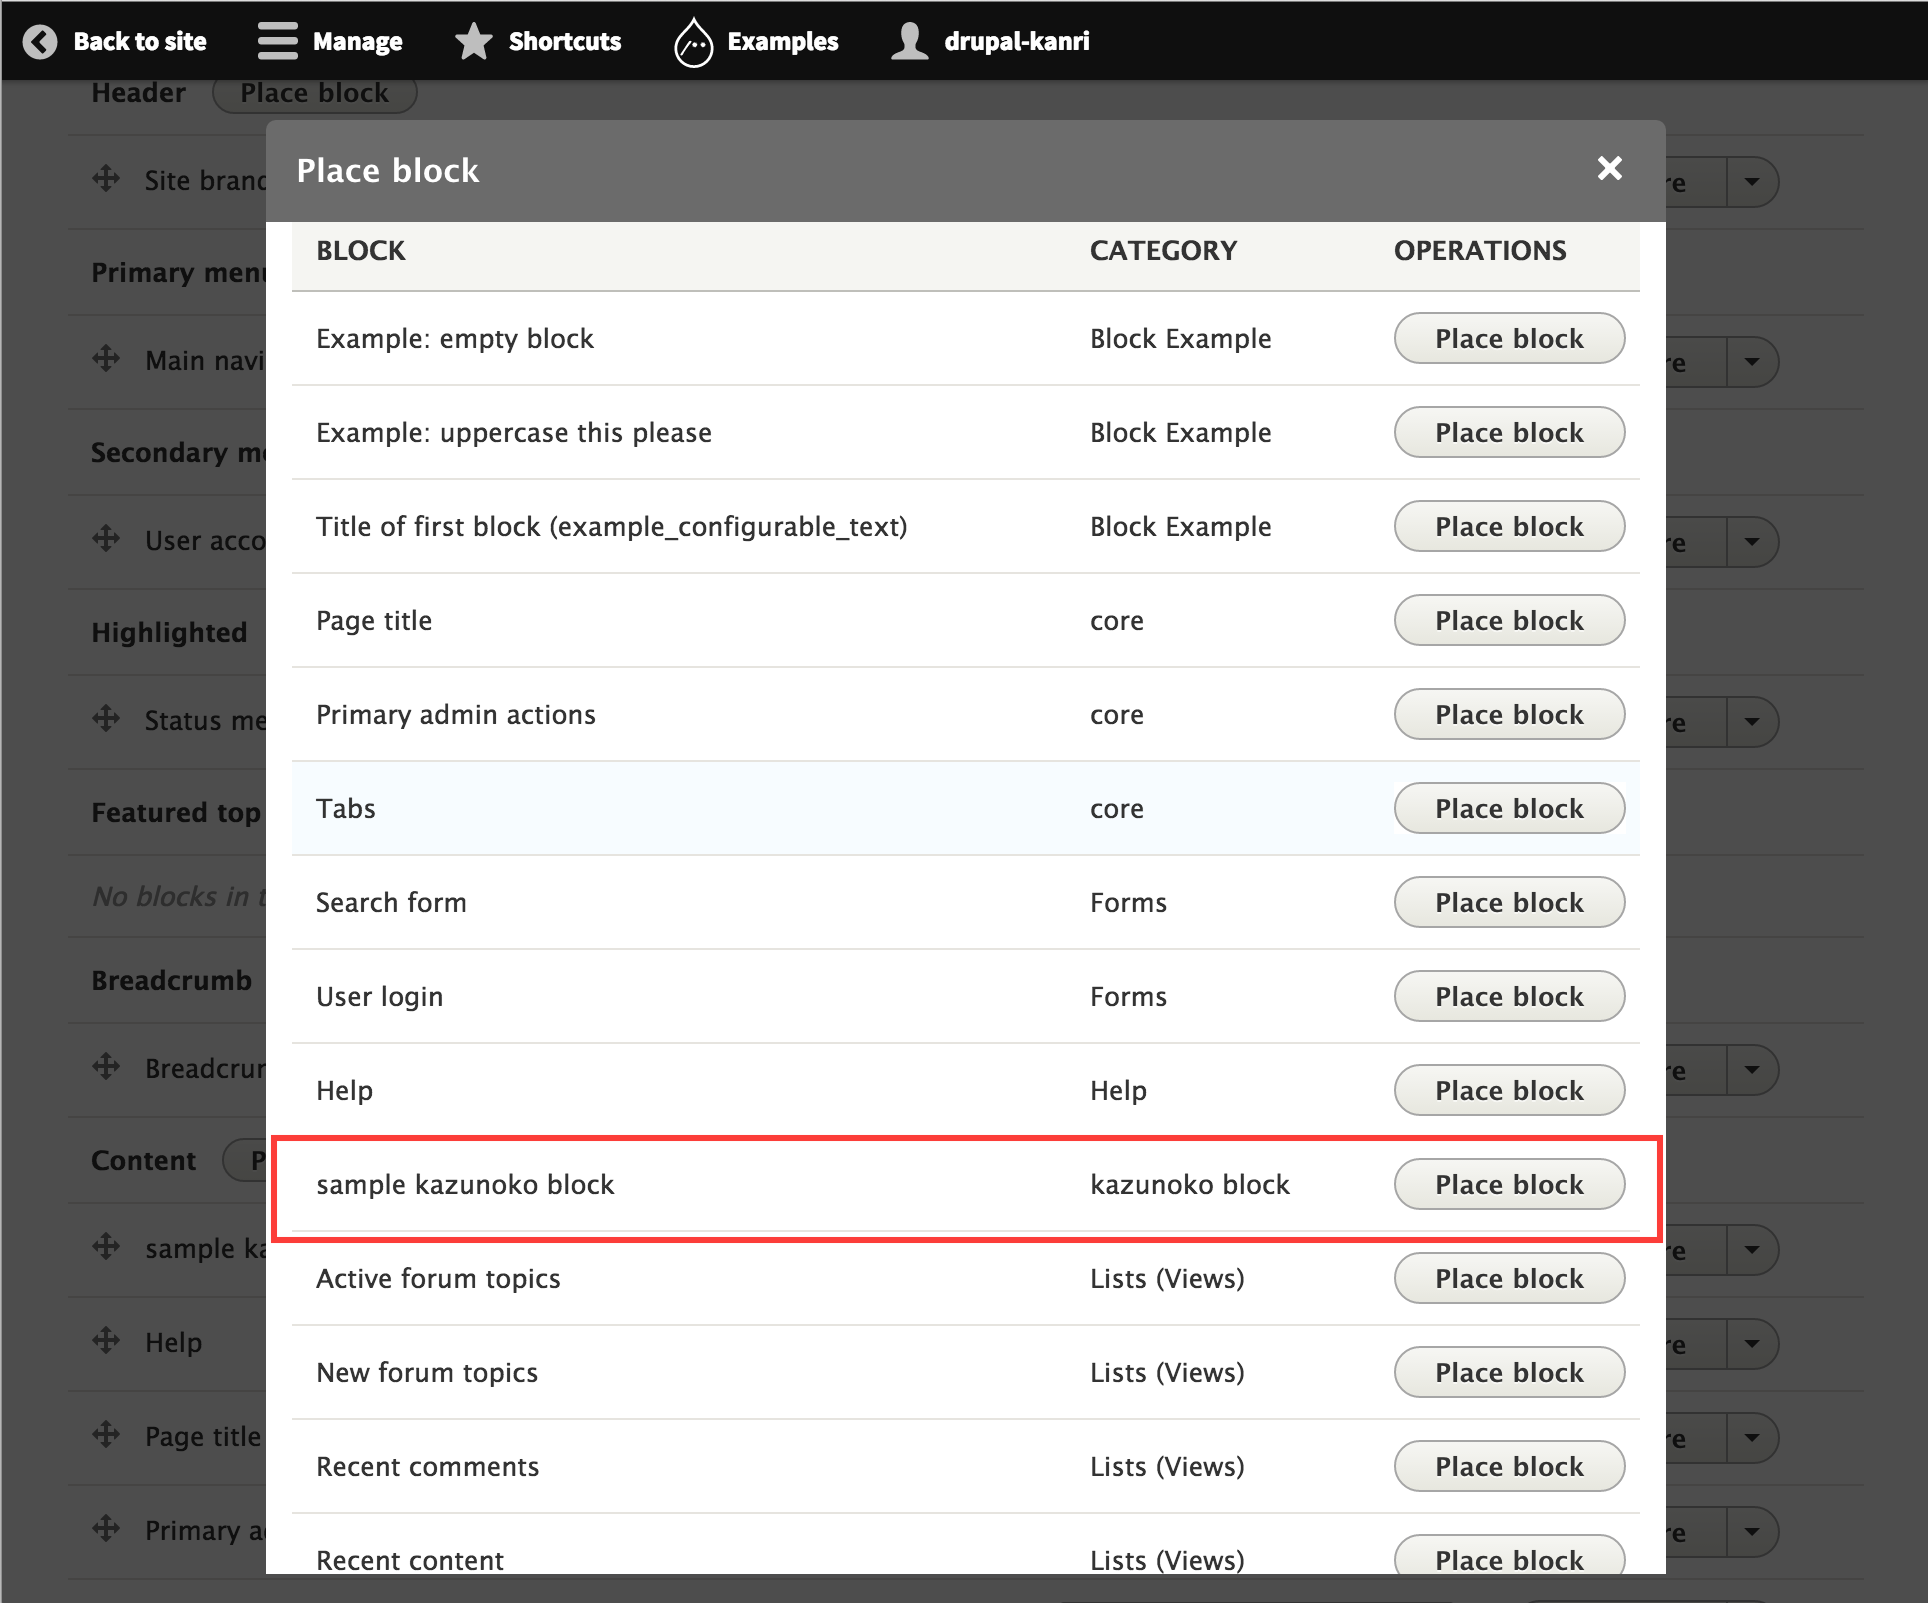
4.管理画面より好きな場所に配置
Block名は@Block で記述したadmin_label、
Category名はモジュール名ぽいです。
(モジュール名 = モジュール.info.ymlのnameに設定した文字列)
追加後
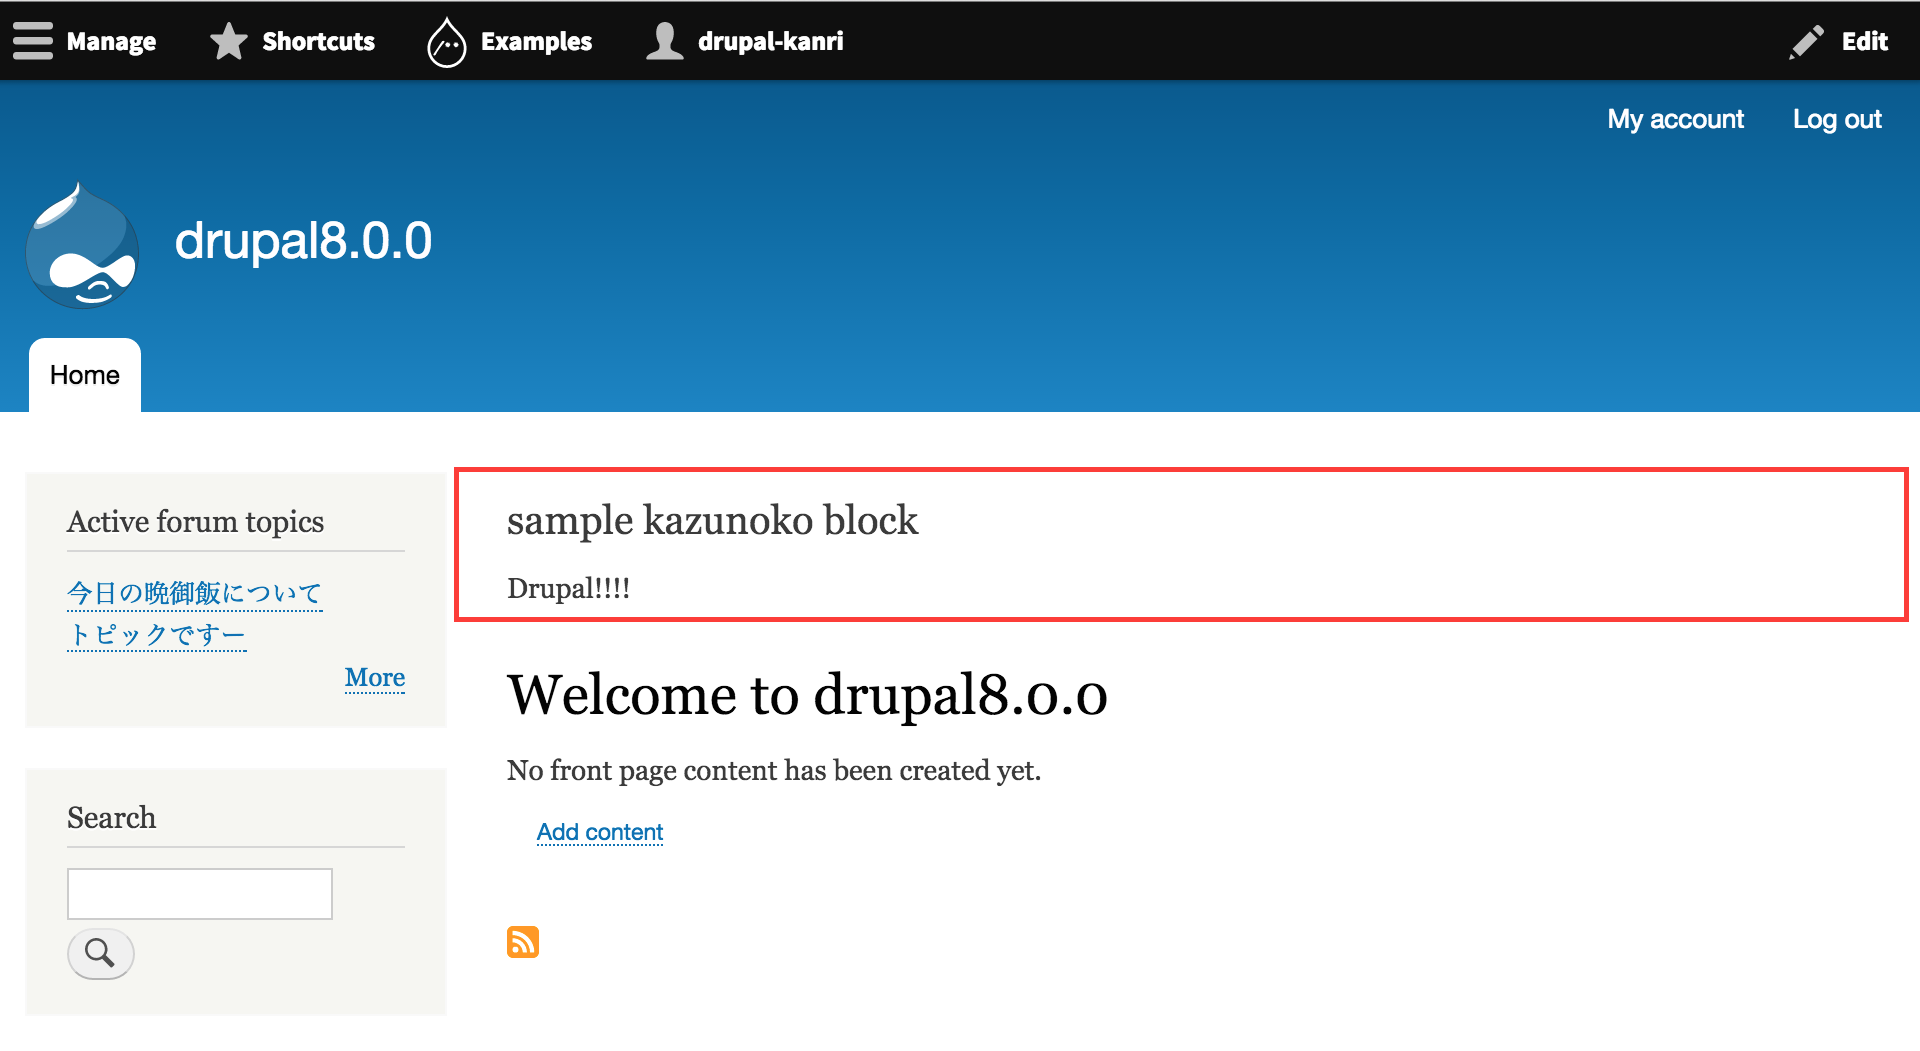
※超わかりにくかったので、ブロックタイトルも表示しています。
ブロックフォームを定義して、利用するまでの手順
ブロック編集画面で独自のフォームを設定し、登録した値を表示時に利用します。

1.blockForm()とblockSubmit()をオーバーライドで定義
blockForm()で表示するフィールドを定義して、
blockSubmit()で入力値を保存するコードを記述。
KazunokoBlock.php(追記分)
  /**
   * {@inheritdoc}
   */
  public function blockForm($form, FormStateInterface $form_state) {
    $form = parent::blockForm($form, $form_state);

    // Retrieve existing configuration for this block.
    $config = $this->getConfiguration();

    // Add a form field to the existing block configuration form.
    $form['text'] = array(
      '#type' => 'textfield',
      '#title' => t('text'),
      '#default_value' => $this->configuration['text'],
    );

    $form['checkbox'] = array(
      '#type' => 'checkbox',
      '#title' => t('checkbox'),
      '#default_value' => $this->configuration['checkbox'],
    );

    $form['radio'] = array(
      '#type' => 'radios',
      '#title' => t('radio'),
      '#options' => array(
        1 => t('yes'),
        0 => t('no')
      ),
      '#default_value' => $this->configuration['radio'],
    );
    return $form;
  }

  /**
   * {@inheritdoc}
   */
  public function blockSubmit($form, FormStateInterface $form_state) {
    // Save our custom settings when the form is submitted.
    $this->setConfigurationValue('text', $form_state->getValue('text'));
    $this->setConfigurationValue('checkbox', $form_state->getValue('checkbox'));
    $this->setConfigurationValue('radio', $form_state->getValue('radio'));
  }
通常のフォームを作成するときと同じ感覚で作れました。
2.(おまけ)defaultConfiguration()をオーバーライドで定義
defaultConfiguration()をオーバーライドすると、デフォルト値の設定が可能。
array値をreturnするだけ。
  /**
   * {@inheritdoc}
   */
  public function defaultConfiguration() {
    return array(
      'text' => t('Drupal!'),
      'checkbox' => 1,
      'radio' => 0,
    );
  }
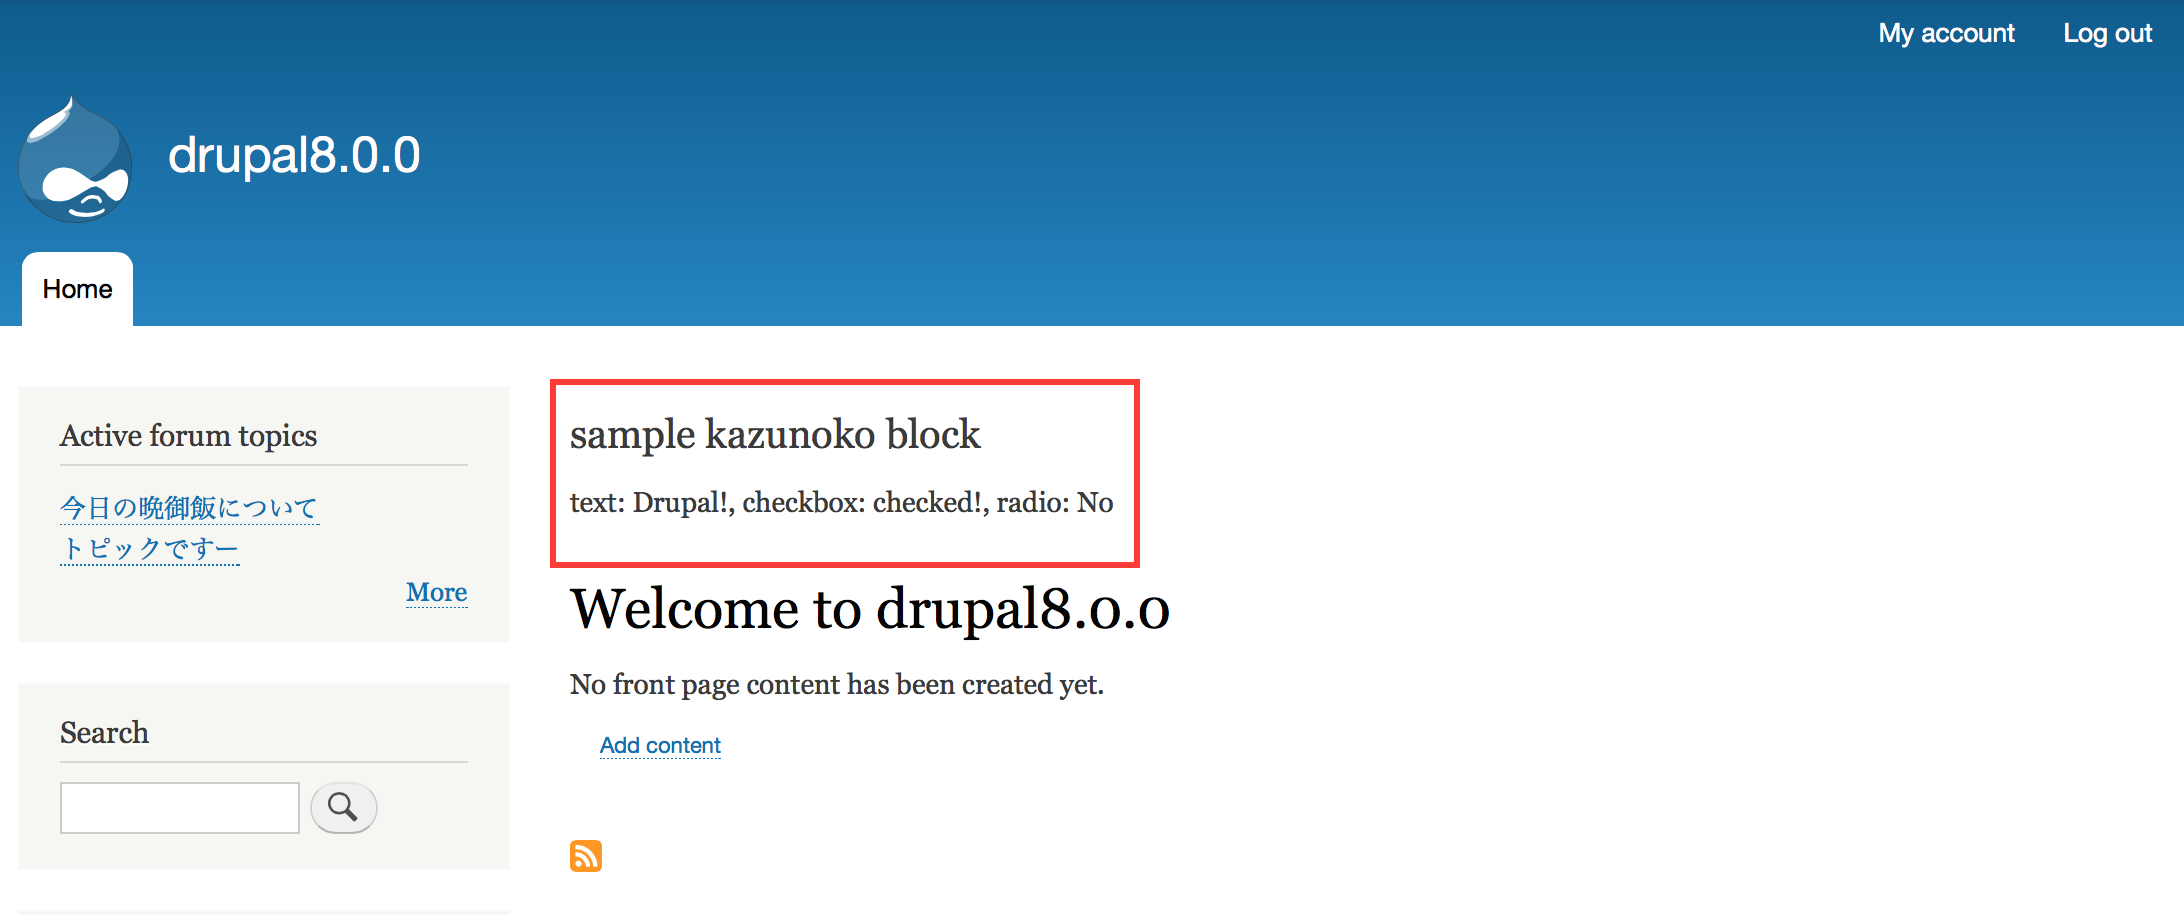
3.build()で登録された変数を取得して表示
  public function build() {
    $checkbox = $this->configuration['text'] ? 'checked!' : '';
    $radio = $this->configuration['radio'] ? 'Yes' : 'No';
    return array(
      '#type' => 'markup',
      '#markup' => sprintf('text: %s, checkbox: %s, radio: %s', $this->configuration['text'], $checkbox, $radio),
      '#cache' => array(
        'contexts' => array('user'),
      ),
    );
  }
上記のコードの出力結果
おしまい
ちょっと複雑なサイトでも
バックエンド担当がブロック定義で部品を実装、
フロントエンド担当でその部品を配置&レイアウト調整、
そんなこんなでサイト完成!なんて感じでサイトができると素敵ですね。
以上です。