概要
Reactで作成したアプリにPayPay決済機能を組み込んでみたのでメモ書き。
参照: 開発者向けツール「PayPay for Developers」で「PayPay」のミニアプリAPIの提供を開始
完成イメージ
https://react-paypay-20210517.netlify.app
使用技術
- React
- TypeScript
- Netlify Functions
- PayPayミニアプリAPI
PayPayミニアプリAPIをReactアプリ(クライアント)で直接呼び出そうとするとCORSエラーで弾かれてしまうため、Netlify Functionsを使って手軽かつ低コスト(この規模の機能なら多分一切お金はかからない)なAPIサーバーを作成します。
参照: 【入門】Netlify Functionsコトハジメ
前準備
具体的なコード実装の前にやるべき事がいくつかあるので、先に済ませておきます。
PayPay for Developersのアカウント作成
https://miniapps.paypay.ne.jp/account/signup
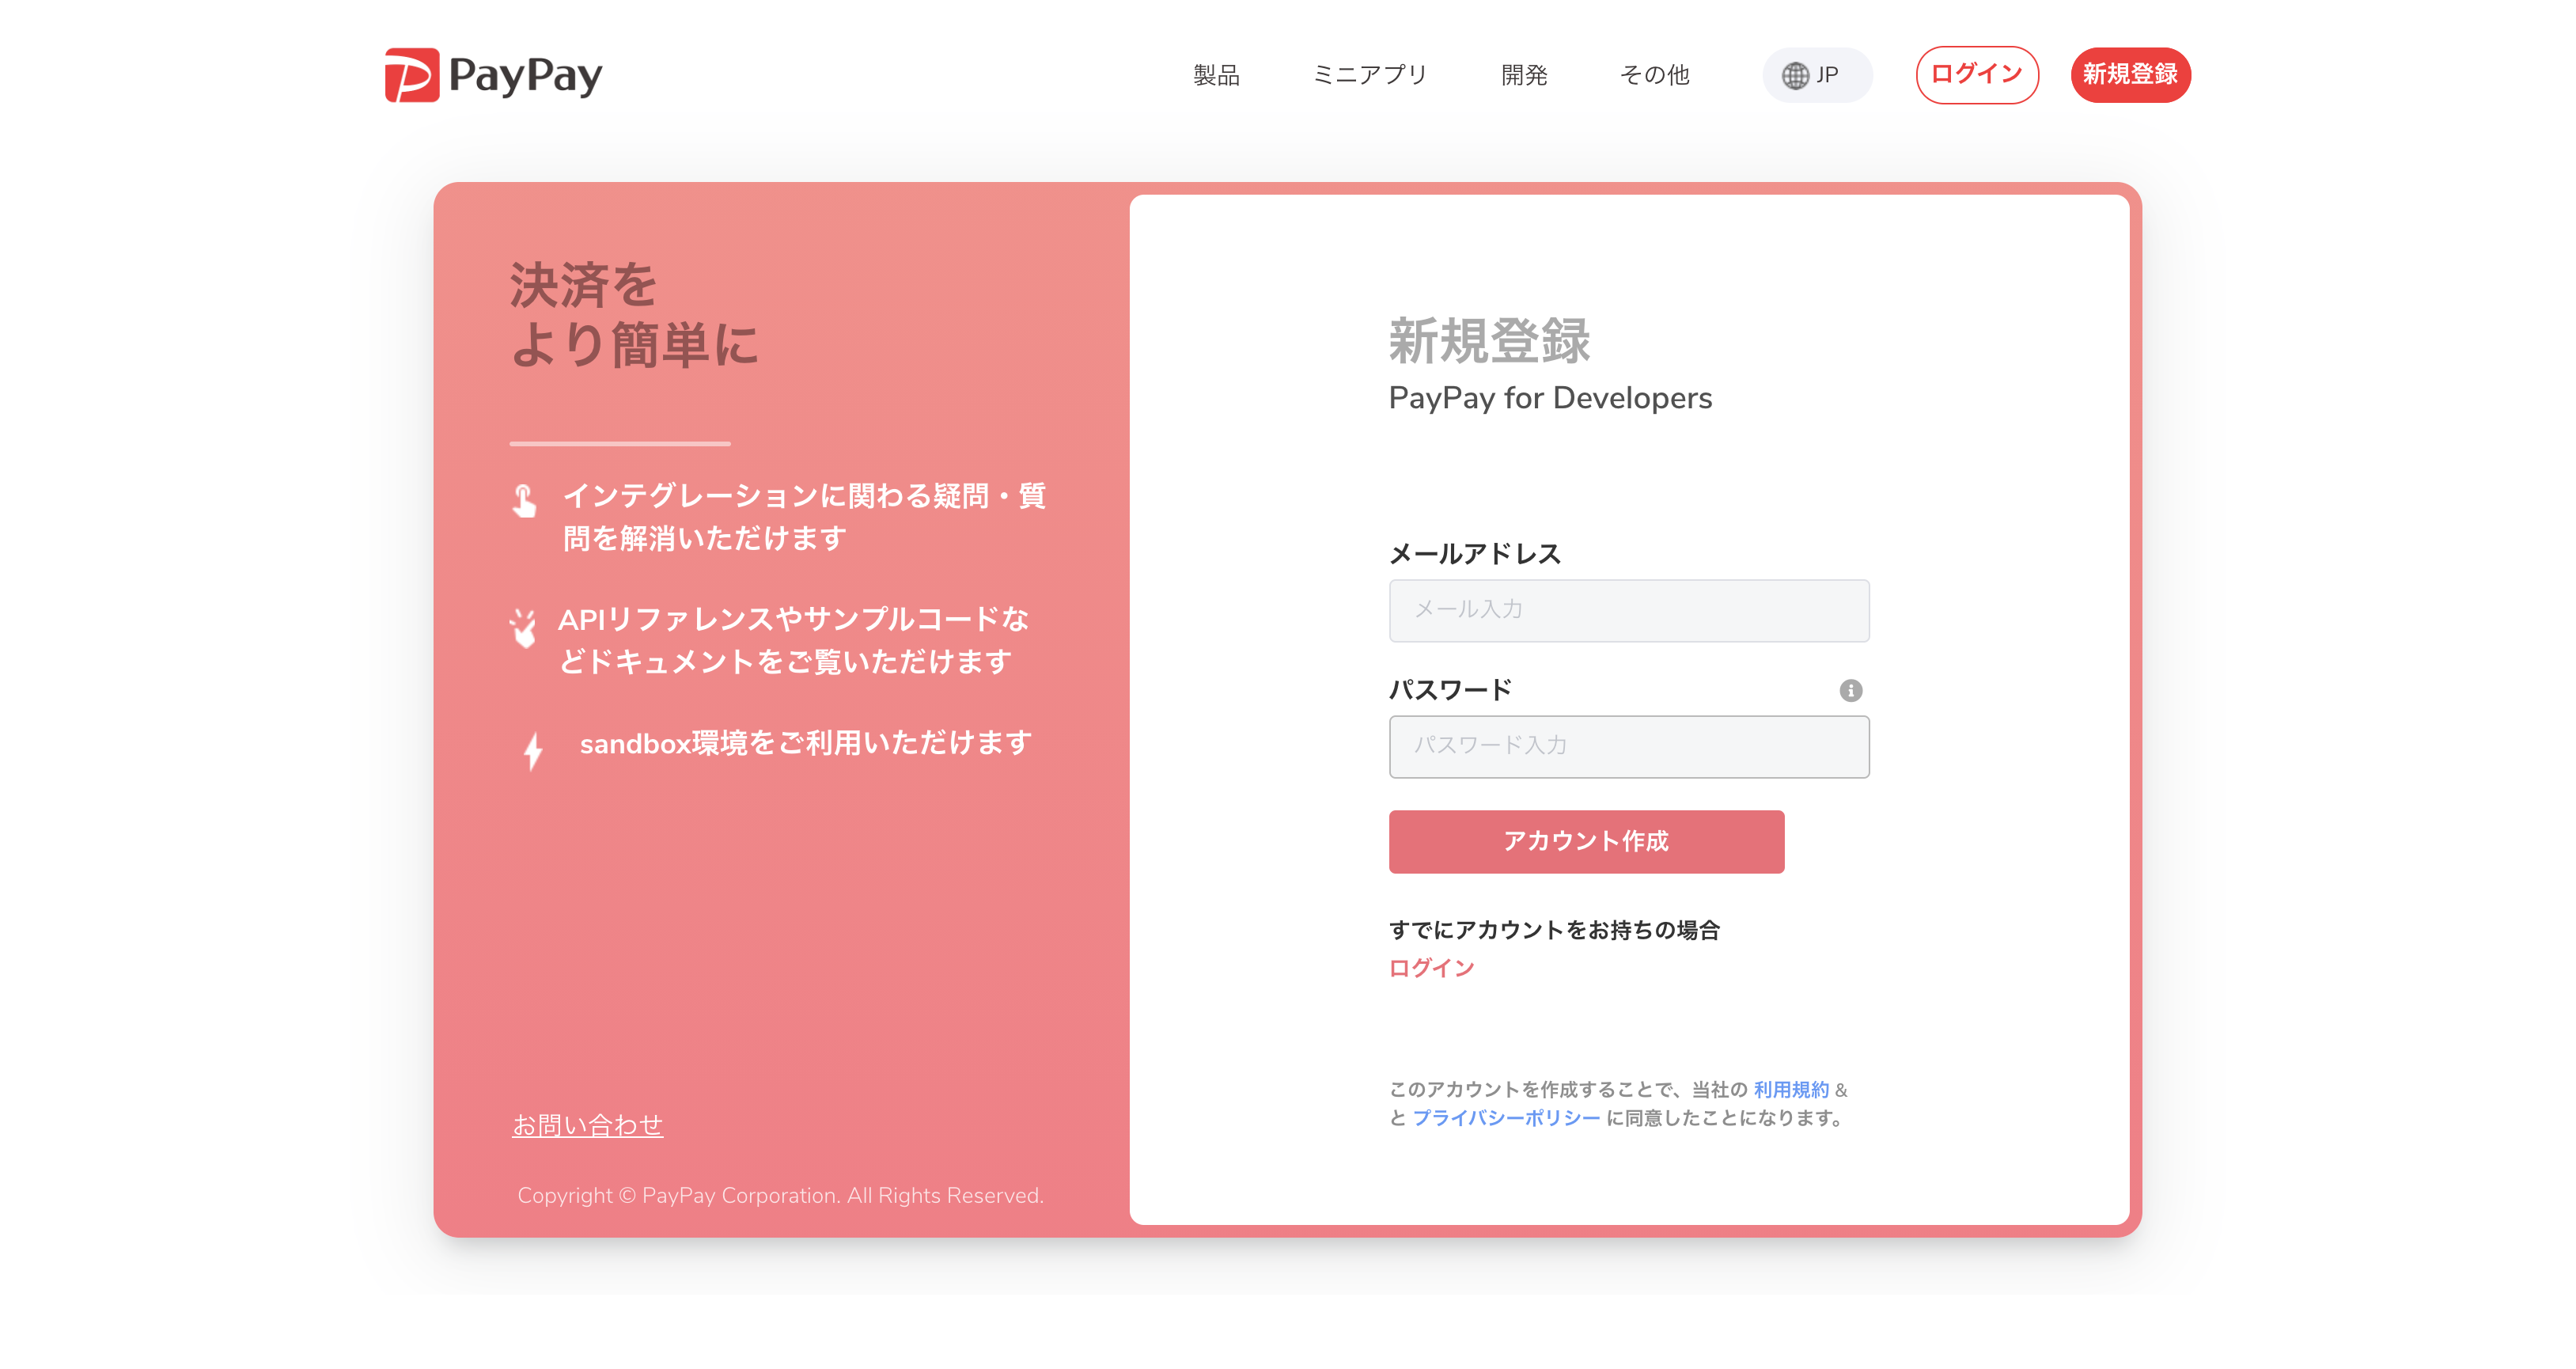
過去にPayPay for Developersのアカウントを作成した事の無い方は上記URLから作成しておいてください。
各種キーを取得

アカウントの作成を終えてダッシュボードに入ると各種キー(APIキー、シークレット、MERCHANT ID)が取得できるので、メモに控えておきましょう。
なお、デフォルトはテスト環境用のものになっているため、今回はそちらを使用していきます。
実装
準備ができたのでコード実装に入ります。
クライアント
まずはクライアント側から。
create-react-app
$ npx create-react-app react-paypay --template typescript
$ cd react-paypay
不要なファイルを削除
この先使う事の無いファイルを削除しておきます。
$ rm src/App.css src/App.test.tsx src/logo.svg src/reportWebVitals.ts src/setupTests.ts
それに伴い、以下の2ファイルを編集。
import React from "react"
import ReactDOM from "react-dom"
import "./index.css"
import App from "./App"

ReactDOM.render(
  <React.StrictMode>
    <App />
  </React.StrictMode>,
  document.getElementById("root")
)
import React from "react"

const App: React.FC = () => {
  return (
    <h1>Hello World!</h1>
  )
}

export default App
動作確認
$ yarn start
http://localhost:3000 にアクセスして「Hello World!」が表示されていればOKです。
各種ライブラリをインストール
この先使用する事になるライブラリをまとめてインストールしてしまいます。
$ yarn add @material-ui/core @material-ui/icons @paypayopa/paypayopa-sdk-node netlify-lambda uuid http-proxy-middleware dotenv-webpack react-router-dom @types/react-router-dom
$ yarn add -D npm-run-all
- material-ui関連
- UIを整えるために使用。
- paypayopa-sdk-node
- PayPayのnode用SDK。
- netlify-lambda
- Netlify Functionsを利用するために使用。
- uuid
- 支払い情報用の一意のIDを生成するために使用
- http-proxy-middleware
- CORS対策のために使用。
- dotenv-webpack
- 環境変数を取り扱うために使用。
- react-router-dom
- ルーティングを管理するために使用。
- npm-run-all
- npm-scriptsをまとめて実行するために使用。
各種ディレクトリ・ファイルを作成
この先使用する事になるディレクトリ・ファイルをまとめて作成してしまいます。
$ mkdir src/components
$ mkdir src/components/checkout
$ touch src/components/checkout/Complete.tsx
$ touch src/components/checkout/Reserve.tsx

$ mkdir src/lambda
$ touch src/lambda/hello.js
$ touch src/lambda/paypay.js

$ touch src/setupProxy.js
$ touch src/setupProxy.ts

$ touch .env
$ touch netlify.toml
$ touch webpack.functions.js
最終的に次のような構成になっていればOKです。
REACT-PAYPAY
├── public
│   ├── favicon.ico
│   ├── index.html
│   ├── logo192.png
│   ├── logo512.png
│   ├── manifest.json
│   └── robots.txt
├── src
│   ├── components
│   │   └── checkout
│   │       ├── Complete.tsx
│   │       └── Reserve.tsx
│   ├── lambda
│   │   ├── hello.js
│   │   └── paypay.js
│   ├── App.tsx
│   ├── index.css
│   ├── index.tsx
│   ├── react-app-env.d.ts
│   ├── setupProxy.js
│   └── setupProxy.ts
├── .env
├── .gitignore
├── netlify.toml
├── package.json
├── README.md
├── tsconfig.json
├── webpack.functions.js
└── yarn.lock
各種ビューを作成
見た目の部分を作り込んでいきます。
App
import React from "react"
import { BrowserRouter as Router, Switch, Route } from "react-router-dom"

import Reserve from "./components/checkout/Reserve"
import Complete from "./components/checkout/Complete"

const App: React.FC = () => {
  return (
    <Router>
      <Switch>
        <Route exact path="/" component={Reserve} />
        <Route exact path="/complete" component={Complete} />
      </Switch>
    </Router>
  )
}

export default App
checkout
import React, { useState } from "react"

import { makeStyles } from "@material-ui/core/styles"
import { Container, Grid } from "@material-ui/core"
import Typography from "@material-ui/core/Typography"
import Slider from "@material-ui/core/Slider"
import Input from "@material-ui/core/Input"
import Button from "@material-ui/core/Button"
import Box from "@material-ui/core/Box"
import Link from "@material-ui/core/Link"

const useStyles = makeStyles({
  container: {
    marginTop: "3rem",
    width: 480,
    maxWidth: "100%"
  },
  input: {
    width: 42
  },
  submitBtn: {
    textTransform: "none"
  },
  box: {
    marginTop: "1rem"
  }
})

const Reserve: React.FC = () => {
  const classes = useStyles()

  // 支払い用URL
  const [paymentUrl, setPaymentUrl] = useState<string>("")
  // // 金額(商品が一つしか無いなら決め打ちでも良いかもしれないが、今回はサンプルなので動的に変更できるように)
  const [amount, setAmount] = useState<number | string | Array<number | string>>(10)
  const [isLoading, setIsLoading] = useState<boolean>(false)

  const handleSliderChange = (e: any, newAmount: number | number[]) => {
    setAmount(newAmount);
  }

  const handleInputChange = (e: React.ChangeEvent<HTMLInputElement>) => {
    setAmount(parseInt(e.target.value))
  }

  const handleBlur = () => {
    if (amount < 0) {
      setAmount(0)
    } else if (amount > 100) {
      setAmount(100)
    }
  }

  const handleSubmit = async (e: React.MouseEvent<HTMLButtonElement>) => {
    e.preventDefault()
    setIsLoading(true)

    try {
      const res = await fetch("/.netlify/functions/paypay", {
        method: "POST",
        body: JSON.stringify({
          amount: amount,
          orderDescription: "Test Payment" // 場合によってはここも動的に変更すると良いかも
        }),
        headers: { "Content-Type": "application/json" }
      })

      const resJson = await res.json()

      if (resJson) {
        console.log(resJson.resultInfo)
        setPaymentUrl(resJson.data.url)
      }
    } catch (err) {
      console.log(err)
    }

    setIsLoading(false)
  }

  return (
    <>
      <Container maxWidth="lg" className={classes.container}>
        <Typography variant="h5" gutterBottom>
          React PayPay
        </Typography>
        <Grid container spacing={2} alignItems="center">
          <Grid item xs>
            <Slider
              value={typeof amount === "number" ? amount : 0}
              onChange={handleSliderChange}
              aria-labelledby="input-slider"
            />
          </Grid>
          <Grid item>
            ¥
            <Input
              className={classes.input}
              value={amount}
              margin="dense"
              onChange={handleInputChange}
              onBlur={handleBlur}
              inputProps={{
                step: 1,
                min: 0,
                max: 100,
                type: "number",
                "aria-labelledby": "input-slider"
              }}
            />
          </Grid>
          <Grid item>
            <Button
              variant="outlined"
              color="primary"
              disabled={isLoading ? true : false}
              onClick={handleSubmit}
              className={classes.submitBtn}
            >
              {isLoading ? "Generating..." : "Generate QR Code"}
            </Button>
          </Grid>
        </Grid>
        <Box className={classes.box}>
          <Link
            href={paymentUrl}
            variant="body2"
            target="_blank"
          >
            {paymentUrl} {/* 支払い用URLが生成されたら表示 */}
          </Link>
        </Box>
      </Container>
    </>
  )
}

export default Reserve
import React from "react"

import { makeStyles } from "@material-ui/core/styles"
import { Container } from "@material-ui/core"
import Typography from "@material-ui/core/Typography"
import Box from "@material-ui/core/Box"
import Button from "@material-ui/core/Button"

const useStyles = makeStyles({
  container: {
    marginTop: "3rem",
    width: 480,
    maxWidth: "100%",
    textAlign: "center"
  },
  box: {
    marginTop: "1rem"
  },
  linkBtn: {
    textTransform: "none"
  }
})

// PayPayの支払いが完了したら遷移するページ
const Complete: React.FC = () => {
  const classes = useStyles()

  return (
    <>
      <Container maxWidth="lg" className={classes.container}>
        <Typography variant="h5" gutterBottom>
          Pay Pay Completed!
        </Typography>
        <Box className={classes.box}>
          <Button
            href="/"
            variant="outlined"
            color="primary"
            className={classes.linkBtn}
          >
            Top
          </Button>
        </Box>
      </Container>
    </>
  )
}

export default Complete
サーバー
次にサーバー側の実装に入ります。
lambda関数を作成
// 動作確認用
// $ curl http://localhost:3000/.netlify/functions/hello

exports.handler = (event, context, callback) => {
  return callback(null, {
    statusCode: 200,
    body: JSON.stringify({ message: "Hello World!" })
  })
}
const PAYPAY = require("@paypayopa/paypayopa-sdk-node")
const { v4: uuidv4 } = require("uuid")

PAYPAY.Configure({
  clientId: process.env.PAYPAY_CLIENT_ID,         // PayPay APIキー
  clientSecret: process.env.PAYPAY_CLIENT_SECRET, // PayPay シークレット
  merchantId: process.env.PAYPAY_MERCHANT_ID,     // PayPay Merchant ID
  productionMode: false                           // 今回はテストモードなのでfalse
})

exports.handler = (event, context, callback) => {
  // POSTメソッド以外が来たら弾く
  if (event.httpMethod !== "POST") {
    return callback(null, { statusCode: 405, body: "Method Not Allowed" })
  }

  // 金額と注文内容の説明はbodyから取得
  const { amount, orderDescription } = JSON.parse(event.body)

  // 金額が1円に満たなかった場合はエラー
  if (parseInt(amount) < 1) {
    return callback(null, {
      statusCode: 400,
      body: JSON.stringify({
        message: "Some required fields were not supplied."
      })
    })
  }

  const merchantPaymentId = uuidv4() // 支払いID(一意になるようにuuidで生成)

  let payload = {
    merchantPaymentId: merchantPaymentId,
    amount: {
      amount: parseInt(amount),
      currency: "JPY"
    },
    codeType: "ORDER_QR", // 「ORDER_QR」で決め打ち
    orderDescription: orderDescription,
    isAuthorization: false,
    redirectUrl: `${process.env.APP_HOST_NAME}/complete?merchant-payment-id=${merchantPaymentId}`, // 支払い完了後のリダイレクト先URL
    redirectType: "WEB_LINK", // Webブラウザからの支払いなら「WEB_LINK」、アプリからの支払いなら「APP_DEEP_LINK」
  }

  // 支払い用QRコードを生成
  PAYPAY.QRCodeCreate(payload, (response) => {
    if (response.STATUS == 201) {
      return callback(null, {
        statusCode: 200,
        body: response.BODY
      })
    }
  })
}
環境変数をセット
const Dotenv = require("dotenv-webpack")

module.exports = {
  plugins: [new Dotenv()]
}
APP_HOST_NAME=http://localhost:3000
PAYPAY_CLIENT_ID=<PaPay APIキー>
PAYPAY_CLIENT_SECRET=<PayPay シークレット>
PAYPAY_MERCHANT_ID=<PayPay Merchant ID>
プロキシの設定
「http://localhost:3000/.netlify/functions/」へのリクエストを「http://localhost:9000」へ代替し、CORSを有効にします。
const { createProxyMiddleware } = require("http-proxy-middleware")

module.exports = function(app) {
  app.use(
    "/.netlify/functions/",
    createProxyMiddleware({
      target: "http://localhost:9000",
      changeOrigin: true
    })
  )
}
import { createProxyMiddleware } from "http-proxy-middleware"

module.exports = function(app: any) {
  app.use(
    "/.netlify/functions/",
    createProxyMiddleware({
      target: "http://localhost:9000",
      changeOrigin: true
    })
  )
}
Netfily Functionsの設定
Netlify Functionsをローカルでエミュレートできるようにするため、以下のように設定してください。
[build]
  Command = "npm run build"
  Functions = "lambda"
  Publish = "build"
動作確認
クライアント、サーバーともに準備ができたのでいよいよ動作確認。
npm-scriptsを編集
「./package.json」内の「scripts」を次のように書き換えます。
"scripts": {
  "start": "run-p start:**",
  "start:app": "react-scripts start",
  "start:lambda": "netlify-lambda serve src/lambda --config ./webpack.functions.js",
  "build": "run-p build:**",
  "build:app": "react-scripts build",
  "build:lambda": "netlify-lambda build src/lambda",
  "test": "react-scripts test",
  "eject": "react-scripts eject"
},
これをやっておくと、今後は
$ npm run start
を一発叩くだけでクライアント(localhost:3000)とサーバー(localhost:9000)が同時に立ち上がるようになるので非常に便利です。
$ curl http://localhost:3000/.netlify/functions/hello
↑のコマンドで「{"message":"Hello World!"}」と返ってくればNetlify Fnctionsが正常に動作してるはず。
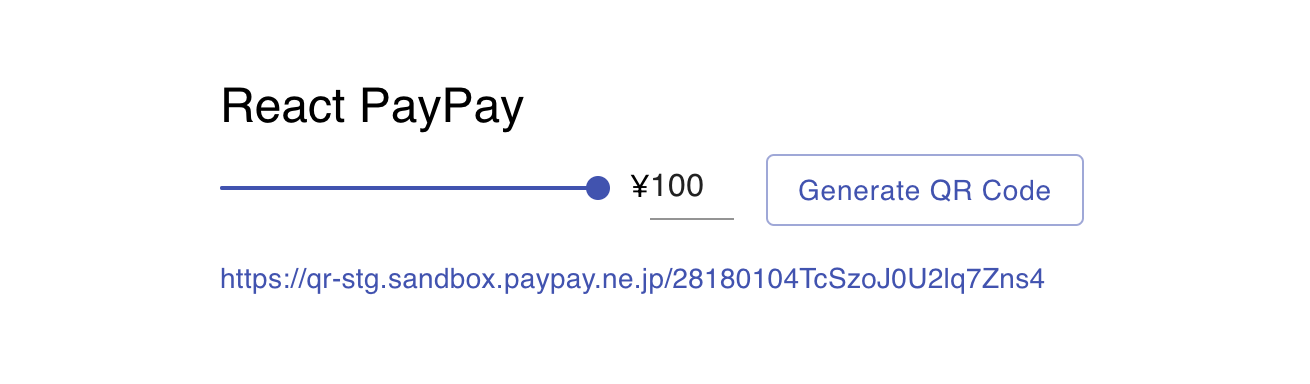
金額を決めて支払い用URLを生成し、リンクを踏みます。
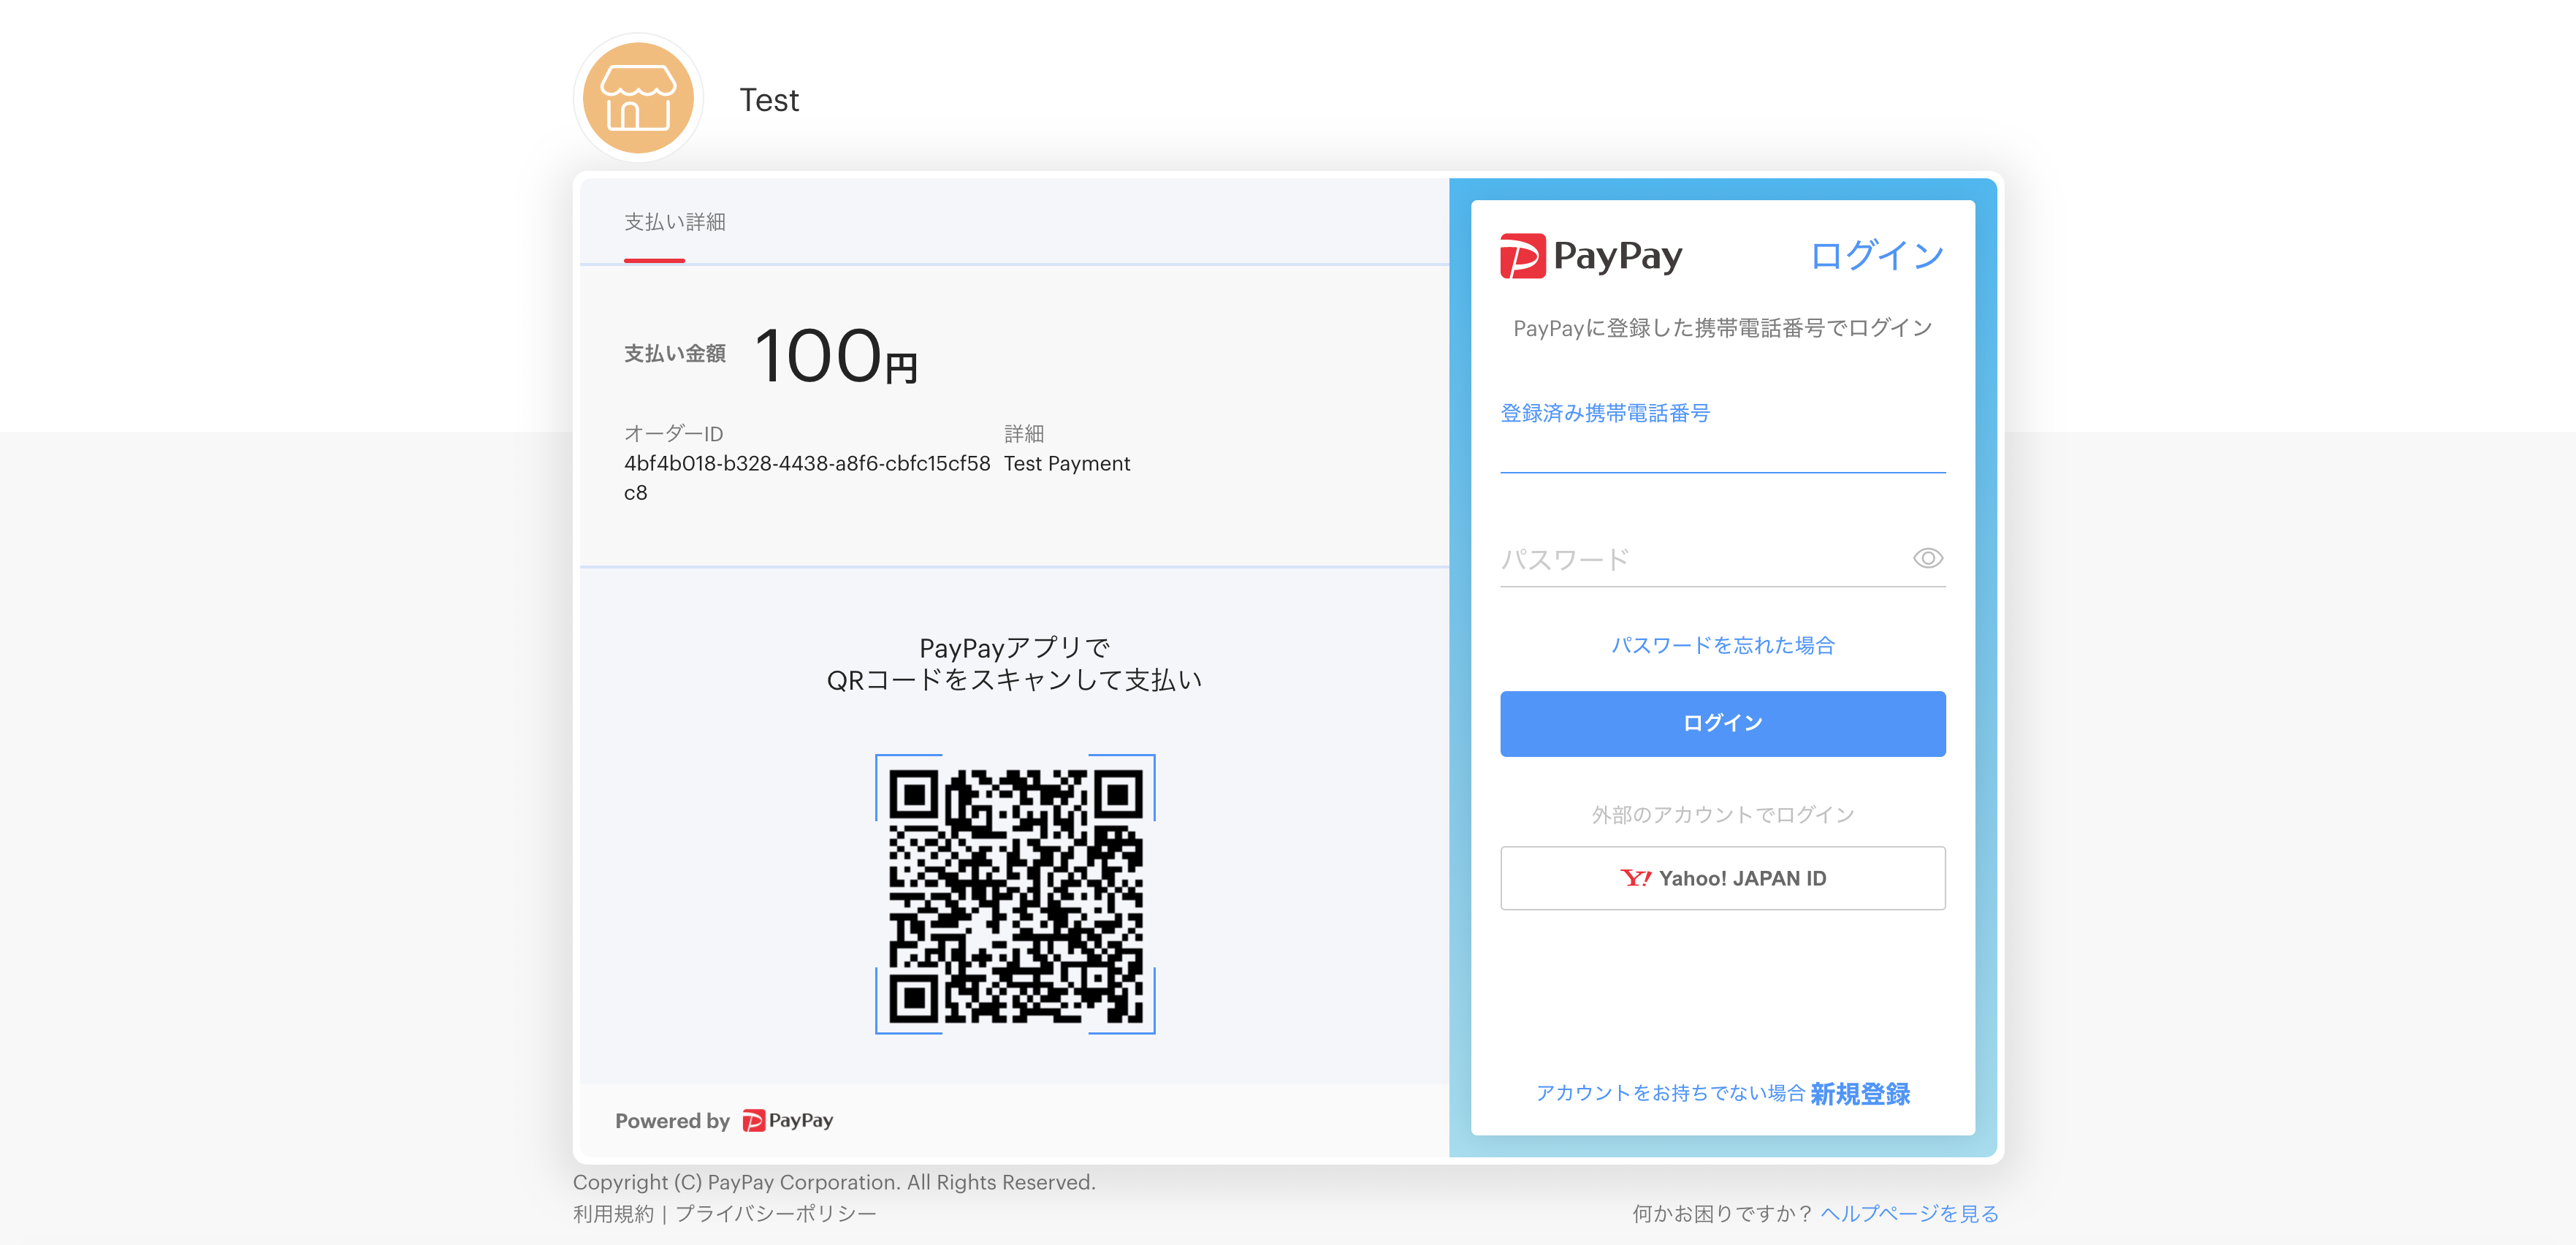
こんな感じで支払ページが表示されれば成功です。
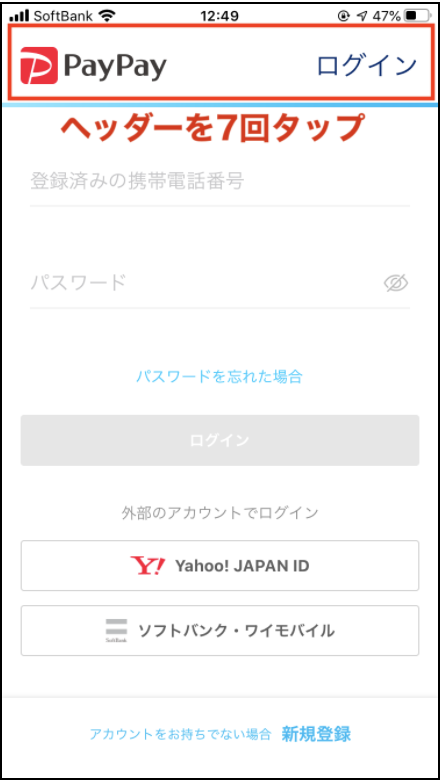
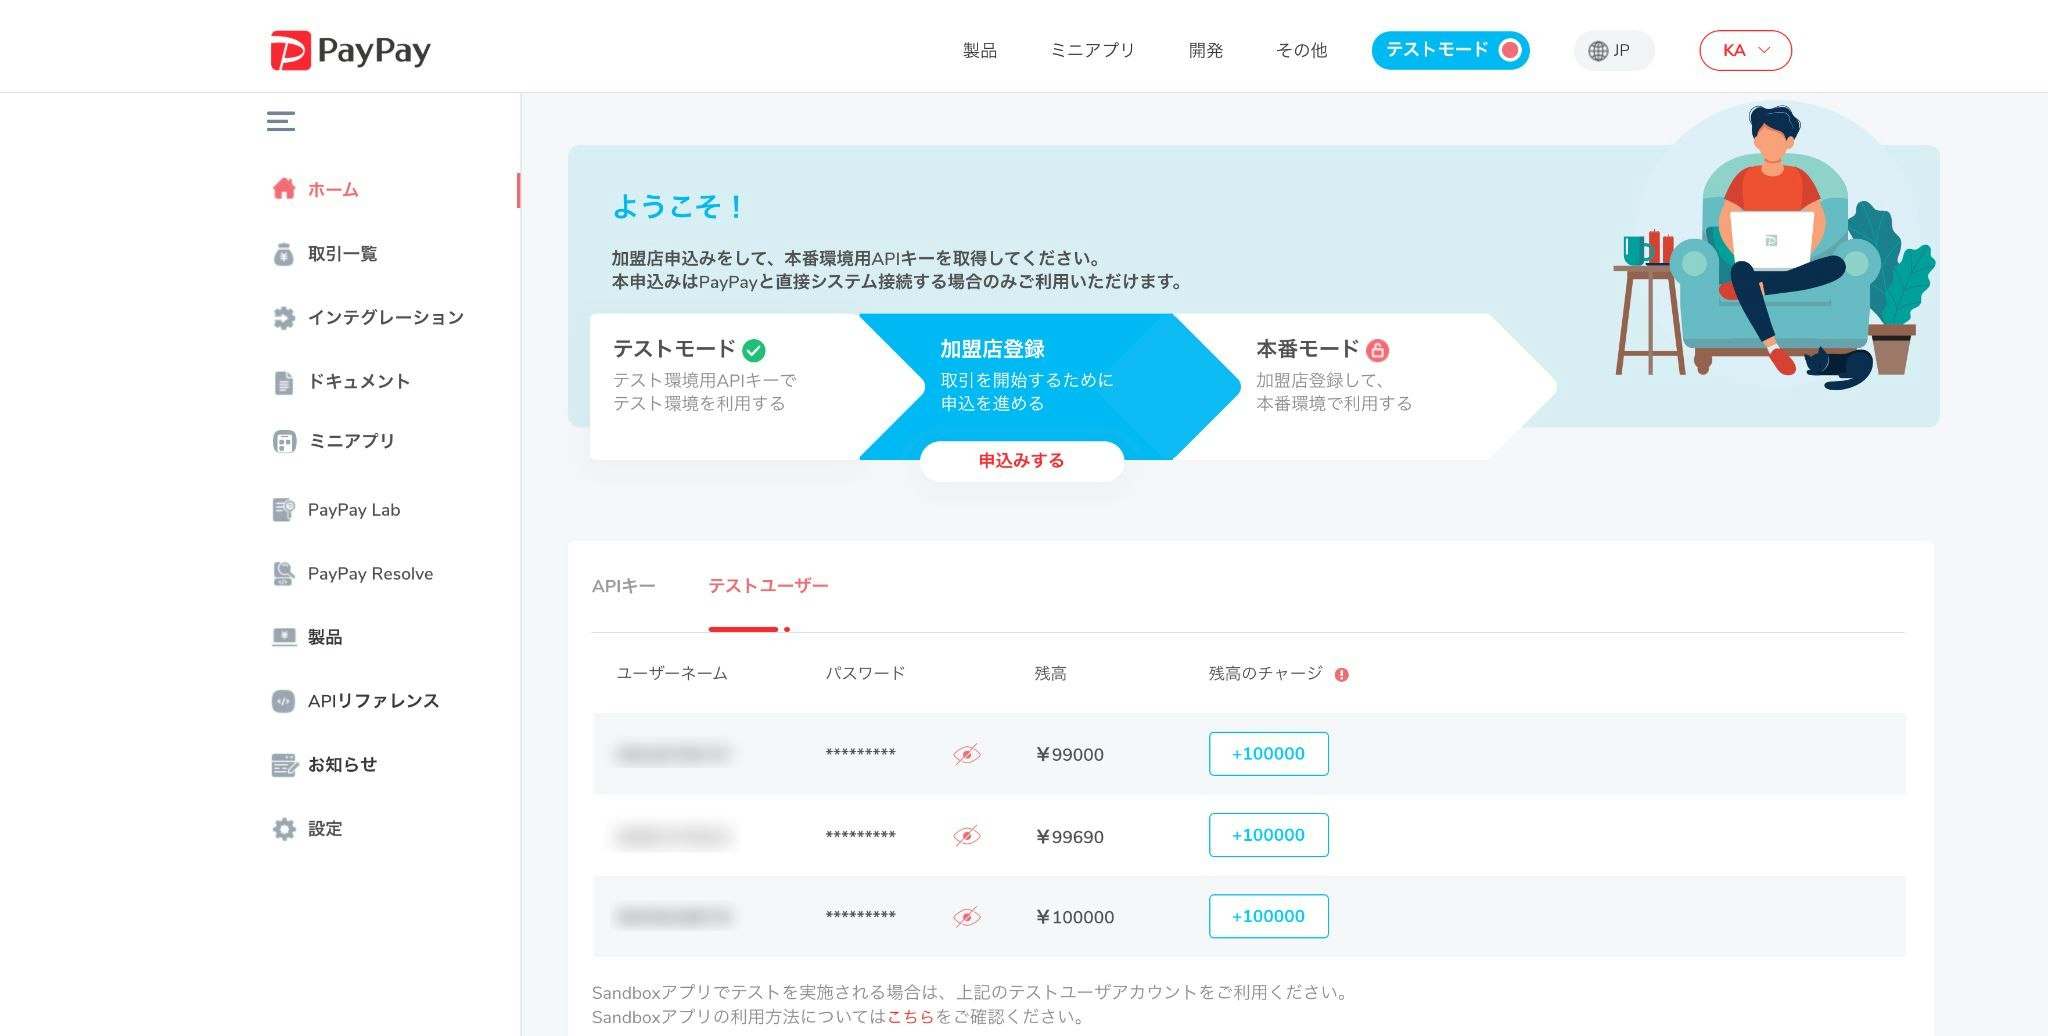
なお、支払いについては以下の手順によりサンドボックス用のテストユーザーで行う事が可能なので試してみてください。
1. PayPayアプリ(スマホ)内の新規登録/ログイン画面で、PayPayのロゴを7回タップ。
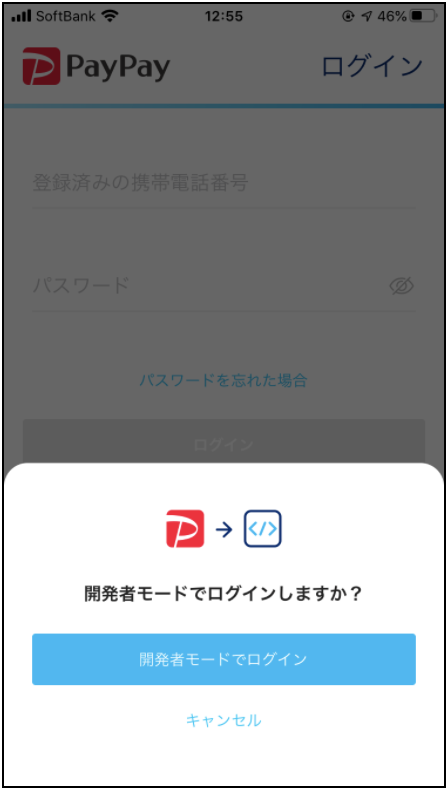
2. 開発モードでログインボタンをタップ。
3. テストユーザーの情報を入力してサインイン。(認証コード確認画面では1234を入力)
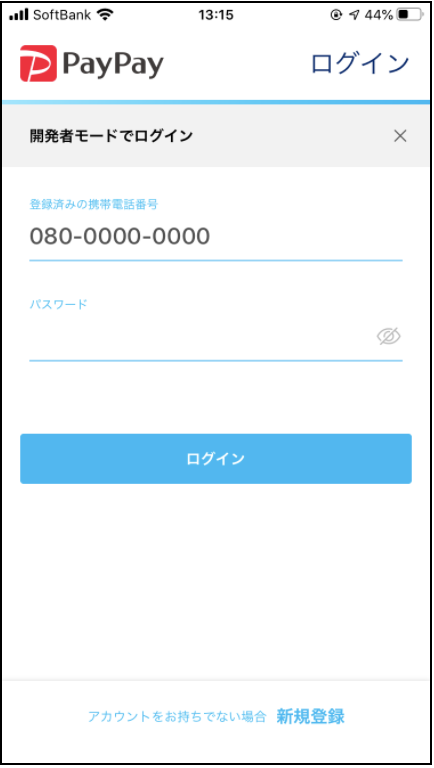
※テストユーザーの情報はダッシュボードから確認できます。
あとはQRコードを読み込んで決済を完了させた後、完了ページに戻ってくる事ができれば実装は成功です。

デプロイ
この辺は各自お好みで。
手順については先日似たような記事を書いたのでそちらを参照ください。基本的に同じ流れでいけるはずです。
参照: React × Stripe × Netlify Functionsでサーバーレスな決済基盤を持ったECサイトを作ってみる
一点だけ、今回は「react-router-dom」を使ってルーティングの設定を行なっていますが、このままだと本番環境でエラー(「Page Not Found」)が生じてしまうので注意が必要です。

React Router handles routing on the client-side (browser) so when you visit the non-root page (e.g. https://yoursite.netlify.com/login), Netlify (server-side) does not know how to handle the route.
(As your routes are set up in the root level).
(訳)
React Routerはクライアントサイド(ブラウザ)でルーティングを処理するので、非ルートページ(例えばhttps://yoursite.netlify.com/login)にアクセスした場合、Netlify(サーバサイド)はルートをどのように処理するかわかりません。(ルートはルートレベルで設定されているため)。
引用: Page Not Found Error on Netlify Reactjs React Router solved
これを何とかするためには、「public」ディレクトリ以下に「_redirects」というファイルを作成する必要があるとの事。
$ touch public/_redirects
/* /index.html 200
Netlify offers a special file, _redirects, which you can add to your codebase and let Netlify handle how to handle the URL that is not handled on the client-side.
(訳)
Netlifyは_redirectsという特別なファイルを提供しており、これをコードベースに追加するこ事でクライアントサイドで処理されないURLをどのように処理するかをNetlifyに任せることができます。
詳細については正直良くわかりませんが、とりあえずたったこれだけの対応で上記エラーを避ける事ができるのでおまじないと思って事前にやっておきましょう。
あとがき
以上、ReactアプリにPayPay決済機能を組み込んでみました。
PayPayは非常にドキュメントも整っていて見やすく、情報も豊富なのでそれほどハマる事無くすんなり実装できたと思います。
ぜひとも参考にしていただけると幸いです。
今回作成したコード