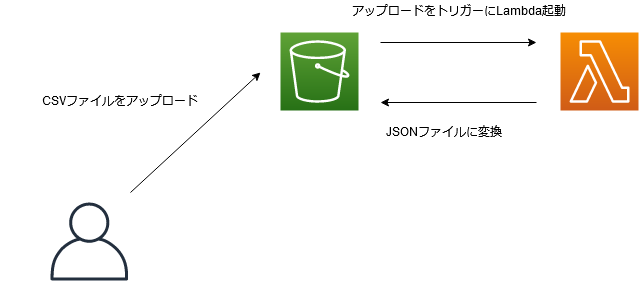
本記事で目指す構成
S3にCSVファイルをアップロード → Lambda起動 → JSONファイルに変換
使用技術
言語: Python 3.8
AWS: S3、Lambda
下準備
まず最初にIAMユーザーやIAMロール、S3バケットなどの準備を行います。
IAMユーザーを作成
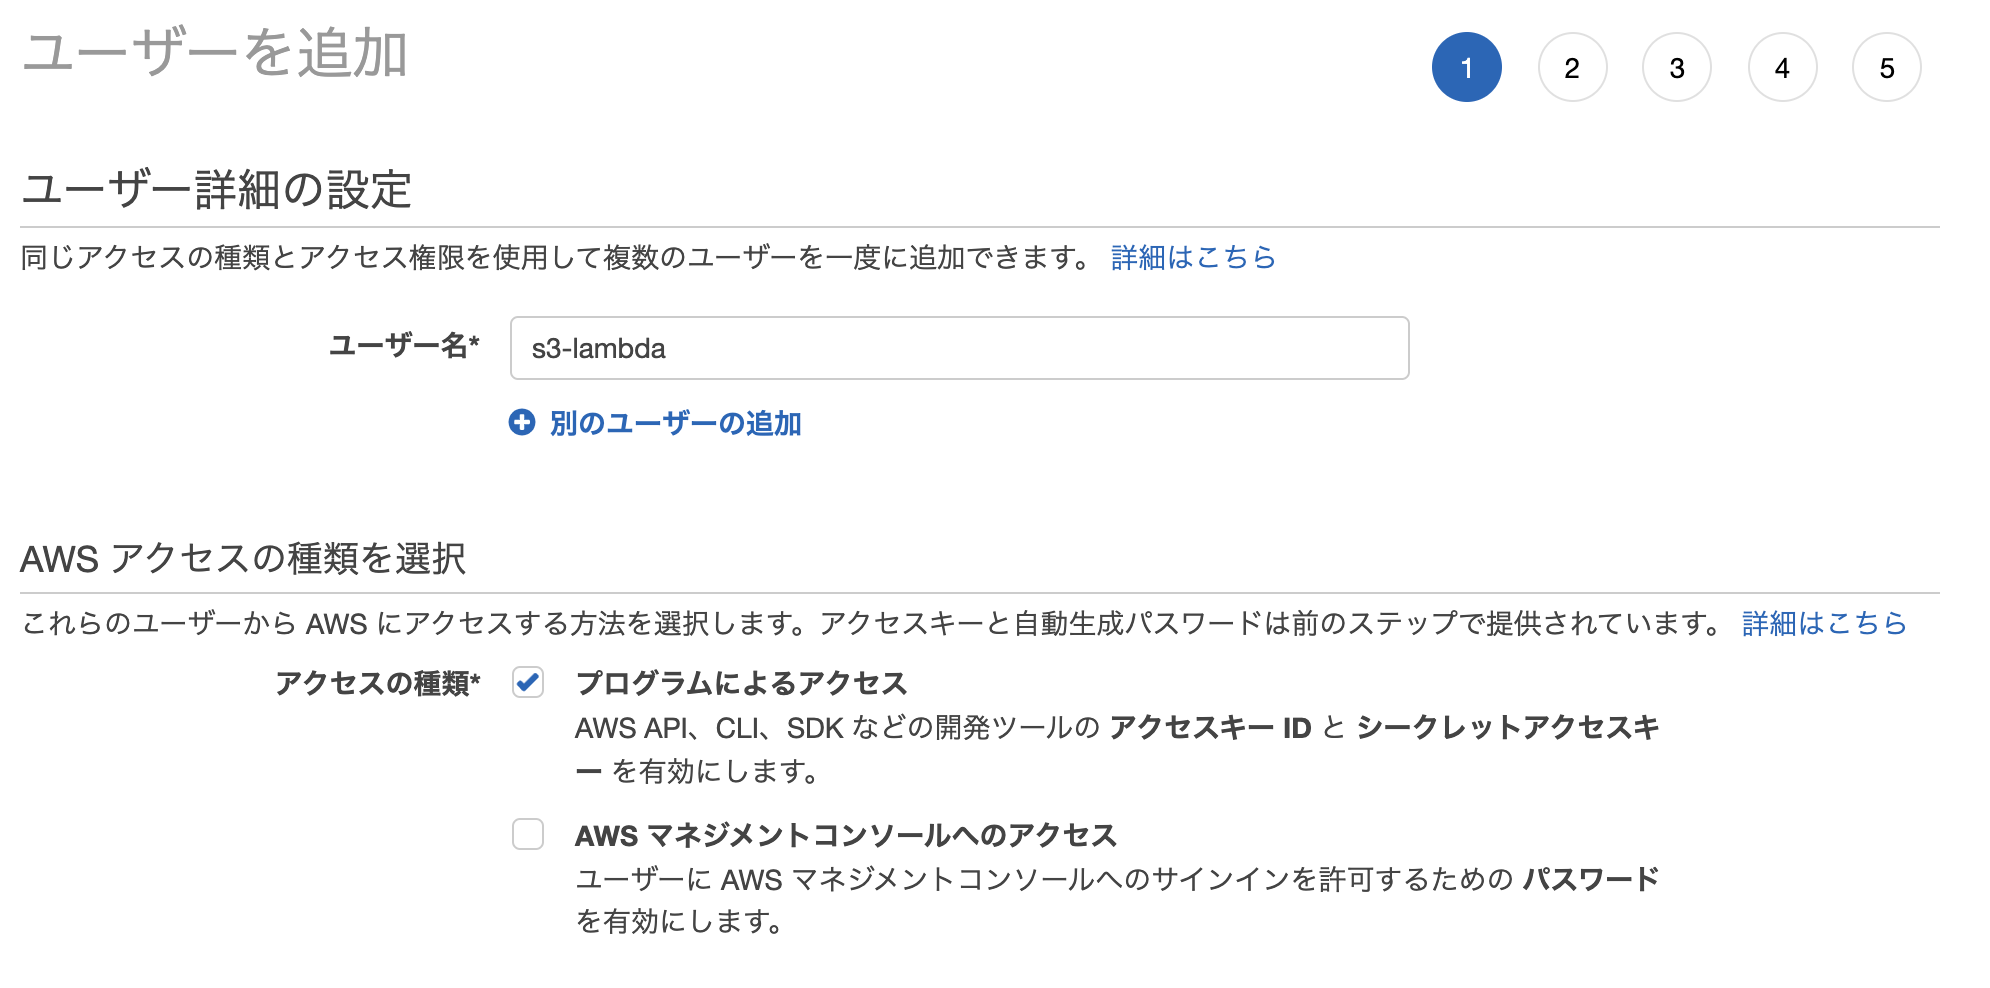
今回はAWS CLIを使って作業していくので、専用のIAMユーザーを作成します。
「IAM」→「ユーザー」→「ユーザーを追加」
ユーザー名: 任意
アクセスの種類: 「プログラムによるアクセス」にチェック
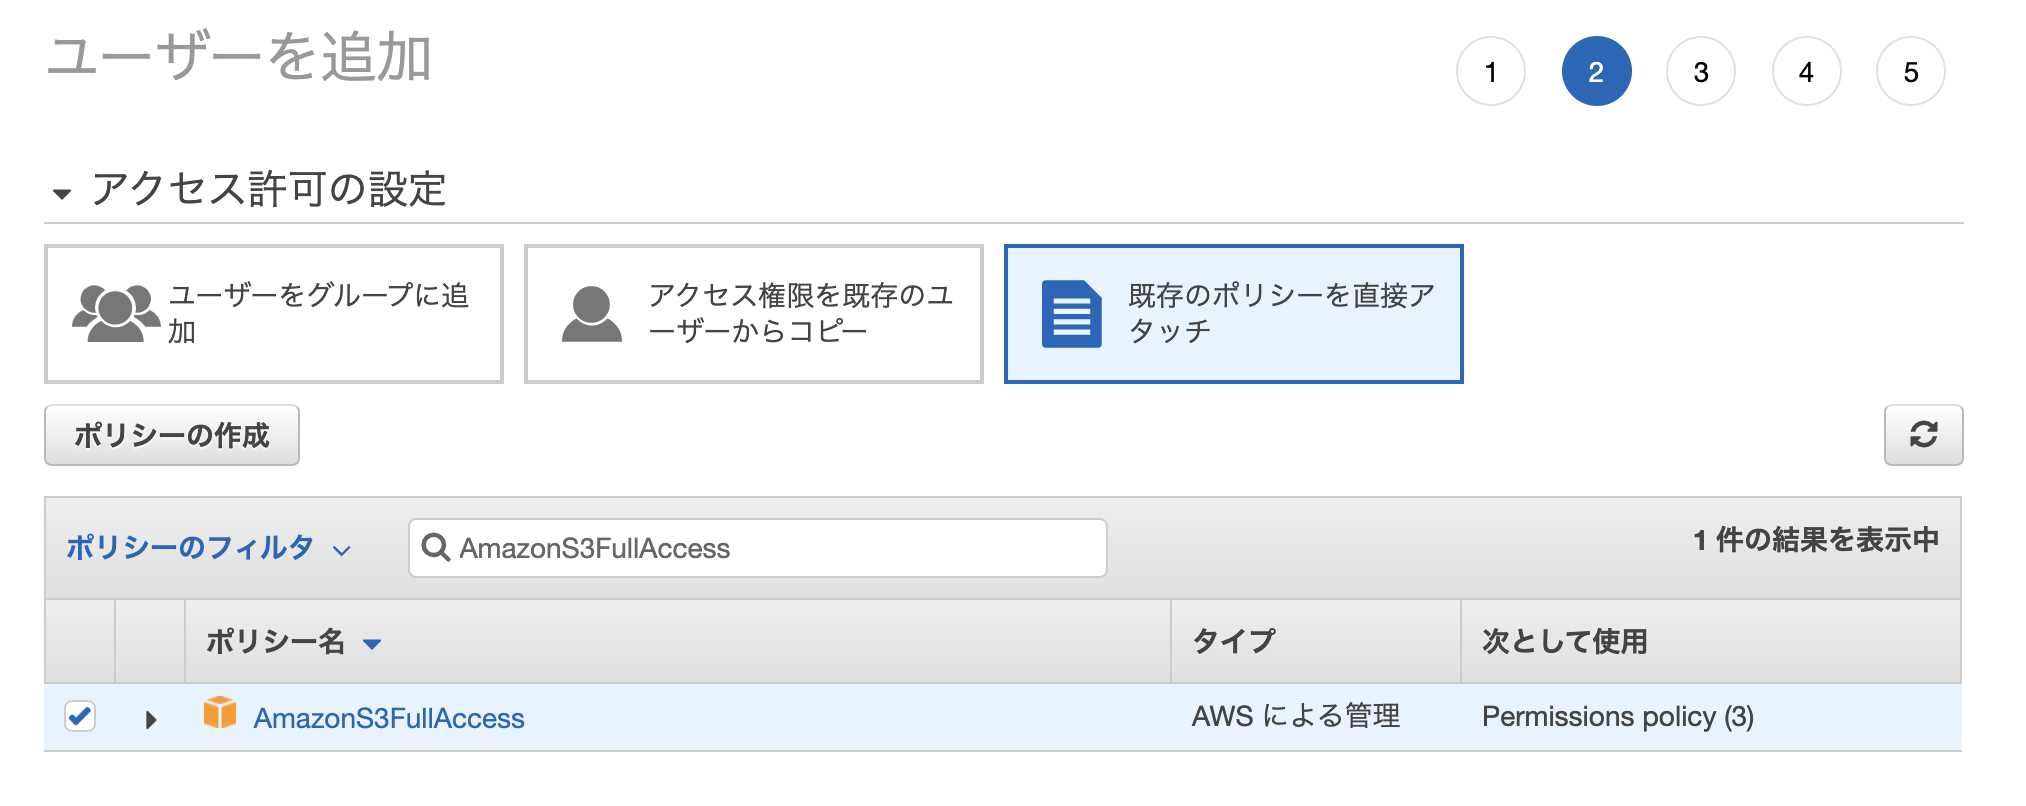
今回はS3バケットの作成、ファイルのアップロードや削除などS3に関する基本的な動作を行いたいので「AmazonS3FullAccess」ポリシーをアタッチしておきます。
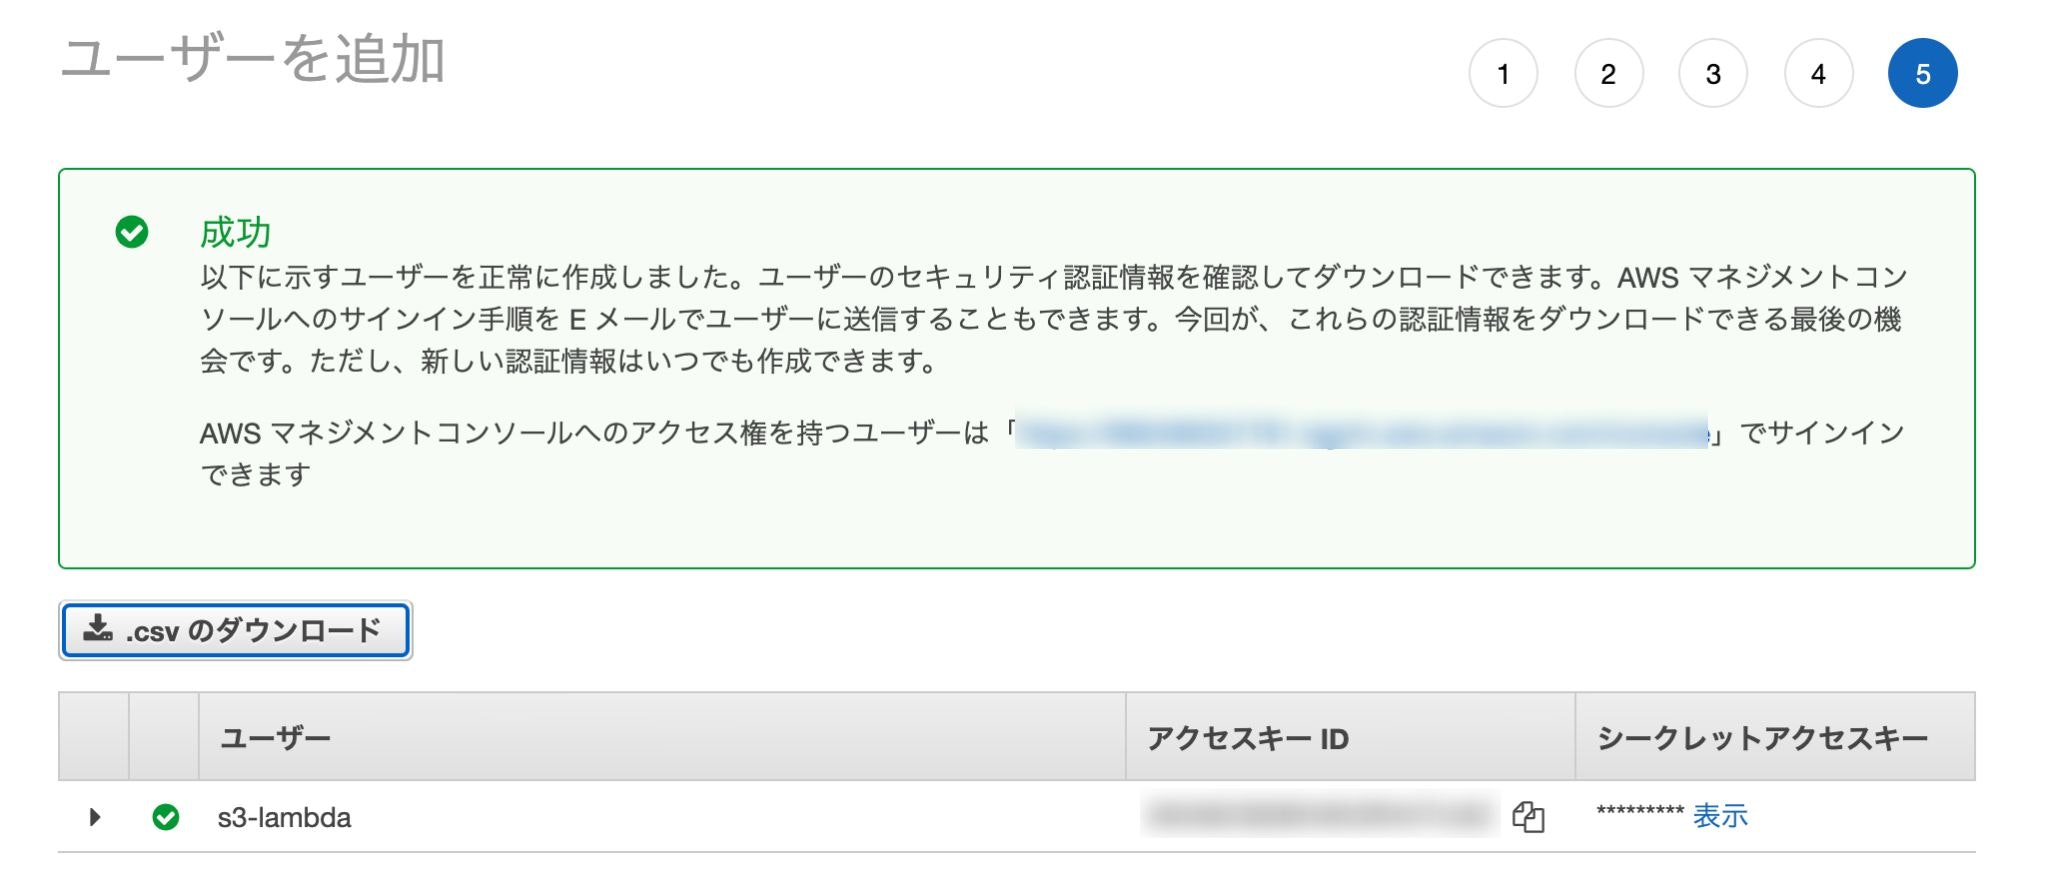
作成完了すると
- アクセスキーID
- シークレットアクセスキー
の2つが発行されるのでメモに控えておきましょう。
$ aws configure --profile s3-lambda

AWS Access Key ID [None]: ***************** # 自分のアクセスキーIDを入力
AWS Secret Access Key [None]: ************************** # 自分のシークレットアクセスキーを入力
Default region name [None]: ap-northeast-1
Default output format [None]: json
ターミナルで上記コマンドを打つと対話形式で情報を聞かれるので、指示に従いながら入力していきます。
S3バケットを作成
先ほど設定したAWS CLIを使ってちゃちゃっと作成してしまいます。
$ aws --profile s3-lambda s3 mb s3://test-bucket-for-converting-csv-to-json-with-lambda

make_bucket: test-bucket-for-converting-csv-to-json-with-lambda
バケット名は全世界においてユニークでないといけないので、各自オリジナルのものを考えてください。
テスト用CSVファイルを作成して試しにアップロードしてみる
$ mkdir ./workspace/
$ cat > ./workspace/test.csv << EOF
heredoc> Name,Age,Country
heredoc> Taro,20,Japan
heredoc> EOF
$ aws --profile s3-lambda s3 sync ./workspace s3://test-bucket-for-converting-csv-to-json-with-lambda

upload: ./test.csv to s3://test-bucket-for-converting-csv-to-json-with-lambda/test.csv
ちゃんとバケット内に入っていれば成功。
$ aws --profile s3-lambda s3 rm s3://test-bucket-for-converting-csv-to-json-with-lambda/test.csv
動作確認が済んだので消しておきます。
IAMロールを作成
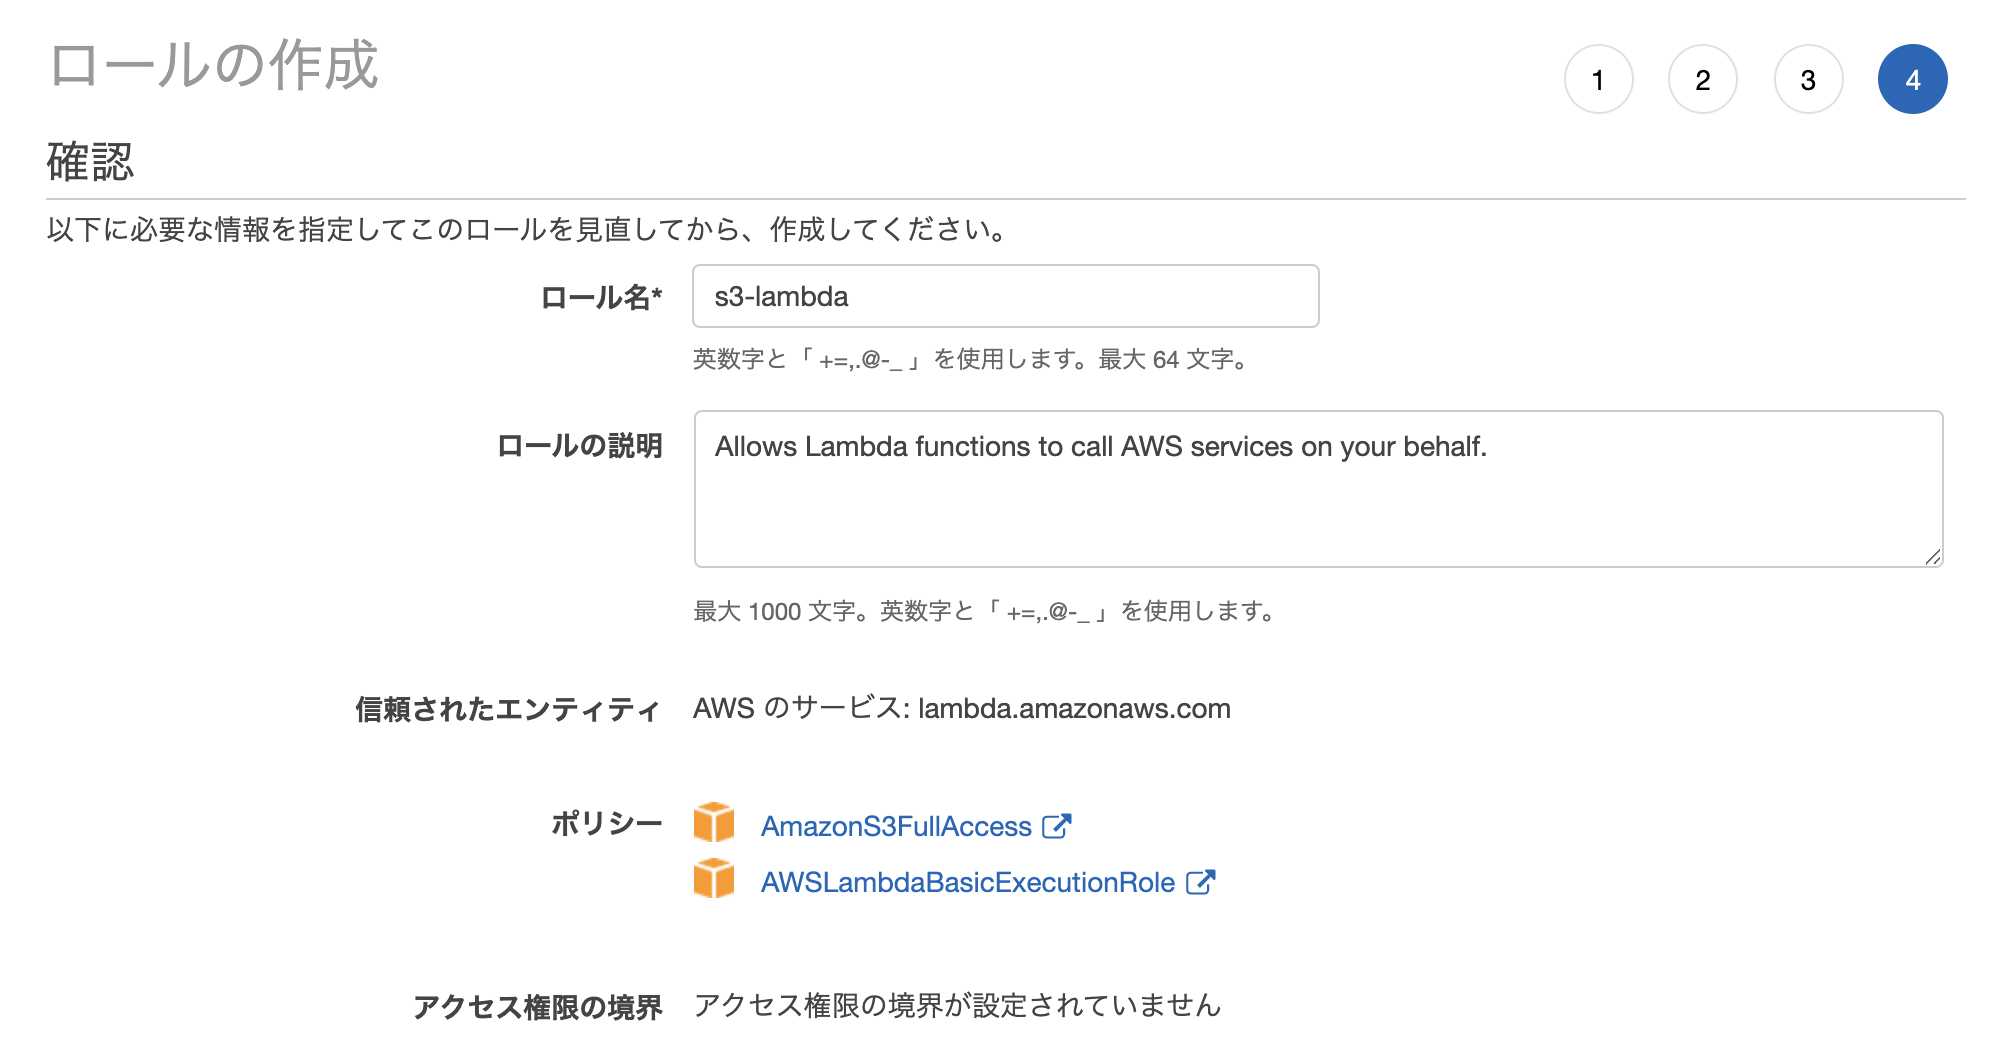
Lambdaに割り当てる用のIAMロールを作成します。
「IAM」→「ロール」→「ロールの作成」
- AmazonS3FullAccess
- AWSLambdaBasicExecutionRole
今回は上記2つのポリシーがあればOK。
適当に名前や説明文を入力して作成してください。
実装
下準備が終わったのでいよいよここから実装を行っていきます。
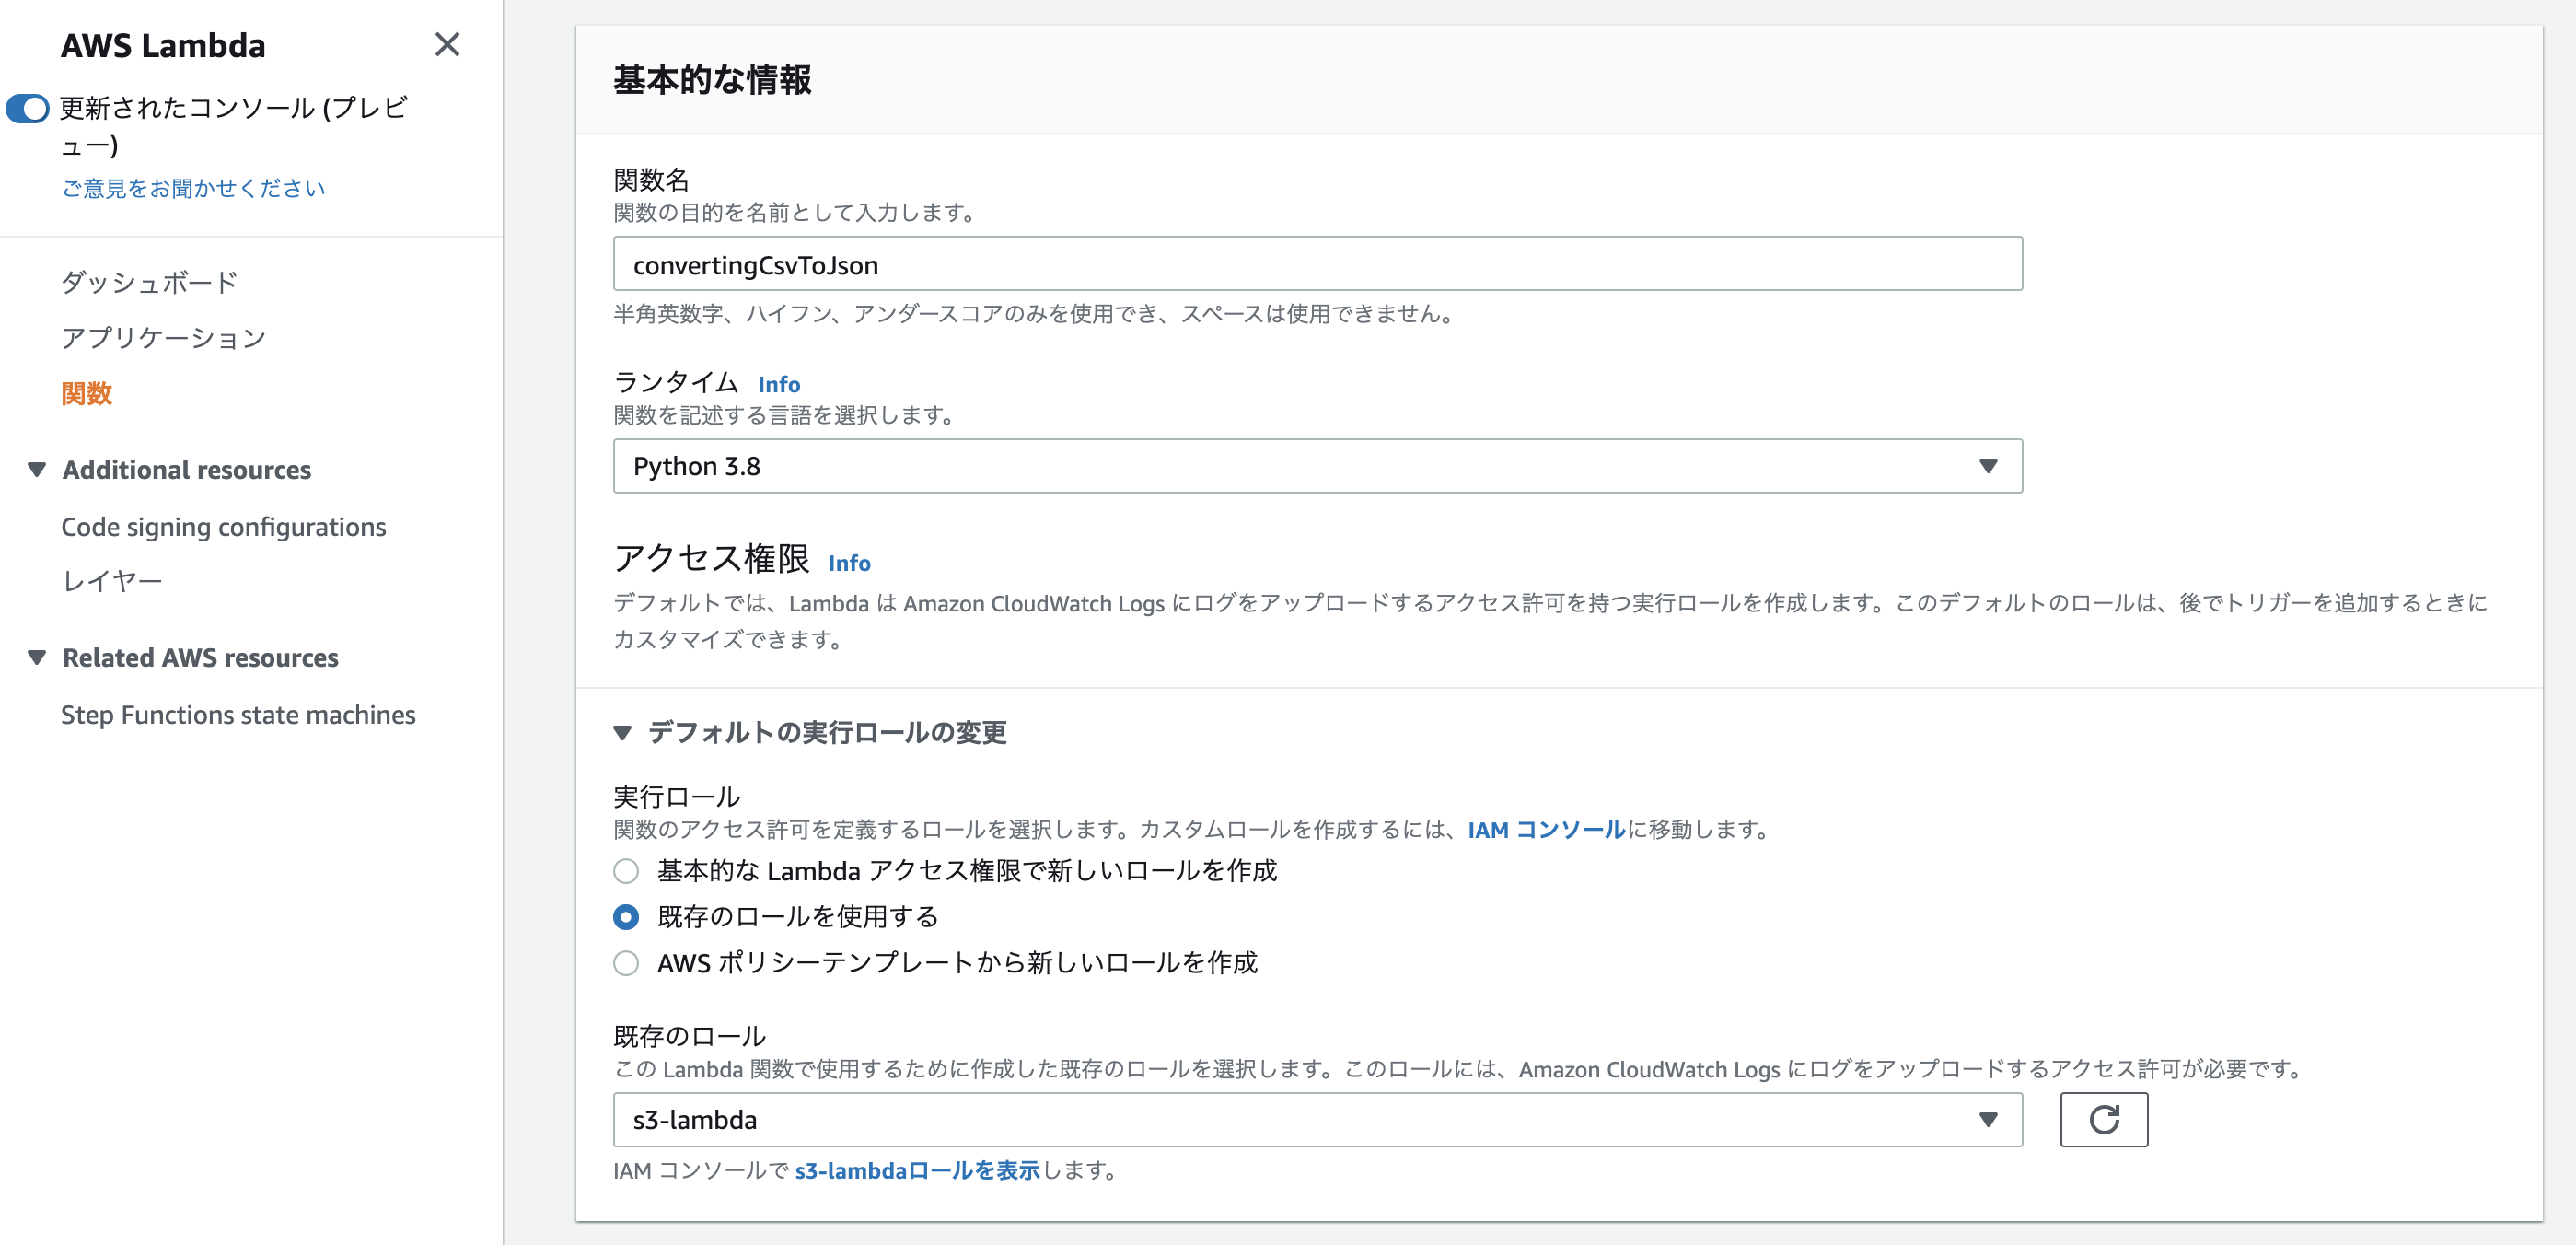
Lambda関数を作成
「Lambda」→「関数の作成」
- オプション: 一から作成
- 関数名: 任意
- ランタイム: Python 3.8
- 実行ロール: 既存のロール(先ほど作した「s3-lambda」)
- その他: デフォルトでOK
トリガーを作成
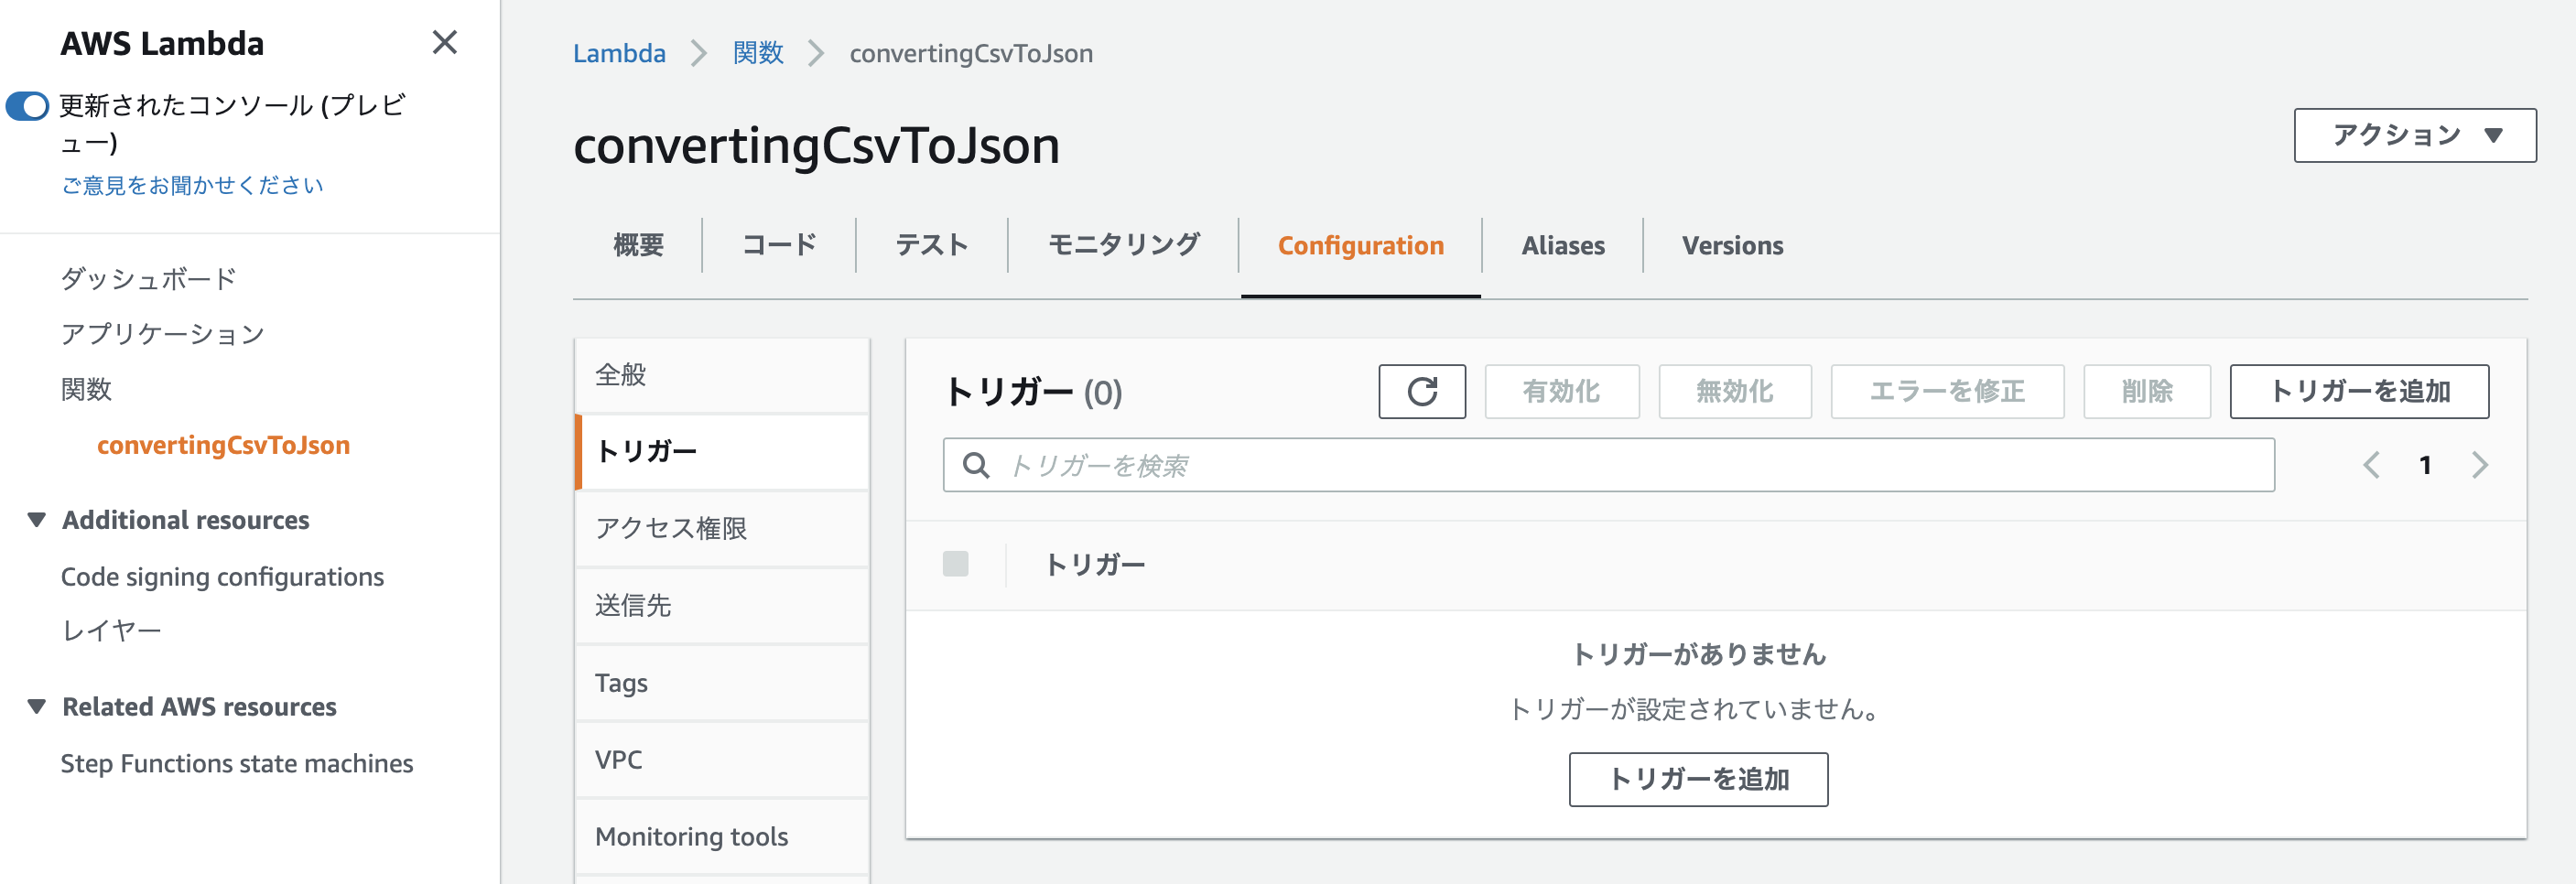
どんなイベントが発生した際にLambdaを起動させるのかを決めるために、「Configuration」→「トリガーを追加」へ進んでください。
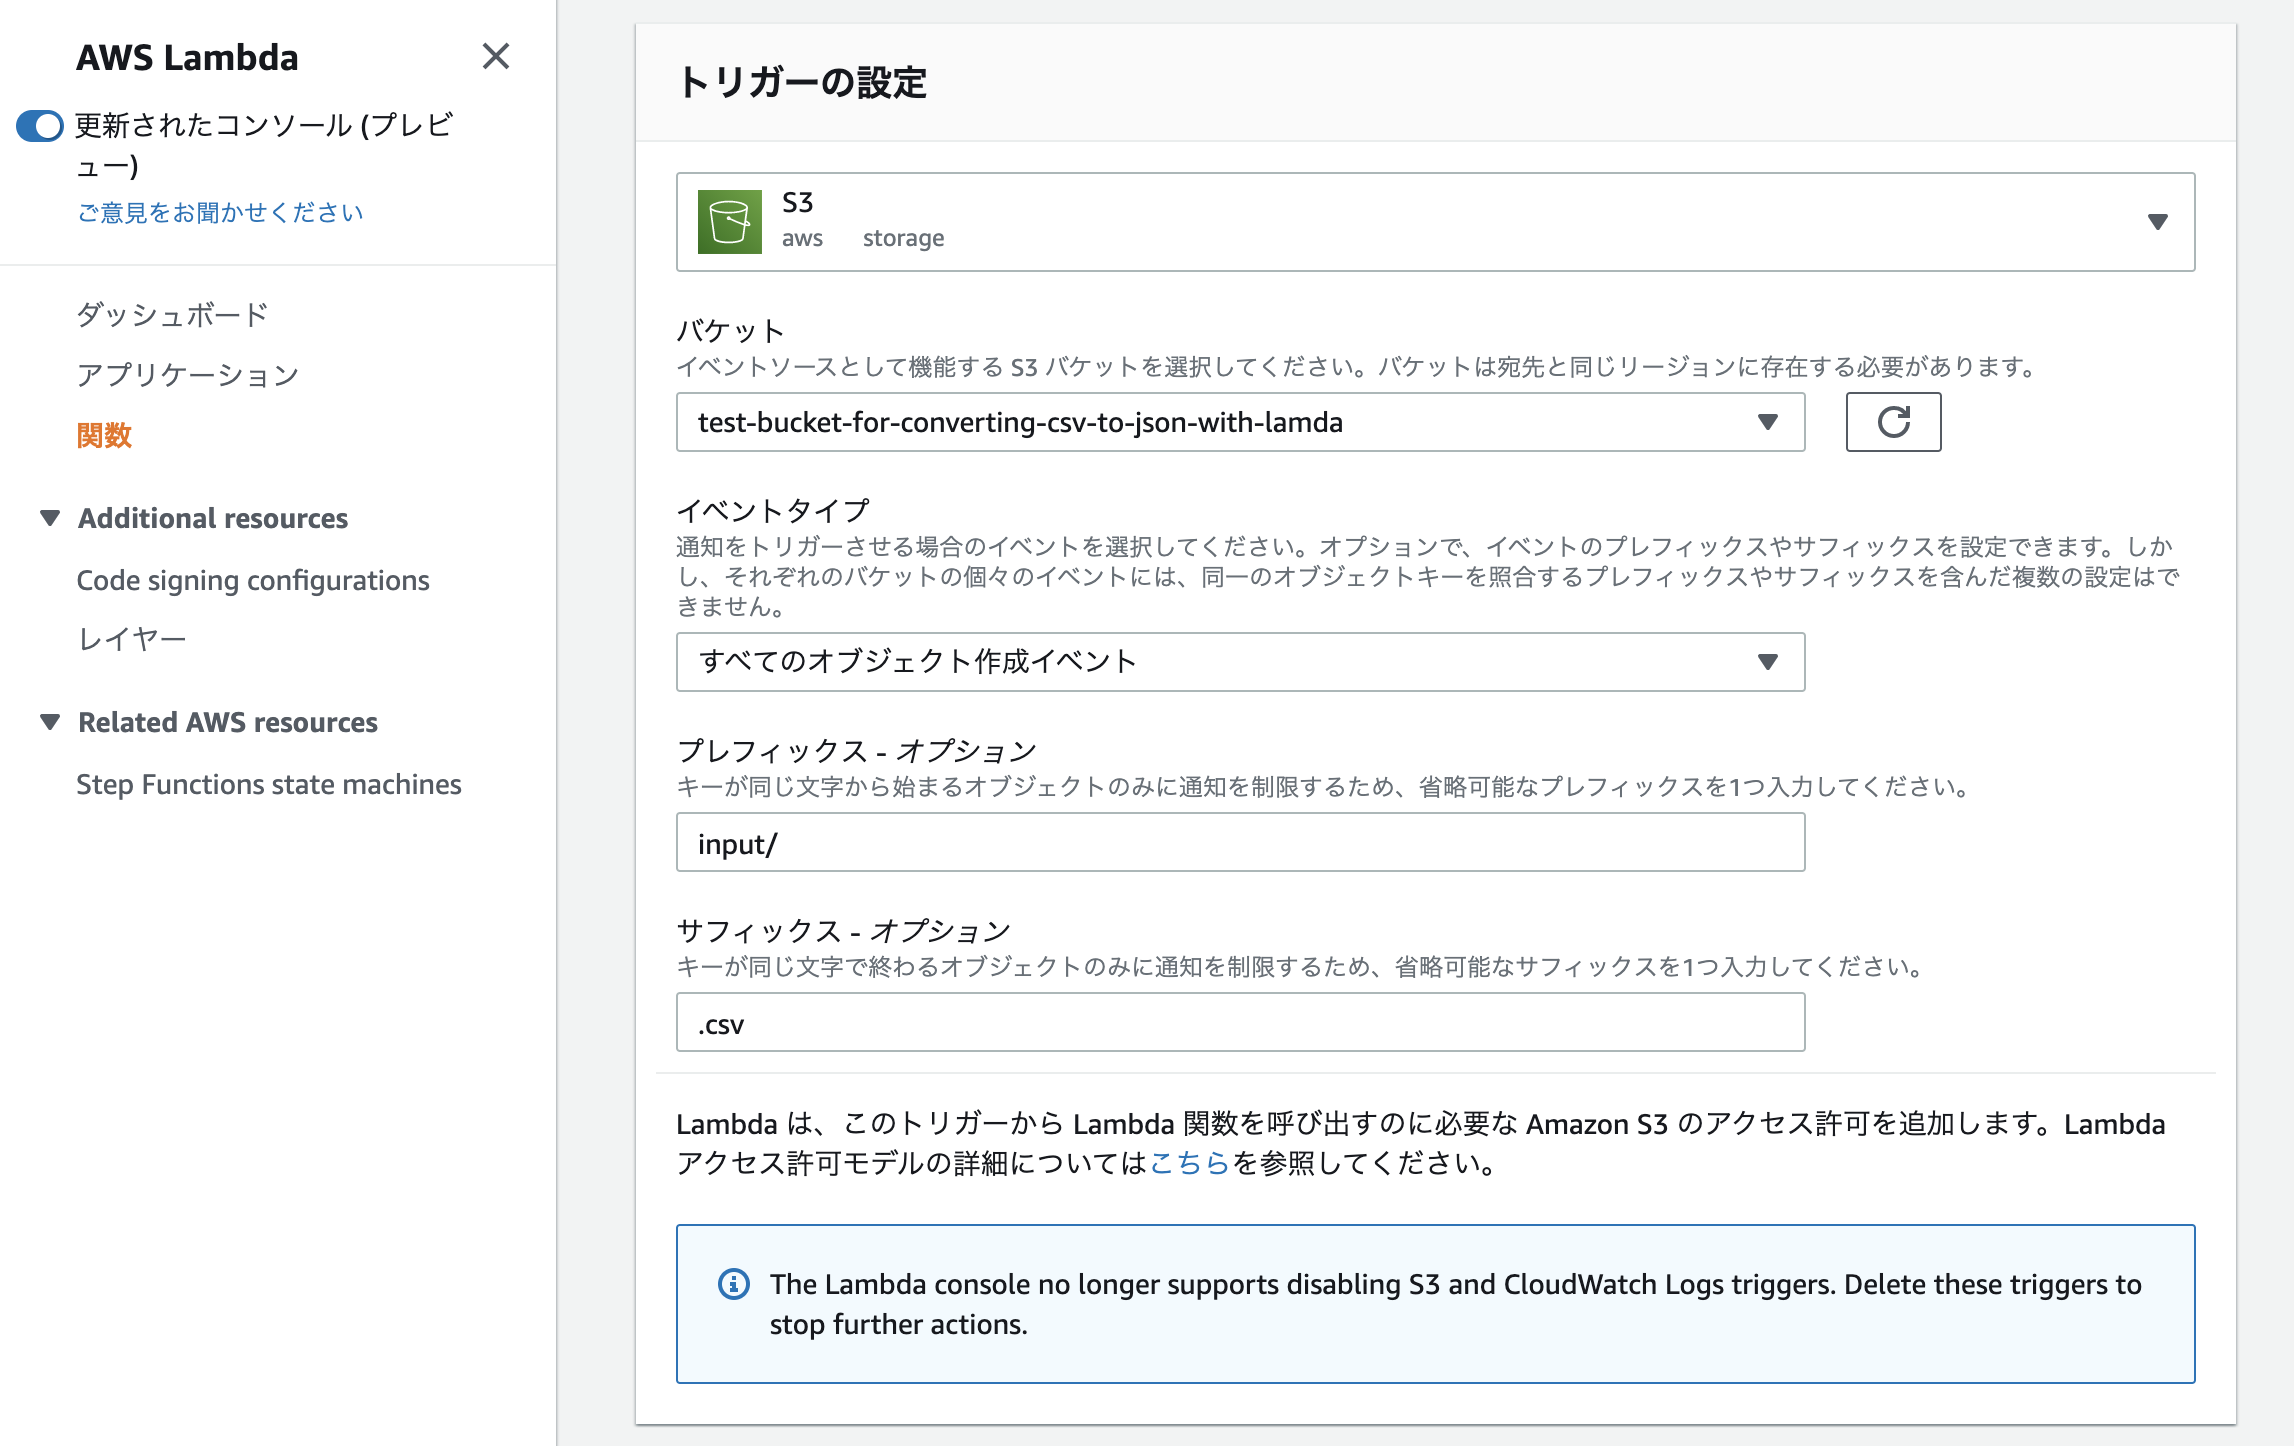
必要事項を記入していきます。
- トリガー: S3
- バケット: 先ほど作成したバケット名
- イベントタイプ: すべてのオブジェクト作成イベント
- プレフィックス: input/
- サフィックス: .csv
今回は「input」というフォルダ配下に「.csv」ファイルがアップロードされた事を検知した後、Lambdaを起動させる事を想定しています。
コード
import json
import csv
import boto3
import os
from datetime import datetime, timezone, timedelta

s3 = boto3.client('s3')

def lambda_handler(event, context):

    json_data = []

    # TZを日本に変更
    JST = timezone(timedelta(hours=+9), 'JST')
    timestamp = datetime.now(JST).strftime('%Y%m%d%H%M%S')

    # 一時的な読み書き用ファイル(後で消す)
    tmp_csv = '/tmp/test_{ts}.csv'.format(ts=timestamp)
    tmp_json = '/tmp/test_{ts}.json'.format(ts=timestamp)

    # 最終的な出力ファイル
    outputted_json = 'output/test_{ts}.json'.format(ts=timestamp)

    for record in event['Records']:
        bucket_name = record['s3']['bucket']['name']
        key_name = record['s3']['object']['key']

    s3_object = s3.get_object(Bucket=bucket_name, Key=key_name)
    data = s3_object['Body'].read()
    contents = data.decode('utf-8')

    try:
        with open(tmp_csv, 'a') as csv_data:
            csv_data.write(contents)

        with open(tmp_csv) as csv_data:
            csv_reader = csv.DictReader(csv_data)
            for csv_row in csv_reader:
                json_data.append(csv_row)

        with open(tmp_json, 'w') as json_file:
            json_file.write(json.dumps(json_data))

        with open(tmp_json, 'r') as json_file_contents:
            response = s3.put_object(Bucket=bucket_name, Key=outputted_json, Body=json_file_contents.read())

        os.remove(tmp_csv)
        os.remove(tmp_json)

    except Exception as e:
        print(e)
        print('Error getting object {} from bucket {}. Make sure they exist and your bucket is in the same region as this function.'.format(key, bucket))
        raise e
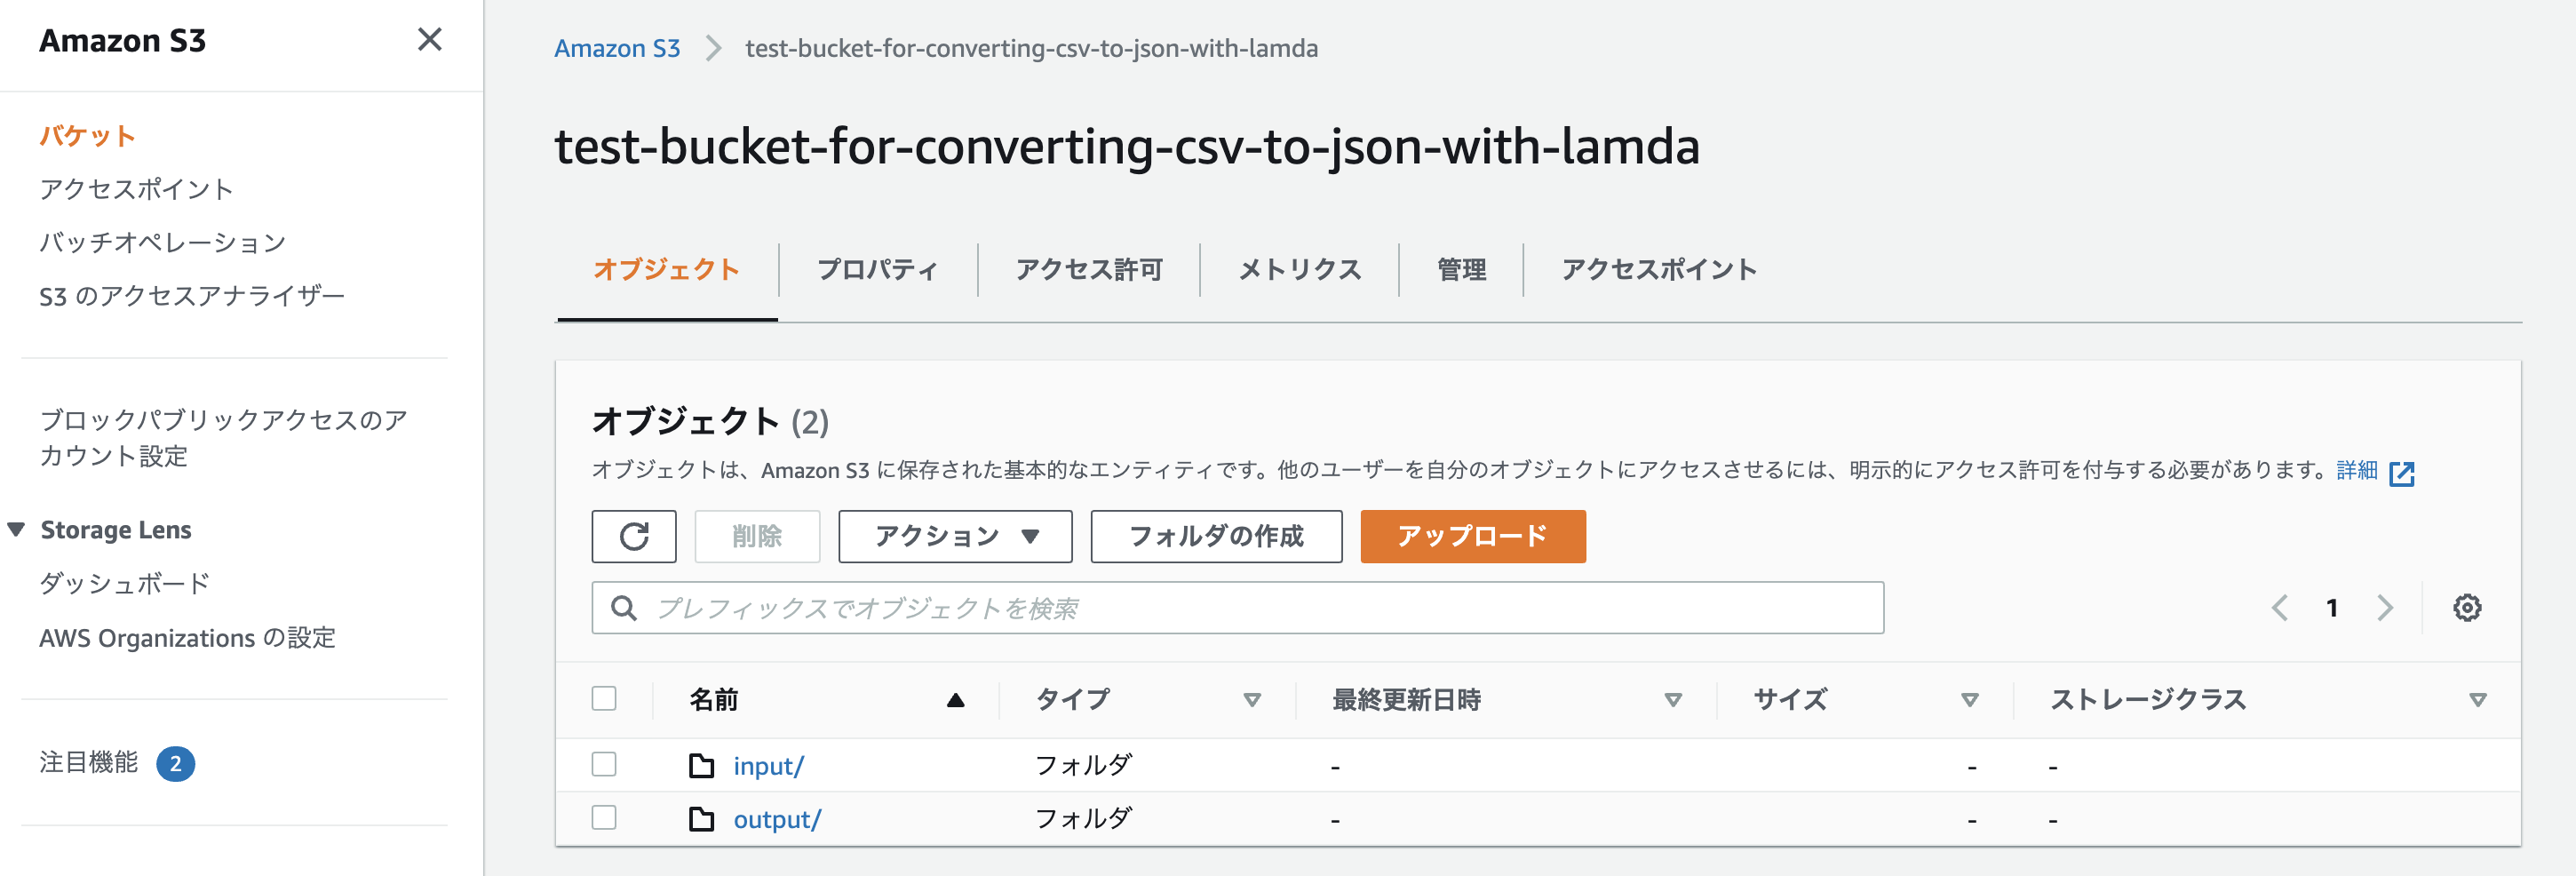
これでS3バケット名「test-bucket-for-converting-csv-to-json-with-lambda/input/」にCSVファイルがアップロードされると「test-bucket-for-converting-csv-to-json-with-lambda/output/」にJSON形式に変換されたファイルが吐き出されるようになります。
$ aws --profile s3-lambda s3 sync ./workspace s3://test-bucket-for-converting-csv-to-json-with-lambda/input

upload: ./test.csv to s3://test-bucket-for-converting-csv-to-json-with-lambda/input/test.csv
再度、AWS CLIでファイルをアップロードしてみましょう。
バケットを確認すると「output」というフォルダが新たに作成され、中にJSONファイルが入っているはず。
[
    {
        "Name": "Taro",
        "Age": "20",
        "Country": "Japan"
    }
]
中身を確認し、しっかりとJSON形式に変換されていれば完了です。
あとがき
お疲れ様でした。今回はCSV→JSONへの変換でしたが、同じ要領で他のパターンも色々実現できると思います。
少しでも参考になれば幸いです。
