はじめに
生成AIまわりで最近よく耳にする Model Context Protocol (MCP)。
概要は理解していたものの、自分で実装したことはありませんでした。
そこで今回、使命感に駆られて MCP サーバーの概要から簡単な実装例までをまとめました。
ご指摘やフィードバックは大歓迎ですので、ぜひ一読いただけると幸いです。
MCPサーバーとは
FastMCPのドキュメントには以下のような記載があります。
What is MCP?
The Model Context Protocol lets you build servers that expose data and functionality to LLM applications in a secure, standardized way. It is often described as “the USB-C port for AI”, providing a uniform way to connect LLMs to resources they can use. It may be easier to think of it as an API, but specifically designed for LLM interactions. MCP servers can:
- Expose data through Resources (think of these sort of like GET endpoints; they are used to load information into the LLM’s context)
- Provide functionality through Tools (sort of like POST endpoints; they are used to execute code or otherwise produce a side effect)
- Define interaction patterns through Prompts (reusable templates for LLM interactions)
And more!
FastMCP provides a high-level, Pythonic interface for building, managing, and interacting with these servers.
ざっくり要約すると、LLM アプリが外部データや機能に安全かつ統一的にアクセスできるようにする標準プロトコルで、APIサーバーをよりLLMのアプリが扱いやすくしたサーバーとなります。
Fast MCPとは
FastMCP は MCP サーバーとクライアントを簡単に構築できるよう設計されたライブラリです。
以下、Fast MCPのドキュメントからの引用です。
Why FastMCP?
FastMCP handles all the complex protocol details so you can focus on building. In most cases, decorating a Python function is all you need — FastMCP handles the rest.
🚀 Fast: High-level interface means less code and faster development
🍀 Simple: Build MCP servers with minimal boilerplate
🐍 Pythonic: Feels natural to Python developers
🔍 Complete: Everything for production — enterprise auth (Google, GitHub, Azure, Auth0, WorkOS), deployment tools, testing frameworks, client libraries, and more
FastMCP provides the shortest path from idea to production. Deploy locally, to the cloud with FastMCP Cloud (free for personal servers), or to your own infrastructure.
FastMCP is made with 💙 by Prefect.
引用: Welcome to FastMCP 2.0!
本番稼働まで素早く、簡単に開発を行うための各種機能が揃っているというのが特徴の一つと思われます。(Fast API的なイメージ)
自作MCPサーバー作成
環境構築
まずは、Fast MCPを動かすための環境を構築します。
今回、簡単な自作MCPサーバーの構築に伴い、
- Python3.11.9
- uv
を使用します。
PypiのWebページによると、Fast MCPパッケージを使用するためにはpythonは3.10.0以降である必要があるとのことでした。実際に、Fast MCPパッケージを利用される方は必要に応じてバージョンの更新をしておく必要がありそうです。
FastMCPパッケージインストール
プロジェクトのディレクトリを作成後に、以下のコマンドを順に実行してください。
# Python プロジェクトを初期化する
uv init
# fastmcpの依存関係パッケージを追加
uv add fastmcp
# 仮想環境を有効化
source .venv/bin/activate
# fastmcpが正常にインストールされていることを確認
fastmcp version
Fast MCPのバージョンが表示されれば準備完了

実装
今回は、クライアントから名前を受け取って挨拶を返す簡単なMCPサーバーを実装します。
まずは、コード/実行結果を紹介させていただいた後でそれぞれの解説をしようと思います。
サーバー作成
# server.py
from fastmcp import FastMCP, Context
from typing import List, Dict

mcp = FastMCP("MyExpandedMCP")

# — Tool を追加 —
@mcp.tool()
def greet(name: str) -> str:
    """指定された名前への挨拶を返す"""
    return f"Hello, {name}!"

@mcp.tool()
def sum_numbers(nums: List[int]) -> int:
    """整数リストの合計を返す"""
    return sum(nums)

@mcp.tool()
async def fetch_data(ctx: Context, key: str) -> Dict[str, str]:
    """
    仮の外部データ取得をシミュレートするツール。
    Context を使ってログを出したり進捗報告も可能。
    """
    await ctx.info(f"Fetching data for key = {key}")
    # ここでは擬似的にデータを返す
    return {"key": key, "value": f"value_for_{key}"}

# — Resource を追加 —
# 静的リソース例
@mcp.resource("app://config")
def get_config() -> Dict[str, str]:
    """アプリケーションの設定情報を返すリソース"""
    return {
        "version": "1.0.0",
        "maintainer": "YourName",
        "features": "greet, sum, fetch"
    }

# 動的テンプレート URI リソース(URI の中にパラメータ {name} を含む例)
@mcp.resource("user://{name}")
def get_user_profile(name: str) -> Dict[str, str]:
    """ユーザープロファイル情報を返すリソース"""
    # 実際には DB などから取る想定
    return {
        "name": name,
        "role": "user",
        "welcome_msg": f"Welcome, {name}!"
    }

# — Prompt を追加 —
@mcp.prompt()
def ask_for_sum(nums: list[int]) -> str:
    """合計を求めるプロンプトテンプレート"""
    return "次の数字の合計を求めてください:" + ", ".join(str(n) for n in nums)

@mcp.prompt()
def greet_user(name: str) -> str:
    """挨拶を促すプロンプトテンプレート"""
    return f"Hi, my name is {name}. Nice to meet you!"

if __name__ == "__main__":
    mcp.run(transport="http", port=8000)
クライアント作成
# client.py
import asyncio
from fastmcp import Client

async def test_calls():
    async with Client("http://localhost:8000/mcp") as client:
        # ツール一覧を確認
        tools = await client.list_tools()
        print("Available tools:", [t for t in tools])

        # リソース一覧もしくは取得
        config = await client.read_resource("app://config")
        print("Config resource:", config)

        profile = await client.read_resource("user://Alice")
        print("User profile for Alice:", profile)

        # プロンプトを取得して使う例
        prompt_text = await client.get_prompt("ask_for_sum", {"nums": [1, 2, 3, 4]})
        print("Prompt for sum:", prompt_text)

        # ツール呼び出し
        greeting = await client.call_tool("greet", {"name": "Bob"})
        print("Greet tool:", greeting)

        total = await client.call_tool("sum_numbers", {"nums": [10, 20, 30]})
        print("Sum tool:", total)

        data = await client.call_tool("fetch_data", {"key": "alpha"})
        print("Fetched data:", data)

if __name__ == "__main__":
    asyncio.run(test_calls())
クライアント実装にあたってWebページでは以下(日本語訳)の留意事項に関して記載があります。
- FastMCP のクライアントは非同期処理で動作するため、クライアントを実行する際には asyncio.run を使う必要があります。
- クライアントを利用する前に、必ず クライアントコンテキスト(async with client:)に入らなければなりません。
- 同じコンテキスト内であれば、複数回のクライアント呼び出しを行うことができます。
引用: Quickstart
実行
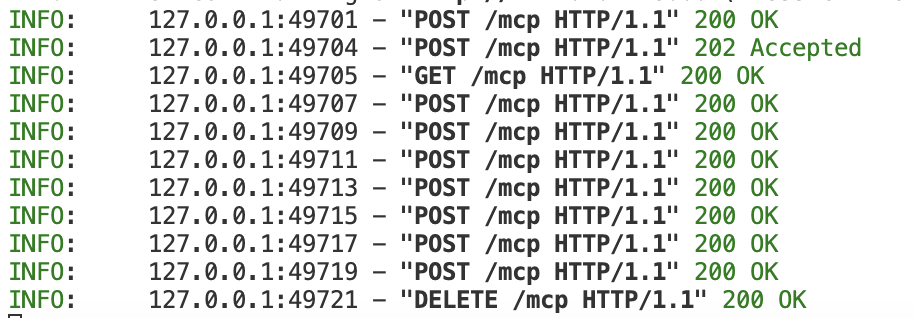
まずは、以下のコマンドでMCPサーバーをローカルホストで立ち上げます。
python3 server.py
サーバーが立ち上がったことを確認

次に、client側のプログラムを実行
python3 client.py
正常にレスポンスが返ってくることを確認

サーバー側でもログが反映されていることを確認
解説
サーバー側
fastmcpサーバーの本体となるFastMCPクラスとコンテキスト情報を扱うContextクラスをインポート
from fastmcp import FastMCP, Context
from typing import List, Dict
tool(POSTメソッドのような役割)を定義
※Docstringは必須ではないが、クライアントがツール一覧を取得する際に、メタ情報として付与されるため、Agentが自律的にtoolの取捨選択をするクライアント構成の場合は必要になる。
@mcp.tool()
def greet(name: str) -> str:
    """指定された名前への挨拶を返す"""
    return f"Hello, {name}!"

@mcp.tool()
def sum_numbers(nums: List[int]) -> int:
    """整数リストの合計を返す"""
    return sum(nums)

@mcp.tool()
async def fetch_data(ctx: Context, key: str) -> Dict[str, str]:
    """
    仮の外部データ取得をシミュレートするツール。
    Context を使ってログを出したり進捗報告も可能。
    """
    await ctx.info(f"Fetching data for key = {key}")
    # ここでは擬似的にデータを返す
    return {"key": key, "value": f"value_for_{key}"}
resource(GETメソッドのような役割)を定義
@mcp.resource("user://{name}")
def get_user_profile(name: str) -> Dict[str, str]:
    """ユーザープロファイル情報を返すリソース"""
    # 実際には DB などから取る想定
    return {
        "name": name,
        "role": "user",
        "welcome_msg": f"Welcome, {name}!"
    }
prompt(プロンプトパターン)の定義
@mcp.prompt()
def ask_for_sum(nums: list[int]) -> str:
    """合計を求めるプロンプトテンプレート"""
    return "次の数字の合計を求めてください:" + ", ".join(str(n) for n in nums)

@mcp.prompt()
def greet_user(name: str) -> str:
    """挨拶を促すプロンプトテンプレート"""
    return f"Hi, my name is {name}. Nice to meet you!"
クライアント側
非同期処理のためのライブラリとクライアントのライブラリをインポート
import asyncio
from fastmcp import Client
MCPサーバーと接続する関数を定義(クライアント自体が非同期処理のためasyncの設定は必須)
async def test_calls():
    async with Client("http://localhost:8000/mcp") as client:
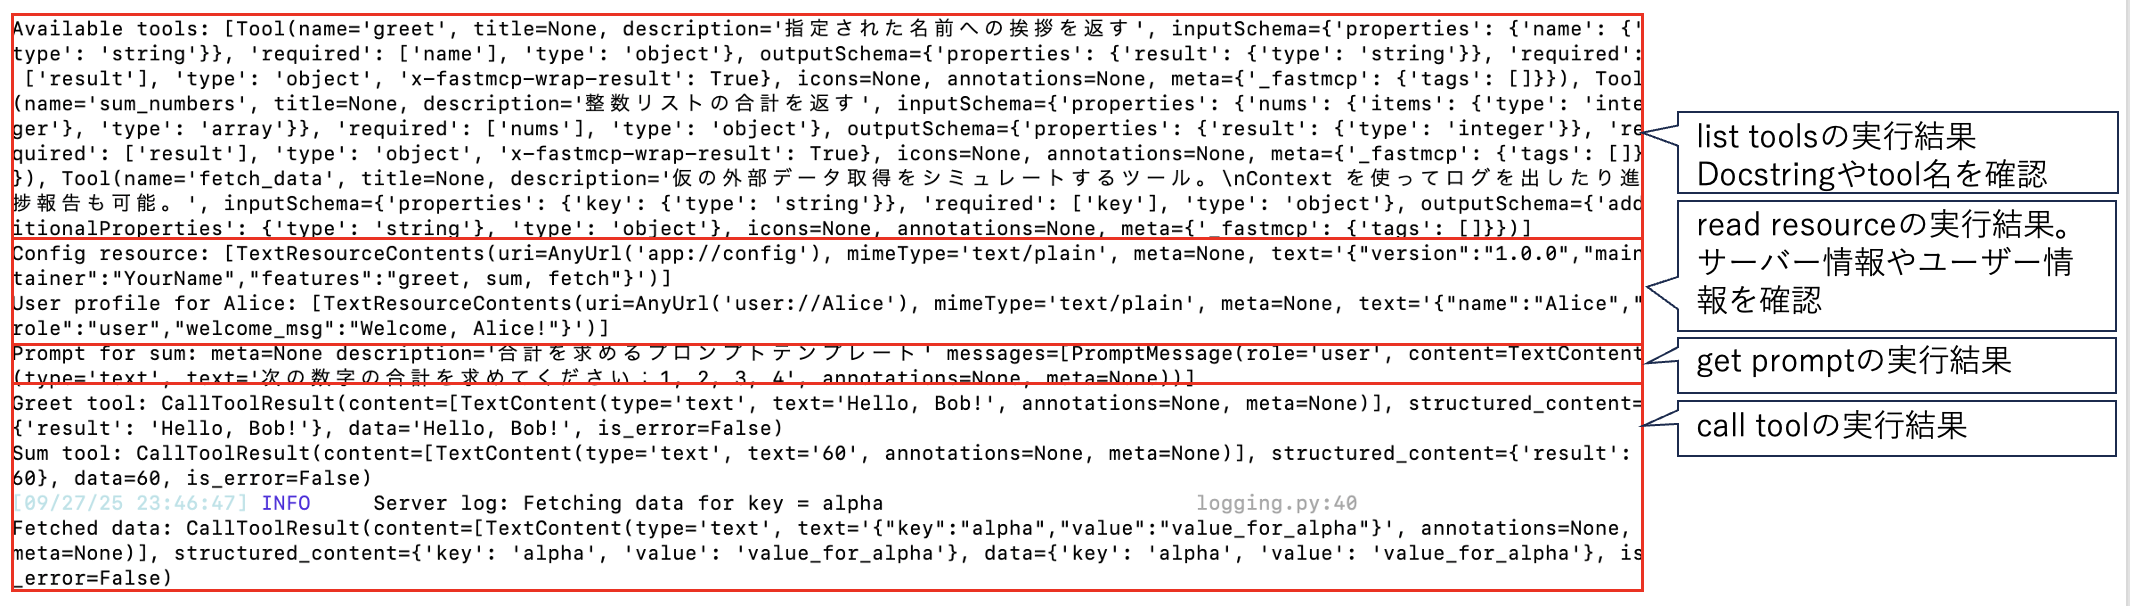
それぞれのtool, resource, promptを呼び出して取得してきた内容をprint文で出力
        # ツール一覧を確認
        tools = await client.list_tools()
        print("Available tools:", [t for t in tools])

        # リソース一覧もしくは取得
        config = await client.read_resource("app://config")
        print("Config resource:", config)

        profile = await client.read_resource("user://Alice")
        print("User profile for Alice:", profile)

        # プロンプトを取得して使う例
        prompt_text = await client.get_prompt("ask_for_sum", {"nums": [1, 2, 3, 4]})
        print("Prompt for sum:", prompt_text)

        # ツール呼び出し
        greeting = await client.call_tool("greet", {"name": "Bob"})
        print("Greet tool:", greeting)

        total = await client.call_tool("sum_numbers", {"nums": [10, 20, 30]})
        print("Sum tool:", total)

        data = await client.call_tool("fetch_data", {"key": "alpha"})
        print("Fetched data:", data)
list_toolメソッド/read_resourceメソッドはFastMCPサーバーより
デフォルトで定義されているメソッドで、それぞれ、MCPサーバー内で定義されているツールや設定値などを取得することでクライアント側がどのようなMCPサーバー構成であるかが理解でき、Agentでの自律的な判断構成の材料になる。
mainファイルだった場合にMCPサーバー呼び出しを行う関数の実行
if __name__ == "__main__":
    asyncio.run(test_calls())
今回、クライアント側はAgentによる自律的なTool呼び出しの構成ではなく、ルールベースの呼び出しとなる。
↑レスポンスと実行元のまとめ
最後に
今回は、Fast MCPを使いローカルホスト上で簡単なMCPサーバーの実装を行いました。今回紹介した機能以外にもFast MCPでは様々な機能が提供されています。
今後は、より発展的なFast MCPの内容をまとめていければと考えておりますので、ご興味をいただけた際はぜひ閲覧およびフィードバックをお願いいたします。