始めに
unityroomにアップロードしたいと思い、自分のつくったUnityのゲームをunityroomにあげるまでの方法を備忘録として残しておきます。
実際に上がったゲームはこちら
https://unityroom.com/games/2d_side_scroll_action
※Unityのバージョンは2019.1.5f1
方法
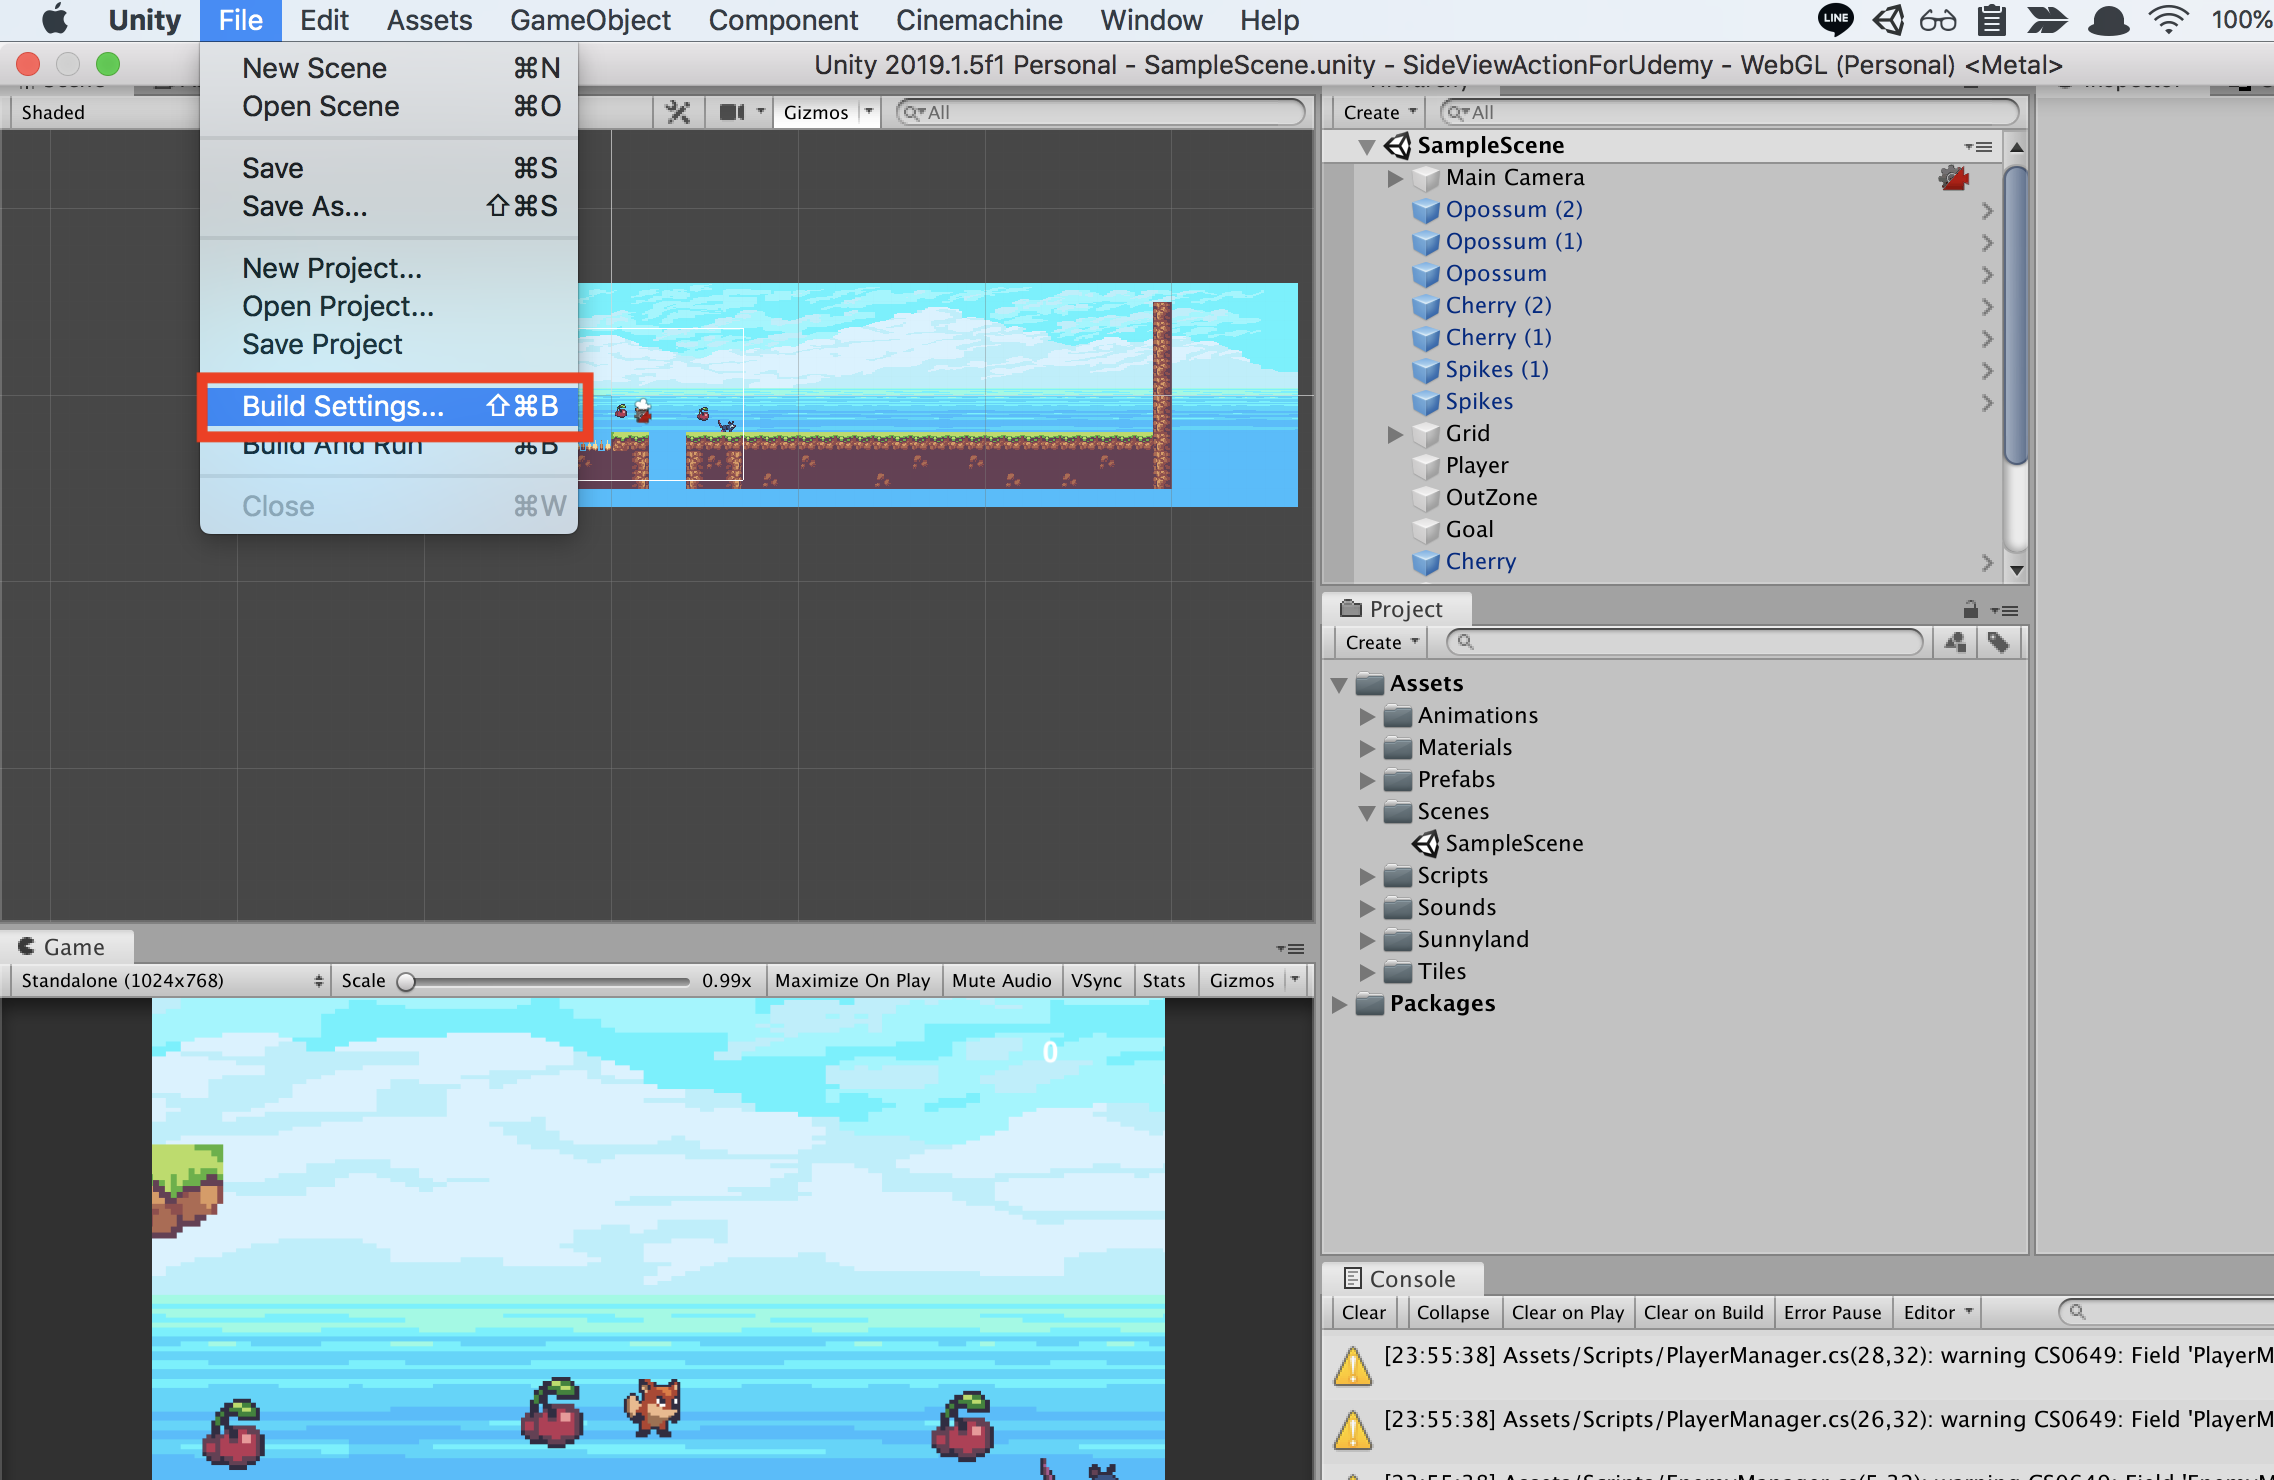
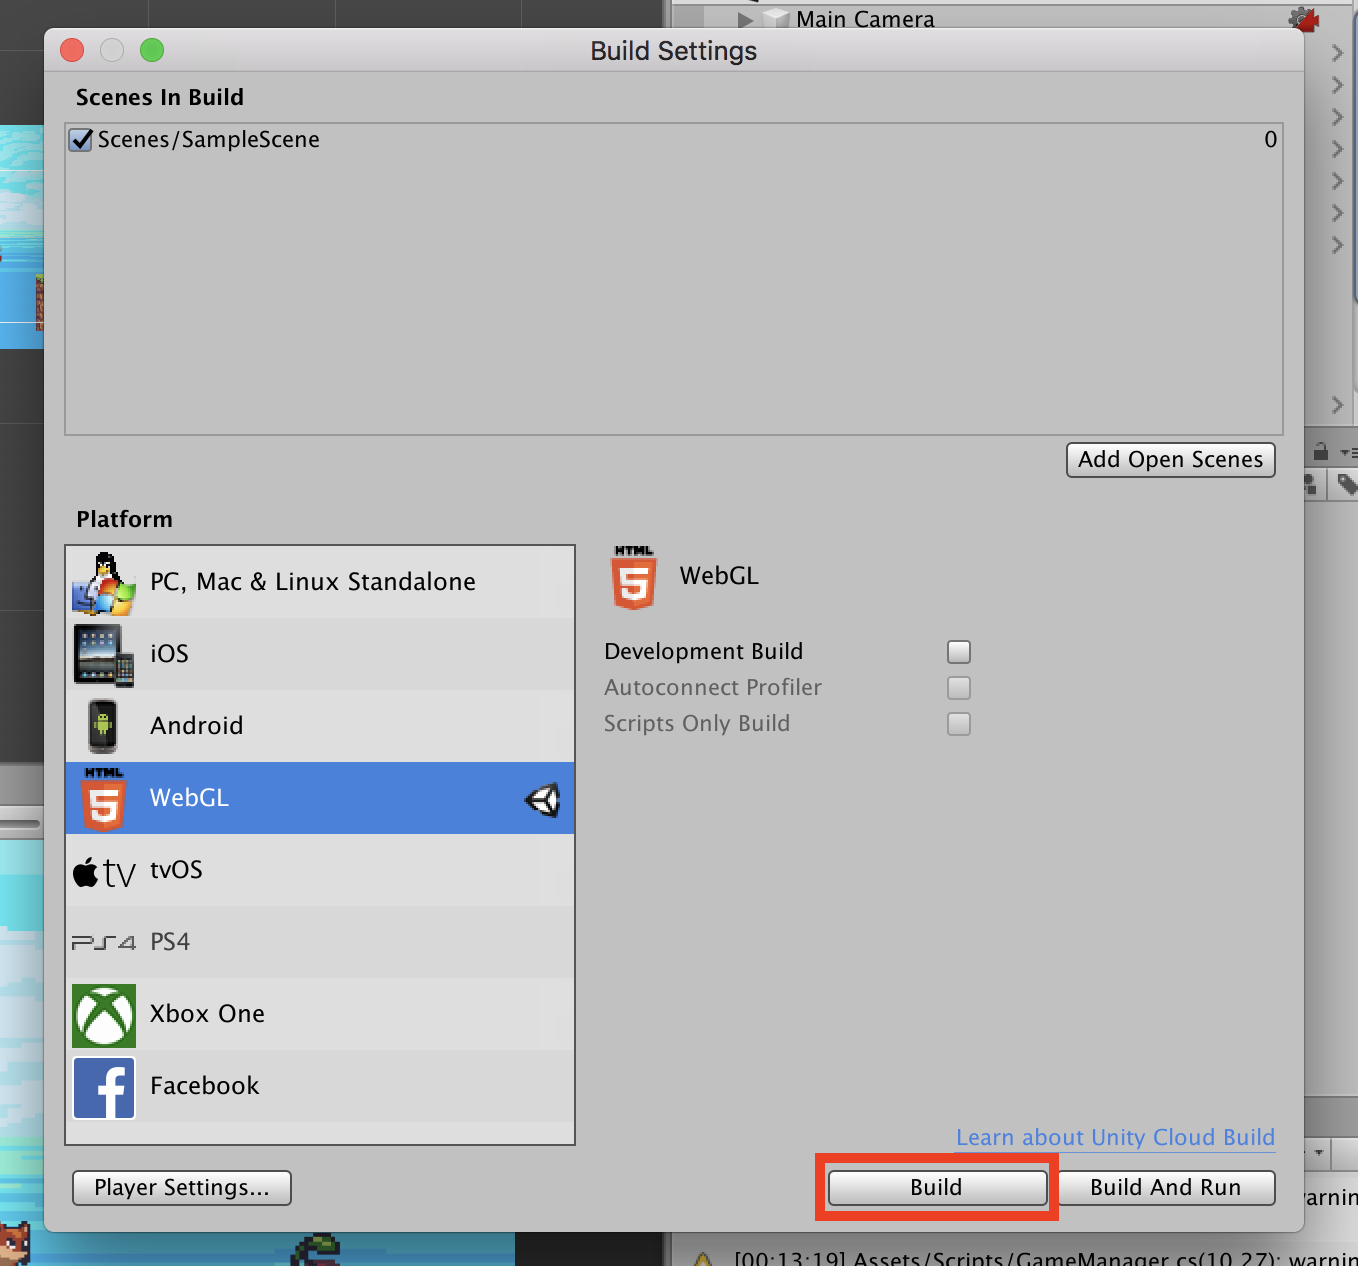
① File > Build Settingsを選択
自分の作りたいゲームがUnityで完成したら、画面右上のメニューからBuild Settingsを選択します。
② WebGLを選択し、Switch Platformを選択
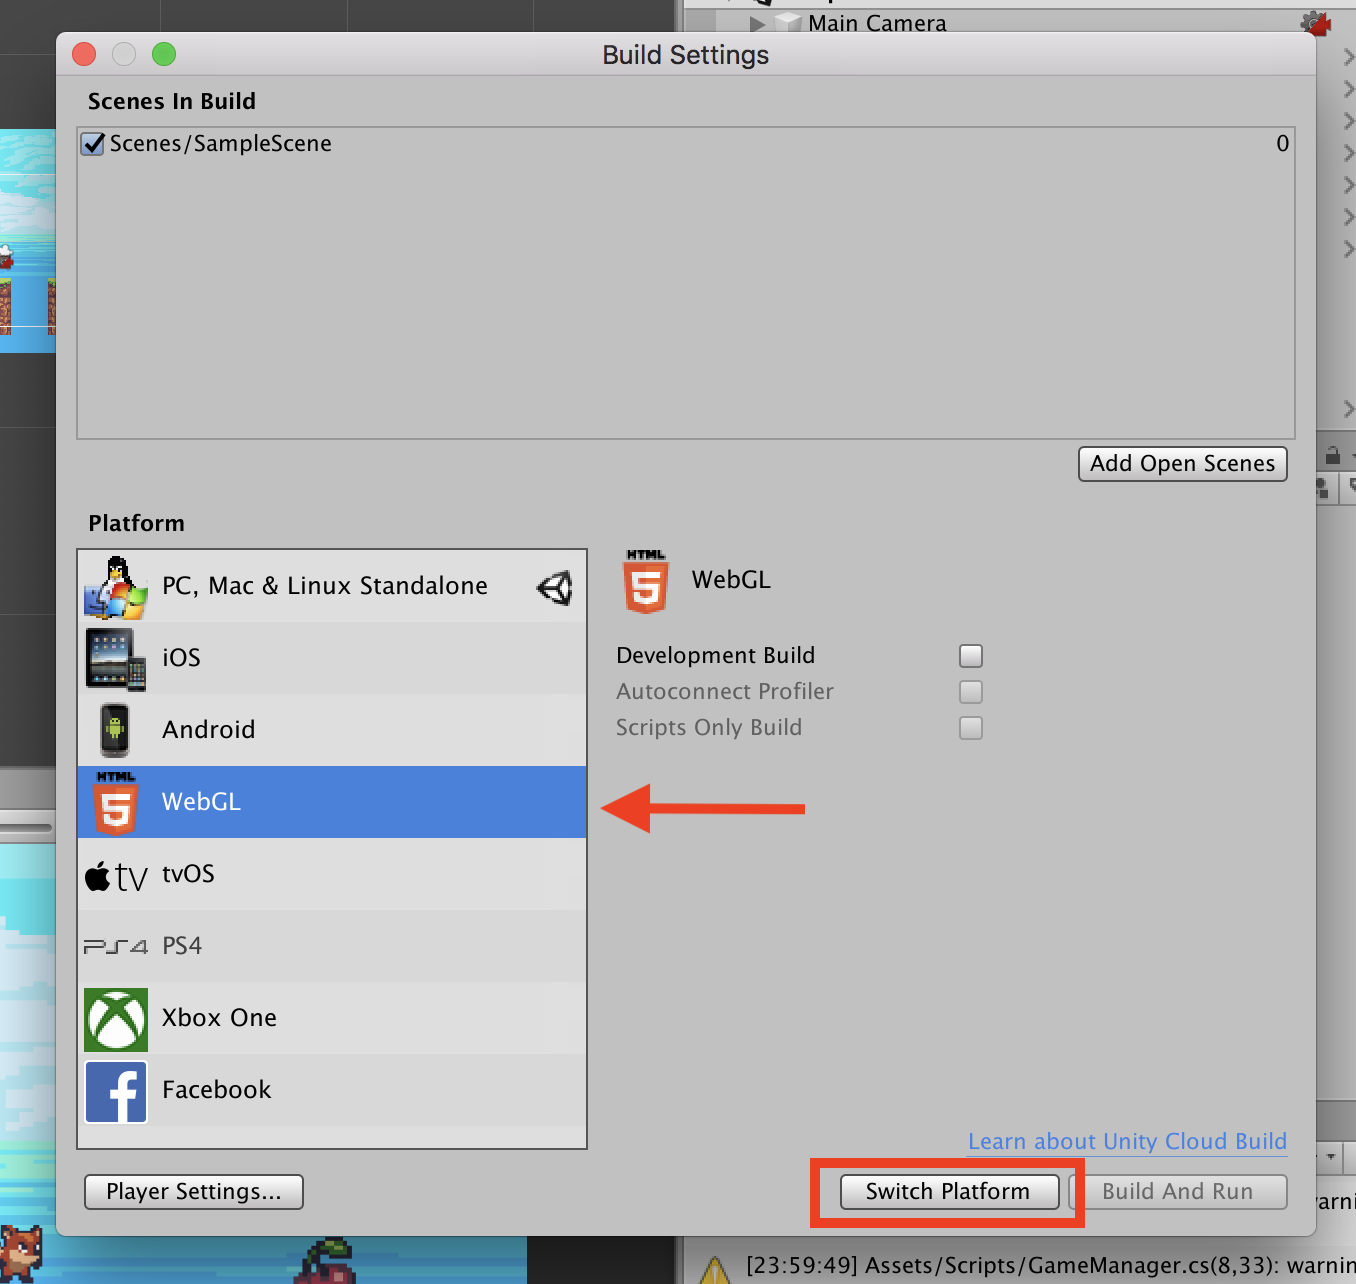
WebGLの横にUnityのアイコンがつけばSwitch完了です。
※Switch Platformが選択できない場合
自分の場合、Switch Platformが半透明になっており選択ができませんでした。
その場合、Unity HubからWebGLのモジュールのインストールが必要になります。
Unity HubからWebGLのモジュールをインストールする
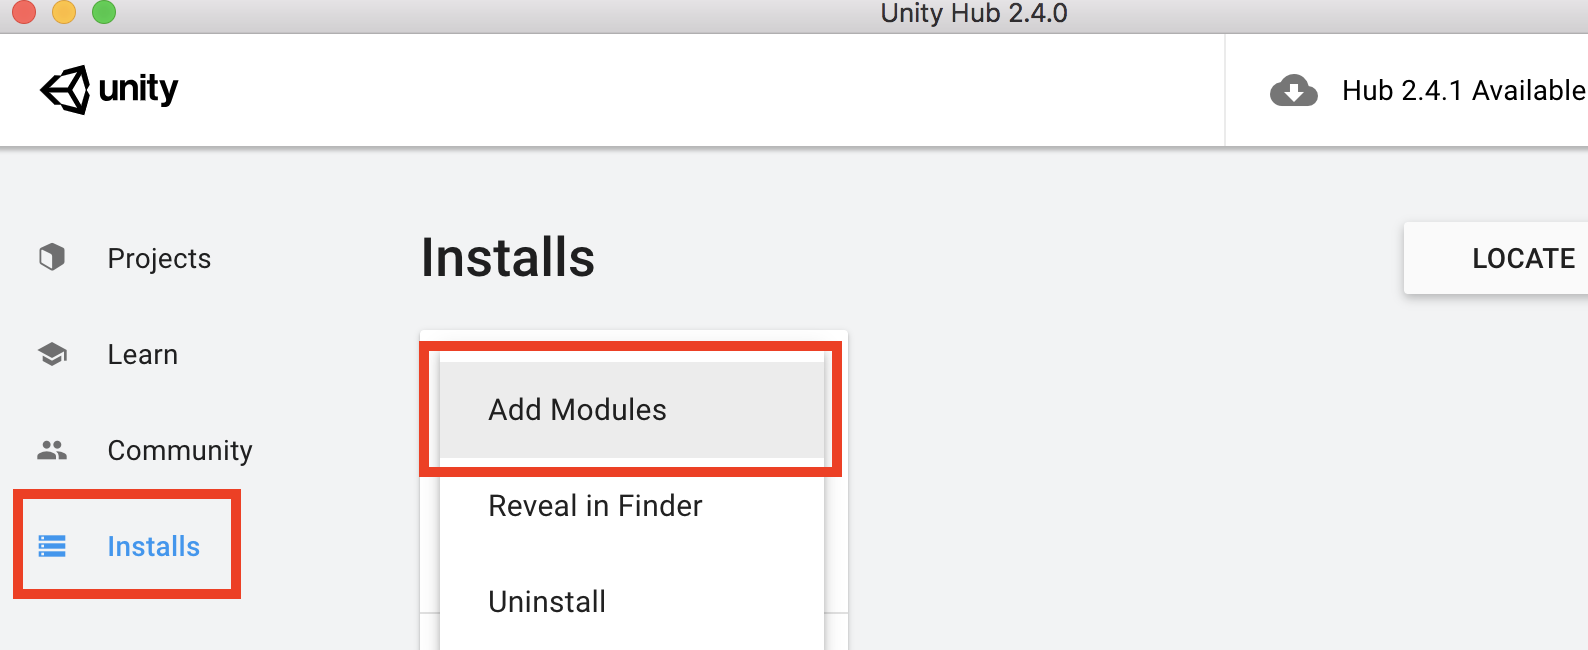
Unity Hubの画面から Installsから作成したゲームのバージョンのアイコンの右上縦3つの点をクリックし、「Add Modules」をクリック
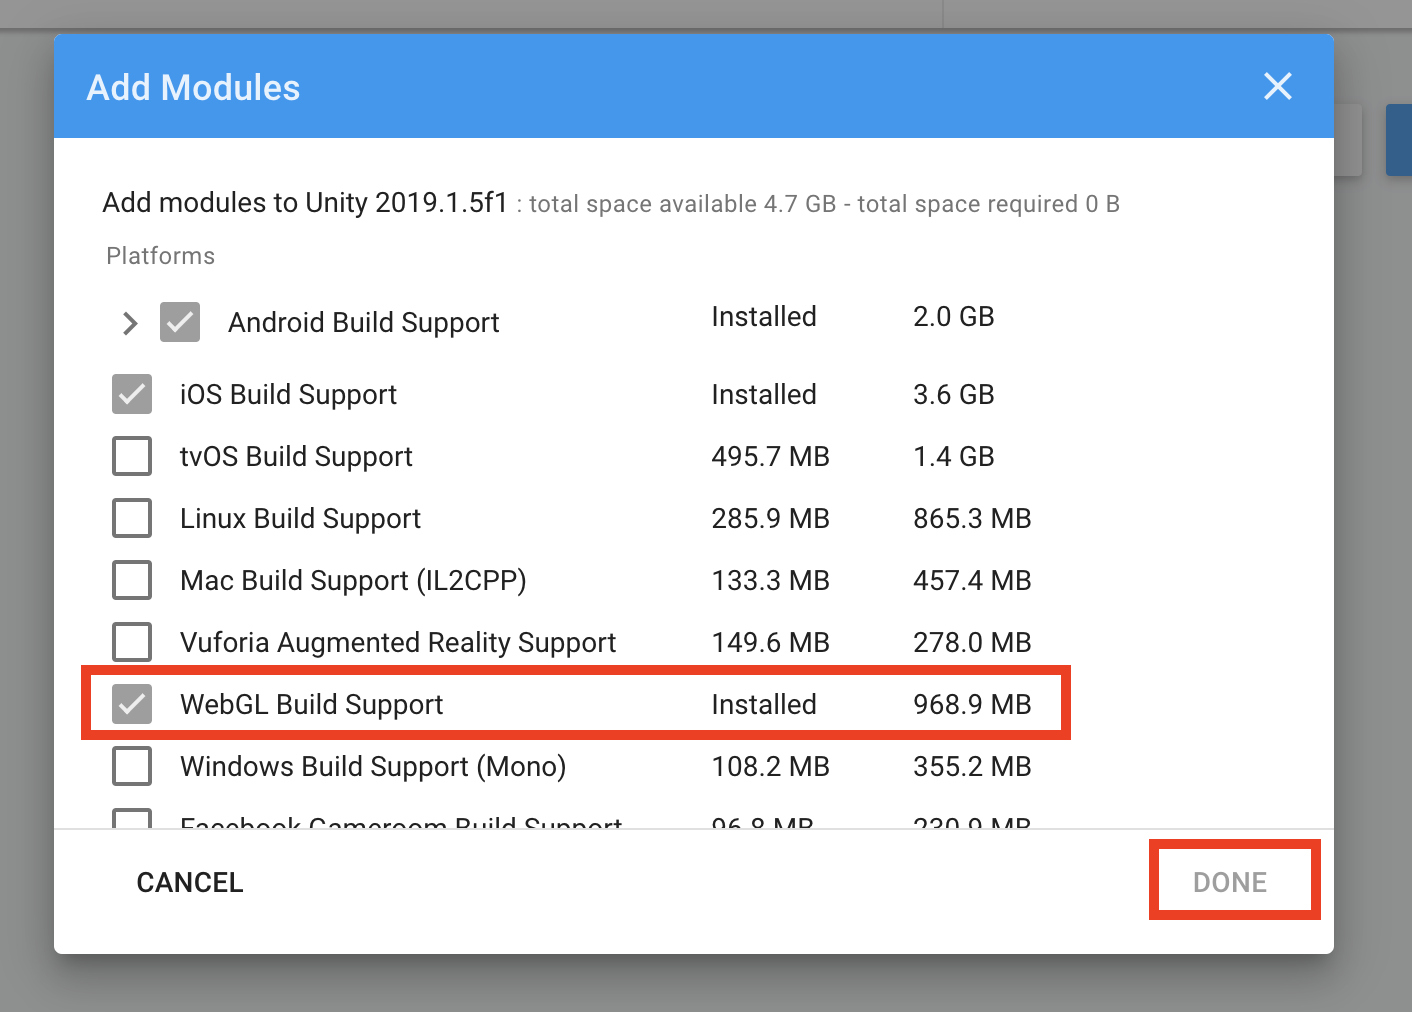
「WebGL Build Support」をチェックし、DONEをクリック。
するとインストールが始まると思います。
インストールが完了したら②の画面に戻りましょう。
戻ってもSwitch Pratformが選択できな場合はUnityを一度終了し、もう一度起動してみてください。
③Buildを選択
保存場所を聞かれるので、任意の場所を選択してください。
そこにBuildのフォルダーができれば完了です。
※数分かかる可能性があります。
unityroomへのアップロード方法
こちらが大変参考になりました。
https://blog.naichilab.com/entry/how-to-upload-unityroom
参考記事
【unity】WebGLビルド方法
https://blog.naichilab.com/entry/2017/04/29/125527
Unity WebGLビルド
https://pgintro.net/unity/build/webgl/#anchor_unity_hub_install