Raspberry Pi Pico
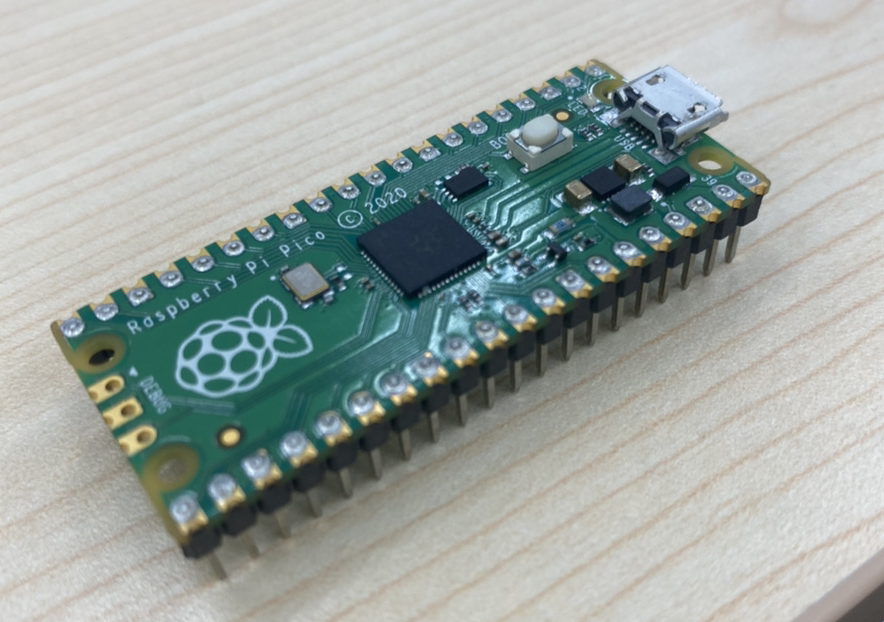
Raspberry Pi Pico(以降ラズピコ)は、今までの Raspberry Pi とは、一線を画す製品で OS を搭載することができない、より組み込み機器よりの開発基盤になっています。
マイコンには、Raspberry Pi財団が新たに開発した ARMベースのRP2040が搭載されています。
ラズピコの調達
ラズピコは、スイッチサイエンス等で550円で調達可能です。
スイッチサイエンス - Raspberry Pi Pico
ただし、こちらの製品は、ピンヘッダーが接続されていないどころか、そもそも、付属もしていません。同様に、USBケーブルも付属されておらず、本当に開発基盤のみの製品です。
Amazon 等で、ピンヘッダー取付済みの商品が販売されています。
ヘッダー ハンダ付け済み Raspberry Pi Pico
今回はこちらを購入して実験を行っています。
ラズピコのセットアップ
ラズピコは、c/c++ による開発だけではなく、Micro Python が使えるようになっていますが、今回は、c/c++ による Sigfox 通信を試してみます。
ラズピコ用のバイナリのビルドには、Raspberry Pi 4 を使用します。
環境整備に関しては、@jamjam さんの記事を参考にさせていただきました。
初めてのRaspberry Pi Pico ① C言語でLチカ
Sigfox モジュール
Sigfox の モジュールに関しては、Sigfox Breakout board BRKWS01 RC3 を使用します。
私自身が、こちらのモジュールを使用した Sigfox 通信のサンプルを別途記事にしていますので、そちらをご参照ください。
Raspberry Pi で Sigfox 通信
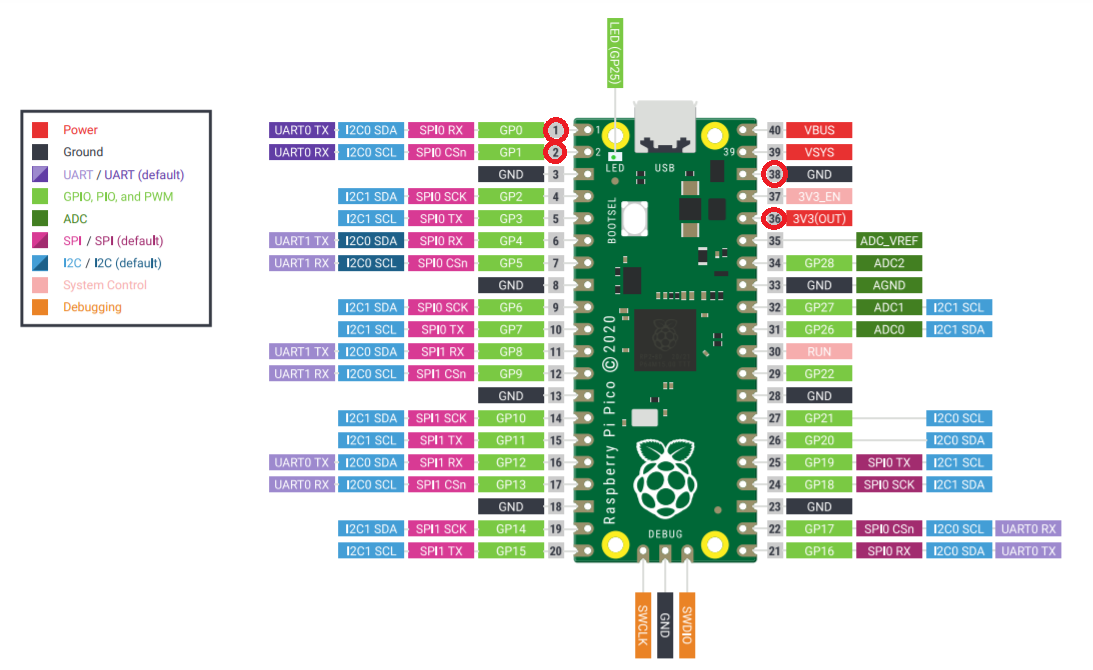
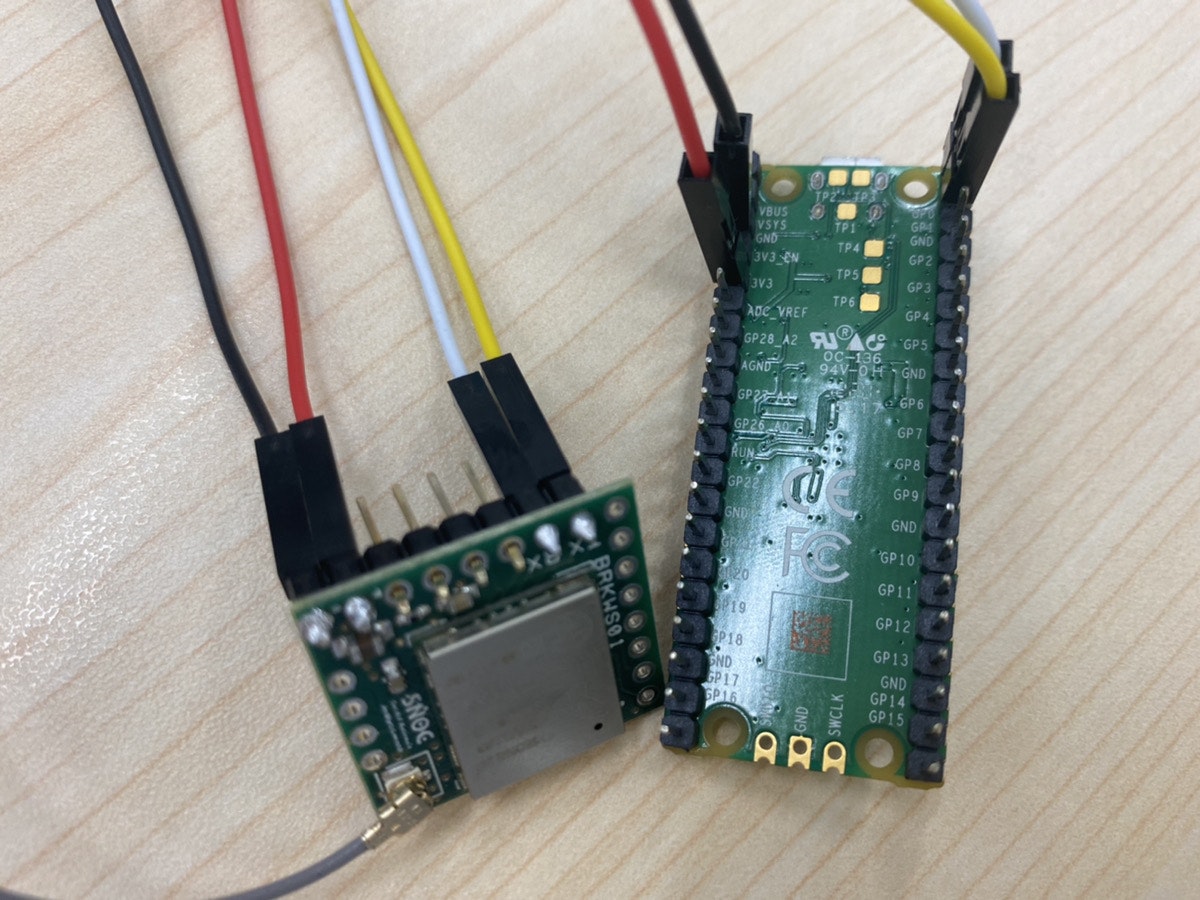
ラズピコと Sigfox モジュールは、下記のPINを使用します。
こちらを参照。
Raspberry Pi Pico Pinout
ラズピコと Sigfox モジュールの通信(UART通信)
こちら Raspberry Pi で Sigfox 通信 では、Python から UART を制御し、ATコマンドを送ることにより、Sigfox 通信を実現しました。
前述のとおり、今回は、ネイティブコードからの制御になります。
ラズピコのセットアップを行うと、pico/examples の配下に、サンプルコードが配置されます。
今回は、その中の uart/hello_uart を改造します。
# include <stdio.h>
# include "pico/stdlib.h"
# include "hardware/uart.h"

/// \tag::hello_uart[]

# define UART_ID uart0
# define BAUD_RATE 9600

// We are using pins 0 and 1, but see the GPIO function select table in the
// datasheet for information on which other pins can be used.
# define UART_TX_PIN 0
# define UART_RX_PIN 1

int main() {
    // Set up our UART with the required speed.
    uart_init(UART_ID, BAUD_RATE);

    // Set the TX and RX pins by using the function select on the GPIO
    // Set datasheet for more information on function select
    gpio_set_function(UART_TX_PIN, GPIO_FUNC_UART);
    gpio_set_function(UART_RX_PIN, GPIO_FUNC_UART);

    sleep_ms(1000 * 30);
    uart_puts(UART_ID, "AT$SF=0123456789abcdefffffffff\r");
}

/// \end::hello_uart[]
BAUD_RATE を 9600 に指定して、uart_puts() にて、ATコマンドで メッセージ送信を行っています。
ATコマンド送信前に、念のため 30秒ほど wait を入れていますが、厳密にそれが必要というわけではありません。
送信結果
Sigfox Backend の方を見ると、先ほど送信したメッセージが Sigfox クラウドまで送信されていることが確認できます。


