RoRでのAPI作成メモ
バージョンによって微妙にやり方が違うので、、、
プロジェクト作成
$ mkdir api_sample
$ cd api_sample
$ bundle init
Gemfile編集
# frozen_string_literal: true

source "https://rubygems.org"

git_source(:github) {|repo_name| "https://github.com/#{repo_name}" }

gem 'rails', '~> 5.2.2'
インストール
$ bundle install --path vendor/bundle
$ bundle exec rails new . -d mysql
Gemfileに追加
# API
gem 'grape', '1.2.3'
gem 'hashie-forbidden_attributes', '0.1.1'
gem 'grape-jbuilder', '0.2.0'
gem 'grape_on_rails_routes', '0.3.2'
gem 'swagger-ui_rails', '0.1.7'
gem 'grape-swagger', '0.32.1'
gem 'grape-swagger-rails', '0.3.0'
もう一度 bundle install を実行してエラーがないことを確認する
モデルクラス準備、データ投入
$ bin/rails g model Task name:string description:string
db/seed.rb
seed.rb
Task.create(name: 'タスク1', description: 'サンプルタスク1')
Task.create(name: 'タスク2', description: 'サンプルタスク2')
Task.create(name: 'タスク3', description: 'サンプルタスク3')
$ bundle exec rake db:create
$ bundle exec rake db:migrate
$ bundle exec rake db:seed
GrapeによるAPI作成
ルーティング
http://localhost:3000/api/v1/tasks/displays とかでアクセスしたいので各種設定
config/routes.rb
Rails.application.routes.draw do
  mount Versions::V1::API => '/'
  mount GrapeSwaggerRails::Engine => '/api/swagger'
end
APIディレクトリの作成
プロジェクト直下に api フォルダを作成してそこにAPIのプログラムを配置するために for Grape 以下の記述を追加
config/application.rb
require_relative 'boot'

require 'rails/all'

# Require the gems listed in Gemfile, including any gems
# you've limited to :test, :development, or :production.
Bundler.require(*Rails.groups)

module ApiSample
  class Application < Rails::Application
    # Initialize configuration defaults for originally generated Rails version.
    config.load_defaults 5.2

    # Settings in config/environments/* take precedence over those specified here.
    # Application configuration can go into files in config/initializers
    # -- all .rb files in that directory are automatically loaded after loading
    # the framework and any gems in your application.

    # For Grape
    config.paths.add File.join('app', 'api'), glob: File.join('**', '*.rb')
    config.autoload_paths += Dir[Rails.root.join('app', 'api', '*')]
    config.middleware.use(Rack::Config) do |env|
      env['api.tilt.root'] = Rails.root.join 'app', 'views', 'api'
    end
  end
end
$ mkdir app/api
$ mkdir app/api/versions
$ mkdir app/api/versions/v1
API作成
大元にこういうのを作成してその中でエンドポイント単位のモジュールをincludeするのが管理しやすい
/api/vi/〜のパスにするために内部でこんな風に記述
テンプレートはJbuilderを指定
app/api/versions/v1/api.rb
module Versions
  module V1
    class API < Grape::API
      version 'v1', using: :path
      format :json
      formatter :json, Grape::Formatter::Jbuilder
      prefix :api

      include ::Versions::V1::TaskDisplays

      # :nocov:
      if Rails.env.development?
        add_swagger_documentation add_version: true
      end
      # :nocov:
    end
  end
end
各APIのコードはこんな感じ。 命名規則に注意。
app/api/versions/v1/task_displays.rb
module Versions
  module V1
    module TaskDisplays
      extend ActiveSupport::Concern
      included do
        namespace :tasks do
          namespace :displays do
            desc 'タスク一覧を取得する'
            get '', jbuilder: 'v1/task_displays/index' do
              @tasks = Task.all
            end
          end
        end
      end
    end
  end
end
テンプレードはこんな感じ
app/views/api/v1/task_displays/index.jbuilder
json.tasks @tasks do |task|
   json.(task, :id, :name, :description)
end
swagger設定ファイル
config/initializers/grape_swagger_rails.rb
unless Rails.env.production?
  GrapeSwaggerRails.options.app_name = 'Grape API Sample'
  GrapeSwaggerRails.options.app_url  = '/'
  GrapeSwaggerRails.options.url = 'api/v1/swagger_doc.json'
end
確認
railsを起動してブラウザで確認
bin/rails s
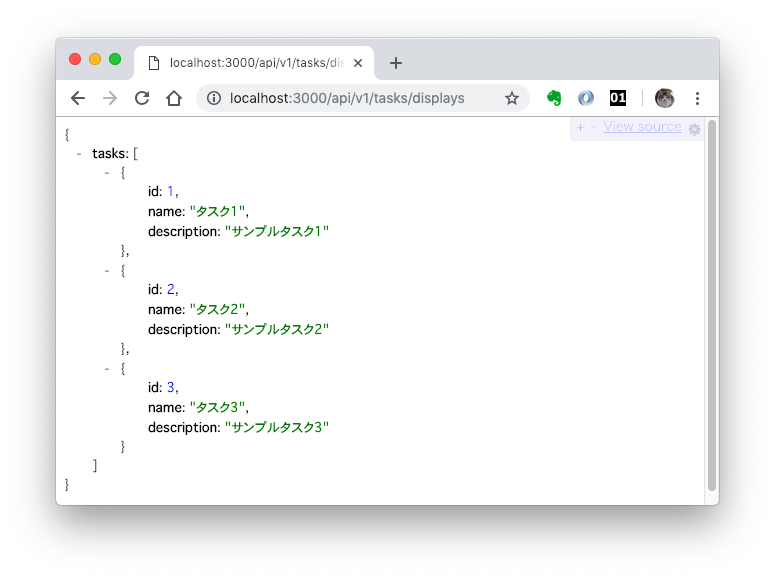
API
http://localhost:3000/api/v1/tasks/displays
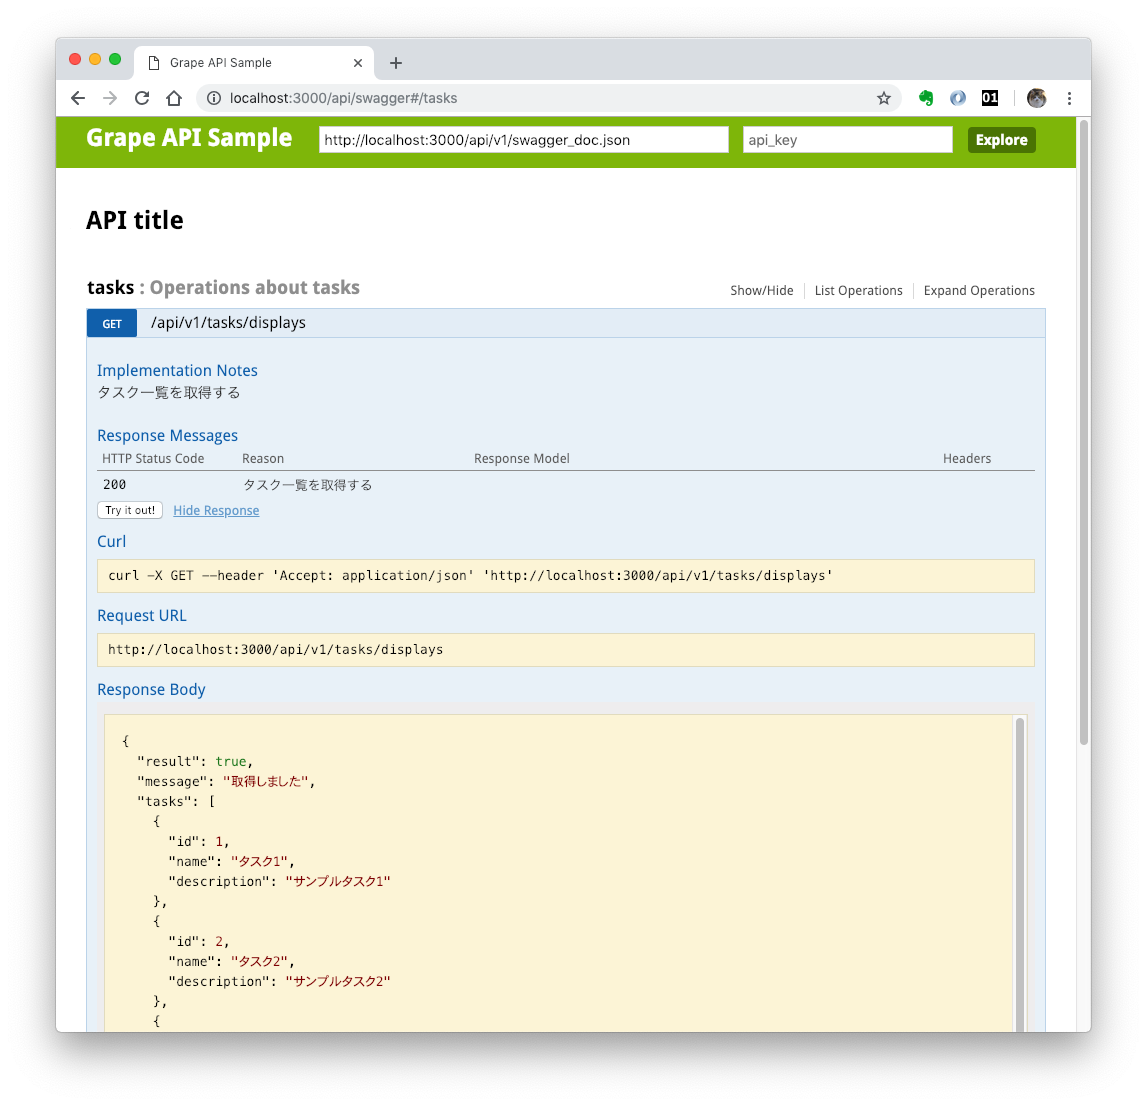
swagger
http://localhost:3000/api/swagger