以下の記事で、OpenAPIでAPIのモックサーバーを作り、動作確認にアプリも作ってみまし
た。
そのアプリのコードの解説です。
環境など
| ツールなど | バージョンなど |
|---|---|
| MacbookPro | macOS Mojave 10.14.5 |
| Android Studio | 3.6.1 |
| Java | 1.8.0_131 |
| Postman | 7.19.1 |
目標
ローカルサーバーで動くAPIモックサーバーと通信して結果を受け取り表示する。
表示はレスポンスヘッダーとJsonをそのまま表示する。
OpenAPIでモックサーバーを動かす
前述の記事を参考にして下さい。
OpenAPIでお手軽にモックAPIサーバーを動かす
Kotlinアプリの作成
1.プロジェクト作成
Android Studioで新規プロジェクト作成します。
- Project Template EmptyActivityでよいでしょう
-
Config
- Use legacy android.support オフにします
- Language Kotlinを選んで下さい
- Minimum SDK は任意で良いですが、作成済みのエミュレーターに合わせましょう(※このアプリはエミュレーターでしか動かせません)
2.ビルド設定
(1)依存ライブラリの追加
app/build.gradleに以下のライブラリ依存を追加します。
各ライブラリの用途などは次の通りです。
| パッケージ | 用途など |
|---|---|
| Lifecycle(AndroidX) | LiveDataとViewModel用 |
| Retrofit2 | 通信ライブラリ |
| coroutine | Kotlinの非常に軽量な非同期(Thread)処理 |
| koin | Kotlin用お手軽DI |
dependencies {
   ...

    // 以下をすべて追加
    def lifecycle_version = "2.1.0"
    implementation "androidx.lifecycle:lifecycle-extensions:$lifecycle_version"
    implementation "androidx.lifecycle:lifecycle-viewmodel-ktx:$lifecycle_version"
    kapt "androidx.lifecycle:lifecycle-compiler:$lifecycle_version"

    // retrofit
    def retrofit_version = "2.6.0"
    implementation "com.squareup.retrofit2:retrofit:$retrofit_version"
    implementation "com.squareup.retrofit2:converter-gson:$retrofit_version"
    implementation "com.squareup.retrofit2:converter-scalars:$retrofit_version"
    implementation 'com.squareup.okhttp3:okhttp:4.5.0'
    implementation 'com.squareup.okhttp3:logging-interceptor:4.5.0'


    // coroutine
    api "org.jetbrains.kotlinx:kotlinx-coroutines-core:1.3.0"
    api "org.jetbrains.kotlinx:kotlinx-coroutines-android:1.3.0"

    // koin
    def koin_version = "2.0.1"
    implementation "org.koin:koin-android:$koin_version"
    implementation "org.koin:koin-androidx-viewmodel:$koin_version"
    implementation "org.koin:koin-core:$koin_version"
}
Jsonしか表示しませんが、コンバーターを指定しないと中でクラッシュしていたので、converter-gsonとconverter-scalarsを入れています。
(2)プラグインの追加
app/build.gradleの上の方に、記述を追加します。
apply plugin: 'com.android.application'
apply plugin: 'kotlin-android'
apply plugin: 'kotlin-android-extensions'
apply plugin: 'kotlin-kapt'  // 追加

android {...
(3)Databindingを有効にする
Databindingとは、レイアウトファイルに表示する変数を指定してその変数に変更があれば自動的に表示が変わるという便利な機能です。
android {
    compileSdkVersion 29
    buildToolsVersion "29.0.2"

    ...

    // 以下を追加
    dataBinding {
        enabled true
    }
(4)APIサーバーのbase_url
APIサーバーのurlは、開発用と本番用で違うことはよくあると思います。特に今回は、ローカルで動かしているモックサーバーを使いますので、その定義をここでします。
どこかにべた書きでも良いですが、こうしておくと、ビルドタイプによって使用する値を簡単に切り替えられます。
    dataBinding {
        enabled true
    }
    buildTypes {
        // 追加
        debug{
            buildConfigField("String", "API_BASE_URL", "\"http://10.0.2.2:8000/\"")
        }
        release {
            minifyEnabled false
            proguardFiles getDefaultProguardFile('proguard-android-optimize.txt'), 'proguard-rules.pro'
            // 追加
            buildConfigField("String", "API_BASE_URL", "\"https://my.api.release.domain/\"")
        }
    }
(5)セキュリティ設定ファイルを追加
本来は、httpsでSSL通信させるべきですが、今回はローカルホスト用の設定なので、デバッグビルド時にはクリアテキスト(平文)通信、つまりhttpでの通信を許可します。
以下のフォルダを作って、それぞれにnetwork_config.xmlというファイルを作ります。
-
app/src/debug/res/xml- debugビルド時に使われる
-
app/src/main/res/xml- debugビルド以外で使われる
<?xml version="1.0" encoding="utf-8"?>
<network-security-config>
    <domain-config cleartextTrafficPermitted="true">
        <domain includeSubdomains="true">10.0.2.2</domain>
    </domain-config>
</network-security-config>
モックサーバーは127.0.0.1:8000で動かしていますが、エミュレーターからは、10.0.2.2から繋がるようですので、そのドメインへの通信は平文をすべて許可します。
<?xml version="1.0" encoding="utf-8"?>
<network-security-config>
    <base-config cleartextTrafficPermitted="false">
    </base-config>
</network-security-config>
今回はリリースビルドしませんが、参考例として載せております。実際のプロジェクトなどで平文をすべて許可しているのはまずいので、基本的にはfalseにすべきです。
なお、TargetAPIを28以上にしていると、この設定ファイルが無い場合はデフォルトでfalseになります。
(6)マニフェストファイルの変更
- パーミッション
インターネットアクセスを有効にするため、AndroidManifest.xmlに以下の記述を追加します。
AndroidManifest.xmlは、プロジェクトフォルダ/app/src/main下にあります。
<uses-permission android:name="android.permission.INTERNET" />
- セキュリティ設定ファイルの指定
先ほど作成したセキュリティ設定ファイルを使うように指定します。
    <application
        ...
        android:networkSecurityConfig="@xml/network_config"
2.モデルクラス、リポジトリクラスの用意
(1)モデルクラス
OpneAPIで作成したのは、以下のようなクラスを受け取ったり返したりするAPIでした。
class LogData{
  public String date;
  public int foo;
  public bool bar;
}
これをKotlinのデータクラスで作成します。
data class LogData(
    val date: String, // yyyy/MM/dd
    val foo: Int,
    val bar: Boolean
)
data classは、javaでいうequalsやtoStringなどを自動的に作ってくれる便利なクラス宣言です。継承できないなどの点もありますが、ほとんどの場合ネックになることはありません。
(2)リポジトリクラス
データの読み出しや書き込みは、リポジトリクラスを介して行います。
通常のMVVMにおいては必須ではありませんが、あった方がDIしやすいなどのメリットがあるので、DBアクセスとかAPIで取得とかの場合には作った方が良さそうです。
今は通信部分をまだ作ってないので、固定値を返すだけにします。
import androidx.annotation.WorkerThread
import les.kasa.android.restclientsample.model.LogData

/**
 * ログデータ取得・保存を管理するリポジトリクラス
 */
class LogRepository {

    @WorkerThread
    suspend fun insert(log: LogData): String {
        return "insert";
    }

    @WorkerThread
    suspend fun update(log: LogData): String {
        return "update";
    }

    /**
     * [date] "yyyy/MM/dd"
     */
    @WorkerThread
    suspend fun delete(date: String): String {
        return "delete";
    }

    @WorkerThread
    suspend fun getAll(): String {
        return "getAll";
    }

    /**
     * [date] "yyyy/MM/dd"
     */
    @WorkerThread
    suspend fun get(date: String): String {
        return "get $date";
}
@WorkerThreadはメインスレッド(=UIスレッド)以外で呼び出されなければならないという指定です。
suspendがKotlinにおける非同期関数の宣言になります。(厳密に言うと、coroutine内で中断可能な関数の宣言)
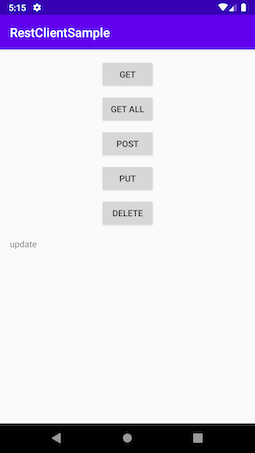
まずはこれらの文字列が画面に表示されるのを確認していきます。
3.画面の作成
(1)ViewModelクラスとLiveData
MVVMの肝(キモ)であるViewModelクラスを作ります。Android Architecture ComponentsにおいてLiveDataが導入されたことで、一気にMVVMパターンでの実装が楽になりました。
import android.app.Application
import androidx.lifecycle.AndroidViewModel
import androidx.lifecycle.LiveData
import androidx.lifecycle.MutableLiveData
import androidx.lifecycle.viewModelScope
import kotlinx.coroutines.Dispatchers
import kotlinx.coroutines.launch
import les.kasa.android.restclientsample.model.LogData
import les.kasa.android.restclientsample.repository.LogRepository

/**
 * MainActivity用のViewModelクラス
 */
class MainViewModel(app: Application) :
    AndroidViewModel(app) {
    private val _repository = LogRepository()
    private var _restResultText = MutableLiveData<String>()

    val restResultText: LiveData<String> = _restResultText

    init {
        _restResultText.value = "TAP BUTTONS TO CALL API."
    }

    // GET from /logs
    fun getAll() = viewModelScope.launch(Dispatchers.IO) {
        val result = _repository.getAll()
        _restResultText.postValue(result)
    }

    // GET from/logs/{date}
    fun get(date: String) = viewModelScope.launch(Dispatchers.IO) {
        val result = _repository.get(date)
        _restResultText.postValue(result)
    }

    // POST to /logs
    fun post(log: LogData) = viewModelScope.launch(Dispatchers.IO) {
        val result = _repository.insert(log)
        _restResultText.postValue(result)
    }

    // PUT to /logs
    fun put(log: LogData) = viewModelScope.launch(Dispatchers.IO) {
        val result = _repository.update(log)
        _restResultText.postValue(result)
    }

    // DELETE to /logs/{date}
    fun delete(date: String) = viewModelScope.launch(Dispatchers.IO) {
        val result = _repository.delete(date)
        _restResultText.postValue(result)
    }
}
-
MainViewModel(app: Application)- クラス宣言とコンストラクタの定義です。
Applicationクラスはそのまま基本クラスのAndroidViewModelのコンストラクタに渡しています。Javaでいうsuper()の呼び出しですね。
- クラス宣言とコンストラクタの定義です。
-
private val _repository = LogRepository()- リポジトリクラスをインスタンス化しています。後でこれはコンストラクタインジェクションに変えます。
-
private var _restResultText = MutableLiveData<String>()-
MutableLiveData(値が変更可能なLiveData)の宣言と初期化を行っています。
-
-
val restResultText: LiveData<String> = _restResultText- LiveDataを取得するプロパティです。
privateを付けないとpublicと見なされます。このようにget用のpublicなプロパティを用意して、意図しない変更を防止するのが推奨されるお作法のようです。
- LiveDataを取得するプロパティです。
-
init {}- インスタンスの追加初期化処理を書けます。
-
fun 関数名() = viewModelScope.launch(Dispatchers.IO) {}- ここがcoroutineの肝な部分です。
viewModelScopeというスコープで、coroutineを起動しています。Dispatchers.IOがスレッドの種類の指定です。Dispatchers.Default等もあります。詳細はこちらなどでご確認ください。
- ここがcoroutineの肝な部分です。
-
_restResultText.postValue- LiveDataに値をセットしています。この処理はメインスレッド(UIスレッド)以外から行われてるため(
Dispatchers.IOを指定しているから)、postValueを使う必要があります。メインスレッドから更新する場合は、init{}内でやっているように、_restResultText.value = resultとプロパティアクセスでset出来ます。
- LiveDataに値をセットしています。この処理はメインスレッド(UIスレッド)以外から行われてるため(
(2)レイアウト
MainActivityのレイアウトファイルactivity_main.xmlを変更します。
activity_main.xmlは、app/src/main/res/layout下にあります。
<?xml version="1.0" encoding="utf-8"?>
<layout xmlns:android="http://schemas.android.com/apk/res/android"
    xmlns:app="http://schemas.android.com/apk/res-auto"
    xmlns:tools="http://schemas.android.com/tools">

    <data>

        <variable
            name="viewmodel"
            type="les.kasa.android.restclientsample.MainViewModel" />
    </data>

    <androidx.constraintlayout.widget.ConstraintLayout
        android:layout_width="match_parent"
        android:layout_height="match_parent"
        tools:context=".MainActivity">

        <Button
            android:id="@+id/getButton"
            android:layout_width="wrap_content"
            android:layout_height="wrap_content"
            android:layout_marginTop="16dp"
            android:text="GET"
            app:layout_constraintEnd_toEndOf="parent"
            app:layout_constraintStart_toStartOf="parent"
            app:layout_constraintTop_toTopOf="parent" />

        <Button
            android:id="@+id/getAllButton"
            android:layout_width="wrap_content"
            android:layout_height="wrap_content"
            android:layout_marginTop="8dp"
            android:text="GET ALL"
            app:layout_constraintEnd_toEndOf="parent"
            app:layout_constraintStart_toStartOf="parent"
            app:layout_constraintTop_toBottomOf="@+id/getButton" />

        <Button
            android:id="@+id/postButton"
            android:layout_width="wrap_content"
            android:layout_height="wrap_content"
            android:layout_marginTop="8dp"
            android:text="POST"
            app:layout_constraintEnd_toEndOf="parent"
            app:layout_constraintStart_toStartOf="parent"
            app:layout_constraintTop_toBottomOf="@+id/getAllButton" />

        <Button
            android:id="@+id/putButton"
            android:layout_width="wrap_content"
            android:layout_height="wrap_content"
            android:layout_marginTop="8dp"
            android:text="PUT"
            app:layout_constraintEnd_toEndOf="parent"
            app:layout_constraintStart_toStartOf="parent"
            app:layout_constraintTop_toBottomOf="@+id/postButton" />

        <Button
            android:id="@+id/deleteButton"
            android:layout_width="wrap_content"
            android:layout_height="wrap_content"
            android:layout_marginTop="8dp"
            android:text="DELETE"
            app:layout_constraintEnd_toEndOf="parent"
            app:layout_constraintStart_toStartOf="parent"
            app:layout_constraintTop_toBottomOf="@+id/putButton" />

        <TextView
            android:id="@+id/textView"
            android:layout_width="0dp"
            android:layout_height="0dp"
            android:layout_marginStart="16dp"
            android:layout_marginTop="16dp"
            android:layout_marginEnd="16dp"
            android:layout_marginBottom="16dp"
            android:text="@{viewmodel.restResultText}"
            app:layout_constraintBottom_toBottomOf="parent"
            app:layout_constraintEnd_toEndOf="parent"
            app:layout_constraintStart_toStartOf="parent"
            app:layout_constraintTop_toBottomOf="@+id/deleteButton" />
    </androidx.constraintlayout.widget.ConstraintLayout>
</layout>
-
<layout>タグ- Databindingを使うときは、このようにレイアウト全体を
<layout>で括ります。
- Databindingを使うときは、このようにレイアウト全体を
-
<data>タグ- Databindingでバインドするデータクラスを指定しています。
nameでこのレイアウト内で利用する変数名、typeでクラス名を指定します。クラス名はフルパスである必要があります。
- Databindingでバインドするデータクラスを指定しています。
-
android:text="@{viewmodel.restResultText}"-
viewmodelオブジェクトのrestResultText変数を表示する設定です。MainViewModel#restResultTextはLiveDataですから、値が変わると、自動的に画面上の表示も更新されることになります。
-
(3)MainActivityの変更
MainActivityクラスで、データバインディングとLiveDataのバインドを行います。
import android.os.Bundle
import androidx.appcompat.app.AppCompatActivity
import androidx.databinding.DataBindingUtil
import androidx.lifecycle.ViewModelProviders
import kotlinx.android.synthetic.main.activity_main.*
import les.kasa.android.restclientsample.databinding.ActivityMainBinding
import les.kasa.android.restclientsample.model.LogData

class MainActivity : AppCompatActivity() {

    private lateinit var viewModel: MainViewModel

    override fun onCreate(savedInstanceState: Bundle?) {
        super.onCreate(savedInstanceState)
//      super.setContentView(R.layout.activity_main) // ここは削除

        // 以下を追加する
        viewModel = ViewModelProviders.of(this).get(MainViewModel::class.java)

        val binding: ActivityMainBinding =
            DataBindingUtil.setContentView(this, R.layout.activity_main)
        binding.lifecycleOwner = this
        binding.viewmodel = viewModel

        getButton.setOnClickListener { viewModel.get("20200222"); }
        getAllButton.setOnClickListener { viewModel.getAll(); }
        postButton.setOnClickListener { viewModel.post(LogData("2020/02/22", 12, false)); }
        putButton.setOnClickListener { viewModel.put(LogData("2020/02/22", 11, true)); }
        deleteButton.setOnClickListener { viewModel.delete("20200223") }
    }
}
-
private lateinit var viewModel: MainViewModel-
MainViewModelメンバーを宣言していますが、lateinit varは初期化は後回しという宣言になります。valだと初期化コードが無いとエラーになります。varだと初期値を入れないと怒られます。でもViewModelが取れるのはonCreate以降なので、=nullとすると、nullableな変数となり、毎回のnullチェックが面倒なことになります。onCreateでセットした以降は変更されず、nullが有り得ないはずなので、lateinit varとして、後でセットするけどセットされたらnon-nulだよ、という宣言になっています。ちなみに、nullableな変数宣言は、var viewModel:MainViewModel? = nullとなります。
-
-
レイアウト初期化コードの変更
val binding: ActivityMainBinding =
            DataBindingUtil.setContentView(this, R.layout.activity_main)
ここでDatabindingを使ってレイアウトを作成しています。ActivityMainBindingがimport出来ない場合、レイアウトファイルが間違っていてDatabindingコードの生成に失敗しています。レイアウトファイルをよく確認して下さい。
-
binding.lifecycleOwner = this- DatabindingのライフサイクルオーナーにActivity自身を指定しています。
Fragmentもオーナーになれます。この指定をしないと、LiveDataの更新が自動的に画面に反映されません。これを忘れていて何時間も「Databinding+LiveDataが動かない!」と悩んでしまうことも(汗)
- DatabindingのライフサイクルオーナーにActivity自身を指定しています。
-
binding.viewmodel = viewModel- Databindingに
viewModelオブジェクトをバインドしています。これを忘れていて(以下略)
- Databindingに
-
ボタンリソースID.setOnClickListener {}- Buttonにクリックリスナーを登録しています。ラムダ表記です。
kotlin-android-extensionsにより、findViewByIdの嵐から解放されました。ボタンリソース名がimport出来ない場合は、レイアウトファイルが間違っていてextensionsのコードの生成に失敗しています。レイアウトファイルをよく確認して下さい。
- Buttonにクリックリスナーを登録しています。ラムダ表記です。
ここまでデバッグ実行して各ボタンを押してみると、insertとかdeleteとかが表示されるはずです。
4.通信部分の作成
いよいよRetrofit2で通信部分を作成していきます。
(1)サービスクラスの作成
import les.kasa.android.restclientsample.model.LogData
import okhttp3.ResponseBody
import retrofit2.Call
import retrofit2.http.*

interface LogApiService {

    @Headers("Accept:application/json, Content-Type:application/json")
    @GET("/logs")
    fun getAll(): Call<ResponseBody>

    @Headers("Accept:application/json, Content-Type: application/json")
    @GET("/logs/{date}")
    fun get(@Path("date") date: String): Call<ResponseBody>

    @Headers("Accept:application/json, Content-Type: application/json")
    @POST("/logs")
    fun post(@Body log: LogData): Call<ResponseBody>

    @Headers("Accept:application/json, Content-Type: application/json")
    @PUT("/logs")
    fun put(@Body log: LogData): Call<ResponseBody>

    @Headers("Accept:application/json, Content-Type: application/json")
    @DELETE("/logs/{date}")
    fun delete(@Path("date") date: String): Call<ResponseBody>
}
-
@Headersでヘッダー定義 -
@GET("/logs")でメソッドとパスの指定 :Call<ResponseBody>- 戻り値の指定です。今回、生のJsonを返すだけにしたいので、
ResponsBodyにしていますが、例えばここをCall<LogData>とやると、Gson等のライブラリを使えば自動的にdata classをjsonからコンバートして返してくれます。 -
@GET("/logs/{date}") fun get(@Path("date") date: String)- パスに含まれている
"date"と関数の引数をマッピングしています
- パスに含まれている
(2)リポジトリクラスの変更
import androidx.annotation.WorkerThread
import les.kasa.android.restclientsample.model.LogData
import les.kasa.android.restclientsample.service.LogApiService

/**
 * ログデータ取得・保存を管理するリポジトリクラス
 */
class LogRepository(private val logApi: LogApiService) {

    @WorkerThread
    suspend fun insert(log: LogData): String {
        val response = logApi.post(log).execute()
        if (response.isSuccessful) {
            return "SUCCESS!\n" +
                    "\n$response.headers().toString()\n${response.body()?.string()}"
        }
        return "ERROR!\n" +
                "\n$response.headers().toString()\n${response.errorBody()?.string()}"
    }

    @WorkerThread
    suspend fun update(log: LogData): String {
        val response = logApi.put(log).execute()
        if (response.isSuccessful) {
            return "SUCCESS!\n" +
                    "\n$response.headers().toString()\n${response.body()?.string()}"
        }
        return "ERROR!\n" +
                "\n$response.headers().toString()\n${response.errorBody()?.string()}"
    }

    /**
     * [date] "yyyy/MM/dd"
     */
    @WorkerThread
    suspend fun delete(date: String): String {
        val response = logApi.delete(date).execute()
        if (response.isSuccessful) {
            return "SUCCESS!\n" +
                    "\n$response.headers().toString()\n${response.body()?.string()}"
        }
        return "ERROR!\n" +
                "\n$response.headers().toString()\n${response.errorBody()?.string()}"
    }

    @WorkerThread
    suspend fun getAll(): String {
        val response = logApi.getAll().execute()
        if (response.isSuccessful) {
            return "SUCCESS!\n" +
                    "\n$response.headers().toString()\n${response.body()?.string()}"
        }
        return "ERROR!\n" +
                "\n$response.headers().toString()\n${response.errorBody()?.string()}"
    }

    /**
     * [date] "yyyy/MM/dd"
     */
    @WorkerThread
    suspend fun get(date: String): String {
        val response = logApi.get(date).execute()
        if (response.isSuccessful) {
            return "SUCCESS!\n" +
                    "\n$response.headers().toString()\n${response.body()?.string()}"
        }
        return "ERROR!\n" +
                "\n$response.headers().toString()\n${response.errorBody()?.string()}"
    }
}
-
class LogRepository(private val logApi: LogApiService)- コンストラクタインジェクションでサービスクラスを受け取っています。
logApiメンバー変数の宣言が無いように見えますが、Kotlinではvalやvarを付けてコンストラクタにパラメータを書くと、それが自動的にメンバー変数となります。なお、valは変更不可能で、varが変更可能な変数です。
- コンストラクタインジェクションでサービスクラスを受け取っています。
-
val response = logApi.関数名(引数).execute()- APIアクセスを起動して、結果を受け取っています。結果にはレスポンスヘッダーや
Bodyなどが含まれます。Retrofit2のCallにはenqueueという非同期実行用の関数がありますが、そもそもリポジトリクラスの関数がcoroutineで起動されているはずなので、ここでは同期実行するexecuteを使っています。
- APIアクセスを起動して、結果を受け取っています。結果にはレスポンスヘッダーや
-
response.body()?.string()-
?はnullableな値の時に、nullだったら実行しないでnullを返すという構文になります。生のJsonを得るにはtoStringではなくてstring関数を呼ぶ必要があるみたいでした。
-
(3)MainViewModelクラスの変更
class MainViewModel(private val _repository: LogRepository, app: Application) :
    AndroidViewModel(app) {
// private val _repository = LogRepository() // ここは削除
リポジトリクラスをコンストラクタインジェクションで受け取るように変更しておきます。
今はまだビルドできません。KoinでDIをやる前提で書いているからです。
5.KoinでDI
Koin使い始めると、Koin使わないで書けなくなる気がしますが、本当に便利なので使って行きます。
(1)モジュールの定義
package les.kasa.android.restclientsample.di

import com.google.gson.FieldNamingPolicy
import com.google.gson.Gson
import com.google.gson.GsonBuilder
import les.kasa.android.restclientsample.MainViewModel
import les.kasa.android.restclientsample.repository.LogRepository
import les.kasa.android.restclientsample.service.LogApiService
import okhttp3.OkHttpClient
import okhttp3.logging.HttpLoggingInterceptor
import org.koin.android.ext.koin.androidApplication
import org.koin.androidx.viewmodel.dsl.viewModel
import org.koin.dsl.module
import retrofit2.Retrofit
import retrofit2.converter.gson.GsonConverterFactory
import retrofit2.converter.scalars.ScalarsConverterFactory

const val API_URL = BuildConfig.API_BASE_URL

// ViewModel
val viewModelModule = module {
    viewModel { MainViewModel(get(), androidApplication()) }
}

// Repository
val repositoryModule = module {
    single { LogRepository(get()) }
}

val networkModule = module {
    factory { provideGson() }
    factory { provideOkHttpClient() }
    factory { provideLogApi(get()) }
    single { provideRetrofit(get(), get()) }
}

fun provideGson(): Gson {
    return GsonBuilder()
        .setFieldNamingPolicy(FieldNamingPolicy.LOWER_CASE_WITH_UNDERSCORES)
        .create()
}

fun provideRetrofit(okHttpClient: OkHttpClient, gson: Gson): Retrofit {
    return Retrofit.Builder().baseUrl(API_URL)
        .client(okHttpClient)
        .addConverterFactory(ScalarsConverterFactory.create())
        .addConverterFactory(
            GsonConverterFactory.create(gson)
        )
        .build()
}

fun provideOkHttpClient(): OkHttpClient {
    return OkHttpClient().newBuilder()
        .addInterceptor(HttpLoggingInterceptor().apply {
            level = HttpLoggingInterceptor.Level.BODY
        })
        .build()
}

fun provideLogApi(retrofit: Retrofit): LogApiService =
    retrofit.create(LogApiService::class.java)


// モジュール群
val appModules = listOf(viewModelModule, repositoryModule, networkModule)
Koinでは、あるクラスのインスタンスを得るのに、引数がある場合は、get()を指定します。そしてその引数の型を返す関数を全モジュールの中から探して自動的にそれを当て込んでくれます。
Applicationクラスのみ、androidApplicationを使います。
-
viewModel{}-
ViewModelまたはAndroidViewModelクラスのインジェクション用のモジュール定義方法です
-
-
single{}- シングルトンにする場合のモジュール定義方法です
-
factory{}- シングルトンでない場合のモジュール定義方法です
最後に、アプリケーションに登録するモジュール群を、val appModules = listOf()でリストにしています。
このようにモジュール群を分けるのは任意で、ぶっちゃけやる必要はないですが、テスト用にモックしたモジュールを一部差し替えるなどの時のことを考えると、機能単位などで分けておくのが良さそうです。
-
const val API_URL = BuildConfig.API_BASE_URL-
build.gradleに作成しておいたBuildConfigからurlを取得しています。debugビルドとreleaseビルドで自動的にこの内容が切り替わってくれるわけです。
-
(2)Applicationクラスの作成
KoinモジュールはApplicationクラスに登録しないと行けないので、Applicationクラスを作ります。作るというか派生します。
import android.app.Application
import les.kasa.android.restclientsample.di.appModules
import org.koin.android.ext.koin.androidContext
import org.koin.android.ext.koin.androidLogger
import org.koin.core.context.startKoin
import org.koin.core.logger.EmptyLogger
import org.koin.core.logger.Level

class MyApp : Application() {

    override fun onCreate() {
        super.onCreate()
        startKoin {
            if (BuildConfig.DEBUG) androidLogger(Level.DEBUG) else EmptyLogger()
            androidContext(this@MyApp)
            modules(appModules)
        }
    }
}
もうこれはテンプレみたいなものなので一度書いたらSnippetとして保存しておくと良いかと思います。
(3)マニフェストファイルの変更
アプリケーションクラスをマニフェストファイルに登録します。登録されていないと、デフォルトのApplicationクラスがインスタンス化されてしまいます。
   <application
        android:name=".MyApp"
(4)MainActivityの変更
Koinを使うと、ViewModelのインジェクションも出来るようになります。
lateinit varから解放されます。便利!
class MainActivity : AppCompatActivity() {

    // 変更
    private val viewModel by viewModel<MainViewModel>()

    override fun onCreate(savedInstanceState: Bundle?) {
        super.onCreate(savedInstanceState)

// 不要になったので削除
//      viewModel = ViewModelProviders.of(this).get(MainViewModel::class.java)

        val binding: ActivityMainBinding =
            DataBindingUtil.setContentView(this, R.layout.activity_main)
        binding.lifecycleOwner = this
        binding.viewmodel = viewModel
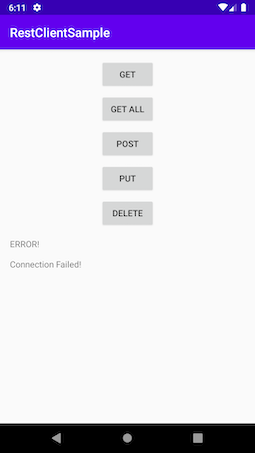
実行
モックAPIサーバーが動いてないとクラッシュしますが、こんな風にtry-catchしておけば良さそうです。
        try {
            val response = logApi.xxx(yyy).execute()
            ...
        } catch (e: Exception) {
            return "ERROR!\n" +
                    "\nConnection Failed!"
        }
感想
やっぱりKotlinはいいなあ。
最近Flutterに浮気してたのでいろいろ手が間違って動いたりしましたが、それでも書きやすい。
このプロジェクトをテンプレートとして持っておけば、API通信のあるアプリを作るのも楽になりそうですね。
以下にアップしてありますのでご自由にお使い下さい。
https://github.com/le-kamba/RestApiCoroutineSample
参考サイト