前回の続きです。
すっかり間が空きましたが、決してFlutterに浮気してたとかではありません(笑)
※2021/02/27
本記事内の実装では、targetSDK30以上かつAndroid 11以上で動作させた場合、不具合が起こります。
以下の記事を同時にご参照下さい。
Kotlin, LiveData, coroutine なんかを使って初めてのAndroidアプリを作る(14)TargetAPIを29に上げる
今回の目標
今回はちょっと趣向を変えて、SNS連携としゃれ込んで(?)みようと思います。
- メッセージ(文字列)をTwitterに投稿する
- 投稿用画像を作って保存する
- 画像をInstagramに投稿する
SNS共有ボタンから共有画面に遷移
まずは共有ボタンを作って共有画面に遷移するようにします。
最初に、共有ボタンを押したら、Twitter/Instagramを選べるようにしましょう。
共有画面に遷移する導線は、このようにするのはどうでしょうか?
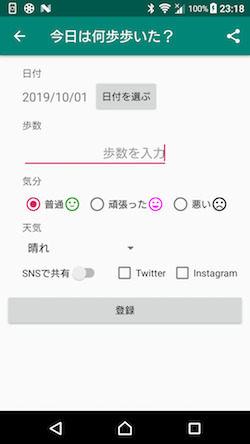
- 新規登録画面
- スイッチ(シェアするon/off)とチェックボックス(Twitter, Instagram)で選択
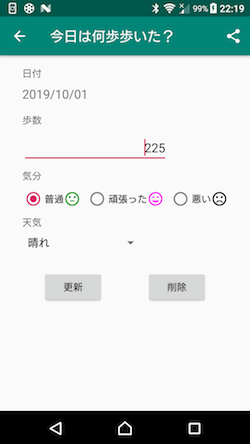
- 編集画面
- 共有メニューアイコンから(Twitter, Instagramの選択表示)
(1) 新規登録画面にシェアメニューを追加する
スイッチでシェアするかどうかのon/offを決めます。
更に、そのスイッチがonの場合、Twitter/Instagramのチェックボックスにチェックが入れられるようにします。
1. レイアウトに追加
こんな感じでどうでしょうか?
xmlのサンプルはこちら
<?xml version="1.0" encoding="utf-8"?>
<androidx.constraintlayout.widget.ConstraintLayout
        xmlns:android="http://schemas.android.com/apk/res/android"
        xmlns:app="http://schemas.android.com/apk/res-auto"
        xmlns:tools="http://schemas.android.com/tools"
        android:layout_width="match_parent"
        android:layout_height="match_parent"
        tools:context=".activity.logitem.LogInputFragment">

    <TextView
            android:text="@string/label_date"
            android:layout_width="wrap_content"
            android:layout_height="wrap_content"
            android:id="@+id/label_date"
            app:layout_constraintStart_toStartOf="parent"
            android:layout_marginStart="32dp"
            app:layout_constraintTop_toTopOf="parent"
            android:layout_marginTop="16dp"/>
    <TextView
            android:layout_width="wrap_content"
            android:layout_height="wrap_content"
            android:id="@+id/text_date"
            app:layout_constraintStart_toStartOf="parent"
            android:layout_marginStart="32dp"
            android:layout_marginTop="8dp"
            app:layout_constraintTop_toBottomOf="@+id/label_date"
            android:layout_marginBottom="8dp"
            app:layout_constraintBottom_toBottomOf="@+id/button_date"
            android:textSize="18sp"
            tools:text="2999/99/99"/>
    <Button
            android:text="@string/label_select_date"
            android:layout_width="wrap_content"
            android:layout_height="wrap_content"
            android:id="@+id/button_date"
            app:layout_constraintStart_toEndOf="@+id/text_date"
            android:layout_marginStart="8dp"
            app:layout_constraintTop_toBottomOf="@+id/label_date"/>
    <TextView
            android:text="@string/label_step_count"
            android:layout_width="wrap_content"
            android:layout_height="wrap_content"
            android:id="@+id/label_step_count"
            android:layout_marginTop="8dp"
            app:layout_constraintTop_toBottomOf="@+id/button_date"
            app:layout_constraintStart_toStartOf="parent"
            android:layout_marginStart="32dp"/>
    <EditText
            android:layout_width="wrap_content"
            android:layout_height="wrap_content"
            android:inputType="numberSigned"
            android:ems="10"
            android:id="@+id/edit_count"
            app:layout_constraintStart_toStartOf="parent"
            android:layout_marginStart="32dp"
            android:layout_marginTop="8dp"
            app:layout_constraintTop_toBottomOf="@+id/label_step_count"
            android:hint="@string/hint_edit_step"
            android:singleLine="true"
            android:textAlignment="textEnd"
            android:importantForAutofill="no" tools:targetApi="o"/>
    <TextView
            android:text="@string/label_level"
            android:layout_width="wrap_content"
            android:layout_height="wrap_content"
            android:id="@+id/label_level"
            android:layout_marginTop="8dp"
            app:layout_constraintTop_toBottomOf="@+id/edit_count"
            app:layout_constraintStart_toStartOf="parent"
            android:layout_marginStart="32dp"/>
    <RadioGroup
            android:layout_width="match_parent"
            android:layout_height="wrap_content"
            app:layout_constraintStart_toStartOf="parent"
            android:layout_marginStart="32dp"
            android:layout_marginTop="8dp"
            android:orientation="horizontal"
            app:layout_constraintTop_toBottomOf="@+id/label_level"
            android:id="@+id/radio_group"
            app:layout_constraintEnd_toEndOf="parent"
            android:layout_marginEnd="32dp">
        <RadioButton
                android:text="@string/level_normal"
                android:layout_width="wrap_content"
                android:layout_height="wrap_content"
                android:id="@+id/radio_normal"/>
        <ImageView
                android:src="@drawable/ic_sentiment_neutral_green_24dp"
                android:layout_width="wrap_content"
                android:layout_height="match_parent"
                android:id="@+id/imageView"/>
        <RadioButton
                android:text="@string/level_good"
                android:layout_width="wrap_content"
                android:layout_height="wrap_content"
                android:id="@+id/radio_good"
                android:layout_marginLeft="8dp"/>
        <ImageView
                android:src="@drawable/ic_sentiment_very_satisfied_pink_24dp"
                android:layout_width="wrap_content"
                android:layout_height="match_parent"
                android:id="@+id/imageView2"/>
        <RadioButton
                android:text="@string/level_bad"
                android:layout_width="wrap_content"
                android:layout_height="wrap_content"
                android:id="@+id/radio_bad"
                android:layout_marginLeft="8dp"/>
        <ImageView
                android:src="@drawable/ic_sentiment_dissatisfied_black_24dp"
                android:layout_width="wrap_content"
                android:layout_height="match_parent"
                android:id="@+id/imageView3"/>
    </RadioGroup>
    <TextView
            android:text="@string/label_weather"
            android:layout_width="wrap_content"
            android:layout_height="wrap_content"
            android:id="@+id/label_weather"
            app:layout_constraintStart_toStartOf="parent"
            android:layout_marginStart="32dp"
            android:layout_marginTop="8dp"
            app:layout_constraintTop_toBottomOf="@+id/radio_group"/>

    <Spinner
            android:layout_width="wrap_content"
            android:layout_height="wrap_content"
            android:minWidth="180dp"
            android:id="@+id/spinner_weather"
            android:layout_marginTop="8dp"
            app:layout_constraintTop_toBottomOf="@+id/label_weather"
            app:layout_constraintStart_toStartOf="parent"
            android:layout_marginStart="32dp"
            android:entries="@array/array_weathers"/>
    <Button
            android:text="@string/resist"
            android:layout_height="wrap_content"
            android:layout_width="match_parent"
            android:id="@+id/button_update"
            app:layout_constraintStart_toStartOf="parent"
            android:layout_marginStart="8dp"
            app:layout_constraintEnd_toEndOf="parent"
            android:layout_marginEnd="8dp"
            app:layout_constraintTop_toBottomOf="@+id/switch_share"
            android:layout_marginTop="16dp"/>
    <Switch
            android:text="@string/share_sns"
            android:layout_width="wrap_content"
            android:layout_height="wrap_content"
            android:id="@+id/switch_share"
            app:layout_constraintStart_toStartOf="parent"
            android:layout_marginStart="32dp"
            android:layout_marginTop="8dp"
            app:layout_constraintTop_toBottomOf="@+id/spinner_weather"
            app:layout_constraintBottom_toBottomOf="@+id/checkBox_twitter"/>
    <CheckBox
            android:text="@string/label_twitter"
            android:layout_width="wrap_content"
            android:layout_height="wrap_content"
            android:id="@+id/checkBox_twitter"
            app:layout_constraintStart_toEndOf="@+id/switch_share"
            android:layout_marginStart="16dp"
            app:layout_constraintTop_toBottomOf="@+id/spinner_weather"
            android:layout_marginTop="8dp"/>
    <CheckBox
            android:text="@string/label_instagram"
            android:layout_width="wrap_content"
            android:layout_height="wrap_content"
            android:id="@+id/checkBox_instagram"
            app:layout_constraintStart_toEndOf="@+id/checkBox_twitter"
            android:layout_marginStart="8dp"
            app:layout_constraintTop_toTopOf="@+id/checkBox_twitter"/>
</androidx.constraintlayout.widget.ConstraintLayout>
縦に長くなってきたので、スクロールが必要な端末もあるかも知れませんね。
可能であれば、画面の小さなエミュレーターなどでも動作確認してみると良いでしょう。
ただ、こういう画面はスクロールしない方がユーザーには使い勝手が良さそうなので、なんとかしないで納める方向がいいんじゃないかなあとは、個人的には思います。
もし、スクロールが必要になったら、全体のルートをScrollViewにします。
<ScrollView xmlns:android="http://schemas.android.com/apk/res/android"
            xmlns:app="http://schemas.android.com/apk/res-auto"
            xmlns:tools="http://schemas.android.com/tools"
            android:layout_width="match_parent"
            android:layout_height="match_parent"
            tools:context=".activity.logitem.LogInputFragment">

    <androidx.constraintlayout.widget.ConstraintLayout
            android:layout_width="match_parent"
            android:layout_height="wrap_content">
    .
    .
    .
    </androidx.constraintlayout.widget.ConstraintLayout>
</ScrollView>
ScrollViewの子要素は一つだけにしなければなりません。また、その子要素は高さにはmatch_parentを指定していると警告が出ます。警告通り、wrap_contentを使うようにします。
Githubにpushしてあるサンプルプロジェクトでは、横画面用のレイアウト(land/fragment_log_input.xml)が、スクロール有りになっていますので、参考にしてみて下さい。
2. スイッチとチェックボックスの制御
ViewModelを使って、制御してみましょう。
LogItemViewModelにまず下記のような変数を追加します。
var shareStatus = ShareStatus()
ViewModelに入れてますが監視はstepCountLogが変更されたタイミングで充分なので、この変数はLiveDataにはしません。
ShareStatusは次のようなデータクラスです。お好きな場所に定義して下さい。
data class ShareStatus(
    val doPost: Boolean = false,
    val postTwitter: Boolean = false,
    val postInstagram: Boolean = false
)
LogInputFragmentの登録ボタンを押したところで、ViewModelにセットします。
        contentView.button_update.setOnClickListener {
            .
            .
            .

            val postSns = switch_share.isChecked
            val postTwitter = checkBox_twitter.isChecked
            val postInstagram = checkBox_instagram.isChecked

            viewModel.shareStatus(ShareStatus(postSns, postTwitter, postInstagram))

            viewModel.changeLog(stepCountLog)
        }
LogItemViewModel#changeLogを呼ぶ前に、shareStatusをセットしておきましょう。
さて、実際に投稿するのはMainActivityに戻ってからになります。
Databaseに登録しているのがMainActivityで行われているからです。その登録処理が終わったら、SNSシェアするように選択されていたらシェア画面が起動するようにしなければなりません。なので、LogItemActivityが終了する際に、このSNSシェア設定が受け渡されなければなりません。
戻りIntentにExtraDataで追加しておきましょう。ShareStatusクラスはSerializableにします。
data class ShareStatus(
   . . .
): Serializable
Intentに設定するところはこうなります。
        viewModel.stepCountLog.observe(this, Observer {
            val dataIntent = Intent()
            dataIntent.putExtra(EXTRA_KEY_DATA, it)
            dataIntent.putExtra(EXTRA_KEY_SHARE_STATUS, viewModel.shareStatus)
            setResult(RESULT_OK, dataIntent)
            finish()
        })
EXTRA_KEY_SHARE_STATUSは適当な値で定義しておきましょう。
これを取り出して使うところはまた後ほど実装します。
・・・ところで、stepCountLogを監視しながらshareStatusにアクセスしているのが気持ち悪いという方もいるかも知れません。どうせなら、その二つがセットになったオブジェクトを監視すれば良いのでは?でもそのためだけに、それらを要素とする下記のようなデータクラスを定義するのもなんだか冗長・・・
クラス名もなんだかしっくりくるのを考えるのが面倒だし・・・
data class InputData(val stepCountLog: StepCountLog,
                   val shareStatus: ShareStatus)
そんな場合にうってつけなものがあります。それがPairというものです。
Pairというのはその名の通り、二つのオブジェクトをペアで扱えるクラスです。
Pair<A, B>という宣言で、AクラスとBクラスをペアで扱う、という宣言になります。今回は、StepCountLogとShareStatusをペアにしたいので、こうなります。
Pair<StepCountLog, ShareStatus>
これのMutableLiveDataですから、MutableLiveData<Pair<StepCountLog, ShareStatus>>となります。
ViewModelで使うとしたら、こんな感じになるでしょう。
    private val _logItem = MutableLiveData<Pair<StepCountLog, ShareStatus>>()
    val logItem = _logItem as LiveData<Pair<StepCountLog, ShareStatus>>

    @UiThread
    fun changeLog(data: StepCountLog, shareStatus: ShareStatus) {
        _logItem.value = Pair(data, shareStatus)
    }
使う方(監視する方)は次のようになるかと思います。
        viewModel.logItem.observe(this, Observer {
            val dataIntent = Intent()
            dataIntent.putExtra(EXTRA_KEY_DATA, it.first)
            dataIntent.putExtra(EXTRA_KEY_SHARE_STATUS, it.second)
            setResult(RESULT_OK, dataIntent)
            finish()
        })
Pairの要素へのアクセス方法は、上記にあるとおり、firstで最初に指定したクラス、secondで次に指定したクラスにアクセスが出来ます。
Pair<StepCountLog, ShareStatus>のfirstはStepCountLog、secondはShareStatusのオブジェクト、というようになります。
Kotlinには、もう一つ、Tripleというのもあり、その名の通り、3つの要素までまとめて扱えるクラスとなります。
このPairやTripleは、今回のように、まとめて取り扱いたいけど、わざわざクラスを作るほど大袈裟なものでは無い、なんて場合に重宝します。
さすがに4つ以上となる場合は、複雑なのでクラス化した方が良さそうですね。
ちなみに、PairやTripleの実装を見ると、ただのジェネリックなdata classなのが分かって面白いですよ。
ついでに、typealiasというのも見ておきましょうか。
Pair,Tripleは便利なのですが、いかんせん、宣言が長くなります。宣言が長いと言うことは、コードの可読性が結構下がります(と個人的には感じます)。
そういう時にこのtypealiasが使えます。
C/C++の経験がある方は、Javaで書いていて「typedefが使えたらな〜」と思ったことはありませんか?そう、まさにアレです。
typealias LogItemData = Pair<StepCountLog, ShareStatus>
こうしておくと、LiveDataの宣言のところが次のように書けて、少しスッキリします。
    private val _logItem = MutableLiveData<LogItemData>()
    val logItem = _logItem as LiveData<LogItemData>
インスタンスを作るときにもこう書けます。
    @UiThread
    fun changeLog(data: StepCountLog, shareStatus: ShareStatus) {
        _logItem.value = LogItemData(data, shareStatus)
    }
やたら長いクラス名のものでPairやTripleを使うことになったときにはとても便利なので覚えておくと良いでしょう。
3. 選択状態を保存、復元する
選択状態は前回選択したのを覚えておくのが親切でしょうね。ということで、SharedPreferenceを使って、選択状態を残すようにしましょう。
個人的には毎回初期値でもいいかなと思うのですが、SharedPreferenceを使う良い機会なのでやってみましょう。
SharedPreferenceというのは、「設定ファイル」のことです。
データの永続化として、Roomというのを前回やりましたが、これはデータベースのことでした。
同じ型のデータがたくさんあるような場合には、データベースが便利ですが、今回のように単純なフラグ等の永続化には、この設定ファイルを使うのが良いかと思います。
さっそく実装してみます。まずは保存から。
SettingRepositoryというクラスを作ります。
class SettingRepository(private val applicationContext: Context) {
    companion object{
        const val PREF_FILE_NAME = "settings"
    }

    fun saveShareStatus(shareStatus: ShareStatus) {
        // 設定に保存
        val pref = applicationContext.getSharedPreferences(PREF_FILE_NAME, AppCompatActivity.MODE_PRIVATE)
        pref.edit().putBoolean("postSns", shareStatus.doPost)
            .putBoolean("postTwitter", shareStatus.postTwitter)
            .putBoolean("postInstagram", shareStatus.postInstagram)
            .apply()
    }
}
これを、LogInputFragmentでViewModelにセットするところでやってしまいましょう・・・
と言いたいところですが、リポジトリクラスをView層であるActivity/Fragmentが直接持つのはよろしくないようなので、ViewModelに置いて呼び出せるようにします。
class LogItemViewModel(application:Application) : AndroidViewModel(application) {
    ....

    private val settingRepository = SettingRepository(application.applicationContext)

    ....

    fun saveSnsShareStatus(shareStatus: ShareStatus){
        settingRepository.saveShareStatus(shareStatus)
    }
applicationContextが必要になったので、派生元クラスをAndroidViewModelに変更しました。
LogInputFragmentでは、ViewModelの関数を呼び出します。
        contentView.button_update.setOnClickListener {
            .
            .
            .

            val postSns = switch_share.isChecked
            val postTwitter = checkBox_twitter.isChecked
            val postInstagram = checkBox_instagram.isChecked

            val shareStatus = ShareStatus(postSns, postTwitter, postInstagram)
            // 設定に保存
             viewModel.saveShareStatus(shareStatus)

            viewModel.changeLog(stepCountLog, shareStatus)
        }
続いて、設定データを取り出して復元する関数です。
    fun readShareStatus(): ShareStatus {
        val pref = applicationContext.getSharedPreferences(PREF_FILE_NAME, AppCompatActivity.MODE_PRIVATE)
        pref ?: return ShareStatus()
        val doPost = pref.getBoolean("postSns", false)
        val postTwitter = pref.getBoolean("postTwitter", false)
        val postInstagram = pref.getBoolean("postInstagram", false)
        return ShareStatus(doPost, postTwitter, postInstagram)
    }

    fun clear(){
        val pref = applicationContext.getSharedPreferences(PREF_FILE_NAME, AppCompatActivity.MODE_PRIVATE)
        pref.edit().clear().apply()
    }
ついでに、全設定情報を削除する関数も作っておきました。テスト用なんですがね。
で、またViewModelにラッパー関数を置きます。
    fun readShareStatus(): ShareStatus {
        return settingRepository.readShareStatus()
    }
これを使うのは、LogInputFragmentのActivity初期化完了時です。
    override fun onActivityCreated(savedInstanceState: Bundle?) {
        super.onActivityCreated(savedInstanceState)
        viewModel = ViewModelProviders.of(activity!!).get(LogItemViewModel::class.java)

        // 日付の選択を監視
        viewModel.selectDate.observe(this, Observer {
            text_date.text = it.getDateStringYMD()
        })

        // sns投稿設定
        val shareStatus = viewModel.readShareStatus()
        switch_share.isChecked = shareStatus.doPost
        checkBox_twitter.isChecked = shareStatus.postTwitter
        checkBox_instagram.isChecked = shareStatus.postInstagram
    }
これで、スイッチボタン、チェックボックスの状態を設定ファイルに保存し、復元できるようになりました。
なお、データ登録をしないと設定情報は保存されません。
新規データを登録してもう一度新規登録画面に行ってみると、シェア設定が復元されるはずです。
(2) 編集画面にシェアメニューを追加する
1. シェアアイコン
この画面は既にボタンが二つあるので、右上にシェアメニューアイコンを追加するのでやってみましょう。
以前、MainActivityに追加メニューアイコンを追加したのと同じ手順で出来ます。ただし、追加するのはLogItemActivityではありません。そこに追加すると、新規登録画面でも、シェアアイコンが表示されてしまいます。今回は、シェアアイコンは、編集画面にのみ表示したいので、この場合、Fragmentクラスで、onCreateOptionsMenuやonOptionsItemSelectedをオーバーライドして実装します。またこの場合、setHasOptionsMenu(true)しておく必要があります。
LogEditFragmentはこうなります。
    override fun onCreate(savedInstanceState: Bundle?) {
        super.onCreate(savedInstanceState)
        setHasOptionsMenu(true)
    }

    override fun onCreateOptionsMenu(menu: Menu, inflater: MenuInflater) {
        super.onCreateOptionsMenu(menu, inflater)
        inflater.inflate(R.menu.log_edit_menu, menu)
    }
アイコンは、[New]-[Vector Assets]で"share"と入力して探し、白色で作成しました。
メニューxmlのサンプルコードはこちら。
<?xml version="1.0" encoding="utf-8"?>
<menu xmlns:app="http://schemas.android.com/apk/res-auto"
      xmlns:android="http://schemas.android.com/apk/res/android">

    <item android:id="@+id/share_sns"
          android:title="@string/menu_label_share_sns"
          android:icon="@drawable/ic_share_white_24dp"
          app:showAsAction="always"/>
</menu>
さて、メニューを選んだときは、対象のSNSを選択出来ないとダメですね。
ということで、その反応のために関数のガワだけ作っておきましょう。
    override fun onOptionsItemSelected(item: MenuItem): Boolean {
        when (item.itemId) {
            R.id.share_sns ->{
                onShareSnsSelected()
                return true
            }
        }
        return super.onOptionsItemSelected(item)
    }

    private fun onShareSnsSelected(){
        // TODO select dialog

    }
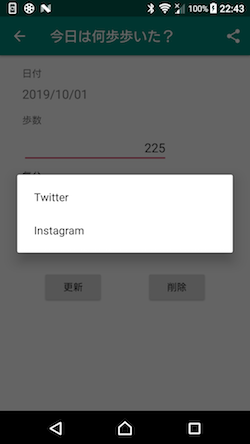
2. 対象SNS選択ダイアログ
対象のSNS(Twitter/Instagram)はダイアログで選択することにします。
AlertDialogにはリスト表示が可能なので、それを利用します。
リストを表示するには、AlertDialog.Builder#setItemsというのを使います。
class SnsChooseDialog : DialogFragment() {

    override fun onCreateDialog(savedInstanceState: Bundle?): Dialog {
        val viewModel = ViewModelProviders.of(activity!!).get(LogItemViewModel::class.java)

        // AlertDialogで作成する
        val builder = AlertDialog.Builder(requireContext())
        builder.setItems(arrayOf("Twitter", "Instagram")) { dialog, which ->
            viewModel.selectShareSns(which)
        }

        return builder.create()
    }
}
選択した値のやりとりには、LogItemViewModelを使っちゃいましょう。
    private val _selectShareSns = MutableLiveData<SNSType>()
    val selectShareSns = _selectShareSns as LiveData<SNSType>

    @UiThread
    fun selectShareSns(snsType: Int) {
        _selectShareSns.value = SNSType.values()[snsType]
    }
}

enum class SNSType {
    Twitter,
    Instagram,
}
先ほど作ったonShareSnsSelectedでこのダイアログを表示するコードを書けばおしまい。
    private fun onShareSnsSelected() {
        val dialog = SnsChooseDialog()
        dialog.show(supportFragmentManager, null)
    }
簡単ですね。
これでひとまず、投稿の手前まで行けるようになりました。
(3) 共有画面
今のところはさし当たって、Twitter共有画面と、Instagram共有画面をそれぞれ枠だけ作成しておきましょう。
Activityは、ナビゲーションは使いたいので、LogItemActivityのように、Toolbarのあるものを使います。
コピペしてきて変更しても良いですね。
パッケージは、activity.shareというのを作りました。
その下に、TwitterShareActivityと、InstagramShareActivityを追加します。
[New]-[Activity]を使わず、手動でクラスを追加した場合は、マニフェストファイルに追加するのも忘れないで下さい。
class TwitterShareActivity : AppCompatActivity() {

    override fun onCreate(savedInstanceState: Bundle?) {
        super.onCreate(savedInstanceState)
        setContentView(R.layout.activity_twitter_share)
        setSupportActionBar(toolbar)
    }

}
class InstagramShareActivity : AppCompatActivity() {

    override fun onCreate(savedInstanceState: Bundle?) {
        super.onCreate(savedInstanceState)
        setContentView(R.layout.activity_instagram_share)
        setSupportActionBar(toolbar)
    }

}
ほとんどデフォルトのままです。
xmlも、[New]-[Activity]-[Basic Activity]で作ってFabボタンを消した、そのままです。なので割愛します。
どうせ後で編集しますしね。
Intentを使ってそれらの画面に遷移するようにだけしておきます。
まずは、MainActivityでの処理。これは新規登録の際の処理になります。
    override fun onActivityResult(requestCode: Int, resultCode: Int, data: Intent?) {

        when (requestCode) {
            REQUEST_CODE_LOGITEM -> {
                onStepCountLogChanged(resultCode, data)
                return
            }
            REQUEST_CODE_SHARE_TWITTER -> {
                val intent = Intent(this, InstagramShareActivity::class.java)
                startActivity(intent)
                return
            }
        }

        super.onActivityResult(requestCode, resultCode, data)
    }

    private fun onStepCountLogChanged(resultCode: Int, data: Intent?) {
        when (resultCode) {
            RESULT_OK -> {
                val log = data!!.getSerializableExtra(LogItemActivity.EXTRA_KEY_DATA) as StepCountLog
                viewModel.addStepCount(log)
                val shareStatus = data.getSerializableExtra(LogItemActivity.EXTRA_KEY_SHARE_STATUS) as ShareStatus
                if(shareStatus.doPost){
                    // 共有フラグがONならDB登録完了後に投稿画面へ遷移する
                    if(shareStatus.postTwitter){
                        val intent = Intent(this, TwitterShareActivity::class.java)
                        if(shareStatus.postInstagram) {
                            // Instagramもチェックされていれば、戻った後で次に起動するため、結果を受け取る必要がある
                            startActivityForResult(intent, REQUEST_CODE_SHARE_TWITTER)
                        }else{
                            startActivity(intent)
                        }
                    }else if(shareStatus.postInstagram){
                        val intent = Intent(this, InstagramShareActivity::class.java)
                        startActivity(intent)
                    }
                }
            }
            RESULT_CODE_DELETE -> {
                val log = data!!.getSerializableExtra(LogItemActivity.EXTRA_KEY_DATA) as StepCountLog
                viewModel.deleteStepCount(log)
            }
        }
    }
今回は、投稿を投げるだけで結果は特に受け取らないので、基本的にstartActivityを使っています。
唯一stargActivityForResultを使っているのは、新規登録画面で、TwitterにもInstagramにもチェックを入れた場合です。この場合、まずTwitterで共有後、戻ってきたら次にInstagram共有画面を起動するようにします。
なんかややこしいですけどね。
TwitterとInstagramの選択をラジオボタンにすれば良かったのだけど、今更変えるのもめんど・・・いえ、勉強なので(笑)
次に、編集画面でSns選択ダイアログで選んだ後の処理です。LogItemActivityに実装します。こちらは、ViewModelを監視して遷移のキックを受け取ります。
   override fun onCreate(savedInstanceState: Bundle?) {
        .
        .
        .

        viewModel.selectShareSns.observe(this, Observer { snsType ->
            when(snsType){
                SNSType.Twitter->{
                    val intent = Intent(this, TwitterShareActivity::class.java)
                    startActivity(intent)
                }
                SNSType.Instagram->{
                    val intent = Intent(this, InstagramShareActivity::class.java)
                    startActivity(intent)
                }
                else->{
                }
            }

        })
こっちはずっとシンプルですね。
これでそれぞれの共有画面に遷移するところまで出来たと思います。実行して、遷移を確認してみて下さい。
Twitterに投稿する
Twitterに、SDKを使わずに文字だけ投稿する手法で行きます。
なお、参考ページは下記です。
記事自体は古いですが暗黙的Intent連携なのでほぼそのままで行けるはずです。
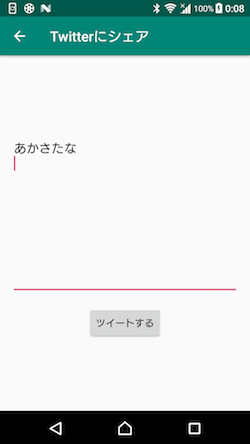
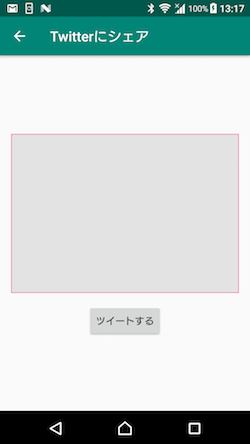
(1) Twitter共有画面を作る
1. 画面の作成
デフォルトのメッセージを作って、表示します。その文字列はユーザーが変更できるようにします。
投稿ボタンを押すと、投稿します。
ダイアログでも良さそうなボリュームですが、テストが面倒になるのでActivityだけにします。Fragmentまで作る必要は無さそうなのでなくても良いでしょう。
レイアウトとしてはこんな感じ。Twitterは文字数制限が140文字なので、EditTextにその制限を入れてあります。
xmlのサンプルはこちら
<?xml version="1.0" encoding="utf-8"?>
<androidx.constraintlayout.widget.ConstraintLayout
        xmlns:android="http://schemas.android.com/apk/res/android"
        xmlns:tools="http://schemas.android.com/tools"
        xmlns:app="http://schemas.android.com/apk/res-auto"
        android:layout_width="match_parent"
        android:layout_height="match_parent"
        app:layout_behavior="@string/appbar_scrolling_view_behavior"
        tools:showIn="@layout/activity_twitter_share"
        tools:context=".activity.share.TwitterShareActivity">


    <EditText android:layout_width="match_parent"
              android:layout_height="wrap_content"
              tools:text="今日は10000歩歩いたよ!"
              android:inputType="textMultiLine"
              android:gravity="start|top"
              android:ems="10"
              app:layout_constraintStart_toStartOf="parent"
              app:layout_constraintTop_toTopOf="parent"
              app:layout_constraintBottom_toBottomOf="parent"
              app:layout_constraintEnd_toEndOf="parent"
              android:id="@+id/editText_share_message"
              app:layout_constraintVertical_bias="0.40"
              android:layout_marginStart="16dp"
              android:layout_marginEnd="16dp"
              android:lines="10"
              android:maxLength="140"/>
    <Button
            android:text="@string/label_tweet"
            android:layout_width="wrap_content"
            android:layout_height="wrap_content"
            android:id="@+id/button_share_twitter"
            app:layout_constraintStart_toStartOf="parent"
            app:layout_constraintEnd_toEndOf="parent"
            app:layout_constraintTop_toBottomOf="@+id/editText_share_message"
            android:layout_marginTop="16dp"/>
</androidx.constraintlayout.widget.ConstraintLayout>
2. EditBoxの枠線・背景を指定する
このままでもいいんですが、マテリアルデザインのはEditBoxのエリアが分かりづらいんですよね。せっかくなので、drawableでshapeを作って背景に指定するのをやってみましょう。
まずは、res/drawableで右クリックして、[New]-[Drawable Resoure File]とします。
作成されたxmlファイルに、次のように記述します。
デフォルトで記入されている<selector>タグは、今回は不要なので削除します。
<?xml version="1.0" encoding="utf-8"?>
<shape xmlns:android="http://schemas.android.com/apk/res/android">
    <stroke android:width="2dp" android:color="#444444" />
</shape>
全体は<shape>タグで囲います。
<stroke>が線を引く属性となります。
EditBoxのbackgroundに上で作成したdrawableを指定します。
    <EditText
       android:background="@drawable/editor_frame"
そのままだとエリアギチギチが入力エリアでキャレットが見づらいので少しpaddingを入れて余白を作ります。
    <EditText
        android:background="@drawable/editor_frame"
        android:padding="8dp"
背景も少し色を変えたければ、<solid>タグを使います。
<?xml version="1.0" encoding="utf-8"?>
<shape xmlns:android="http://schemas.android.com/apk/res/android">
    <stroke android:width="1dp" android:color="#A6E91E63" />
    <solid android:color="#40A0A0A0" /></shape>
こんな感じになりました。
こうした色やなんかを細かく調整するときには、Instant Runが便利です。
通常のRun/Debugでの実行は、アプリ全体がビルドされ、apkがその都度端末にインストールされます。なのでその分時間がかかります。Instant Runは、変更のあったコード/ファイルのみを転送して、今表示している画面のみを再起動してくれる、というなんとも便利な機能です。
基本的にはデフォルトで有効になっていて、Android Studioのメニューバーの稲妻アイコンをクリックすると、Instant Runとなります。

Instant Runで注意しないと行けないところは、以下のような点です。
- 時々毎回フルビルドしかしてくれなくなる
- デバッグセッションを終了した後に残っているのは、変更前のコード/ファイルだけなので、いったん落として再起動すると前に戻ってる!デグレか!?と混乱しやすい
- マニフェストファイルに変更が入るような変更は、フルビルドするしかない
アプリによってはInstant Runだと思いがけない不具合を吐くこともあって、私は実は普段はオフにしています。今回のように、レイアウトの微調整で頻繁に再起動するようなときにだけ有効にして使っています。
Instant RunのOn/Offの切替方ですが、Android Studioのメニューから、Prefereceを選んで、[Biuld, Execution, Deplyment]の下に項目がありますが、検索に"Instant"と入力すると見つけやすいです。
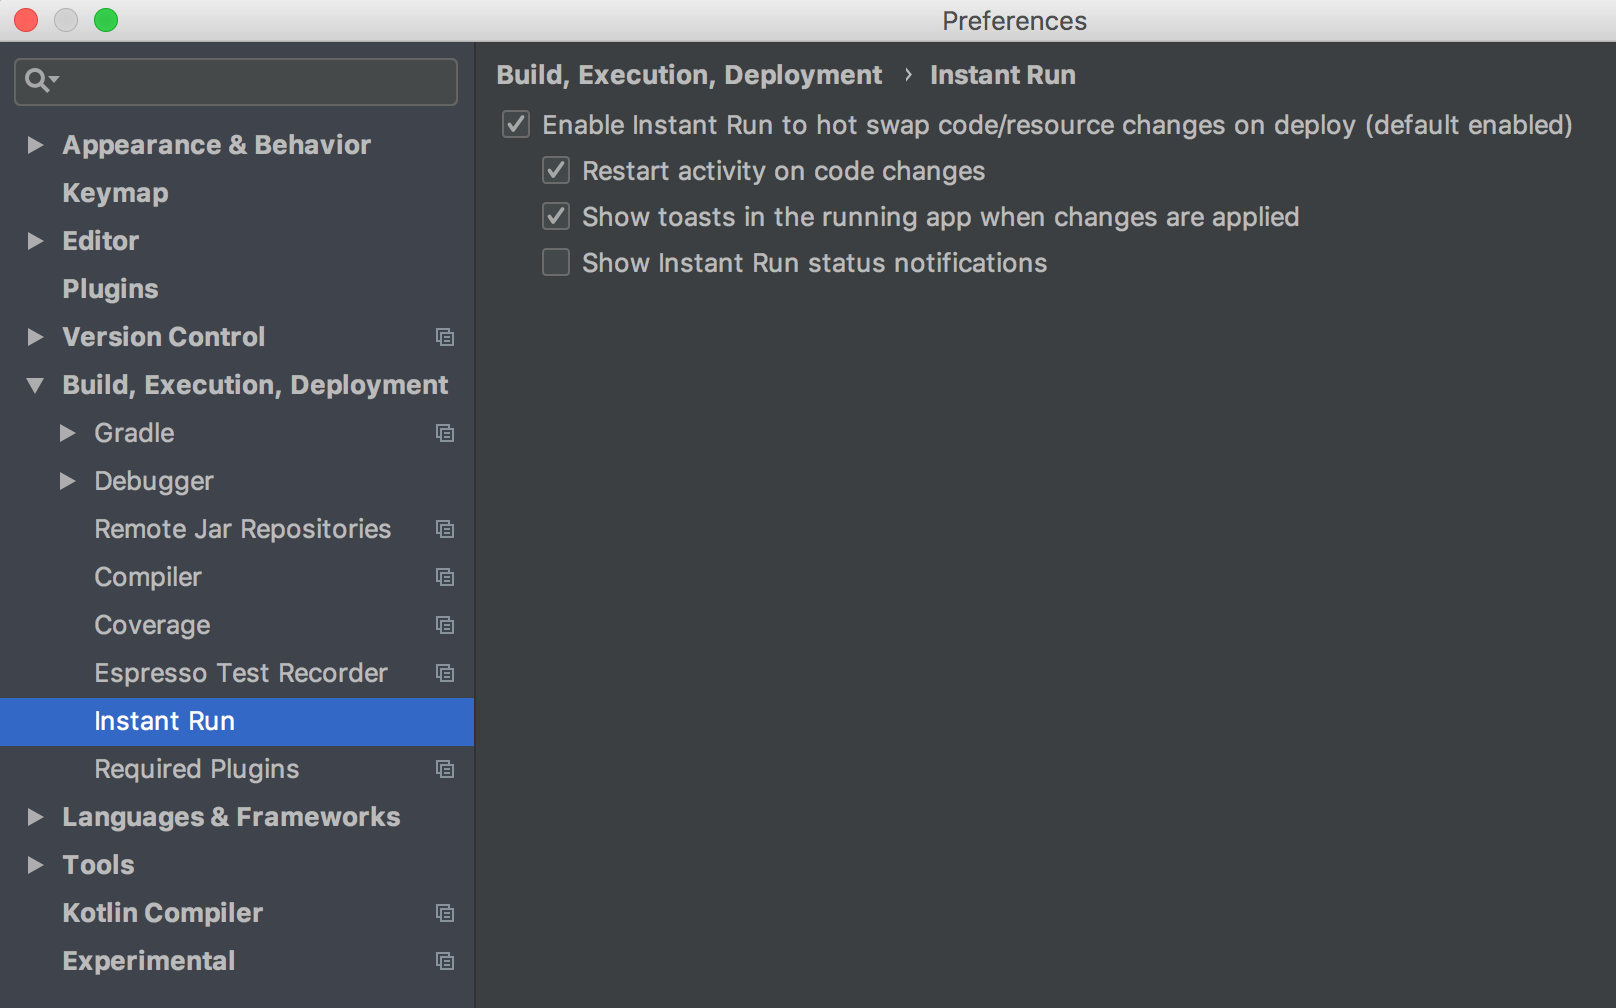
一番上の[Enable Instan Run to host swap....]というのを選ぶと機能全体のOn/Offが切り替えられます。
是非活用して、デバッグ効率を上げましょう。
(2) 暗黙的Intentで投稿する
1. 暗黙的Intentとは
他の画面(Activity)に遷移する際に、このようにIntentを作って使ってきました。
val intent = Intent(context, LogItemActivity.class)
このように、起動するクラスを指定して作成するIntentのことを、明示的Intentと呼びます。
このIntentを使う場合、起動されるクラスは固定の物になります。クラスを明示的に指定しているので、当然ですね。
一方、Androidには起動する対象を特定しないでIntentを投げつける方法があります。
「誰かこの情報処理できる人いない?」と聞いて、「できるかもー」と手を挙げたアプリに「じゃ、よろしく」と情報を渡してあげる、というように考えれば良いでしょう。
これが暗黙的Intentです。
暗黙的Intentを使う場合の注意は、「必ずしも処理できる対象がいるとは限らない」ということです。
例えば今回では、Twitterに投稿しようとしていますが、Twitterクライアントが端末にインストールされてなければ、当然ながら処理してくれる人はいません。誰も処理できる人がいないのに情報を投げつけようとすると、クラッシュするので、要注意です。
ちなみに、パッケージ名とAcitivityのクラスが分かっていれば、他のアプリであっても、明示的Intentで起動することは可能です。
そしてそれらの情報は、Logcatを眺めていると結構分かります。
(アプリではなくOS本体が出しているログがあるんです)
2. Twitterに投稿する
Twitter公式クライアントは、暗黙的インテントでの、スキームを使った投稿に対応してくれていますので、それを使います。
スキームというのは、"hogehoge://"という形のものです。インターネットのurlは、"https://"というスキームを使いますが、専用のものを指定すると反応してくれるよう、Twitter社がアプリを作ってくれているのです。そのスキームが、"twitter://です。
    private fun post(message: String) {
        val intent = Intent(Intent.ACTION_VIEW)
        val encoded = Uri.encode(message)
        intent.data = Uri.parse("twitter://post?message=$encoded")
        startActivity(intent)
    }
たったこれだけで、完了です。Twitterの公式アプリが起動して、投稿画面が表示されます。
実際の投稿は、公式アプリから、となるので、APIの接続制限数とか、APIの開発者登録とか、そんなものは一切不要です。
Intentの作り方を見て下さい。パッケージコンテキストやActivityのクラス名を指定していません。
このIntentに反応するのは、インテントフィルターというもので、
- ACTION_VIEWというアクションに対して
- データが"twitter://"であるもの
で起動する画面を持っているアプリです。
インテントフィルターは、アプリのマニフェストファイルでActivityに対して指定します。
例えば、これまで作ってきたアプリでは、MainActivityにこんなインテントフィルターが設定されていると思います。
        <activity android:name=".MainActivity">
            <intent-filter>
                <action android:name="android.intent.action.MAIN"/>

                <category android:name="android.intent.category.LAUNCHER"/>
            </intent-filter>
        </activity>
このインテントフィルターの意味は、
-
MAINというアクションに対して、 - カテゴリが
LAUNCHERであれば起動する
ということになります。
LAUNCHERは見て分かるとおり、ランチャーから、つまりホーム画面から起動する、ということで、ホーム画面のアイコンをタップすると最初にこの画面が起動します、という宣言である、ということになります。
ちなみに、このインテントフィルターを持ったActivityが存在しないと、アプリをインストールしても、ホーム画面にアイコンが表示されません。アイコンをタップしても起動する画面が無い=アイコンを置く必要が無い、ってことでしょうね。
逆に、先ほど作ったIntentで起動するActivityのインテントフィルターにはどう指定したら良いかというと、このようになります。
            <intent-filter>
                <action android:name="android.intent.action.VIEW"/>
                <category android:name="android.intent.category.DEFAULT"/>
                <data android:scheme="twitter"/>
            </intent-filter>
そう、自分のアプリでも、このスキームで反応するように作っておくと、実は公式アプリの代わりに反応させることも出来るんですね(複数反応できるアプリがある場合は、選択するダイアログが表示されます)。
ただ、このスキームに反応するサードパーティー製のTwitterアプリは今のところ無いようです。
さて、この方法は、Twitter公式クライアントアプリが入っていないと動きません。無いとクラッシュします。なので起動できるアプリがなかったときの対処が必要となります。
どうすれば良いかというと、startActivityが例外ActivityNotFoundExceptionを投げるので、それをキャッチして代替処理を書けばよいです。今回は、アプリが無いので、「アプリが無いよ」とメッセージを出すことにします。
    private fun post(message: String) {
        val intent = Intent(Intent.ACTION_VIEW)
        val encoded = Uri.encode(message)
        intent.data = Uri.parse("twitter://post?message=$encoded")
        try {
            startActivity(intent)
        }catch ( e:ActivityNotFoundException ){
             // TODO メッセージを出す
        }
    }
"twitter://post?message=$encoded"の部分の、$encodedについて解説していませんでしたね。これは文字列に変数encodedを埋め込んでいます。
これがKotlin流文字列への変数埋め込み手法になります。{}を付けるのが基本ですが、文字列の最後に付ける場合には不要みたいです。
埋め込みが途中にある場合は、次のように書きます。
val a = "えい"
val b = "びー"
val num = 3

val str = "${num} : aは${a}で、bは${b}です"
ところで、このままだと全文を自分で入力しなくてはなりません。
歩数情報などを初期で入れておくと親切ですね。
TwitterShareActivityにデフォルトのメッセージを渡すようにしましょう。
class TwitterShareActivity : AppCompatActivity() {

    companion object{
        const val KEY_TEXT = "text"
    }

    override fun onCreate(savedInstanceState: Bundle?) {
        ...

        editText_share_message.setText(intent.getStringExtra(KEY_TEXT))
TwitterShareActivityを起動するIntentを作っているところで、メッセージをExtraデータとしてセットしてやれねばなりませんね。
文章は、StepCountLogに関数を作って取れるようにしましょう
@Entity(tableName = "log_table")
@TypeConverters(LevelConverter::class, WeatherConverter::class)
data class StepCountLog(
    @PrimaryKey @ColumnInfo(name = "date") val date: String,
    @ColumnInfo(name = "step") val step: Int,
    @ColumnInfo(name = "level") val level: LEVEL = LEVEL.NORMAL,
    @ColumnInfo(name = "weather") val weather: WEATHER = WEATHER.FINE
) : Serializable {

    fun getShareMessage(): String {
        val levelText = when (level) {
            LEVEL.NORMAL -> "まあまあ。"
            LEVEL.BAD -> "いまいち・・・"
            LEVEL.GOOD -> "上々!"
        }
        return "${this.date} は ${this.step} 歩 歩きました。気分は $levelText"
    }
}
これを、MainActivityとLogItemActivityでそれぞれIntentのExtraDataにセットしてやります。
        private fun onStepCountLogChanged(resultCode: Int, data: Intent?) {
            ....
                        val intent = Intent(this, TwitterShareActivity::class.java)
                        intent.putExtra(TwitterShareActivity.KEY_TEXT, log.getShareMessage())
    override fun onCreate(savedInstanceState: Bundle?) {
        ...
                    val intent = Intent(this, TwitterShareActivity::class.java)
                    intent.putExtra(TwitterShareActivity.KEY_TEXT, logData?.getShareMessage())
これで、TwitterActivityに初期文字列が入るようになりました。
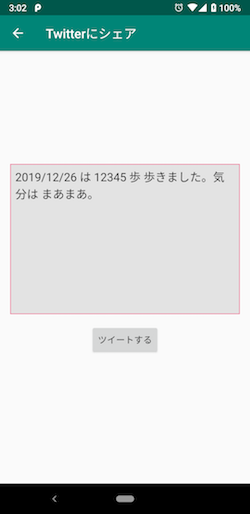
もちろん、入力欄をタップしてメッセージを編集することも可能です。
3. Snackbar
Twitterアプリがないエラーメッセージを出すのに、Snackbarというのを使ってみようと思います。
下からひょこっと出てきて、数秒で消えるやつです。何かアクションするボタンが付いていることもありますね。
今回、Toastでも良いのですが、無ければインストールボタンを押すとストアに飛んであげる親切設計にしてみようということで、Snackbarを使います。
Snackbarは下記のように表示します。
    private fun post(source: String) {
        .
        .
        .
        } catch (e: ActivityNotFoundException) {
            Snackbar.make(view_root, R.string.error_no_twitter_app, Snackbar.LENGTH_LONG)
                .setAction(R.string.install) {
                    openPlayStore("com.twitter.android")
                }
                .show()
        }
    }
Toastとほぼ同じですが、setActionでボタンを付けられるところが違いますね。
第1引数のview_rootは、activity_twitter_share.xmlの一番ルートのCoordinatorLayoutにidを付けました。
openPlayStoreは下記のような関数です。Util.ktに定義しました。
せっかくなので、Contextの拡張関数にしてみました。
/**
 * Playストアの指定アプリのページを開く
 */
fun Context.openPlayStore(packageName: String) {
    val intent = Intent(Intent.ACTION_VIEW)
    var url = context.getString(R.string.market_url, packageName)
    intent.data = Uri.parse(url)
    try {
        context.startActivity(intent)
    } catch (e: ActivityNotFoundException) {
    }
}
Playストアアプリが入っていないことは、エミュレーターで無ければ有り得ないので、いったん例外を無視する実装で行きます。
market_urlとは、下記のようなものです。
<string name="market_url" tools:ignore="ExtraTranslation">http://play.google.com/store/apps/details?id=%1$s</string>
こちらに、Playストアを起動するリンクについて細やかに設定が解説されています。
このように、通常のurlのリンクでアプリの特定の画面を起動することを、**「ディープリンク」**と言います。このディープリンクの世界は色々と奥深いので、詳しくは触れませんが、興味ある方は調べてみて下さい。プロモーションを貼って特定の画面を開かせたい、等と言うときに便利なようです。
最後の%1$sが、リソース文字列に、変数を埋め込む場合の記述です。%{n/渡す引数のn番目を使うという指定}${引数の型}という意味になっています。引数の型は、数字だったらdなど決まっています。この型の指定方法については、JavaのFormatterに準ずるようです。
tools:ignore="ExtraTranslation"は、翻訳バリエーションが無いという警告を抑制する設定です。
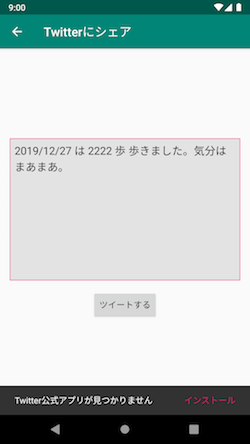
Twitter公式アプリがインストールされていない端末で実行してみると、下のようにSnackbarが表示されるはずです。「インストール」をタップすれば、Playストアアプリが起動し、Twitter公式アプリのページが開くはずです。なお、Playストアがインストールされていないエミュレーターだと、ブラウザが起動します。ディープリンク、素晴らしいですね。
画像を作って保存する
Instagramには画像がないと投稿が出来ません。
ということで、まずその画像を作って保存する機能を実装します。
どんな画像を作るかというと、
- ベースとなる画像(ローカルに数枚用意)
の上に、
- アプリ固有の文字列を配置
して、合成した画像、というのを作ります。
イメージとしてはこんな感じです。

(1) ベース画像の用意
適当な正方形な画像を作ってdrawableフォルダに入れます。
注意点としては、上に載せる文字の色を決めておき、その文字が見づらくならない色や模様にすることです。
私は以下のような画像を用意しました。(※GIMPというアプリで作りました)
最近の主要端末の解像度を考えて、xhdpiとxxhdpiがあれば充分かなと思って、それぞれ1080と1620で作成し、drawable-xhdpiとdrawable-xxhdpiに置きました。

(2) Instagram共有画面を作る
ひとまず、Instagram用の投稿画面を作りましょう。画像を合成するのに、「見た目のレイアウト」を利用するので、まず画面が必要なのです。
1. レイアウト
こんな感じにしました。

xmlのサンプルはこちら
<?xml version="1.0" encoding="utf-8"?>
<androidx.constraintlayout.widget.ConstraintLayout
        xmlns:android="http://schemas.android.com/apk/res/android"
        xmlns:tools="http://schemas.android.com/tools"
        xmlns:app="http://schemas.android.com/apk/res-auto"
        android:layout_width="match_parent"
        android:layout_height="match_parent"
        app:layout_behavior="@string/appbar_scrolling_view_behavior"
        tools:showIn="@layout/activity_instagram_share"
        tools:context=".activity.share.InstagramShareActivity">

    <androidx.constraintlayout.widget.ConstraintLayout
            android:layout_width="0dp"
            android:layout_height="wrap_content"
            android:id="@+id/layout_post_image"
            app:layout_constraintTop_toTopOf="parent"
            android:layout_marginTop="32dp"
            app:layout_constraintStart_toStartOf="parent"
            android:layout_marginStart="32dp"
            app:layout_constraintEnd_toEndOf="parent"
            android:layout_marginEnd="32dp">

        <ImageView
                android:layout_width="0dp"
                android:layout_height="wrap_content"
                app:srcCompat="@drawable/square_sample"
                android:id="@+id/post_image_bg"
                android:adjustViewBounds="true"
                android:cropToPadding="false"
                android:scaleType="center"
                app:layout_constraintTop_toTopOf="parent"
                app:layout_constraintStart_toStartOf="parent"
                app:layout_constraintBottom_toBottomOf="parent"
                app:layout_constraintEnd_toEndOf="parent"/>
        <TextView
                android:layout_width="wrap_content"
                android:layout_height="wrap_content"
                android:id="@+id/text_today"
                tools:text="2020/12/12"
                app:layout_constraintStart_toStartOf="parent"
                app:layout_constraintTop_toTopOf="parent"
                android:textSize="36sp"
                android:textColor="#545455"
                android:layout_marginStart="16dp"
                android:layout_marginTop="16dp"
                android:textStyle="bold"/>
        <TextView
                android:layout_width="wrap_content"
                android:layout_height="wrap_content"
                android:id="@+id/text_step_count"
                app:layout_constraintStart_toStartOf="@+id/post_image_bg"
                app:layout_constraintEnd_toEndOf="@+id/post_image_bg"
                android:layout_marginEnd="8dp"
                android:layout_marginBottom="8dp"
                app:layout_constraintBottom_toBottomOf="parent"
                android:layout_marginTop="8dp"
                app:layout_constraintTop_toTopOf="@+id/post_image_bg"
                tools:text="12345"
                android:textSize="66sp"
                android:textColor="#E91E63"
                android:textStyle="bold"
                android:fontFamily="monospace"/>
        <TextView
                android:text="@string/label_step"
                android:layout_width="wrap_content"
                android:layout_height="wrap_content"
                android:id="@+id/label_step"
                app:layout_constraintStart_toEndOf="@+id/text_step_count"
                app:layout_constraintBottom_toBottomOf="@+id/text_step_count"
                android:layout_marginBottom="8dp"
                android:textSize="36sp"
                android:layout_marginStart="8dp"/>
        <TextView
                android:text="@string/app_copyright"
                android:layout_width="wrap_content"
                android:layout_height="wrap_content"
                android:id="@+id/label_copyright"
                app:layout_constraintEnd_toEndOf="parent"
                android:layout_marginEnd="8dp"
                app:layout_constraintBottom_toBottomOf="@+id/post_image_bg"
                android:layout_marginBottom="8dp" android:textSize="18sp"/>
    </androidx.constraintlayout.widget.ConstraintLayout>
    <Button
            android:text="@string/label_post"
            android:layout_width="wrap_content"
            android:layout_height="wrap_content"
            android:id="@+id/button_share_instagram"
            app:layout_constraintStart_toStartOf="parent"
            android:layout_marginStart="8dp"
            app:layout_constraintEnd_toEndOf="parent"
            android:layout_marginEnd="8dp"
            app:layout_constraintTop_toBottomOf="@+id/layout_post_image"
            android:layout_marginTop="24dp"/>
</androidx.constraintlayout.widget.ConstraintLayout>
テキストを配置するためにあらかじめTextViewを置いています。
画像を表示するエリアのルートとなるレイアウトには、idを付けておいて下さいね。
2. Instagram投稿画面に必要な情報を渡して反映させる
日付と歩数を渡して、TextViewに反映させましょう。
データの数が少ないですけど、やっぱりDatabindingを使いましょうか。
例によって全体を<layout>タグで囲み、<data>要素を宣言します。
日付と、歩数のTextViewに使用するデータを指定します。
<layout xmlns:android="http://schemas.android.com/apk/res/android"
        xmlns:tools="http://schemas.android.com/tools"
        xmlns:app="http://schemas.android.com/apk/res-auto">
    <data>
        <variable name="stepLog"
                  type="jp.les.kasa.sample.mykotlinapp.data.StepCountLog"/>
    </data>

    ...
    <TextView
                    android:layout_width="wrap_content"
                    android:layout_height="wrap_content"
                    android:id="@+id/text_today"
                    tools:text="2020/12/12"
                    android:text="@{stepLog.date}"
                    ... />
    <TextView
                    android:layout_width="wrap_content"
                    android:layout_height="wrap_content"
                    android:id="@+id/text_step_count"
                    android:text="@{Integer.toString(stepLog.step)}"
                    ... />
    ...
あれ?でも、待って下さい?
今編集していたレイアウトファイルは、content_instagram_share.xmlです。これはActivityのレイアウトファイルactivity_instagram_share.xmlからincludeされているレイアウトです。
このままでは、ActivityInstagramShareDatabindingクラスが出来ないので、ActivityクラスのonCreateでデータバインディングによって初期化できないのでは??
そうです。このままでは、ダメです。
どうするか?
ActivityのレイアウトもDatabindingにしてやり、include属性にバインド用のデータを設定してやれば良いのです。
どういうことかというと・・・
ます、InstagramSchareActivityのレイアウトも、databindingにしてやって・・・
<layout xmlns:android="http://schemas.android.com/apk/res/android"
        xmlns:app="http://schemas.android.com/apk/res-auto"
        xmlns:tools="http://schemas.android.com/tools">
    <data>
        <variable name="stepLog"
                  type="jp.les.kasa.sample.mykotlinapp.data.StepCountLog"/>
    </data>
  ...
次に、includeしているcontent_instagram_share.xmlに、そのままデータを渡してやるのです。
        <include layout="@layout/content_instagram_share"
            app:stepLog="@{stepLog}"/>
こうすれば、無事にActivityInstagramShareBindingが作成され、Activityクラスから、stepLogにデータを設定してやることが出来ます。
    override fun onCreate(savedInstanceState: Bundle?) {
        super.onCreate(savedInstanceState)
        val binding: ActivityInstagramShareBinding = DataBindingUtil.setContentView(this, R.layout.activity_instagram_share)
        binding.stepLog = intent.extras.getSerializable(KEY_STEP_COUNT_DATA) as StepCountLog

        setSupportActionBar(toolbar)

        supportActionBar?.setDisplayHomeAsUpEnabled(true)
    }
どうでしょう?シェアメニューから、Instagram投稿画面が開きましたか? ログの値が入っていますか?
実は、このままでは、編集画面から開いた場合、色々変更した後は、Instagram投稿画面にはその変更が反映されません。
編集中の値を取り直して入れてやらなければなりませんねえ・・・
何か上手い方法はないでしょうか?
少し悩んだのですが・・・
- 各項目のフォーカスが外れたときに逐一
LogEditFragmentのstepCountLogの値も書き換える - シェアメニューが選ばれたときに一括で
stepCountLogの値も書き換える - 更新ボタンを押した後画面を終了しないようにする
くらいのアプローチしか思いつきませんでした。
3はViewModelを監視しているデータベースを更新するところに関わってきてしまい、手を入れるのはちょっと面倒(笑)なので、2でいきます。
LogEditFragment#onShareSnsSelectedでやってやればいいですね。ダイアログを出す前にやります。
    private fun onShareSnsSelected() {
        // 変更値を収集する
        validation()?.let {
            val fgm = fragmentManager ?: return
            ErrorDialog.Builder().message(it).create().show(fgm, null)
            return
        }
        val dateText = text_date.text.toString()
        val stepCount = edit_count.text.toString().toInt()
        val level = levelFromRadioId(radio_group.checkedRadioButtonId)
        val weather = weatherFromSpinner(spinner_weather.selectedItemPosition)
        stepCountLog = StepCountLog(dateText, stepCount, level, weather)

        val dialog = SnsChooseDialog()
        dialog.show(requireActivity().supportFragmentManager, null)
    }
これでInstagramへの投稿の準備まで出来ました。
3. 合成画像を保存する
Instagramに投稿するには、画像ファイルを用意しなければなりません。
先ほどのステップで何となく合成した画像が見えていますが、これをそのまま「画像ファイル」として保存したいですね。
考え方としては、「画面の見えている状態のキャプチャを撮る」ということになります。
とはいえ、Screenshotを全体で取るのではありません。
レイアウトファイルの画像部分、ルートのレイアウトにidを付けておいて下さいと書きましたが、ここでそれを使います。
そのidのビューを取ってきて、そのビューの「今描かれている情報」を、Bitmapとして取得し、画像として保存するのです。
昔は、こんなに簡単にできたんですが・・・
    view.setDrawingCacheEnabled(true);
    view.buildDrawingCache();
    return view.getDrawingCache();
今このままコピペすると、赤線が引かれるし、ビルドすると(Lint警告を有効にしていると)、非推奨メソッドを使ってる!とたくさん注意してくれます^^;
あ、Lint警告の詳細を有効にするには、プロジェクトルートのbuild.gradleに以下を追加すると出来ますよ。
allprojects {

    repositories {
        google()
        jcenter()
    }

    gradle.projectsEvaluated {
       tasks.withType(JavaCompile) {
            options.compilerArgs << "-Xlint:deprecation"
        }
    }
}
最新のやり方は、PixelCopyなのですが、これはOSバージョンが26以上で無いと使えません。
MinSDKバージョンが26より低い場合は、DrawingCacheの方法を使っても良いのですが・・・
安全な方法として、自前でCanvasに描くのをやってみます。
こんな関数になります。
     private fun getBitmapFromView(view: View): Bitmap {

        val height = view.height
        val width = view.width

        val canvasBitmap = Bitmap.createBitmap(width, height, Bitmap.Config.ARGB_8888)
        val canvas = Canvas(canvasBitmap)

        val bgDrawable = view.background
        if (bgDrawable != null)
            bgDrawable.draw(canvas)
        else
            canvas.drawColor(Color.WHITE)

        view.draw(canvas)

        return canvasBitmap
    }
やっているのは以下のステップです。
- 対象のViewの高さ、幅と同じサイズのBitmapを、フルカラーで作成する
- そのBitmapを持つCanvasを作成する
- 対象のViewの
backgraound:Drawableを参照して、nullでなければそのままcanvasにそれを描画、nullなら白で埋め尽くす- ここで描き込んでいるのはそのViewが持つbackgroundの情報。
- viewをcanvasに描き込む
でも、待って下さい。
画像(Bitmap)を描き込むのって、結構時間がかかる処理です。(※Bitmapは簡単に言えばPixel数分の色情報の配列です。300x300のサイズの画像の配列サイズは、300 * 300 になります。配列としては充分に大きいです。)
メインスレッド止めちゃうのはやばそうですね?
それに、Instagramに連携するのには、ファイルをいったん保存しなければなりません。そのファイル保存もUIスレッドでやっちゃうのはまずそうですね?
ということで、Croutineの出番です。
まず、coroutineを使えるようにするため、InstagramShareActivityクラスをCoroutineScopeの継承とします。
そして、JobとCroutineContextを持つようにします。
jobは、onCreate内で実体化させます。
また、onDestroyですべてのJobがキャンセルされるようにします。
class InstagramShareActivity : AppCompatActivity(), CoroutineScope {

    lateinit var job: Job
    override val coroutineContext: CoroutineContext
        get() = job + Dispatchers.Main

    override fun onCreate(savedInstanceState: Bundle?) {
        super.onCreate(savedInstanceState)
        job = Job()
        ...
    }

    override fun onDestroy() {
        super.onDestroy()
        (job + Dispatchers.Default).cancel()
    }
次に、getBitmapFromViewをsuspend関数にします。
    // Bitmapを保存
    private suspend fun getBitmapFromView(view: View): Bitmap {
この関数を呼ぶのは、投稿するボタンのクリックリスナーからですが、後々のことも考えて別メソッドに出しておきます。
class InstagramShareActivity : AppCompatActivity() {
    override fun onCreate(savedInstanceState: Bundle?) {
        ....
        binding.root.button_share_instagram.setOnClickListener {
            createShareImage()
        }
        ...
    }

    private fun createShareImage() {
        val dir = File(
            Environment.getExternalStoragePublicDirectory(
                Environment.DIRECTORY_PICTURES
            ), "qiita_pedometer"
        )
        launch {
            val bitmap = withContext(Dispatchers.Default) {
                getBitmapFromView(binding.root.layout_post_image)
            }
            withContext(Dispatchers.IO) {
                // ファイル保存処理
            }
        }
    }
launchで、coroutineを起動しています。
Dispatchers.Defaultは、UI(メイン)スレッドでは無いバックグラウンドスレッドを指定します。(どうやらいくつかプールされているスレッドを利用するみたいです。)
Dispatchers.IOはその名の通りIO(InputOutput:つまりファイル読み書き)用のスレッド・・・というか、別途スレッドを新しく作るそうです。詳しくは公式の説明をどうぞ。
さて続いては、ファイル保存です。
- Viewから作成したBitmapをファイル保存する(メディアファイルとして)
- LiveDataで保存ファイルを受け取る
早速InstagramShareViewModelクラスを作って実装しましょう。
class InstagramShareViewModel : ViewModel() {
    // 保存完了を貰う
    private val _savedBitmapFile = MutableLiveData<File>()
    val savedBitmapFile = _savedBitmapFile as LiveData<File>

    /**
     * bitmapを保存する
     * @param bitmap
     * @param dir ファイルを保存するディレクトリFile
     */
    @WorkerThread
    suspend fun createShareImage(bitmap: Bitmap, dir: File) {

        // タイムスタンプをファイル名にする
        val date = Date()
        val formatter = SimpleDateFormat("yyyyMMdd_HHmmss", Locale.ENGLISH)
        val filepath = File(dir, formatter.format(date) + ".jpg")
        val resultFile = saveBitmap(bitmap, filepath)
        _savedBitmapFile.postValue(resultFile)
    }
必ずUI(メイン)スレッド以外で実行されて欲しいので、@WorkerThreadアノテーションを付け、suspend関数としています。
保存するファイルの形式はjpegにすることにしました。
ファイル名はタイムスタンプを使います。よくある手ですね。
最後にLiveDataにpostValueしているのは、この処理がUI(メイン)スレッド以外で実行されているからです。
LiveDataは、UIスレッド以外からsetValueしようとするとクラッシュします。
LiveDataを更新するのがどのスレッドなのかは意識しておく必要があります。
saveBitmap関数のサンプルはこちらをどうぞ。
    private fun saveBitmap(bitmap: Bitmap, filepath: File): File? {
        // 親ディレクトリまで作成
        filepath.parentFile.mkdirs()

        val fos = FileOutputStream(filepath)
        try {
            // 書込実施
            val result = bitmap.compress(Bitmap.CompressFormat.JPEG, 100, fos)

            if (result) {
                return filepath
            }

        } catch (e: IOException) {
        } finally {
            fos.close()
        }
        return null
    }
さて、実行してみて下さい。
Instagramにシェアの画面で、投稿するボタンを押してみます。
せっかくなので、まずBitmapがちゃんと生成されているか、ブレークポイントを貼って見てみましょう。
まず、この位置にブレークポイントを設定します。

実行して止まったら、Debuggerウィンドウの右ペインVariablesにある、canvasBitmap変数の横にあるView Bitmapの部分をクリックします。

すると、こんなふうにBitmapがポップアップで表示されます!

いやはや、AndroidStudioの進化には驚きますね。
さて、画像がちゃんと生成はされていることは分かったので、そのまま実行を続けましょう。
ファイルが保存されるはず・・・
ステップ実行しているか、Logcatを見ていれば(※)分かるはずです。
クラッシュしていることを・・・
※多分、直ぐに新しいプロセスが始まってしまっているので、そのままではLogcatでエラー出力が見えませんが、もし、Logcatウィンドウに以下のように[DEAD]というプロセスが残っていたら、それを選択するとなぜ落ちたのかが分かるようになります。

エラーはこうなっているはずです。
    java.io.FileNotFoundException: /storage/emulated/0/Pictures/qiita_pedometer/20191226_192924.jpg (No such file or directory)
        at java.io.FileOutputStream.open0(Native Method)
        at java.io.FileOutputStream.open(FileOutputStream.java:308)
        at java.io.FileOutputStream.<init>(FileOutputStream.java:238)
        at java.io.FileOutputStream.<init>(FileOutputStream.java:180)
        at jp.les.kasa.sample.mykotlinapp.activity.share.InstagramShareViewModel.saveBitmap(InstagramShareViewModel.kt:85)
ファイルが書き込めていません。
ファイルが無いと言われています。
陥りがちなのは、親ディレクトリが無い場合ですが、今回はちゃんと作成しています。
        // 親ディレクトリまで作成
        filepath.parentFile.mkdirs()
なぜ?
これ、エラーが不親切なので分かりづらいのですが、
権限(permission)を宣言していないから
なのです。
4. ランタイムパーミッション
Androidには、内部/外部ストレージに書き込む場合、権限(permission)の宣言をしておかなければなりません。
どこでするかというと、AndroidManifest.xmlになります。
ストレージの書込には、以下の宣言をします。
<?xml version="1.0" encoding="utf-8"?>
<manifest xmlns:android="http://schemas.android.com/apk/res/android"
          package="jp.les.kasa.sample.mykotlinapp">

    <uses-permission android:name="android.permission.WRITE_EXTERNAL_STORAGE" />

    <application
    ...
これでストレージの読み書きが出来るようになりました。
しかし、実は、これだけでは実行できません。同じエラーでクラッシュします。
なぜか?
それは、ランタイムパーミッションのせいです。
ランタイムパーミッションという仕組みのため、ユーザーに「ストレージに書き込むから許可してね」と許可を取らなければならないのです。
このランタイムパーミッションは、「権限を必要とするタイミングで必ず毎回許可されているかチェックしなければならない」ものになっています。
アプリ起動時に一度聞いてOKしたらもうその後は要らないような気がする?
いいえ、ダメです。
アプリを起動して、権限を許可したとします。
ホームボタンを押して、アプリの設定画面を開いて、「権限」のところから、スイッチをオフにしてしまうことが出来るからです。
なので、本当に権限が必要な処理の直前に、毎回確認して、オフになっていたらまた許可を取らなければならないのです。
ということで、そのまま実装しようとすると結構煩雑になります。
しかし、PermissionsDispatcherという便利なライブラリがあるのでそちらを使いましょう。(作者さんに感謝!)
まず、dependenciesに追加します。
    // perission dispather
    implementation "org.permissionsdispatcher:permissionsdispatcher:4.6.0"
    kapt "org.permissionsdispatcher:permissionsdispatcher-processor:4.6.0"
ランタイムパーミッションを必要とするActivityクラスに、@RuntimePermissionsのアノテーションを付けます。
@RuntimePermissions
class InstagramShareActivity : AppCompatActivity() {
次に、パーミッションを必要とするメソッドに、@NeedsPermissionを付けます。
今回は、InstagramShareActivity#createShareImageに付けましょう。
なお、このアノテーションを付けるメソッドはprivateだとダメなので外します。
    @NeedsPermission(Manifest.permission.WRITE_EXTERNAL_STORAGE)
    fun createShareImage() {
そして、createShareImageを呼び出していた箇所を、次のように変更します。
        binding.root.button_share_instagram.setOnClickListener {
            createShareImageWithPermissionCheck()
        }
WithPermissionCheckというsuffixを付けます。このメソッドは一度ビルドをしないと生成されないので、まだ「そんなメソッド無い」と赤線引かれますがいったん置いておきましょう。
最後に、以下のメソッドを作成します。
    override fun onRequestPermissionsResult(requestCode: Int, permissions: Array<String>, grantResults: IntArray) {
        super.onRequestPermissionsResult(requestCode, permissions, grantResults)
        // NOTE: delegate the permission handling to generated function
        onRequestPermissionsResult(requestCode, grantResults)
    }
ビルドしてみましょう。赤線は消えましたか?
ビルドエラーが出た場合は一度clean&リビルドしてみましょう。
ビルドできたら、実行します。
「Instagramにシェア」画面で、「投稿する」ボタンを押すと、ダイアログが表示されるはずです。
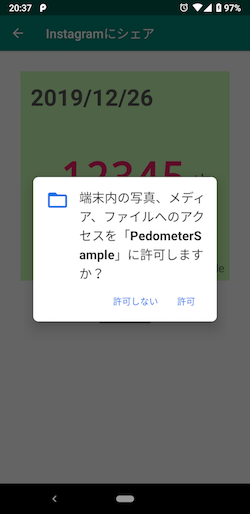
「許可しない」をタップすると、Bitmap生成とファイル保存は行われません。
もう一度「許可しない」をタップすると、「今後表示しない」というチェックボックス付きになります。ここでチェックをして「許可しない」にすると、二度と聞かれません。二度とシェアできなくなります。
ただし、設定アプリから、ユーザーが自分で「権限」からスイッチをONにすれば出来るようになります。
「許可」をタップすると、ファイルの保存が成功することが分かります。
AndroidStudioの右下に、Device File Explorerというパネルがあります。
クリックすると、デバッグ実行している端末のストレージを見ることが出来ます。
(ただし、公開ディレクトリと、自分のアプリ専用のディレクトリのみ。他はPermission deniedになります。)
sdcardフォルダのPicturesを開いてみましょう。自分が指定したディレクトリ名で、ディレクトリが出来ているはずです。
更にその下には、jpgファイルが出来ています。
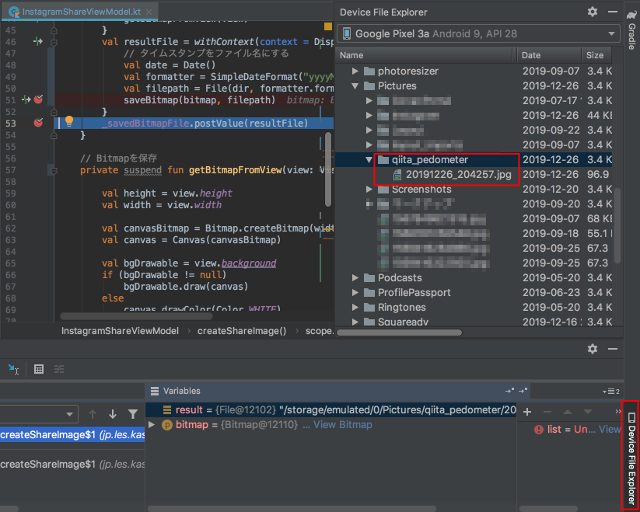
これでやっと、Instagramに投稿する画像の準備が出来ました!
Instagramに投稿する
Instagramへも、暗黙的Intentで共有することが出来ます。
InstagramAPI? GraphAPI?そんなものは不要です。
InstagramShareActivityで、InstagramShareViewModelのsavedBitmapFileを監視しましょう。
    lateinit var viewModel: InstagramShareViewModel

    override fun onCreate(savedInstanceState: Bundle?) {
        ....
        viewModel = ViewModelProviders.of(this).get(InstagramShareViewModel::class.java)

        viewModel.savedBitmapFile.observe(this, Observer { file ->
            // シェア用画像が出来た

            // フォトアルバムなどで見えるようにするため、いったんメディアスキャンを掛ける
            val contentUri = Uri.fromFile(file)
            val mediaScanIntent = Intent(Intent.ACTION_MEDIA_SCANNER_SCAN_FILE, contentUri)
            sendBroadcast(mediaScanIntent)

            // シェアインテント
            val imageFileUri = FileProvider.getUriForFile(this, "$packageName.provider", file)

            val share = Intent(Intent.ACTION_SEND)
            share.type = "image/*"
            share.putExtra(Intent.EXTRA_STREAM, imageFileUri)
            startActivity(Intent.createChooser(share, "Share to"))
        })
    }
メディアスキャンを入れているのは、コメントにあるとおり、アルバムアプリ等画像をリストアップしてくれるアプリに、直ぐに反映して貰うためです。MediaScannerConnection.scanFileを使う方法が一般的ですが、今回はコールバックを受け取る必要も無いし、ブロードキャストインテントを投げつけるだけにしておきます。
ブロードキャストインテントというのは、暗黙的インテントと似ていて、反応して欲しい情報などを設定して、一斉配信します。反応するように設定されたアプリは、基本的にすべてが反応します。
暗黙的インテントは、反応するアプリを1つだけ選ぶので、そこが違いですね。
「誰かこれ処理できる人いない?」-「あ、出来ますよ」-「じゃあお願い」
が、暗黙的インテント。
「誰かこれ出来る人処理してねー」(書類ばらまき)
が、ブロードキャストインテント。
ってな感じでしょうか(笑)
シェアインテントというコメント以降が、Instagramを起動してくれるかもしれない暗黙的インテントを投げるコードです。
Twitterの時とは違い、特殊スキームを使っていません。
今回は、画像を送りつけて反応できるアプリを選ぶことになります。
それが、Intent.ACTION_SENDというアクションの指定であり、タイプとして"image/*"を指定している箇所です。画像なので、ファイルの場所を教えてあげるため、Intent.EXTRA_STREAMというExtraDataにファイルのUriを渡しています。
ところで、このファイルのUriがちょっと曲者です。直ぐ上のコードで、val contentUri = Uri.fromFile(file)としてファイルのUri取ってるんじゃ無いの?なんで違う方法で取ってるの?と思ったことでしょう。
確かにAndroid6までは、val contentUri = Uri.fromFile(file)のコードで取得したUriでも外部アプリとファイルを共有することが出来ました(※外部に公開されているフォルダにある場合)。
しかし、Android 7以降、コンテンツプロバイダ経由でしか、外部アプリとファイルを共有することが出来なくなったのです。FileProviderというのが、コンテンツプロバイダ用のUriを返してくれるので、それを利用しているのです。
更に、ファイルの公開範囲を定めてマニフェストファイルに指定しなければなりません。
まず、res/xmlフォルダを作成して、下記のようなxmlファイルを作成して配置します。
<?xml version="1.0" encoding="utf-8"?>
<paths xmlns:android="http://schemas.android.com/apk/res/android">
	<external-path name="share_image" path="Pictures/" />
</paths>
"share_image"という名前で、ストレージの"Pictures/"ディレクトリ下のすべてを他のアプリからアクセス可能にします、という宣言ファイルになります。
他にアプリ用フォルダのキャッシュディレクトリを公開するときは、<cache-path>を使うとか、いろいろあります。
詳しくは、公式ドキュメントを参照して下さい。
次に、マニフェストファイルに、このファイルを使うように記述します。
    <application
    ...
       <provider
                android:name="androidx.core.content.FileProvider"
                android:authorities="${applicationId}.provider"
                android:exported="false"
                android:grantUriPermissions="true">
            <meta-data
                    android:name="android.support.FILE_PROVIDER_PATHS"
                    android:resource="@xml/provider_paths" />
        </provider>
これで、準備が調いました。
画像作成が終わったらアプリを選択するボトムシートが出てくるはずです。

Instagramのタイムラインは"Feed"を選びます。
無事、投稿できましたか?
尚、共有メニューにTwitterとInstagramしか用意していないのは、
- 文字だけシェアしたい → Twitterで充分
- 画像をシェアしたい → InstagramからFacebookその他にも一緒に投稿できる
という理由です。
シェアダイアログでも、他のアプリを選べますし^^
テスト
今回のテストは、以下くらいでしょうか。外部アプリとの連携はUnitTestやEspressoのUI Testでは出来ませんので。
- 設定リポジトリクラスのテスト
- 設定ファイルの新規読取り
- 設定ファイルの書き込み
- 設定ファイルの更新読取り
- 新規登録画面にシェア関連項目が追加
- 追加レイアウトのテスト
- 追加遷移のテスト
- 編集画面にシェア関連項目が追加
- 追加レイアウトのテスト
- 追加遷移のテスト
-
TwitterShareActivityのテスト- レイアウトのチェック
-
InstagramShareActivityのテスト- レイアウトのチェック
-
InstagramShareViewModelのテスト- Bitmapからのファイル保存が成功するか
早速作っていきましょう。
(0) 既存テストの修正
その前に、既存のテストがビルドエラーやテスト失敗になるので直していきます。
-
LogItemViewModelがAndroidViewModelの派生になったことによる変更点 -
ShareStatusが追加になったことによる変更点
これらが影響して、LogItemViewModelTestやMainActivityTestI(androidTest版)でエラーになります。
直し方は自分で考えてみて下さい。そんなに難しくないはずです。
答えは、Githubのリポジトリ(後段にリンクあります)で確認して下さい。
(1) 設定リポジトリクラスのテスト
SettingRepositoryはContextを必要としますが、画面は不要なので、Robolectricの出番ですね。
@RunWith(AndroidJUnit4::class)
class SettingRepositoryTest {
    private lateinit var repository: SettingRepository

    @Before
    fun setUp() {
        repository = SettingRepository(ApplicationProvider.getApplicationContext<Context>())
        repository.clear()
    }

    @After
    fun tearDown() {
        repository.clear()
    }

    @Test
    fun saveReadShareStatus() {
        val defaultData = repository.readShareStatus()
        assertThat(defaultData).isEqualToComparingFieldByField(ShareStatus())

        val newData = ShareStatus(true, true, false)
        repository.saveShareStatus(newData)
        val getData = repository.readShareStatus()
        assertThat(getData).isEqualToComparingFieldByField(newData)
    }

    @Test
    fun clear() {
        val newData = ShareStatus(true, true, false)
        repository.saveShareStatus(newData)

        repository.clear()
        val getData = repository.readShareStatus()
        assertThat(getData).isEqualToComparingFieldByField(ShareStatus())
    }
保存・読み出しのテストは、同時に行っています。どうせ相互に使うので、メソッド数節約です。
(2) 新規登録画面のテスト
1. 追加レイアウトのチェック
新規登録画面(LogInputFragment)の初期レイアウトにシェアスイッチ、Twitterチェックボックス、Instagramチェックボックスがあるのを確認します。
    @Test
    fun logInputFragment() {
         ....

        // 天気スピナー
        onView(withId(R.id.spinner_weather)).check(matches(isDisplayed()))

        // シェアスイッチ
        onView(withText(R.string.share_sns)).check(matches(isDisplayed()))
        // シェアチェックボックス
        onView(withText(R.string.label_twitter)).check(matches(isDisplayed()))
        onView(withText(R.string.label_instagram)).check(matches(isDisplayed()))

        // 登録ボタン
        onView(withText(R.string.resist)).check(matches(isDisplayed()))
    }
ここで、レイアウトの高さが足りなくなってScroolViewで囲った場合は、シェアスイッチ以降はスクロールしないと見えていない可能性があります。そうするとこのテストは失敗します。
その場合、scrollToをしておくとそのビューが見える位置までスクロールした状態にしてくれます。
        // 登録ボタン
        onView(withText(R.string.resist)).perform(scrollTo()).check(matches(isDisplayed()))
2. 選択状態の反映のチェック
初期状態と、変更状態のそれぞれ、ShareStatusと一致するかチェックします。
    /**
     * シェアスイッチ、チェックボックスの初期状態反映確認
     */
    @Test
    fun shareStatus_default() {
        // 初期状態
        activity = activityRule.launchActivity(null)

        // シェアスイッチ
        onView(withText(R.string.share_sns)).check(matches(isNotChecked()))
        // シェアチェックボックス
        onView(withText(R.string.label_twitter)).check(matches(isNotChecked()))
        onView(withText(R.string.label_instagram)).check(matches(isNotChecked()))
    }

    /**
     * シェアスイッチ、チェックボックスの変更保存確認
     */
    @Test
    fun shareStatus_change_saved() {
        // 初期状態
        activity = activityRule.launchActivity(null)

        // 変更
        onView(withText(R.string.share_sns)).perform(click())
        onView(withText(R.string.label_twitter)).perform(click())

        // 登録ボタンを押したら保存されること
        onView(withId(R.id.edit_count)).perform(replaceText("12345"))
        onView(withText(R.string.resist)).perform(click())

        val status = settingRepository.readShareStatus()
        assertThat(status).isEqualToComparingFieldByField(ShareStatus(true, true, false))
    }

    /**
     * シェアスイッチ、チェックボックスの保存状態反映確認
     */
    @Test
    fun shareStatus() {

        settingRepository.saveShareStatus(
            ShareStatus(
                doPost = true,
                postTwitter = true, postInstagram = true
            )
        )

        activity = activityRule.launchActivity(null)

        // シェアスイッチ
        onView(withText(R.string.share_sns)).check(matches(isChecked()))
        // シェアチェックボックス
        onView(withText(R.string.label_twitter)).check(matches(isChecked()))
        onView(withText(R.string.label_instagram)).check(matches(isChecked()))
    }
ここまでのテストは、Robolectricでも同じ書き方でテストできます。
3. Twitterチェック時の戻りIntentの確認
登録ボタンを押したら、シェアスイッチがオンで、Twitterがチェックされている場合、Twitter共有画面に遷移しなければなりません。
そのための情報をきちんと返しているかを確認します。
    @Test
    fun shareTwitterResult() {
        activity = activityRule.launchActivity(null)

        // 変更
        onView(withText(R.string.share_sns)).perform(click())
        onView(withText(R.string.label_twitter)).perform(click())
        // 取り敢えず歩数だけ入れて登録
        onView(withId(R.id.edit_count)).perform(replaceText("12345"))

        onView(withId(R.id.button_update)).perform(click())

        val data = activityRule.activityResult.resultData.getSerializableExtra(LogItemActivity.EXTRA_KEY_SHARE_STATUS)
        assertThat(data).isNotNull()
        assertThat(data is ShareStatus).isTrue()
        assertThat(data).isEqualToComparingFieldByField(ShareStatus(true, true, false))
    }
4. その他チェック時の戻りIntentの確認
パターンとしては、
- Instagramにのみチェック
- 両方にチェック
- シェアスイッチがオフ
があります。
Twitterの時とほぼ同じで書けるので、ここでは割愛します。
Githubのサンプルコードをご参照下さい。
ここの部分のテストは、Robolectricで書く場合は、activityRule.activityResult.resultDataで戻りIntentを取得できないので、ActivityScenarioを使った方法にする必要があります。
例として、shareTwitterResultテストのRobolectric版を記載しておきます。
    @Test
    fun shareTwitterResult() {
        val scenario = ActivityScenario.launch<LogItemActivity>(Intent(context, LogItemActivity::class.java))

        // Robolectricでは、ActivityRule#getActivityResultでresultが取れなかった
        // この方法なら取れたので、こちらにしてある。
        // 同じコードは逆に、androidTestでは動かない
        scenario.onActivity { activity ->
            // 変更
            onView(withText(R.string.share_sns)).perform(click())
            onView(withText(R.string.label_twitter)).perform(click())
            // 取り敢えず歩数だけ入れて登録
            onView(withId(R.id.edit_count)).perform(replaceText("12345"))

            onView(withId(R.id.button_update)).perform(click())
        }

        val data = scenario.result.resultData.getSerializableExtra(LogItemActivity.EXTRA_KEY_SHARE_STATUS)
        assertThat(data).isNotNull()
        assertThat(data is ShareStatus).isTrue()
        assertThat(data).isEqualToComparingFieldByField(ShareStatus(true, true, false))
    }
(3) メイン画面のテスト
新規登録画面から戻った際の、各遷移の確認をします。この動作はMainActivityのものなので、MainActivityのテストとして書きます。
基本的には、既にonActivityResultテストでやっているように、戻りインテントを偽装して、onActivityResultを走らせる流れになります。
1. シェア有り(片方)で戻った場合
Twitterシェア遷移のみのテスト。
一度登録画面を起動させてからTwitterシェア画面の起動をチェックすることになるので、ActivityMonitorを二画面分セットする必要があるのがこれまでとは違うところです。
    @Test
    fun onActivityResult_NoneShare() {
        val resultData = Intent().apply {
            putExtra(LogItemActivity.EXTRA_KEY_DATA, StepCountLog("2019/06/19", 666, LEVEL.BAD, WEATHER.SNOW))
            putExtra(LogItemActivity.EXTRA_KEY_SHARE_STATUS, ShareStatus(true, true, false))
        }

        val monitor = Instrumentation.ActivityMonitor(
            LogItemActivity::class.java.canonicalName, null, false
        )
        getInstrumentation().addMonitor(monitor)

        // 登録画面を起動
        onView(
            Matchers.allOf(withId(R.id.add_record), withContentDescription("記録を追加"))
        ).perform(click())

        val resultActivity = getInstrumentation().waitForMonitorWithTimeout(monitor, 500L)

        // Twitterシェア画面起動確認用のモニタ
        val shareMonitor = Instrumentation.ActivityMonitor(
            TwitterShareActivity::class.java.canonicalName, null, false
        )
        getInstrumentation().addMonitor(shareMonitor)

        // 登録画面に結果をセットして終了させる
        resultActivity.setResult(Activity.RESULT_OK, resultData)
        resultActivity.finish()

        getInstrumentation().waitForIdleSync()

        // Twitterシェア画面起動を確認
        val shareActivity = getInstrumentation().waitForMonitorWithTimeout(shareMonitor, 500L) as TwitterShareActivity
        assertThat(shareMonitor.hits).isEqualTo(1)
        assertThat(shareActivity).isNotNull()
    }
Instagramシェア遷移のみのテストは、Twitterの場合とほぼ同じで書けるので割愛します。
サンプルコードはGithubに上げてあります。
2. シェア無しで戻った場合
他のActivityが起動していないことの確認になりますので、最後の確認ロジックだけ違いますが、やることはほぼ同じです。
    @Test
    fun onActivityResult_NoneShare() {
        val resultData = Intent().apply {
            putExtra(LogItemActivity.EXTRA_KEY_DATA, StepCountLog("2019/06/19", 666, LEVEL.BAD, WEATHER.SNOW))
            putExtra(LogItemActivity.EXTRA_KEY_SHARE_STATUS, ShareStatus(false, true, true))
        }

        val monitor = Instrumentation.ActivityMonitor(
            LogItemActivity::class.java.canonicalName, null, false
        )
        getInstrumentation().addMonitor(monitor)

        // 登録画面を起動
        onView(
            Matchers.allOf(withId(R.id.add_record), withContentDescription("記録を追加"))
        ).perform(click())

        val resultActivity = getInstrumentation().waitForMonitorWithTimeout(monitor, 500L)

        // Twitter/Instagramシェア画面起動確認用のモニタ
        val shareMonitor = Instrumentation.ActivityMonitor(
            TwitterShareActivity::class.java.canonicalName, null, false
        )
        getInstrumentation().addMonitor(shareMonitor)
        val shareMonitor2 = Instrumentation.ActivityMonitor(
            InstagramShareActivity::class.java.canonicalName, null, false
        )
        getInstrumentation().addMonitor(shareMonitor2)

        // 登録画面に結果をセットして終了させる
        resultActivity.setResult(Activity.RESULT_OK, resultData)
        resultActivity.finish()

        getInstrumentation().waitForIdleSync()

        // シェア画面起動なしを確認
        val shareActivity = getInstrumentation().waitForMonitorWithTimeout(shareMonitor, 500L)
        val shareActivity2 = getInstrumentation().waitForMonitorWithTimeout(shareMonitor2, 500L)
        assertThat(shareMonitor.hits).isEqualTo(0)
        assertThat(shareMonitor2.hits).isEqualTo(0)
        assertThat(shareActivity).isNull()
        assertThat(shareActivity2).isNull()
    }
ついでに、ShareStatusのpostTwitterやpostInstagramがtrueであっても、doPostがfalseならばシェアは行われないテストにもなっています。
3. シェアあり(両方)で戻った場合
特殊なのがこの遷移ですが、これまでのテストの流れを繰り返すだけなので、それほど難しくはないはずです。
    @Test
    fun onActivityResult_ShareAll() {
        val resultData = Intent().apply {
            putExtra(LogItemActivity.EXTRA_KEY_DATA, StepCountLog("2019/06/19", 666, LEVEL.BAD, WEATHER.SNOW))
            putExtra(LogItemActivity.EXTRA_KEY_SHARE_STATUS, ShareStatus(true, true, true))
        }

        val monitor = Instrumentation.ActivityMonitor(
            LogItemActivity::class.java.canonicalName, null, false
        )
        getInstrumentation().addMonitor(monitor)

        // 登録画面を起動
        onView(
            Matchers.allOf(withId(R.id.add_record), withContentDescription("記録を追加"))
        ).perform(click())

        val resultActivity = getInstrumentation().waitForMonitorWithTimeout(monitor, 500L)

        // Twitter/Instagramシェア画面起動確認用のモニタ
        val shareMonitor = Instrumentation.ActivityMonitor(
            TwitterShareActivity::class.java.canonicalName, null, false
        )
        getInstrumentation().addMonitor(shareMonitor)
        val shareMonitor2 = Instrumentation.ActivityMonitor(
            InstagramShareActivity::class.java.canonicalName, null, false
        )
        getInstrumentation().addMonitor(shareMonitor2)

        // 登録画面に結果をセットして終了させる
        resultActivity.setResult(Activity.RESULT_OK, resultData)
        resultActivity.finish()

        getInstrumentation().waitForIdleSync()

        // Twitterシェア画面起動を確認
        val shareActivity = getInstrumentation().waitForMonitorWithTimeout(shareMonitor, 500L)
                as TwitterShareActivity
        assertThat(shareMonitor.hits).isEqualTo(1)
        assertThat(shareActivity).isNotNull()

        // Twitterシェア画面の戻りは自動でセット(そのまま返る)
        shareActivity.finish()

        getInstrumentation().waitForIdleSync()

        // Instagramシェア画面起動を確認
        val shareActivity2 = getInstrumentation().waitForMonitorWithTimeout(shareMonitor2, 500L)
                as InstagramShareActivity
        assertThat(shareMonitor2.hits).isEqualTo(1)
        assertThat(shareActivity2).isNotNull()
    }
なお、ここまでのテストは、Robolectricではテストが出来ません。(というか出来る実装方法を見つけられなかった)
(4) 編集画面のテスト
続いて、編集画面のテストです。
やることは新規登録画面とほぼ同じですが、レイアウトの変更がメニューアイコンであること、遷移が直接起こること、が違いでしょうか。
1. シェアメニューのチェック
メニューアイコンが表示されているかのチェックをします。
    @Test
    fun logEditFragment() {
        ....
        // メニューアイコン
        onView(
            Matchers.allOf(withId(R.id.share_sns), withContentDescription("共有"))
        ).check(matches(isDisplayed()))
    }
このテストはRobolectricでも同じです。
2. シェアメニューダイアログのチェック
まずメニューアイコンをタップしたときにダイアログが表示されるかのテストをします。
ダイアログには"Twitter", "Instagram"がリスト表示されているので、その二つの文字列があるかのチェックとします。
    @Test
    fun logEditShareMenuClick() {
        // データをセットしてから起動
        val intent = Intent().apply {
            putExtra(LogItemActivity.EXTRA_KEY_DATA, StepCountLog("2019/06/22", 456, LEVEL.BAD, WEATHER.HOT))
        }
        activity = activityRule.launchActivity(intent)

        // メニューアイコンタップ
        onView(
            Matchers.allOf(withId(R.id.share_sns), withContentDescription("共有"))
        ).perform(click())

        // ダイアログの表示をチェック
        onView(withText("Twitter")).check(matches(isDisplayed()))
        onView(withText("Instagram")).check(matches(isDisplayed()))

        // キャンセルできる
        pressBack()

        onView(withText("Twitter")).check(doesNotExist())
        onView(withText("Instagram")).check(doesNotExist())
    }
ついでにキャンセルできることも確認しています。
Robolectricでのテストでは、DialogのViewを確認できない問題があるので、専用の書き方をする必要がありましたね。
参考までに、ダイアログの表示チェック部分だけ載せておきます。
        // ダイアログの表示をチェック
        // RobolectricはAlertDialogのビューを拾えない・・・
        val alert = ShadowAlertDialog.latestAlertDialog!!
        assertThat(alert.isShowing).isTrue()
        val shadowAlertDialog = shadowOfAlert(alert)
        val items = shadowAlertDialog.getItems()!!
        assertThat(items.size).isEqualTo(2)
        assertThat(items[0]).isEqualTo("Twitter")
        assertThat(items[1]).isEqualTo("Instagram")
3. 共有先選択時のテスト
Twitterシェア画面が起動するのを確認します。
    @Test
    fun logEditShare_Twitter() {
        // データをセットしてから起動
        val intent = Intent().apply {
            putExtra(LogItemActivity.EXTRA_KEY_DATA, StepCountLog("2019/06/22", 456, LEVEL.BAD, WEATHER.HOT))
        }
        activity = activityRule.launchActivity(intent)

        // メニューアイコンタップ
        onView(
            Matchers.allOf(withId(R.id.share_sns), withContentDescription("共有"))
        ).perform(click())

        // ResultActivityの起動を監視
        val monitor = Instrumentation.ActivityMonitor(
            TwitterShareActivity::class.java.canonicalName, null, false
        )
        InstrumentationRegistry.getInstrumentation().addMonitor(monitor)

        // ダイアログのリストをタップ
        onView(withText("Twitter")).perform(click())
        InstrumentationRegistry.getInstrumentation().waitForIdleSync()

        // ResultActivityが起動したか確認
        val resultActivity =
            InstrumentationRegistry.getInstrumentation().waitForMonitorWithTimeout(monitor, 1000L)
        assertThat(monitor.hits).isEqualTo(1)
        assertThat(resultActivity).isNotNull()
    }
Instagram選択時も全く同じに書けるので割愛します。
Robolectricで書く場合は、ダイアログの操作方法が異なるのと、resultActivityが取れないので注意してください。
ダイアログの操作には、shadowAlertDialog.clickOnItemを使えば良いです。
(5) Twitterシェア画面のテスト
1. レイアウトのテスト
ここでテストするのは、
- レイアウト
- 起動Intentに設定されたデフォルト文字列の反映チェック
くらいです。単純ですね。
@RunWith(AndroidJUnit4::class)
class TwitterShareActivityTestI {
    @get:Rule
    val activityRule = ActivityTestRule(TwitterShareActivity::class.java, false, false)

    @Test
    fun layout() {
        val text = "2019/06/28 は 12335歩 歩きました。気分は上々。"
        val intent = Intent().apply {
            putExtra(
                TwitterShareActivity.KEY_TEXT,
                text
            )
        }
        activityRule.launchActivity(intent)

        onView(withText(text)).check(matches(isDisplayed()))
        Espresso.onView(withText(R.string.label_tweet))
            .check(matches(isDisplayed()))
    }

    @Test
    fun edit() {
        val text = "2019/06/28 は 12335歩 歩きました。気分は上々。"
        val intent = Intent().apply {
            putExtra(
                TwitterShareActivity.KEY_TEXT,
                text
            )
        }
        activityRule.launchActivity(intent)

        onView(ViewMatchers.withId(R.id.editText_share_message)).perform(ViewActions.replaceText("テキスト変更"))
        onView(withText("テキスト変更")).check(matches(isDisplayed()))
    }

        @Test
    fun finishWithIntent() {
        val intent = Intent().apply {
            putExtra(
                LogItemActivity.EXTRA_KEY_DATA,
                StepCountLog("2019/06/13", 12345, LEVEL.GOOD)
            )
            putExtra(
                LogItemActivity.EXTRA_KEY_SHARE_STATUS,
                ShareStatus(true, false, true)
            )
        }

        val activity = activityRule.launchActivity(intent)
        InstrumentationRegistry.getInstrumentation().waitForIdleSync()
        activity.finish()

        val resultData = activityRule.activityResult.resultData
        assertThat(resultData).isNotNull()

        val extraData = resultData.getSerializableExtra(LogItemActivity.EXTRA_KEY_DATA) as StepCountLog
        assertThat(extraData).isNotNull()
        assertThat(extraData).isEqualToComparingFieldByField(StepCountLog("2019/06/13", 12345, LEVEL.GOOD))

        val extraData2 = resultData.getSerializableExtra(LogItemActivity.EXTRA_KEY_SHARE_STATUS) as ShareStatus
        assertThat(extraData2).isNotNull()
        assertThat(extraData2).isEqualToComparingFieldByField(ShareStatus(true, false, true))
    }
}
あまり意味はありませんがテキスト変更のテストも入れました。
Robolectricも同じコードで行けます。
投稿ボタンを押したらTwitterアプリが起動するか、snackbarが出るかですが、他のアプリが起動したかどうかのテストはEspressoでは書けません。また、Snackbarが出ているかのチェックも、ググるとちらほら情報があって実際に使ったこともあるのですが、OSが新しいと(9以降だったかな)取れなかったりしたので、今回はやっていません。
この辺は手動テストでやるしかないですね。
2. 戻りIntentのセット内容のテスト
finish()メソッドで受け取ったIntentをそのまま戻しているはずなので、それもテストしましょう。
    @Test
    fun finishWithIntent() {
        val intent = Intent().apply {
            putExtra(
                LogItemActivity.EXTRA_KEY_DATA,
                StepCountLog("2019/06/13", 12345, LEVEL.GOOD)
            )
            putExtra(
                LogItemActivity.EXTRA_KEY_SHARE_STATUS,
                ShareStatus(true, false, true)
            )
        }

        val activity = activityRule.launchActivity(intent)
        InstrumentationRegistry.getInstrumentation().waitForIdleSync()
        activity.finish()

        assertThat(activityRule.activityResult.resultCode).isEqualTo(Activity.RESULT_OK)
        val resultData = activityRule.activityResult.resultData
        assertThat(resultData).isNotNull()

        val extraData = resultData.getSerializableExtra(LogItemActivity.EXTRA_KEY_DATA) as StepCountLog
        assertThat(extraData).isNotNull()
        assertThat(extraData).isEqualToComparingFieldByField(StepCountLog("2019/06/13", 12345, LEVEL.GOOD))

        val extraData2 = resultData.getSerializableExtra(LogItemActivity.EXTRA_KEY_SHARE_STATUS) as ShareStatus
        assertThat(extraData2).isNotNull()
        assertThat(extraData2).isEqualToComparingFieldByField(ShareStatus(true, false, true))
    }
このテストはRobolectricでは戻りインテントの取り方を少し変えないと行けません。
    @Test
    fun finishWithIntent() {
        val context = ApplicationProvider.getApplicationContext<Application>()
        val intent = Intent(context, TwitterShareActivity::class.java).apply {
            putExtra(
                LogItemActivity.EXTRA_KEY_DATA,
                StepCountLog("2019/06/13", 12345, LEVEL.GOOD)
            )
            putExtra(
                LogItemActivity.EXTRA_KEY_SHARE_STATUS,
                ShareStatus(true, false, true)
            )
        }

        val scenario = ActivityScenario.launch<TwitterShareActivity>(intent)

        // Robolectricでは、ActivityRule#getActivityResultでresultが取れなかった
        // この方法なら取れたので、こちらにしてある。
        // 同じコードは逆に、androidTestでは動かない
        scenario.onActivity { activity ->

            activity.finish()
        }

        Assertions.assertThat(scenario.result.resultCode).isEqualTo(Activity.RESULT_OK)

        val resultData = scenario.result.resultData
        Assertions.assertThat(resultData).isNotNull()

        val extraData = resultData.getSerializableExtra(LogItemActivity.EXTRA_KEY_DATA) as StepCountLog
        Assertions.assertThat(extraData).isNotNull()
        Assertions.assertThat(extraData).isEqualToComparingFieldByField(StepCountLog("2019/06/13", 12345, LEVEL.GOOD))

        val extraData2 = resultData.getSerializableExtra(LogItemActivity.EXTRA_KEY_SHARE_STATUS) as ShareStatus
        Assertions.assertThat(extraData2).isNotNull()
        Assertions.assertThat(extraData2).isEqualToComparingFieldByField(ShareStatus(true, false, true))
    }
(6) Instagramシェア画面のテスト
この画面でテストするのは、
- レイアウト
- 文字列の反映チェック
- 投稿ボタンを押してViewModelのsavedBitmapが更新される
です。
1. レイアウトと文字列の反映チェック
特に新しいものは無いですね。
@RunWith(AndroidJUnit4::class)
class InstagramShareActivityTest {

    @get:Rule
    val activityRule = ActivityTestRule(InstagramShareActivity::class.java, false, false)

    lateinit var activity: InstagramShareActivity

    @Test
    fun layout() {
        val intent = Intent().apply {
            putExtra(
                InstagramShareActivity.KEY_STEP_COUNT_DATA,
                StepCountLog("2019/06/22", 456, LEVEL.BAD, WEATHER.HOT)
            )
        }
        activity = activityRule.launchActivity(intent)

        onView(withText("2019/06/22")).check(matches(isDisplayed()))
        onView(withText("456")).check(matches(isDisplayed()))
        onView(withText("歩")).check(matches(isDisplayed()))
        onView(withText(R.string.app_copyright)).check(matches(isDisplayed()))
        onView(withText(R.string.label_post)).check(matches(isDisplayed()))
    }
}
Robolectric版も同じで行けます。
2. 投稿ボタンのクリックテスト
ここは少し特殊になります。
そのままだと、最後に共有アプリを選択するボトムシートが出てきてしまって、あれはアプリでなく別のプロセスが出しているため、テストが終わった後もボトムシートが残ってしまいます。
そこで、いったんViewModelのsavedBitmapFileに設定されたObserverを削除してしまいます。
その後で、テスト用に設定して、パスが入っていることを確認します。尚、パスの正確性についてはここではチェックしません。
ActivityクラスのテストでViewModelの監視をするのもどうかとは思うのですが、ボタンを押したテストが無いとなあ・・・と思ってこうしました。こういう場合ってどうしたら良いんでしょうね?
ファイルが実際に出来てしまうし・・・
    @get:Rule
    val rule = InstantTaskExecutorRule()

    @get:Rule
    var grantPermissionRule = GrantPermissionRule.grant(
        Manifest.permission.WRITE_EXTERNAL_STORAGE,
        Manifest.permission.READ_EXTERNAL_STORAGE
    )

    @Test
    fun post() {
        val intent = Intent().apply {
            putExtra(
                InstagramShareActivity.KEY_STEP_COUNT_DATA,
                StepCountLog("2019/06/22", 456, LEVEL.BAD, WEATHER.HOT)
            )
        }
        activity = activityRule.launchActivity(intent)


        // activityに反応させないため、いったんすべての監視者を削除
        activity.viewModel.savedBitmapFile.removeObservers(activity)

        // テスト用の監視
        val testObserver = TestObserver<File>(1)
        activity.viewModel.savedBitmapFile.observeForever(testObserver)

        onView(withText(R.string.label_post)).perform(click())

        testObserver.await()

        assertThat(activity.viewModel.savedBitmapFile.value).isFile()

        activity.viewModel.savedBitmapFile.removeObserver(testObserver)
    }
LiveDataの監視はメインスレッドで実行しないといけないので、
    @get:Rule
    val rule = InstantTaskExecutorRule()
を追加しています。
次のgrantPermissionRuleルールも追加が必要です。
    @get:Rule
    var grantPermissionRule = GrantPermissionRule.grant(
        Manifest.permission.WRITE_EXTERNAL_STORAGE,
        Manifest.permission.READ_EXTERNAL_STORAGE
    )
これは、ランタイムパーミッションを自動的に付与するものになります。
あのダイアログもアプリの表示ではないので、出てしまうともうテストが出来ないのです。
ということで、強制的に付与するしかありません。
ランタイムパーミッションの権限付与周りは、手動テストをするしかないということになります。
このテストもRobolectricで同じコードで行けるようです。
(7) InstagramShareViewModelのテスト
このクラスのテストは、実はInstagramシェア画面のテストでも出来てしまっているのですが、単体テストの意味もあり、ファイルが実際にできているところまで確認することにします。
このテストはRobolecticで書きます。
Bitmapは2x2くらいにでもしておきましょう。
ただし、RobolecticがShadowBitmapでダミーのBitmapを返すので、あまり意味はないですが(汗)
@RunWith(AndroidJUnit4::class)
class InstagramShareViewModelTest {
    @get:Rule
    val rule: TestRule = InstantTaskExecutorRule()

    lateinit var viewModel: InstagramShareViewModel

    @Before
    fun setUp() {
        viewModel = InstagramShareViewModel()
    }

    @Test
    fun createShareImage() {
        val bitmap = Bitmap.createBitmap(2, 2, Bitmap.Config.RGB_565)

        val time = System.currentTimeMillis()

        // テスト用の出力ディレクトリはアプリのキャッシュディレクトリとする
        val dir = ApplicationProvider.getApplicationContext<Context>().cacheDir
        runBlocking {
            viewModel.createShareImage(bitmap, dir)
        }

        // パスセットの確認
        val value = viewModel.savedBitmapFile.value
        assertThat(value).isNotNull().isFile()
        assertThat(value!!.parent).isNotNull().isEqualTo(dir.absolutePath)

        // 拡張子とファイル名の確認
        val ext = value.extension
        val bodyName = value.name.replace(ext, "")
        val formatter = SimpleDateFormat("yyyyMMdd_HHmmss", Locale.ENGLISH)
        val bodyTimeStamp = formatter.parse(bodyName)

        assertThat(ext).isEqualTo("jpg")

        // 処理直前の時間と僅差であることの確認
        assertThat(bodyTimeStamp.time).isCloseTo(time, Offset.offset(1000L))

        // ファイルが出来ているかの確認
        val savedBitmap = BitmapFactory.decodeFile(value.absolutePath)
        assertThat(savedBitmap).isNotNull()
        // 画像が一致するかなどは、Robolectricがダミー画像を作って返すためチェック出来ない。
    }
}
ファイル書込もRobolectricならばモックしてくれるようなので、ストレージを汚さずに済みますね。
ブレークポイントを貼って、ApplicationProvider.getApplicationContext<Context>().cacheDirの値をデバッガーで見てみると、いわゆるアプリのディレクトリを指す/data/data/<package_name>/cacheではないことが分かります。
(8) 総確認
過去に作ったのも含め、すべてのテストを実行してみましょう。
すべて成功しましたか?
・・・実は、Robolectric版のLogItemActivityTestで、以下の4つのテストが必ず失敗します。
- LogItemActivityTest.shareStatus_change_saved
- LogItemActivityTest.shareStatus
- LogItemActivityTest.shareNoneResult
- LogItemActivityTest.shareInstagramResult
しかし、個別に一個ずつ実行すると成功するのです。
どうやら、設定ファイルのShareStatusの状態が次のテストに引き継がれてしまっていて、それで前提条件が違ってしまっているために起こっているようです。clearを呼んでるけど、なんでかなあ・・・?
androitTest版では成功するし。
しばらく悩んだのですが、
SettingsRepositoryのインスタンスが違うからダメなのでは?
と予測。
ViewModelにあるSettingsRepositoryのインスタンスと、テストクラスにあるSettingsRepositoryのインスタンスが同じになるようにしたらどうなるだろうか??
ということで、シングルトンにしてみたら・・・
class SettingRepository private constructor(private val applicationContext: Context) {
    companion object {
        const val PREF_FILE_NAME = "settings"

        private var instance: SettingRepository? = null

        fun getInstance(applicationContext: Context): SettingRepository {
            if (instance == null)
                instance = SettingRepository(applicationContext)
            return instance!!
        }
    }
成功するようになりました(^-^)
ここでこういう予測が出来ます。
SharedPreference.Editor#applyを使うといったんメモリ上を書き変え、適宜タイミングを見て実際のファイルに書き込む、ということが行われています。これが、SettingsRepositoryのインスタンスが異なることで、影響してしまっているのでは・・・?と。
commitは実際にファイルを書き換えますが、AndroidStudioでは「applyを使え」と警告されますね。
そして・・・applyをcommitに書き変えても、改善されませんでした(泣)
どうやら、RobolectricがSharedPreferenceを何かモックしている関係で、別インスタンスだと整合性がとれなくなるのだろう、と結論づけました。
そんなわけで、シングルトンに修正しても良いですが・・・
androidTestではシングルトンじゃなくても通るテストです。
Robolectric用にシングルトンでなければならないだけで、アプリ内部ではそうである必要は無い。
なので、テストに合わせて本体を書き変えるという本末転倒っぽい状態でもあります。
どうするかは、個人の好み、開発チームの意向で決まってくるでしょう。
しかしまあ、シングルトンであってもアプリ的にはそれでも問題はないのと、コードの参考用に、Githubへはシングルトンバージョンでpushしておきます。
この後DIとかしていくときにはやっぱりシングルトンにするかもしれないし(汗)
ただし!
安易にシングルトンを使うことはオススメしません。
というのも、どこからも参照されないstaticな変数は、AndroidOSの場合、いつ何時解放されるか分からないのです。
私は実際、とあるアプリケーションを特定の端末で動かしたときに、ホームボタン押下でアプリを非表示にするだけで、あるクラスがごっそりアンロードされてしまい、staticな変数にセットした値が軒並みデフォルト値に戻ってしまうという現象に行き当たったことがあります。ここで重要なのは、アプリケーションのプロセス自体は生きているのに(当然アプリケーションクラスは破棄されていない) 、どこからも参照されてないから、という理由で、クラスごとメモリからアンロードされてしまった、ということです。
(他のメンバーには何度説明しても「本当にそんなこと起こるの?」と信じて貰えませんでしたが・・・)
そのクラスへのアクセスが発生したタイミングでもちろん再ロードされますが、その時はクラスは初期状態に戻ってしまっているのです。
static変数を使うのは、変化がない定数だけにすべき、という説も良く聞くと思いますが、まさにこのためなのです。
今回は、テスト中は、SettingRepositoryへの参照が切れることはないという点(テストクラスが参照を持っているから)、アプリ実行の際には、例え参照が切れてstaticなinstanceが再生成されても、実害は無いという点から、シングルトン化も有り、という判断です。
まとめ
暗黙的Intentで、SNS連携する方法について学びました。
また、画像を作って、外部連携できる場所に保存すること、その外部連携方法について学びました。
更には、ランタイムパーミッションの処理についても学びました。
ここまでの状態のプロジェクトをGithubにpushしてあります。
https://github.com/le-kamba/qiita_pedometer/tree/feature/qiita_06
また、今回、画像は固定の画像を使いましたが、カメラで撮影した画像を取得して使いたいですよね。
その機能については、番外編の記事で実は触れています。是非、組み合わせて入れてみて下さい。
Androidで文字認識(数字)をやってみた
予告
Databaseを実際に内臓ストレージに作っては消し、とやっているテストが気になるので、DI(Dependency Injection/依存性注入)の導入をしてみようと思います。
DIってなんぞや?というのは予習しておくといいかも知れません。
なお、使うのはKoinの予定です。
参考ページなど
-
SDKを使わないでSNSに投稿する
https://qiita.com/le_skamba/items/c9810a0e6df27097d502 -
Android Intents ・ Instagram
https://www.instagram.com/developer/mobile-sharing/android-intents/ -
TextView, EditTextの装飾(swatanabeのIT技術ブログ)
http://www.s-watanabe.work/article/461362131.html -
MediaScannerに登録を依頼する方法
https://qiita.com/wasnot/items/ae1e6282d2c33626b604 -
Android 画像ファイルを扱う際のFileとUriまとめ
https://qiita.com/wakamesoba98/items/98b79bdfde19612d12b0