これは何?
- Kotlin*SpringBootでAWS触るコードがあんまりなかったので投稿
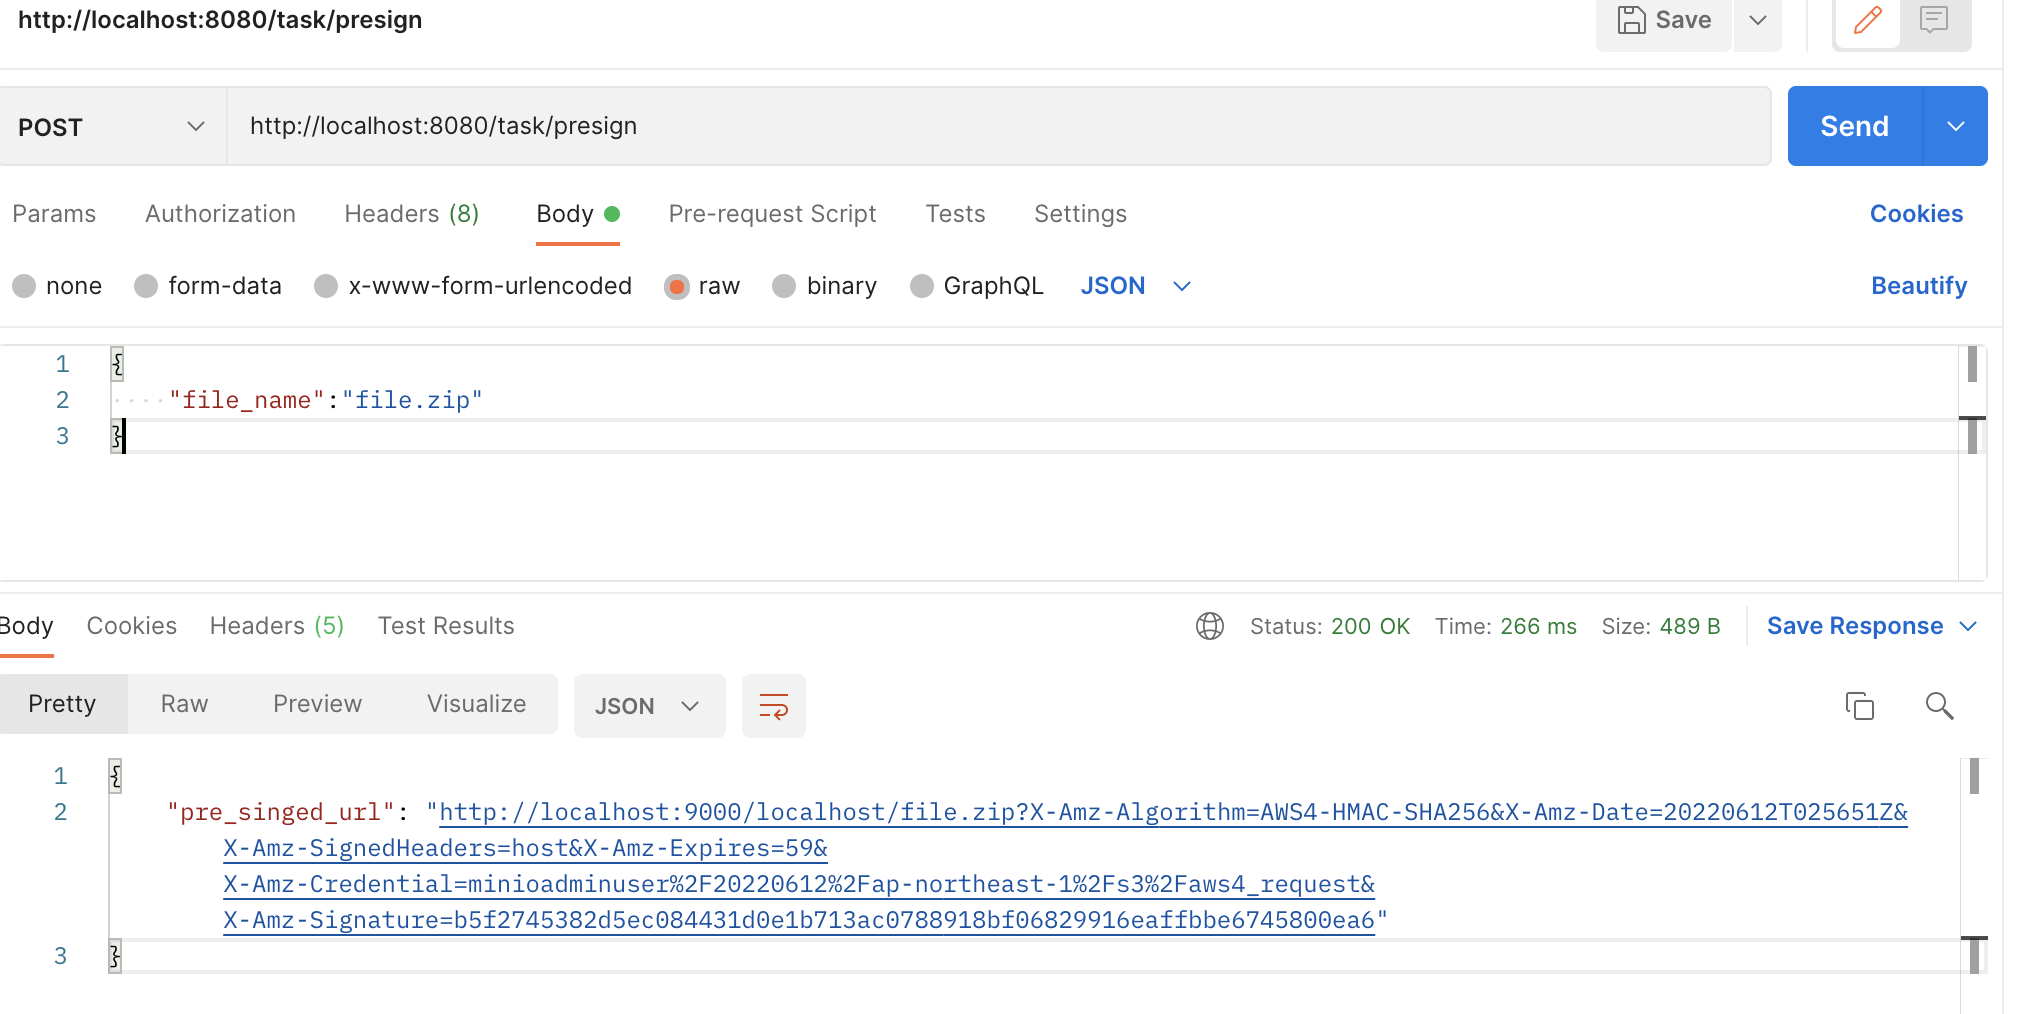
- ネタは「署名付きURLの生成」
前置き
CleanArchitectureを(自信ないながらも)採用しております。
またAWSとは関係ないところで、下記2点の書き方してます。
Kotlin+SpirngBoot+AWSの本質とはまた別なのでコード読む際の参考までに...
- 設定ファイル(application.yml)からs3Client生成用設定値を取得している
- エンドポイントとか、タイムアウトとか...
- 設定ファイルを分けることで、環境ごとに設定値を分けられるようにしてる
- うまいことGradle書いてモジュール分割(domain/usecase/infra/presentation)している
- CleanArchitectureの層間の依存を明示的に示すため
- build.gradleのdependenciesで管理
- 参考はタケハタさんのこのブログ
- ↑Kotlin サーバーサイドプログラミング実践開発の筆者
- CleanArchitectureの層間の依存を明示的に示すため
利用技術
- SpringBoot2.6.4
- Kotlin(JDKは17)
- amazon-sdk-for-java 1.12.231
リポジトリ
利用手順
- git clone
- ルートディレクトリでdocker-compose up
- gradlew :presetation:bootRun
- 下記のように実行
コードピックアップして解説
docker-compose.yml
docker-composeでminioを呼んで実行します。
こちらのサイトを参考にしてます。
version: '3.9'

services:
  #https://qiita:com/reflet/items/3e0f07bc9d64314515c1: 参考
  minio:
    image: 'minio/minio'
    container_name: minio
    environment:
      MINIO_ROOT_USER: minioadminuser
      MINIO_ROOT_PASSWORD: minioadminpassword
    entrypoint: sh
    command: -c "
      mkdir -p /data/.minio.sys/buckets;
      cp -r /policies/* /data/.minio.sys/;
      cp -r /export/* /data/;
      /opt/bin/minio server /data --address :9000 --console-address :9001
      "
    volumes:
      - ./docker/minio/data:/data
      - ./docker/minio/export:/export
      - ./docker/minio/config:/root/.minio
      - ./docker/minio/policies:/policies
    ports:
      - '9000:9000'
      - '9001:9001'
domain
infra層に向けて公開するinterfaceを用意。
ITaskDetailCsvRepository.kt
interface ITaskDetailCsvRepository {
    fun prepareForSecureUpload(dirName: String, fileName: String): String
}
infra(Repository)
S3Clientを作成し、Bean生成しSpringのコンテナに登録します。
Beanはアプリケーション起動時に生成されます。
StorageConfig.kt
@Configuration
class StorageConfig {

    //application.ymlから取得する値群
    @Value("\${s3.credential.accessKey}")
    val accessKey: String = ""

    @Value("\${s3.credential.secretKey}")
    val secretKey: String = ""

    @Value("\${s3.region}")
    val region: String? = ""

    @Value("\${s3.endPoint}")
    val endPoint: String = ""

    @Value("\${s3.bucketName}")
    val bucketName: String = ""

    @Value("\${s3.connectionTimeout}")
    val connectionTimeout: Int = 0

    @Value("\${s3.readTimeout}")
    val readTimeout: Int = 0

    //s3Client生成
        //Beanに登録
    @Bean
    fun getClient(): AmazonS3 {

        // 設定ファイルから
        val credentials = BasicAWSCredentials(accessKey, secretKey)
        val endpointConfiguration = EndpointConfiguration(endPoint, region)
        val clientConfiguration = ClientConfiguration()
        clientConfiguration.connectionTimeout = connectionTimeout
        clientConfiguration.requestTimeout = readTimeout

        val client = AmazonS3ClientBuilder.standard()
            .withEndpointConfiguration(endpointConfiguration)
            .withPathStyleAccessEnabled(true) // TODO これ何?
            .withClientConfiguration(clientConfiguration)
            .withCredentials(AWSStaticCredentialsProvider(credentials))
            .build()

        // 設定値から取得したBucketが存在するかチェック
        if (!client.doesBucketExistV2(bucketName)) {
            throw Exception("bucketが存在しません")
        }

        return client
    }
}
ドメイン層で作っておいたinterfaceを実装する。
上記でBean登録したclientをDIしています。
TaskDetailCsvRepository.kt
@Repository
class TaskDetailCsvRepository(
    private val s3: AmazonS3
) : ITaskDetailCsvRepository {

    override fun prepareForSecureUpload(dirName: String, fileName: String): String {

        // 有効期限設定
        val expiration = Date()
        var expirationInMs = expiration.time
        println("Current Time :${expiration.time}")
        expirationInMs += (1000 * 60).toLong()
        expiration.time = expirationInMs
        println("Expiration Time:${expiration.time}")

        // 生成
        val request = GeneratePresignedUrlRequest(dirName, fileName)
            .withMethod(HttpMethod.PUT)
            .withExpiration(expiration)

        val url = s3.generatePresignedUrl(request).toURI().toString()

        println("PresignedUrl:$url")
        return url
    }
}
usecase(Service)
ここまでできたらあとは利用するだけ。
GetPreSignedUrlService.kt
@Service
class GetPreSignedUrlService(
    private val preSignedUrlRepository: ITaskDetailCsvRepository
) {

    // フォルダ名
    private val dirName = "localhost"

    fun get(form: GetPreSingedUrlForm): GetPreSignedUrlResponse {
        return GetPreSignedUrlResponse(
            preSignedUrlRepository.prepareForSecureUpload(dirName, form.fileName)
        )
    }
}
presentation(Controller)
コントローラー生成
GetPreSignedUrlController.kt
@RestController
class GetPreSignedUrlController(
    private val getPreSignedUrlService: GetPreSignedUrlService
) {
    @PostMapping("/task/presign")
    fun register(@RequestBody form: GetPreSingedUrlForm): ResponseEntity<GetPreSignedUrlResponse> {
        return ResponseEntity.ok(getPreSignedUrlService.get(form))
    }
}
いったん作ったはいいけど、分からんこと
Storage周りの処理をCleanArchitectureに載せるとしたら、どの層に何を書くべき?
今んとこコレに乗っかって書いてます
とはいえ、「ファイルのアップロード」って、ドメインの知識なんですかね?
ログインとかと同じく、アプリケーション固有の知識のような気がしていて,usecase層に書くのもありかなと思います。
※その場合infra層がusecase層に依存していいんだっけ??という新たな疑問が出ますが...
S3Presignerっていうオブジェクトなしで書いたけど、必要??
AWS公式記事を見ると、S3Presignerというオブジェクトをインスタンス化して署名付きURL生成してます。
今回はコレなしで書いちゃったのですが、もうちょい調べてみて使ったほうが良さそうなら使おうかなと思います。
今後
- 取得したUrlを用いて実際にUploadを実施
- S3PresingerクラスのUsage調査
- セキュリティ周りの理解