AWS EC2 インスタンスを作成して使用する必要がありましたので、簡単に手順を残します。
以下の AWS の資料を参考にしました。
Amazon EC2 Linux インスタンスの開始方法
EC2 インスタンスの作成と起動
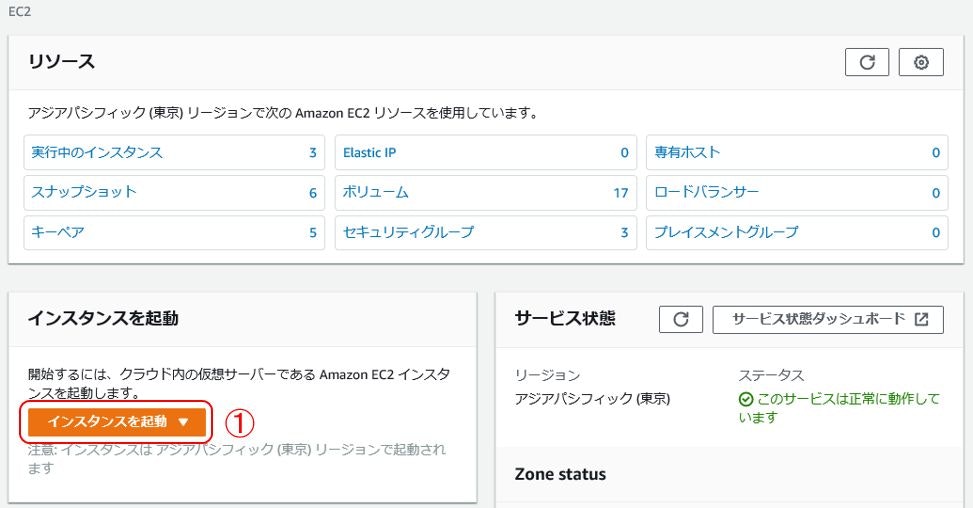
Amazon EC2 ダッシュボード を開いて、インスタンス起動をクリックします。(①)

Amazonマシンイメージ(AMI)選択画面に遷移しますので、AMIを選択します。今回は、2020年4月にリリースされた Ubuntu Server 20.04 を選択します。(②)

インスタンスタイプを選択します。今回は、無料枠で使用可能な t2.micro を選択して(③)、次のステップ:インスタンスの詳細の設定 をクリックします。(④)

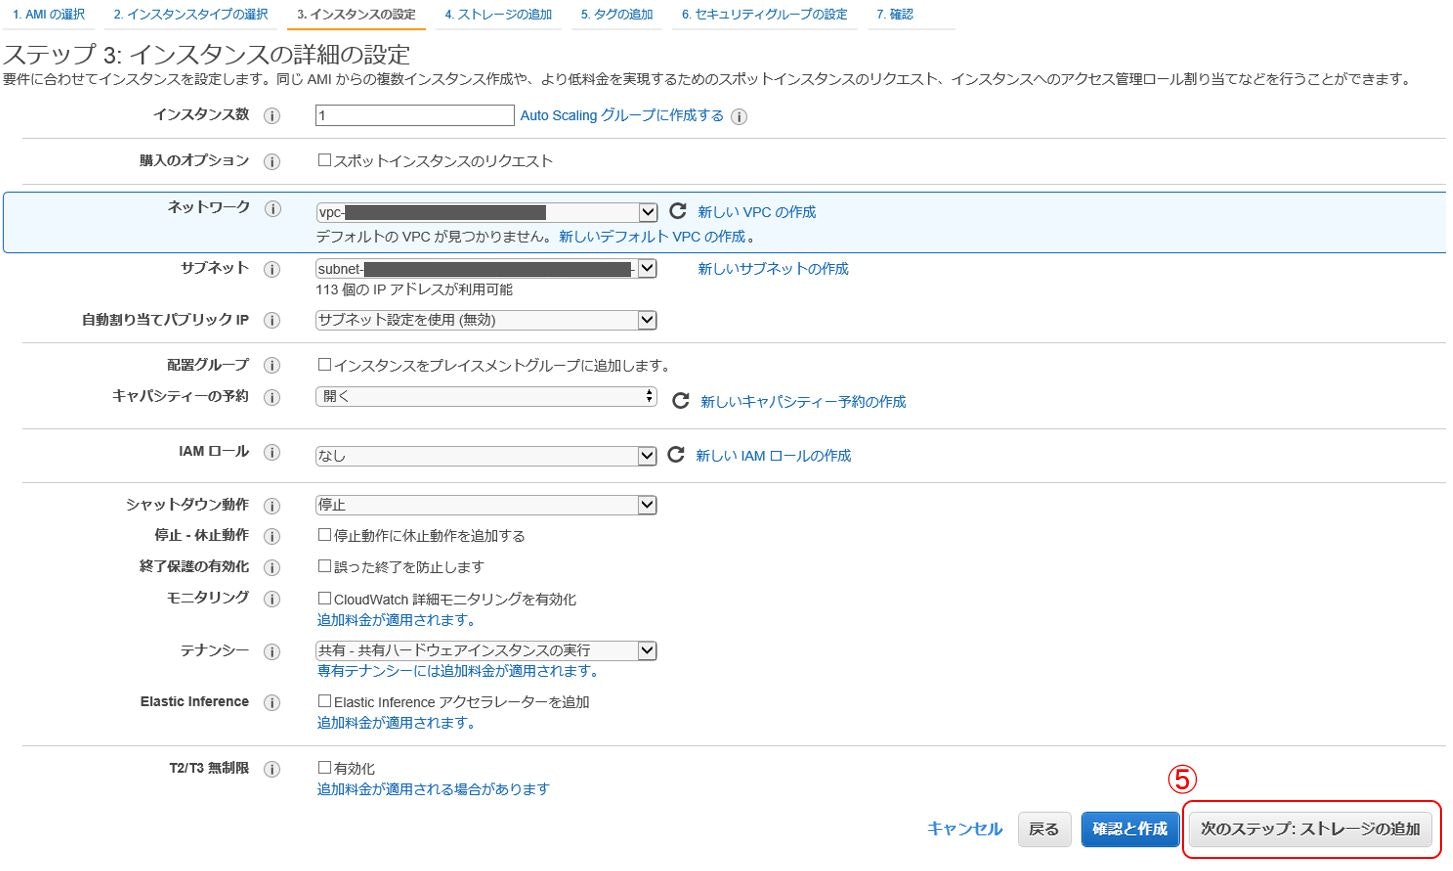
インスタンスの詳細の設定は基本的にデフォルトで、次のステップ:ストレージの選択をクリックします。(⑤)

ストレージの選択では、汎用SSDだと30GBまで無料で使用できます。必要なサイズを指定して、次のステップ:タグの追加をクリックします。(⑥)

インスタンス一覧から名前で判断できるように、Nameタグを追加します(⑦)。今回は eagle2 としました。次のステップ:セキュリティグループの設定をクリックします。(⑧)

セキュリティグループの設定はデフォルトのままで進めます。確認と作成をクリックします。(⑨)
あとでセキュリティポリシーに従って、設定を変更しましょう。

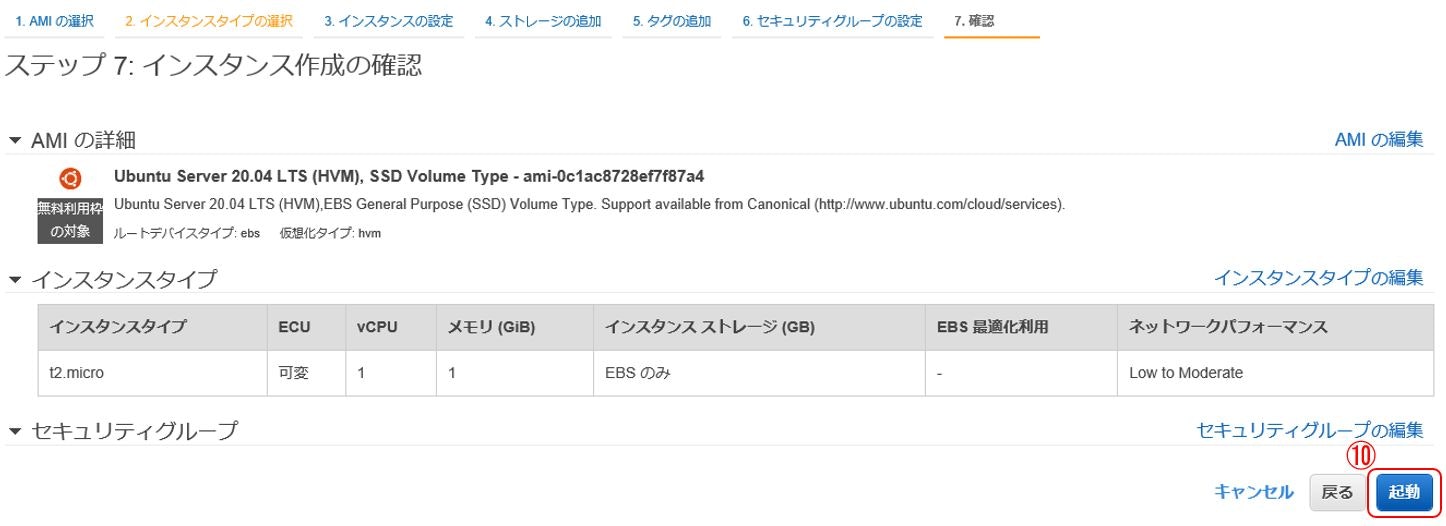
作成するインスタンスを確認して、。起動をクリックします。(⑩)

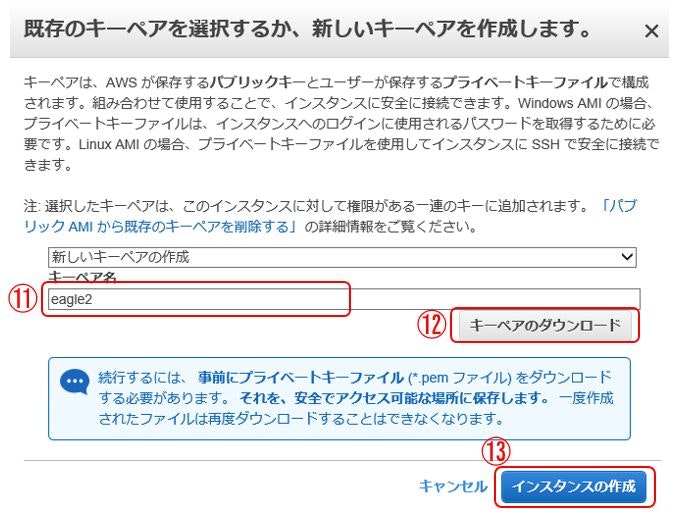
インスタンスへアクセスするためのキーペアを作成します。キーペア名を入力して(⑪)、キーペアのダウンロードをクリックします。(⑫)
キーペアのダウンロードが終了後、インスタンスの作成をクリックします。(⑬)
ダウンロードした秘密キーはアクセスする時に必要となりますので、大切に保存しておいて下さい。

インスタンス一覧画面が表示されます。作成したインスタンスの状態が、runningになっていることを確認して下さい。
インスタンス一覧で作成したインスタンスを選択しますと、下部にインスタンス情報が表示されます。プライベートIPを確認しておきましょう。
EC2 インスタンスへのアクセス
先程、作成した キーペアを使って、SSH クライアント で EC2 インスタンスへアクセスしてみます。
$ ssh -i キーペア ubuntu@プライベートIP
以下、PowerShell での実行例です。
PS C:\> ssh -i "eagle2.pem" ubuntu@xxx.xxx.xxx.xx
Welcome to Ubuntu 20.04 LTS (GNU/Linux 5.4.0-1009-aws x86_64)
<< 省略 >>
To run a command as administrator (user "root"), use "sudo <command>".
See "man sudo_root" for details.

ubuntu@ip-xxx-xxx-xxx-xxx:~$
ホスト名の変更
ホスト名が ip-xxx-xxx-xxx-xxx と プライベートIP ベースの名前になっているので変更します。
以下のように、hostnamectl コマンドで
ubuntu@ip-xxx-xxx-xxx-xxx:~$ sudo hostnamectl set-hostname eagle2
ubuntu@ip-xxx-xxx-xxx-xxx:~$ hostname
eagle2
/etc/hosts にホスト名を追加
/etc/hosts にホスト名を追加します。
ubuntu@ip-xxx-xxx-xxx-xxx:~$ sudo vi /etc/hosts
127.0.0.1 localhost eagle2
これで、EC2 インスタンスを起動して、アクセスできました。
