はじめに
Cloudinaryを使ったの画像変換の2回目
今回は画像の合成(重ね合わせ)のパターンを少し増やしてみます。
前回の内容はこちらです。
ゴール
このようなURLを組み立てて、on the flyで画像変換をできるようになれます。

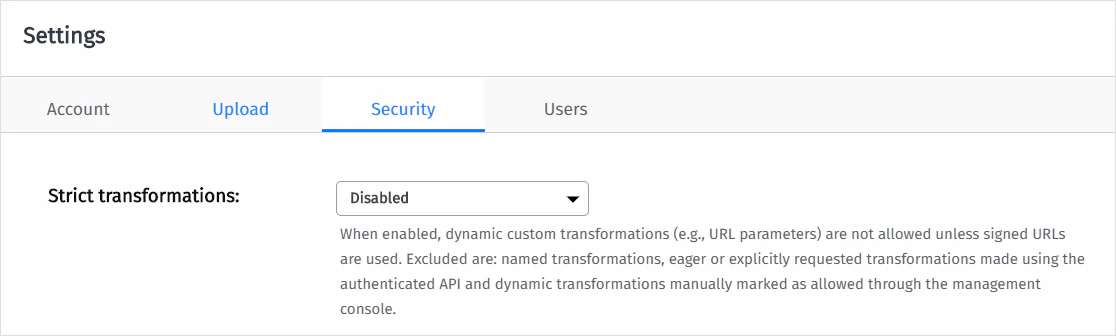
注意 ![]()
今回のサンプルを動かすには、URLベースで画像変換が効くようにSecurityの設定を緩める必要があります。Strinctな変換がDisabled、つまり緩いということです。
まずは、画像の準備
今回も「いらすとや」さんと「ぱくたそ」さんから何枚かお借りしました。必要な画像は2つのサイトから探してください。画像はいったんローカルに保存しMediaLibraryを使ってアップロードしました。
いらすとや


ぱくたそ


画像に特定のタグが付いているときだけ、画像を重ねる
前回、画像を重ねるサンプルを提示しましたが、常に画像が重ねられてしまいます。重ねたいときと重ねたくないときがある場合、2種類の画像を作っておいてどちらの画像を使うか判断しないといけません。
Cloudinaryには、Condition transformationsという条件付きで変換を実行する仕組みがあります。画像に付けたタグを判断材料に使えるので、タグ付き、タグ無しで判断してみます。
https://cloudinary.com/documentation/image_transformations#conditional_transformations
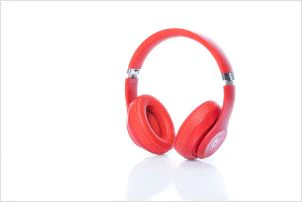
重ねられる画像
https://res.cloudinary.com/kanaxx/image/upload/w_500,h_500,c_fill,g_auto/paku1.jpg
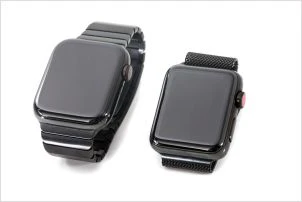
https://res.cloudinary.com/kanaxx/image/upload/h_500,c_fill,g_auto/paku2.jpg
重ねる画像
https://res.cloudinary.com/kanaxx/image/upload/h_500,c_fill,g_auto/freeship.png

0. Cloudinary内の画像にタグをつける
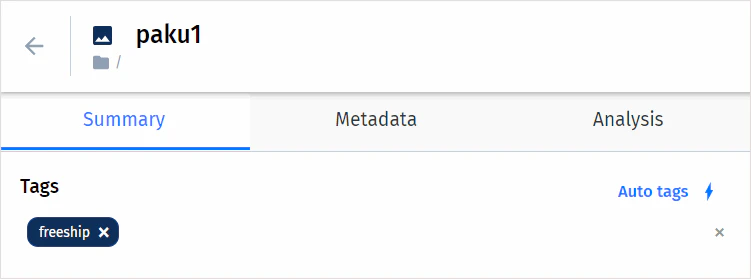
CloudinaryのMediaLibraryで画像にタグをつけます。GUIでちょいちょいとできます。paku1には画像タグfreeshipが付いていて、paku2にはタグが付いてない状態です。
タグをつけたい画像のManageアイコンをクリックし
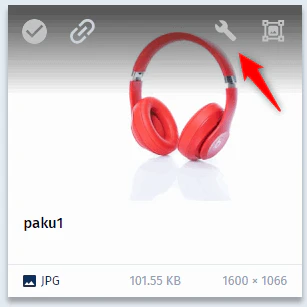
Tagsに入れるだけです。
APIを使えば、複数の画像に一括でタグを入れたり消したりできます。1回の操作で1000画像までできるようです。
https://cloudinary.com/documentation/image_upload_api_reference#tags_method
1. まずは普通に合成
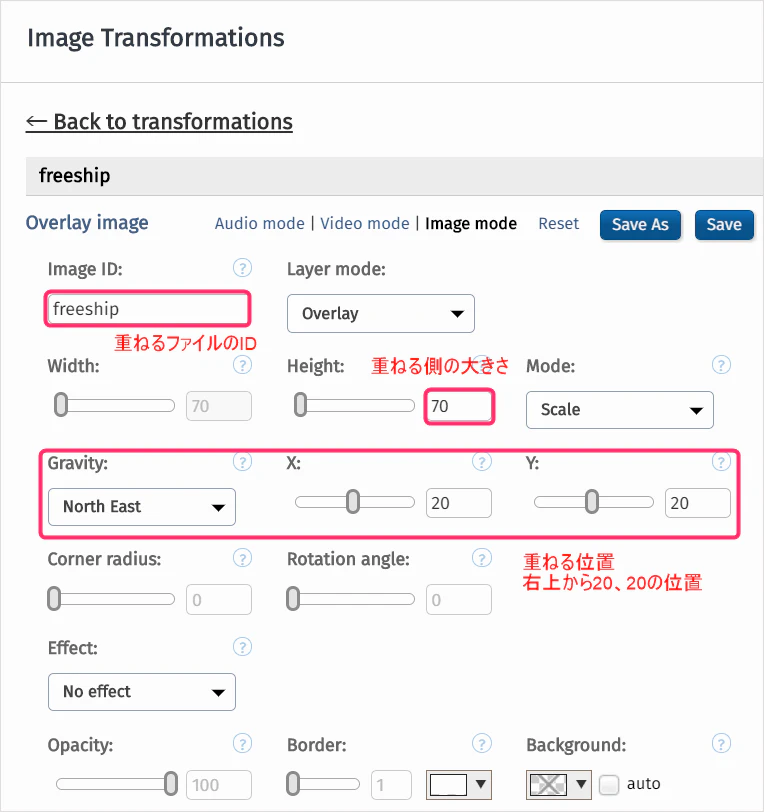
前回と同じような形です。パラメータは、l_ファイル名,位置で指定します。
https://res.cloudinary.com/kanaxx/image/upload/h_500,c_fill,g_auto/l_freeship,w_70,g_north_east,x_20,y_20/paku1.jpg
https://res.cloudinary.com/kanaxx/image/upload/h_500,c_fill,g_auto/l_freeship,w_70,g_north_east,x_20,y_20/paku2.jpg
2. IF条件を付ける
Condition transformationsの仕組みを使って、同じURLなのに画像が重なったり重ならなかったりする例です。ポイントは if_!freeship!_in_tags です。変換対象の画像にfreeshipタグが付いているだけ、重ね合わせが発動するようになります。
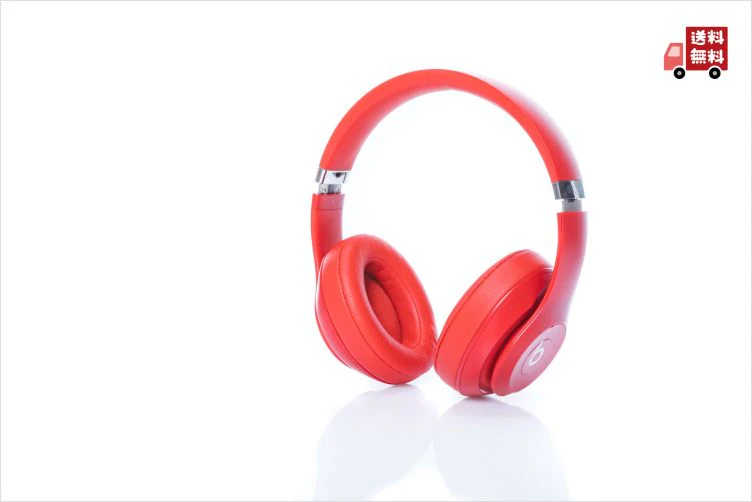
ヘッドホンの右上にはアイコンがついたまま

https://res.cloudinary.com/kanaxx/image/upload/h_500,c_fill,g_auto/if_!freeship!_in_tags,l_freeship,w_70,g_north_east,x_20,y_20/paku1.jpg
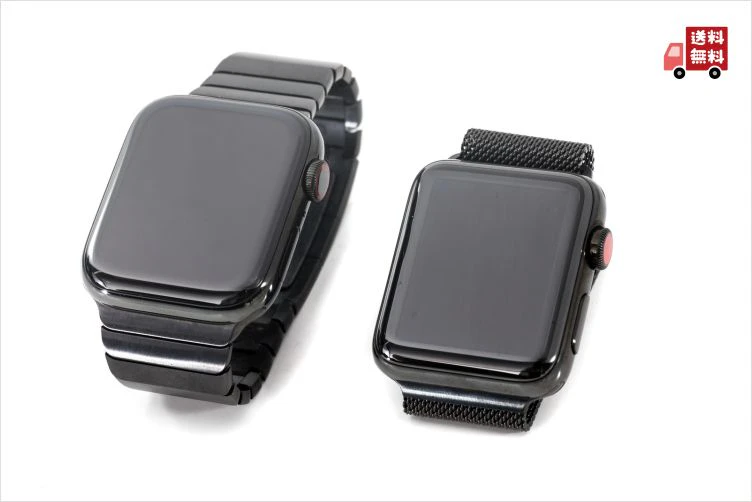
ウォッチの右上のアイコンは消えます
合成する命令を使ってるのにアイコンが付かなくなります。IF条件が効いていることが分かります。
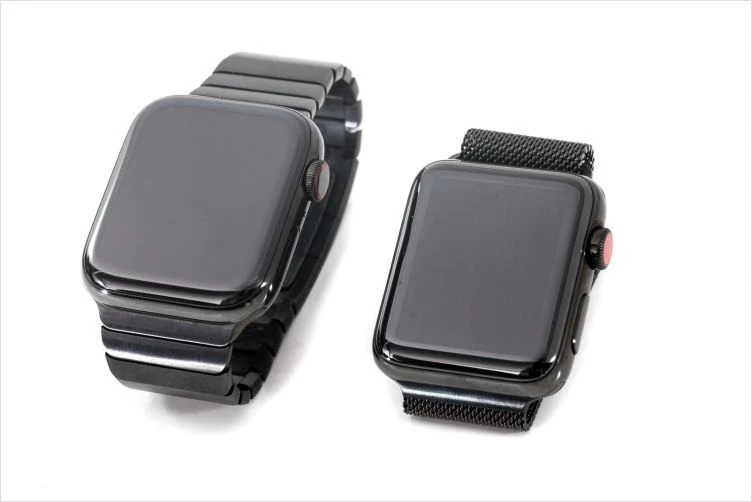
https://res.cloudinary.com/kanaxx/image/upload/h_500,c_fill,g_auto/if_!freeship!_in_tags,l_freeship,w_70,g_north_east,x_20,y_20/paku2.jpg
3. 名前付きに変換する
if_!freeship!_in_tags,l_freeship,w_70,g_north_east,x_20,y_20を毎回付けるとURLが長くなるので、この変換に名前を付けて保存して、呼び出せるようにします。

URLが少し短くなりました。

https://res.cloudinary.com/kanaxx/image/upload/h_500,c_fill,g_auto/t_freeship/paku1.jpg
このように、Cloudinary側にある画像の属性によって、振る舞いを変えることができます。手持ちの画像のメタデータをCloudinryと同期しておく必要がありますが、合成した複数の画像を作ったり、使い分けたりする手間はなくなります。
URLのパラメータを使って文字入れした画像を作成する
次は文字入れです。
Cloudinaryは画像にオーバーレイで文字を重ねることができます。日本語も入れることができますが、Fontがイマイチなので英語の方がいいかもしれません。これを使うと、%オフのような割引率もパラメータの組み立てるだけで入れられるようになります。
Amazonのあれと一緒ですね
http://rikumalog.com/webservice/amazon-img-can-change-by-url.html
0. もとの画像
数字が入ってない画像を用意します。

https://res.cloudinary.com/kanaxx/image/upload/percent_off.png
1. テキストを差し込む
位置の調整もフォントの調整もなしで、10を入れてみます。

https://res.cloudinary.com/kanaxx/image/upload/l_text:Verdana_130:10/percent_off.png
l_text を使って埋める文字、フォントなど指定します。
2. 太字にしていい感じに位置調整

何も指定しないと中央に文字が入るので、今回の画像に合う位置にずらします。x_ と y_ を使います。
3. 色も付ける

%オフが茶色の色なので、せっかくなので茶色にしましょう。co_rgbパラメータを使ってカラーコードを指定すれば文字に色が付きます。
4. ユーザ定義変数で分かりやすくする
3の状態でもほぼ完成していますが、10%オフの10がURLの奥まったところに組み込まれているので変更しにくいです。この場合、ユーザ定義変数というのを使って変更しやすくします。l_text:Verdana_130_bold:10,x_-40,y_-30,co_rgb:B55519 の10の部分を外出しするイメージです。

$discount_88は、discountという変数に88を入れるという意味です。変換は左から解釈されていくので、この変数定義より右側にある変換式の中で$discountが使えるようになります。少し分かりやすくなりました。
5. 名前付きにする
URLが長くなるので、いつも通り名前付き変換ルールを保存します。ユーザ定義変数を使うようにしておくと、変換ルールと変換に使う値が分離できます。画面では見えてないですが、Image ID の部分に画像名ではなく text:Verdana_130_bold:$(discount) を入れるのがポイントです。
この変換ルールをdiscountという名前で保存しておき、t_discountで呼び出せばOKです。

最終的にこのようなURLになります。

https://res.cloudinary.com/kanaxx/image/upload/$discount_33/t_discount_rate/percent_off.png
URLにある$discount_xxの数値を変えるだけで、どんな画像でも作れます。何%オフになってもまったく怖くないですね。
![]() ユーザ定義変数が必要なURLで変数を入れ忘れるとエラーになります。
ユーザ定義変数が必要なURLで変数を入れ忘れるとエラーになります。
https://res.cloudinary.com/kanaxx/image/upload/t_discount_rate/percent_off.png
独自のフォントを使う
CloudinaryのAPIを使うと自分でフォントをアップロードすることもできます。Media LibraryのGUIではフォントをアップロードできないのでAPIかSDKでやりましょう。
https://cloudinary.com/documentation/image_transformations#using_custom_fonts_for_text_overlays
1.フォントをアップロードする
PHPのSDKだとこんな感じになります。composerでSDKをインストールしておきます。
https://cloudinary.com/documentation/php_integration#installation
<?php
require_once "vendor/autoload.php";

\Cloudinary::config(array(
    "cloud_name" => "kanaxx",
    "api_key" => "xxx",
    "api_secret" => "yyy"
  ));

\Cloudinary\Uploader::upload(
    "RictyDiminishedDiscord-Regular.ttf", #path to ttf file
    [
        'public_id'=>'RictyDiminishedDiscord-Regular.ttf',
        'resource_type'=>'raw', # Custom fonts must be upload as 'raw'
        'type'=>'authenticated', # Custom fonts must be upload as 'authenticated'
    ]
);
Custom font guidelines:
- .ttf and .otf font types are supported.
- Custom fonts must be uploaded as raw, authenticated files.
- Make sure to include the file extension when referencing the public_id of the raw file. The extension must be specified in lower-case letters.
- To make use of bold or italic font styles, upload separate font files for each emphasis style and specify the relevant file in the overlay transformation.
- A custom font is available only to the specific account or sub-account where it was uploaded.
- Underscores are not supported in custom font names. When uploading the font as a raw file, make sure the public_id does not include an underscore.
- As with any resource you upload to Cloudinary, it is your responsibility to make sure you have the necessary license and redistribution rights for any custom fonts you use.
.ttfと.otfだけ使える。
rawでauthenticatedでアップロードすること(これが、Media Libraryではできないです)
拡張子は小文字で。
アンダースコアはフォント名に使えないのでpublic_idのほうはアンダースコアを混ぜないように。
自分が使えるライセンスのフォントだけ使うように。
とのことです。
2.カスタムフォントで画像に文字を埋め込む
カスタムフォントを使ったときは、通常はURLで実行できる太字のパラメータが効きません。太字のフォントをアップロードして指定しないといけません

Rictyで
Rictyで埋め込みできた。半濁点(右上の◯が大きいのが特徴。40_boldで指定しているけど、太字にはならない例
https://res.cloudinary.com/kanaxx/l_text:RictyDiminishedDiscord-Regular.ttf_40_bold:%E3%81%B1%E3%81%B4%E3%81%B7%E3%81%BA%E3%81%BD,y_35/w_200/happyou_blankyokonaga_girl

Rictyの太字で
太字にしたいときは、太字フォントを指定
https://res.cloudinary.com/kanaxx/l_text:RictyDiminishedDiscord-Bold.ttf_40:%E3%81%B1%E3%81%B4%E3%81%B7%E3%81%BA%E3%81%BD,y_35/w_200/happyou_blankyokonaga_girl

送料無料とOFF画像を同時に載せる
いままでやったことをURL上に連ねるだけでできます。名前付き変換を経由しないで実施すると、このような感じになります。
https://res.cloudinary.com/kanaxx/image/upload/w_500/$discount_33/if_$discount_gt_0,l_percent_off,g_south_west,x_30,y_30,w_80,h_80/if_$discount_gt_0,l_text:Verdana_26_bold:$(discount),g_south_west,x_45,y_70,co_rgb:B55519/if_!freeship!_in_tags,l_freeship,w_70,g_north_east,x_20,y_20/paku4.jpg
長いですが、左から順番に読んでいくと
- widthを500pxにし
- ユーザ定義変数でdiscount=33にし
- dicount>0のとき、percent_off画像を南西の方角(左下)からx=30, y=30空けて、width=80px, height=80pxで置き、
- discount>0のとき、discount変数の値を茶色の文字で左下からx=45, y=70の位置に置き
- freeshipタグが付いていれば、freeship画像をw=70になるように変換し、北東(右上)の位置からx=20, y=20空けて置き、
- それをpaku4.jpgに合成する
という流れです。
上の2~5までを、CloudinaryのGUIで変換を定義します。

最終的にURLはこうなります。discountの値を変えるだけで、いろんな画像が手に入るようになりました。
https://res.cloudinary.com/kanaxx/$discount_10/t_mark_ship_off/paku1.jpg
https://res.cloudinary.com/kanaxx/$discount_15/t_mark_ship_off/paku2.jpg
Offしていない商品はdiscountに0を設定すれば、文字もアイコンもでなくなります。
https://res.cloudinary.com/kanaxx/$discount_0/t_mark_ship_off/paku1.jpg
https://res.cloudinary.com/kanaxx/$discount_0/t_mark_ship_off/paku2.jpg
名前付き変換と通常の変換は同時に実行できますので、画像を小さくしたい場合には、パラメータを追加してください。ただ、変換の順番は気を付けてください。
小さくしてから重ねる

https://res.cloudinary.com/kanaxx/$discount_10/w_300/t_freeship_and_discount/paku1.jpg
重ねてから小さくしている

https://res.cloudinary.com/kanaxx/$discount_10/t_freeship_and_discount/w_300/paku1.jpg
まとめ
Cloudinaryを使うと、Amazonで実現しているような高度な画像の変換がURLベースで実現できてしまいます。保持している画像の量にもよりますが、無料のライセンスの範囲でできてしまいます。
試してみたくなった方は、inviteコード付きのURL からアカウント作って下さると助かります。
参考資料

画像変換 全般
https://cloudinary.com/documentation/image_transformations
条件付き変換
https://cloudinary.com/documentation/image_transformations#conditional_transformations
パラメータ一覧
https://cloudinary.com/documentation/image_transformation_reference
埋め込みに使えるフォント
https://support.cloudinary.com/hc/en-us/articles/203352832-What-is-the-list-of-supported-fonts-for-text-overlay-transformation-
絵文字もいけるようだ
https://support.cloudinary.com/hc/en-us/articles/360003457091-How-to-overlay-emojis-in-images