はじめに
今回はWindows端末でTerraformを使用してGCPのインスタンスを作成する手順をまとめました。
Windows端末へのTerraformインストール~VPCネットワークの作成については以下の記事にまとめています。
1. .tfファイルの編集
構成ファイル.tfファイルを編集します。
PowerShellを開き、main.tfファイルが保存されているディレクトリに移動します。
作成済みのmain.tfファイルを編集します。
notepad main.tf
ファイルに以下内容を追記します。
resource "google_compute_instance" "terraform" {
  project      = "PROJECT_ID"
  name         = "tf-instance"
  machine_type = "n1-standard-1"
  zone         = "asia-northeast1-a"
  boot_disk {
    initialize_params {
      image = "debian-cloud/debian-10"
    }
  }
  network_interface {
    network = "terraform-network"
    access_config {
    }
  }
}
・projectにプロジェクトIDを指定します。
・regionに任意のリージョンを指定します。
・nameにインスタンスの名前を指定します。
・networkに使用するVPCネットワークの名前を指定します。
network_interfaceを指定せずにインスタンスを作成することが出来ないため、networkの指定は必須となります。
2. 実行
2-1. フォーマットの確認
main.tfファイルに記述した構文のフォーマットをチェックし、整えます。
terraform fmt
2-2. 構文の確認
main.tfファイルに記述した内容に構文エラーがないかチェックします。
terraform validate
出力例
Success! The configuration is valid.
2-3. Terraformの初期化
プロバイダーとモジュールを初期化します。
terraform init
出力例
Initializing the backend...

Initializing provider plugins...
- Reusing previous version of hashicorp/google from the dependency lock file
- Using previously-installed hashicorp/google v5.10.0

Terraform has been successfully initialized!

You may now begin working with Terraform. Try running "terraform plan" to see
any changes that are required for your infrastructure. All Terraform commands
should now work.

If you ever set or change modules or backend configuration for Terraform,
rerun this command to reinitialize your working directory. If you forget, other
commands will detect it and remind you to do so if necessary.
2-4. 実行プランを作成
実際のリソースや状態に変更を加えずに想定通りの実行ができるか確認します。
terraform plan
出力例
Terraform used the selected providers to generate the following execution plan. Resource actions are indicated with the
following symbols:
  + create

Terraform will perform the following actions:

  # google_compute_instance.terraform will be created
  + resource "google_compute_instance" "terraform" {
      + can_ip_forward       = false
      + cpu_platform         = (known after apply)
      + current_status       = (known after apply)
      + deletion_protection  = false
      + effective_labels     = (known after apply)
      + guest_accelerator    = (known after apply)
      + id                   = (known after apply)
      + instance_id          = (known after apply)
      + label_fingerprint    = (known after apply)
      + machine_type         = "asia-northeast1"
      + metadata_fingerprint = (known after apply)
      + min_cpu_platform     = (known after apply)
      + name                 = "tf-instance"
      + project              = "PROJECT_ID"
      + self_link            = (known after apply)
      + tags_fingerprint     = (known after apply)
      + terraform_labels     = (known after apply)
      + zone                 = "asia-northeast1-a"

      + boot_disk {
          + auto_delete                = true
          + device_name                = (known after apply)
          + disk_encryption_key_sha256 = (known after apply)
          + kms_key_self_link          = (known after apply)
          + mode                       = "READ_WRITE"
          + source                     = (known after apply)

          + initialize_params {
              + image  = "debian-cloud/debian-9"
              + labels = (known after apply)
              + size   = (known after apply)
              + type   = (known after apply)
            }
        }

      + network_interface {
          + internal_ipv6_prefix_length = (known after apply)
          + ipv6_access_type            = (known after apply)
          + ipv6_address                = (known after apply)
          + name                        = (known after apply)
          + network                     = "terraform-network"
          + network_ip                  = (known after apply)
          + stack_type                  = (known after apply)
          + subnetwork                  = (known after apply)
          + subnetwork_project          = (known after apply)

          + access_config {
              + nat_ip       = (known after apply)
              + network_tier = (known after apply)
            }
        }
    }

Plan: 1 to add, 0 to change, 0 to destroy.
2-5. Terraformの実行
定義したリソースを作成します。Terraformが作成するリソースを確認し、yesを入力して実行を許可します。
terraform apply
出力例
Do you want to perform these actions?
  Terraform will perform the actions described above.
  Only 'yes' will be accepted to approve.

  Enter a value: yes

google_compute_instance.terraform: Creating...
google_compute_instance.terraform: Still creating... [10s elapsed]
google_compute_instance.terraform: Creation complete after 15s [id=projects/deft-diode-406504/zones/asia-northeast1-a/instances/tf-instance]

Apply complete! Resources: 1 added, 0 changed, 0 destroyed.
2-6. 作成したインスタンスの確認
作成されたインスタンスの状態を確認します。
terraform show
出力例
# google_compute_instance.terraform:
resource "google_compute_instance" "terraform" {
    can_ip_forward       = false
    cpu_platform         = "Intel Broadwell"
    current_status       = "RUNNING"
    deletion_protection  = false
    effective_labels     = {}
    enable_display       = false
    guest_accelerator    = []
    id                   = "projects/PROJECT_ID/zones/asia-northeast1-a/instances/tf-instance"
    instance_id          = "7481252722560599049"
    label_fingerprint    = "42WmSpB8rSM="
    machine_type         = "n1-standard-1"
    metadata_fingerprint = "Xa3s0bneRtA="
    name                 = "tf-instance"
    project              = "PROJECT_ID"
    self_link            = "https://www.googleapis.com/compute/v1/projects/PROJECT_ID/zones/asia-northeast1-a/instances/tf-instance"
    tags_fingerprint     = "42WmSpB8rSM="
    terraform_labels     = {}
    zone                 = "asia-northeast1-a"

    boot_disk {
        auto_delete = true
        device_name = "persistent-disk-0"
        mode        = "READ_WRITE"
        source      = "https://www.googleapis.com/compute/v1/projects/PROJECT_ID/zones/asia-northeast1-a/disks/tf-instance"

        initialize_params {
            image  = "https://www.googleapis.com/compute/v1/projects/debian-cloud/global/images/debian-10-buster-v20231212"
            labels = {}
            size   = 10
            type   = "pd-standard"
        }
    }

    network_interface {
        internal_ipv6_prefix_length = 0
        name                        = "nic0"
        network                     = "https://www.googleapis.com/compute/v1/projects/PROJECT_ID/global/networks/terraform-network"
        network_ip                  = "10.146.0.2"
        queue_count                 = 0
        stack_type                  = "IPV4_ONLY"
        subnetwork                  = "https://www.googleapis.com/compute/v1/projects/PROJECT_ID/regions/asia-northeast1/subnetworks/terraform-network"
        subnetwork_project          = "PROJECT_ID"

        access_config {
            nat_ip       = "34.84.135.236"
            network_tier = "PREMIUM"
        }
    }

    scheduling {
        automatic_restart   = true
        min_node_cpus       = 0
        on_host_maintenance = "MIGRATE"
        preemptible         = false
        provisioning_model  = "STANDARD"
    }

    shielded_instance_config {
        enable_integrity_monitoring = true
        enable_secure_boot          = false
        enable_vtpm                 = true
    }
}
......
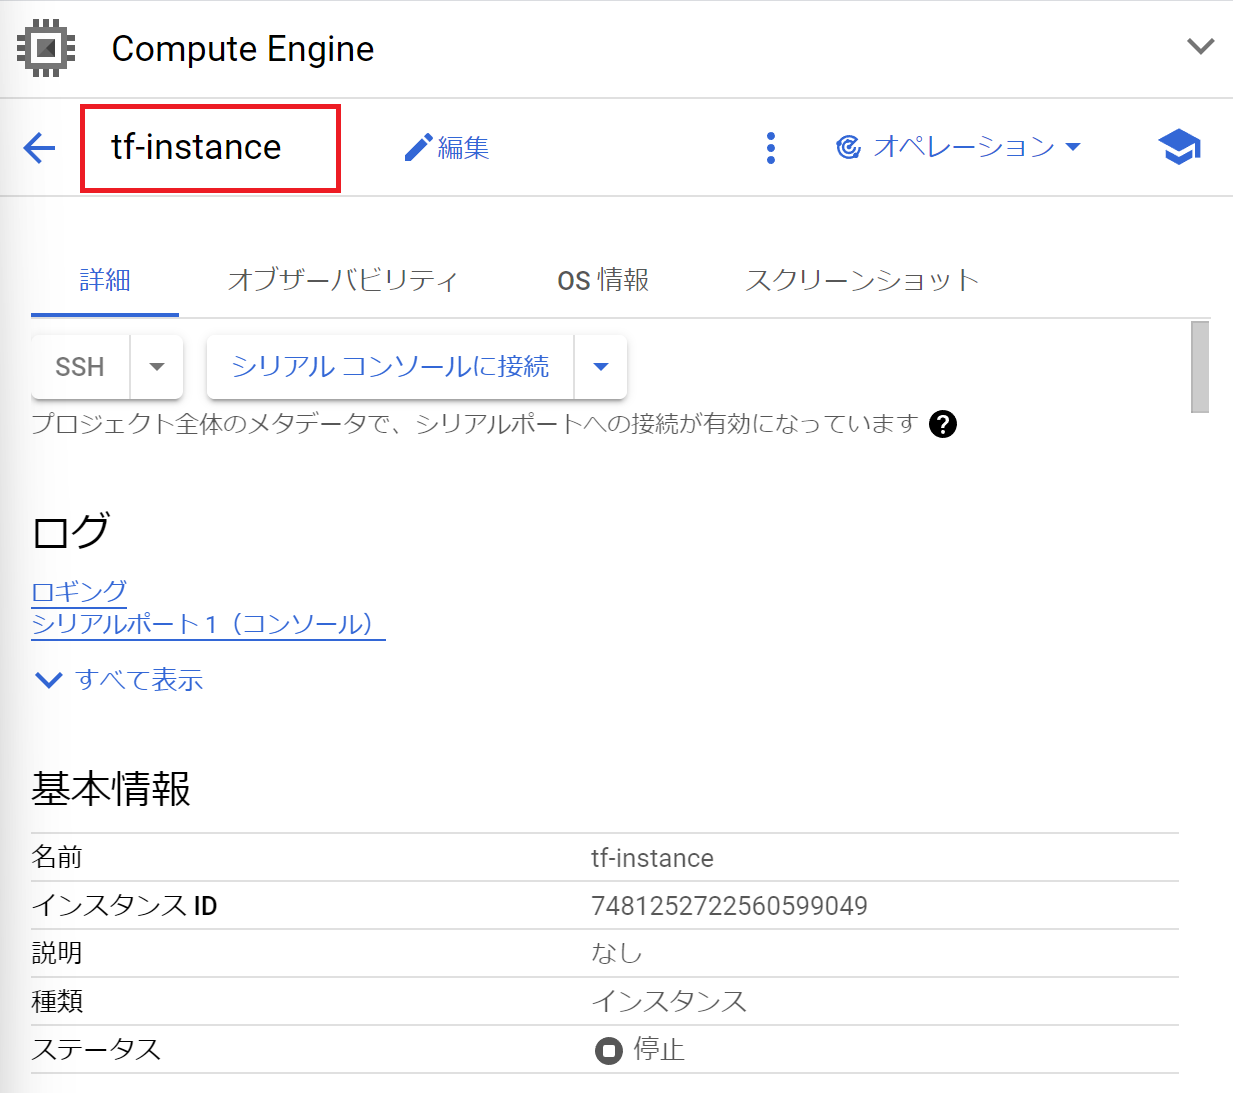
GCPのコンソールでもインスタンスが作成されたことが確認できました。

2-7. リソースの削除
main.tfで定義された全てのリソースを削除します。
特定のリソースのみ削除する場合はmain.tfを手動で編集し、「2. 実行」手順を実施します。
terraform destroy
3. 参考記事