はじめに
Windows端末へTerraformをインストールし、GCPのリソースを作成する手順をまとめました。
1. Terraformインストール
以下の公式サイトを参考にインストールします。
Install Terraform(https://www.terraform.io/intro/index.html)
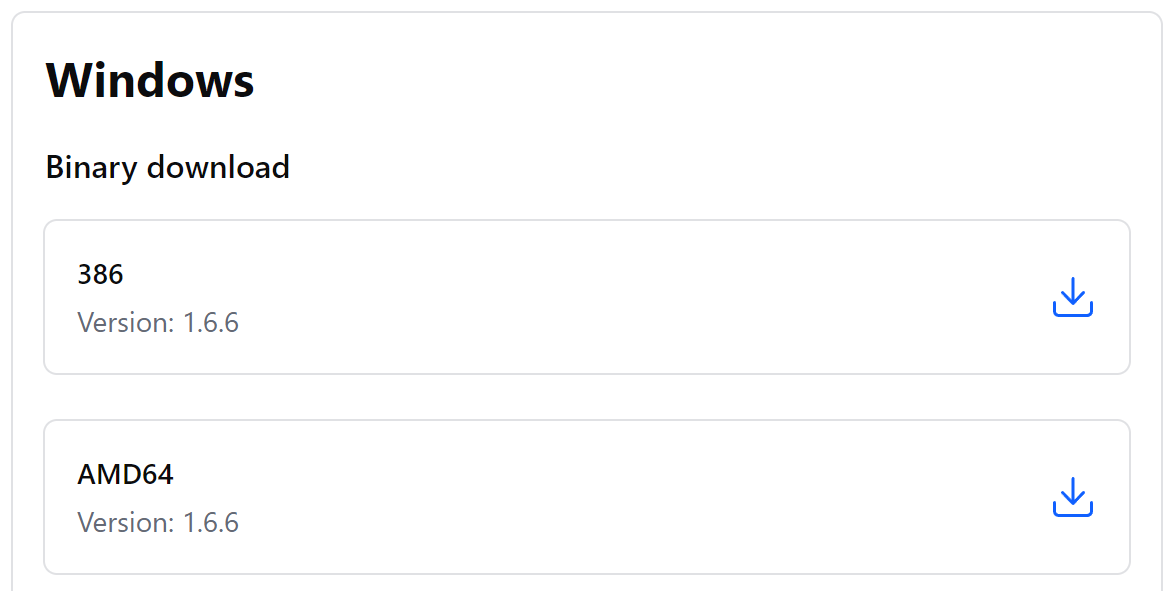
1-1. バイナリのダウンロード
ダウンロードサイトから「AMD64」をインストールします。
【ダウンロードサイト】
https://developer.hashicorp.com/terraform/install(https://developer.hashicorp.com/terraform/install)
1-2. zipファイルの解凍
ダウンロードした「terraform_1.6.6_windows_amd64.zip」を任意のフォルダに展開します。
今回はC:\Windows\terraformへ展開しました。
展開後、フォルダ内に「terraform.exe」が展開されていることを確認します。
1-3. 環境変数 PATH に Terraformのインストールディレクトリを通す
-
スタートメニューを右クリックして、「システム」を選択します。
-
左側の「システムの詳細設定」をクリックします。
-
「詳細設定」ウィンドウが表示されたら、「環境変数」ボタンをクリックします。
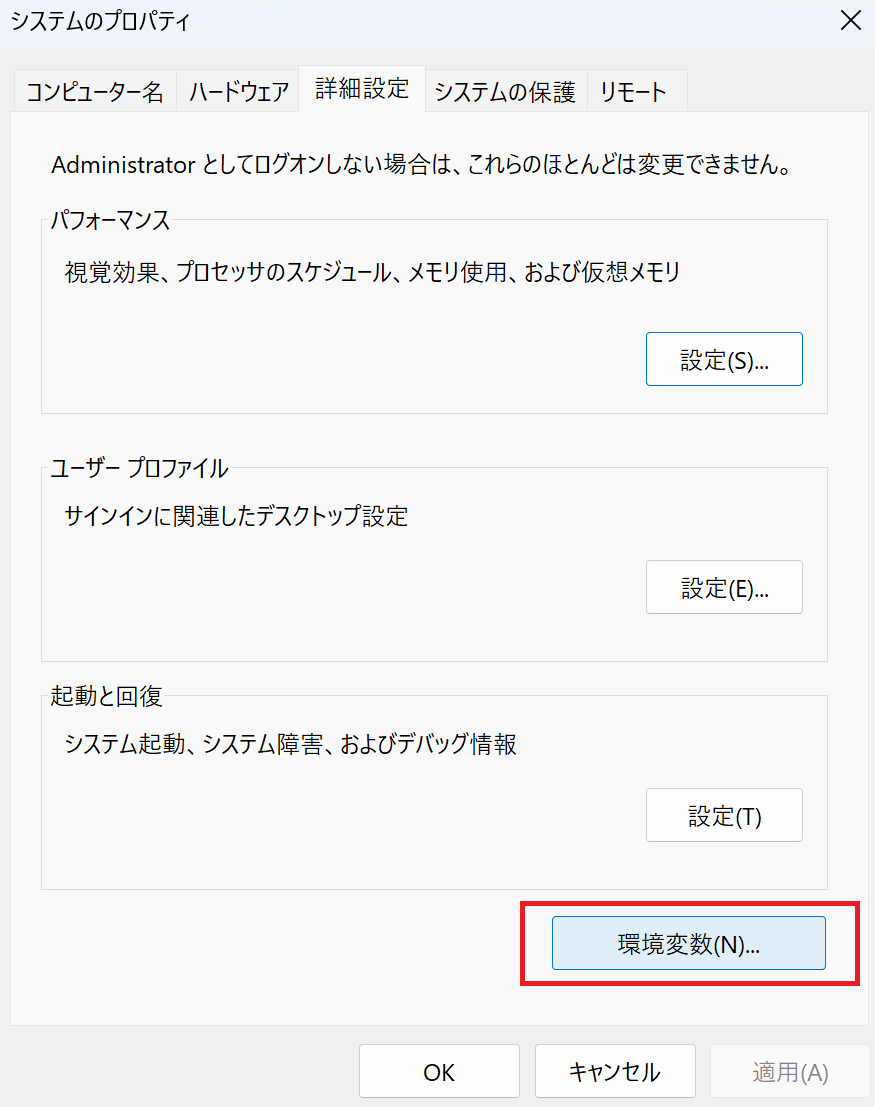
- 下部の「システム変数」からPathを選択し、クリックします。
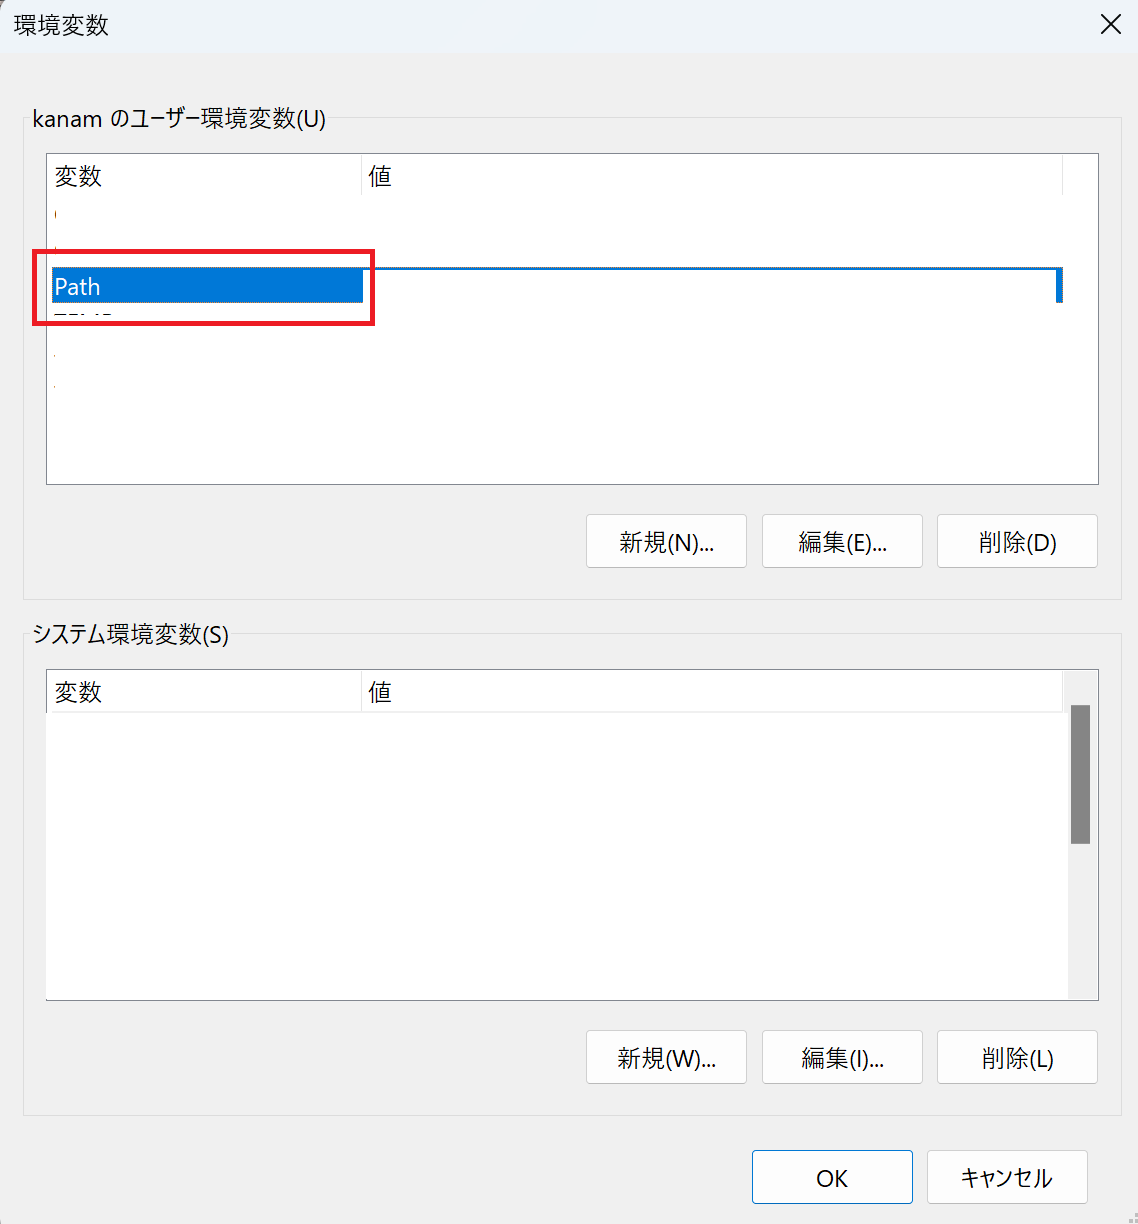
- 「新規」をクリックし、Terraformのインストールディレクトリのパスを追加し、「OK」をクリックします。
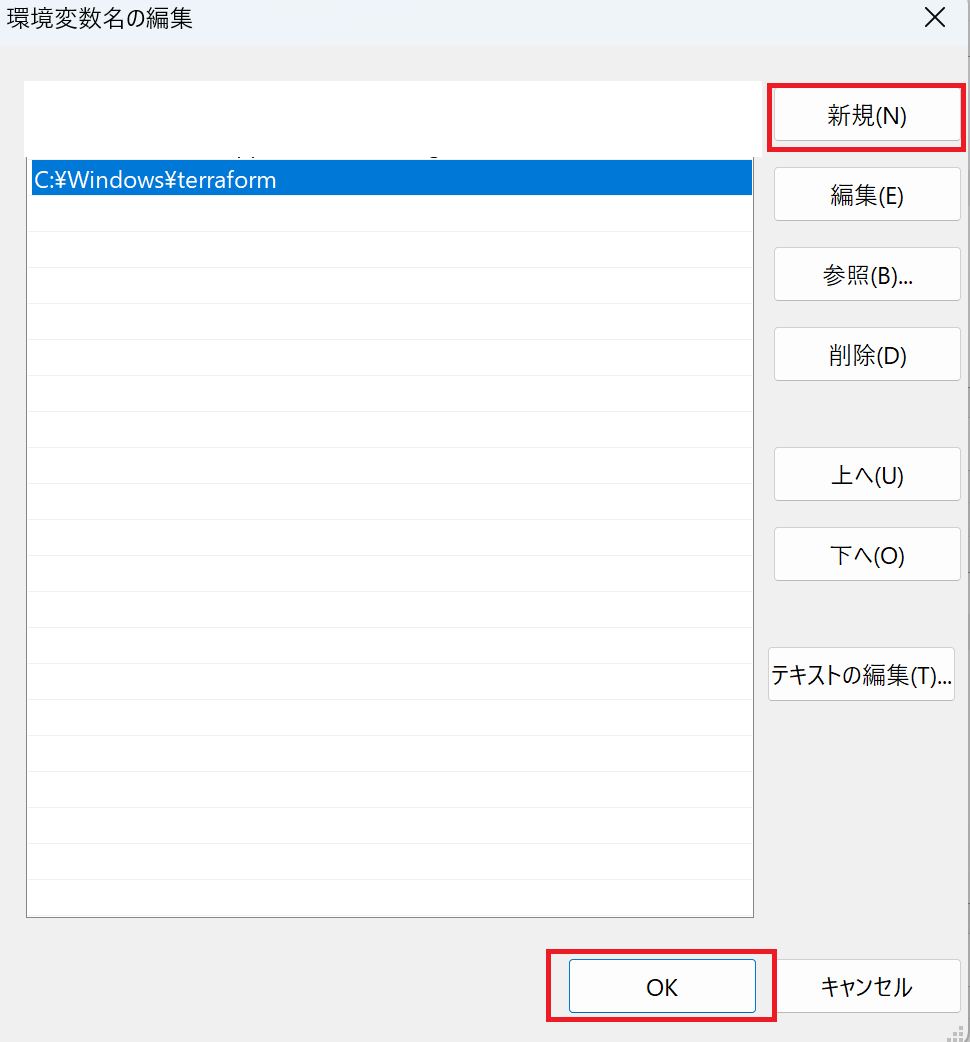
-
全てのウィンドウを閉じて設定を保存します。
-
PowerShellまたはコマンドプロンプトを再起動します。
-
PowerShellまたはコマンドプロンプトを開き、
terraform --versionを実行します。
以下はPowerShellでの実行例です。
PS C:\Windows\terraform>terraform --version
Terraform v1.6.6
on windows_amd64
2. GCP設定
続いてGCPのコンソールでサービスアカウントを作成し、秘密鍵をWindows端末に保存します。
こうすることで、ローカルからTerraformを実行し、GCPリソースを作成することが可能になります。
2-1. プロジェクト作成
GCPのクラウド管理コンソールにログイン後Cloud Shellを開き、gcloud projects createコマンドでプロジェクトを作成します。
ここではプロジェクトIDをProject_ID、プロジェクトの名前を"MyProject"としていますが、適切なプロジェクトIDとプロジェクト名に変更してください。
gcloud projects create Project_ID --name="MyProject"
既存のプロジェクトを使用する場合は以下コマンドでプロジェクトIDを調べておきます。
gcloud config get-value project
2-2. プロジェクトの切り替え
指定のプロジェクトを使用するように切り替えます。
gcloud config set project Project_ID
これで、指定したプロジェクトが現在のデフォルトプロジェクトとして設定されます。
2-3. サービスアカウント作成
gcloud iam service-accounts createコマンドを使用し、Terraform構築用のサービスアカウントを作成します。
gcloud iam service-accounts create terraform-account \
  --display-name "Terraform User"
2-4. サービスアカウントへの権限付与
作成したterraform-accountへ編集者(Editor)ロールを付与します。
Project_IDを、先ほど作成したプロジェクトIDへ変更してください。
gcloud projects add-iam-policy-binding Project_ID \
  --member serviceAccount:terraform-account@Project_ID.iam.gserviceaccount.com \
  --role roles/editor
2-5. サービスアカウントの確認
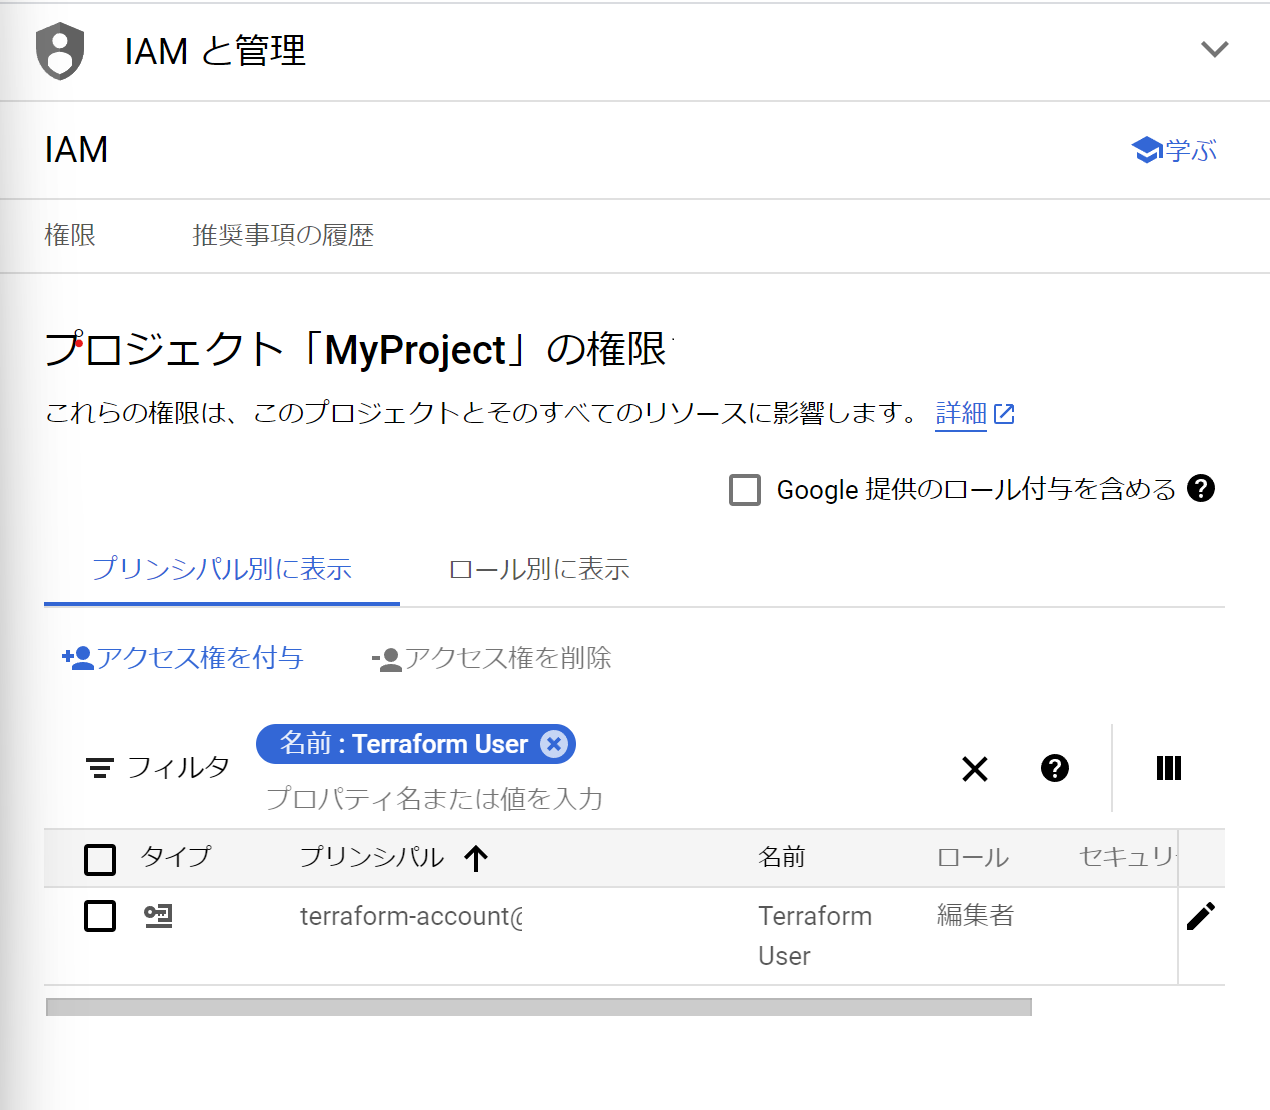
GCPコンソールで「IAMと管理」を開きます。
アカウントが作成されていることを確認します。
2-6. 秘密鍵の作成とダウンロード
GCPコンソールで「APIとサービス」 > 「認証情報」を開きます。
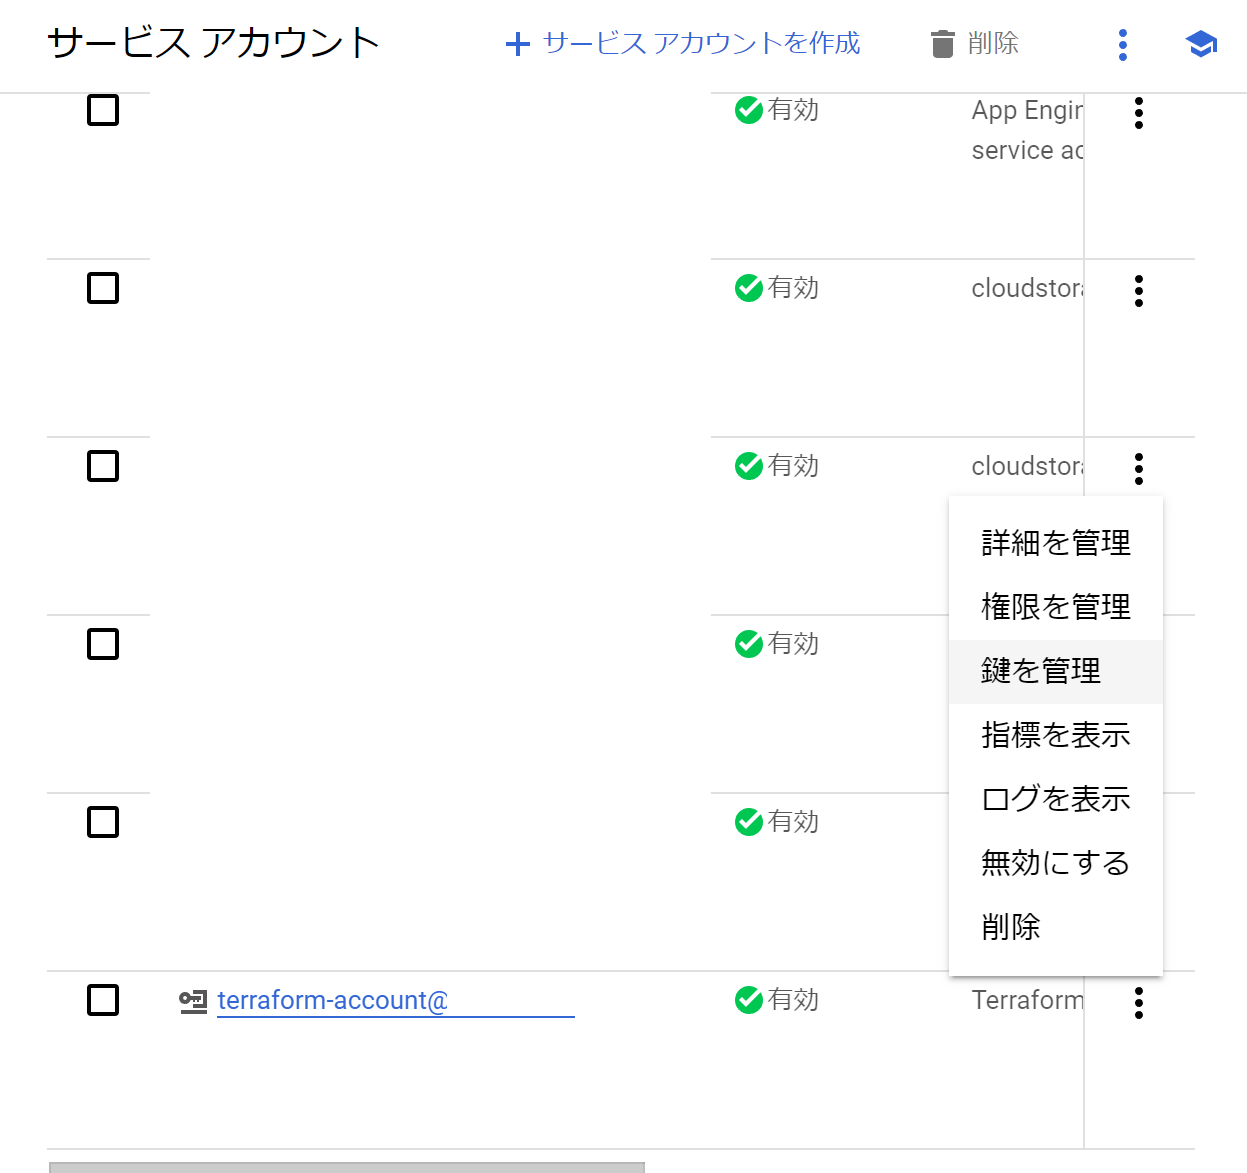
作成したアカウントの「鍵の管理」をクリックします。
「新しい鍵を作成」をクリックします。
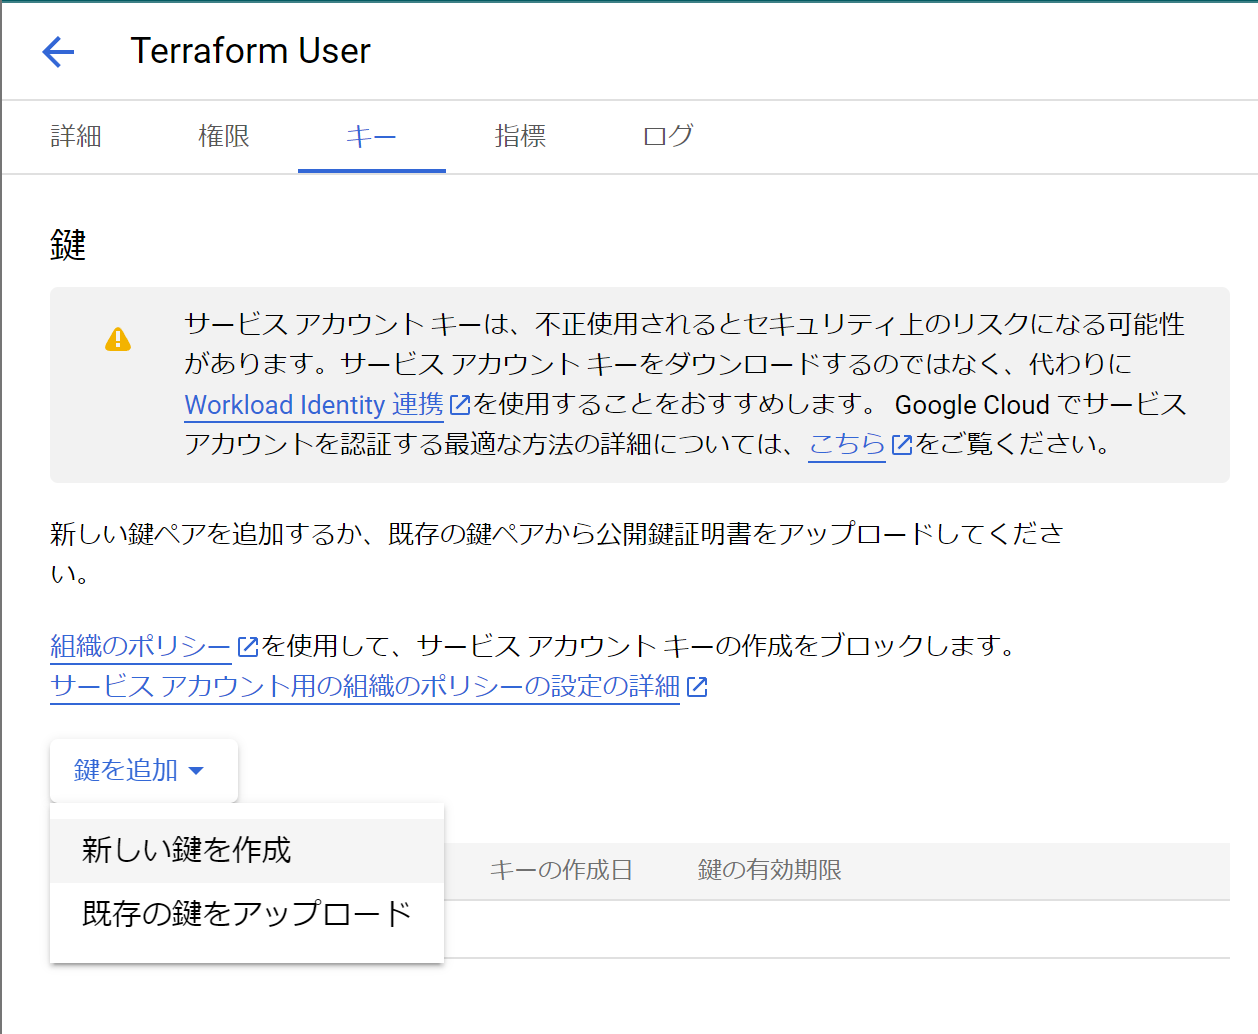
「JSON」を選択して「作成」をクリックします。
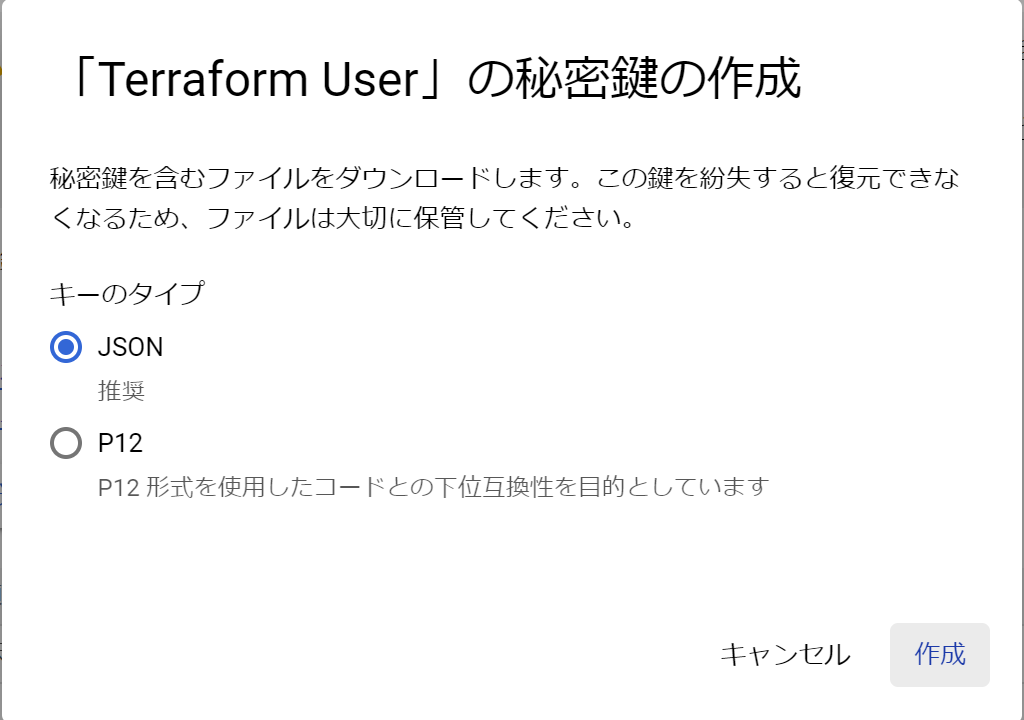
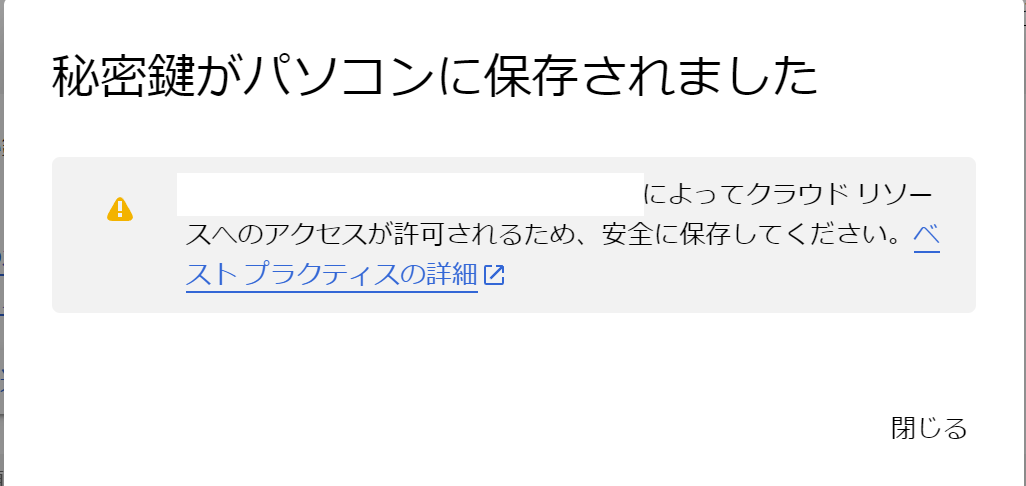
ダウンロードしたファイルをTerraformをインストールしたディレクトリに保存します。
3. tfファイルの作成
tfファイルという、terraformからGCPリソースを構築するための設定ファイルを作成します。
3-1. tfファイル作成
PoweShell上で、New-Itemコマンドを使用してterraformをインストールしたディレクトリにmain.tfという名前のファイルを作成します。
cd C:\Windows\terraform
New-Item -ItemType File -Name main.tf
3-2. tfファイル編集
メモ帳でmain.tfファイルを開き、編集します。
VsCodeで開く場合はcode main.tfと入力します。
notepad main.tf
main.tfファイルを編集し、保存します。
今回はterraform-networkというVPCネットワークを作成するため、resource "google_compute_network" "vpc_network"でネットワークを指定します。
またrequired_providersでGoogle CloudのProviderを指定しています。
terraform {
# プロバイダーを指定
  required_providers {
    google = {
     source = "hashicorp/google"
      version = "5.10.0"
    }
  }
 }
provider "google" {
  credentials = file("ダウンロードしたJSONファイルへのフルパス")
  project     = "Project_ID"
  region      = "asia-northeast1"  # 任意のリージョンを指定
}
resource "google_compute_network" "vpc_network" {
  name = "terraform-network"
}
・Providerの最新バージョン情報は以下のサイトで確認することができます。
https://github.com/hashicorp/terraform-provider-google/blob/master/CHANGELOG.md
・credentialsに記述するパスの\はエスケープしてください。
Ex)C:\Windowsの場合:C:\\Windowsと記述
・projectはプロジェクトIDを指定します。
・regionに任意のリージョンを指定します。
・nameにVPCネットワーク名を指定します。
3-3. 作成後の確認
terraform validateコマンドを実行し、文法上のエラーがないことを確認します。
terraform validate
Success! The configuration is valid.と表示されればOKです。
4. Terraformの初期化
main.tfが保存されているディレクトリに移動します。
terraform initコマンドを実行し、プロバイダーとモジュールを初期化します。
terraform init
出力例
Initializing provider plugins...
- Reusing previous version of hashicorp/google from the dependency lock file
- Using previously-installed hashicorp/google v5.10.0

Terraform has been successfully initialized!

You may now begin working with Terraform. Try running "terraform plan" to see
any changes that are required for your infrastructure. All Terraform commands
should now work.

If you ever set or change modules or backend configuration for Terraform,
rerun this command to reinitialize your working directory. If you forget, other
commands will detect it and remind you to do so if necessary.
5. 実行プランを作成
terraform planコマンドを実行し、実際のリソースや状態に変更を加えずに想定通りの実行ができるか確認します。
terraform plan
6. Terraformの実行
terraform applyコマンドを実行して、定義したリソースを作成します。Terraformが作成するリソースを確認し、yesを入力して実行を許可します。
terraform apply
7. リソースの確認
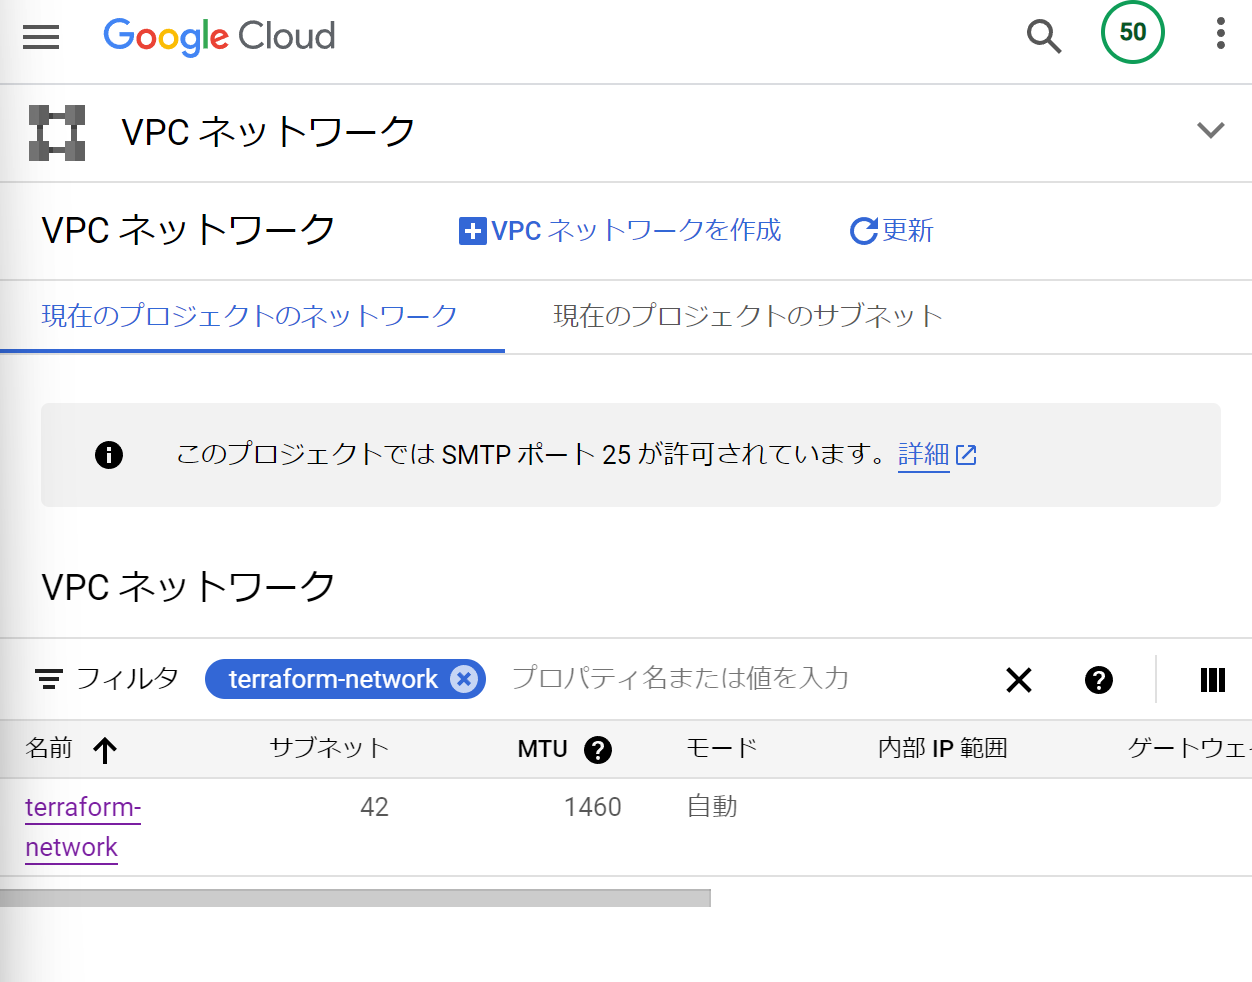
GCPのコンソールで「VPCネットワーク」を開き、作成したネットワークが表示されていることを確認します。
8. 参考
