「rails server」コマンドを読み解く
前置き
本記事の内容はタイトルのまんま。rails serverコマンドを叩いた際に一体何が実行されているのかを調べてみた。内容的に、対象者は初心者以上中級者未満。多分。なお、調べながら記事を書いていたので、説明の流れが下手くそな部分があるがそこは許してンゴンゴ。
※Rackについて詳しい人は得るものないかもしれませんがご了承ください。
バージョン
ruby 2.6.3
Rails 6.0.1
準備
多分そんなに必要ないけどRails newしてアプリを作成。
$ rails new adc2019
からのbundle install
$ bundle install
コントローラも作成してルートを通しておこう。
rails g controller home
Rails.application.routes.draw do
  get '/', to: 'home#homw'
end
viewsは適当で
<h1>HOME</h1>
んでrails s
$ rails s
localhost:3000にアクセス

rails server とは
早速、rails serverの中身をみていく。
rails コマンド
基本、ターミナル上でrailsコマンドを叩いた場合、システム上のrailsコマンドを呼ぶ。
$ which rails
/Users/かもひこ/.rbenv/shims/rails
んでもって、``rails newして作ったアプリのディレクトリにおいては、その配下のbin/rails`が呼ばれる。
(上記システム上のrailsを呼ぶ。→からのアプリディレクトリ配下の`bin/rails`を呼ぶ。という流れ。)
中身は下記のとおり、
# !/usr/bin/env ruby
begin
  load File.expand_path('../spring', __FILE__)
rescue LoadError => e
  raise unless e.message.include?('spring')
end
APP_PATH = File.expand_path('../config/application', __dir__)
require_relative '../config/boot'
require 'rails/commands'
最初の部分でspring(アプリケーションプリローダー)を呼び出しとる。
コマンドの2回目以降の起動時間を短縮してくれるやつ。
Rails4.1からデフォルトで追加されたらしい。
次にAPP_PATHを定義して、なにやらconfig系のファイルを読み、やっと最後rails/commandsという、如何にもなファイルを読みにいく。
rails serverが何をやっているのかを知りたいので、configの部分は「なんか初期化やら設定してるんやろな」ぐらいに済ませて、さっさとrails/commandsを見てみる。(ここからはgemのrailsをみていく。アプリ配下のファイルではないのでご注意を。)
commands.rb
require "rails/command"

aliases = {
  "g"  => "generate",
  "d"  => "destroy",
  "c"  => "console",
  "s"  => "server",
  "db" => "dbconsole",
  "r"  => "runner",
  "t"  => "test"
}

command = ARGV.shift
command = aliases[command] || command

Rails::Command.invoke command, ARGV
ここでコマンドのエイリアスを定義してる。普段rails sとかでrails server扱いしてくれているのはここのおかげ。
んで、最後のinvokeメソッドの記述部分。コマンドラインで叩いたserverをinvokeに渡している。直略で呼び出すの意味を持つこのメソッド。
次に見るんはここやな。
てわけでinvokeメソッドを見てみる。
command.rb
def invoke(full_namespace, args = [], **config)
  namespace = full_namespace = full_namespace.to_s

  if char = namespace =~ /:(\w+)$/
    command_name, namespace = $1, namespace.slice(0, char)
  else
    command_name = namespace
  end

  command_name, namespace = "help", "help" if command_name.blank? || HELP_MAPPINGS.include?(command_name)
  command_name, namespace = "version", "version" if %w( -v --version ).include?(command_name)

  command = find_by_namespace(namespace, command_name)
  if command && command.all_commands[command_name]
    command.perform(command_name, args, config)
  else
    find_by_namespace("rake").perform(full_namespace, args, config)
  end
end
namespaceって書いてあるあたり、名前空間が引数(今回でいうとserver)のモジュールを読みにいくのかな?
下記の部分がおそらくそうっぽい。
command = find_by_namespace(namespace, command_name)
find_by_namespaceは下記のとおり。
def find_by_namespace(namespace, command_name = nil) # :nodoc:
  lookups = [ namespace ]
  lookups << "#{namespace}:#{command_name}" if command_name
  lookups.concat lookups.map { |lookup| "rails:#{lookup}" }

  lookup(lookups)

  namespaces = subclasses.index_by(&:namespace)
  namespaces[(lookups & namespaces.keys).first]
end
最初の3行で探しにいくモジュールの名前空間を配列にぶちこんでいる。lookupsの中身は下記。
["server", "server:server", "rails:server", "rails:server:server"]
rails:serverだけでよくね?と思ったが、きっと何か理由があるのだろう。(他のコマンド使用時に必要な処理かな?)とりあえず進む。
lookupメソッドに上記の名前空間たちを渡している。きっとこのメソッド内でモジュールを読み込むのだろう。
def lookup(namespaces)
  paths = namespaces_to_paths(namespaces)

  paths.each do |raw_path|
    lookup_paths.each do |base|
      path = "#{base}/#{raw_path}_#{command_type}"

      begin
        require path
        return
      rescue LoadError => e
        raise unless /#{Regexp.escape(path)}$/.match?(e.message)
      rescue Exception => e
        warn "[WARNING] Could not load #{command_type} #{path.inspect}. Error: #{e.message}.\n#{e.backtrace.join("\n")}"
      end
    end
  end
end
場所は変わってbehavior.rb内にlookupメソッドはいる。
最初の一行目で渡されてきた名前空間たちをパスへと変換している。
んで、案の定requireしている。そろそろメソッド一つ一つ追っていくのがだるくなったのでpathをputsして確認する。
(できればソースを直にいじるべきではないが、パッチをあてるのもあれだったので。)
begin
  puts path #ここで確認
  require path
  return
んでサーバーたてる。
$ rails server
rails/commands/server/server_command
=> Booting Puma
=> Rails 6.0.1 application starting in development
...
..
.
〜略〜
でましたでました。ここでやっと、
「requireしたのはrails/commands/server/server_commandか!!じゃあ、serverコマンド叩いたときの処理はそこを見ればいいんだな!」(棒読み)
となるわけである。(まあソース開いてディレクトリ構成見た時点で予想はついてたけど、我慢して順繰りに処理を追ってみた。)
さて、モジュールを読み込んだところで、少し戻ってfind_by_namespaceの下記の部分。
  lookup(lookups)

  namespaces = subclasses.index_by(&:namespace)
  namespaces[(lookups & namespaces.keys).first]
モジュールを読み込んだだけでは意味がない。最後に返り値としてサブクラスを返している。
つまりRails::Command::ServerCommandを返す。
そして、ここでinvokeメソッドに戻る。下記の部分である。
  command = find_by_namespace(namespace, command_name)
  if command && command.all_commands[command_name]
    command.perform(command_name, args, config)
  else
    find_by_namespace("rake").perform(full_namespace, args, config)
  end
commandの中には上記サブクラスが入っており、その中にあるメソッドperformを実行している。
ようやくここでserverコマンドの処理が実行されるわけである。
てわけで、いよいよserver_command.rbの中をみる。
server_command.rb
ではperformメソッドをみてみる。
def perform
  extract_environment_option_from_argument
  set_application_directory!
  prepare_restart

  Rails::Server.new(server_options).tap do |server|
    # Require application after server sets environment to propagate
    # the --environment option.
    require APP_PATH
    Dir.chdir(Rails.application.root)

    if server.serveable?
      print_boot_information(server.server, server.served_url)
      after_stop_callback = -> { say "Exiting" unless options[:daemon] }
      server.start(after_stop_callback)
    else
      say rack_server_suggestion(using)
    end
  end
end
まだまだコードリーディングが続くのかあ....と思っていたが、じつはここの部分、公式ガイドラインにて説明されている。(→ここから)
Rails::ServerクラスはRack::Serverクラスを継承しており、以下のようにRack::Server#startを呼び出します。
つまり上記のまんま、rails serverはRackよりサーバーを起動していたのである。
Rackとは
rails sがRackよりサーバーを起動してるとわかったところで、ここでRackについて説明する。
Rackとは
Rackについて説明しているページより下記を引用する。
In the words of the author of Rack – Christian Neukirchen: Rack aims to provide a minimal API for connecting web servers supporting Ruby (like WEBrick, Mongrel etc.) and Ruby web frameworks (like Rails, Sinatra etc.).
簡潔に説明すると、RackとはRuby製のWEBサーバーとWEBアプリケーション間のインターフェースである。様々なwebサーバー、WEBアプリケーションが双方依存せずに開発できるのはこのRackのおかげ。
Rackの仕様に従って開発されているWEBサーバー、WEBアプリケーションであればどのような組み合わせも可能なのである。(puma & rails、 unicorn & rails, unicorn & sinatra みたいな)
Rackを使ってみる1
それでは実際に、引用元のページを参考にしてRackの仕様に従ったアプリ、いわゆるRackアプリケーションを作ってみる。Rackアプリケーションとしての最低限の仕様は下記のとおり。
A Rack application is a Ruby object that has a call method, which has a single argument, the environment, (corresponding to a HTTP request) and returns an array of 3 elements, status, headers and body (corresponding to a HTTP response).
つまり、
- callメソッドを持つこと。
- 引数としてWEBサーバーからのHTTPリクエストを受けること
- 返り値は、ステータスコード(100以上)、レスポンスヘッダ(ハッシュ)、レスポンスボディであること。
の3つがRackアプリケーションとしての最低限の条件である。
それでirbで簡単に作ってみる。(ここは参考元のほぼ丸パクリ。)
$ irb
まず、rackを読み込む。
irb(main):001:0> require 'rack'
=> true
callメソッドを持っていればよいので、lambdaを使ってProcオブジェクトを作る。
引数は一つ。返り値は仕様どおりのレスポンスコード、レスポンスヘッダ、レスポンスボディ。
irb(main):002:0> my_app = lambda { |env| [200, {"Content-Type" => "text/plain"}, ["Hello. The time is #{Time.now}"]] }
=> #<Proc:0x00007fdb888ff528@(irb):2 (lambda)>
試しに実行。
irb(main):003:0> my_app.call({})
=> [200, {"Content-Type"=>"text/plain"}, ["Hello. The time is 2019-12-19 11:26:39 +0900"]]
問題ないので、最後にWEBrickをWEBサーバーとしてをアプリ起動、
irb(main):004:0> Rack::Handler::WEBrick.run my_app, :Port => 9876
[2019-12-19 11:27:02] INFO  WEBrick 1.4.2
[2019-12-19 11:27:02] INFO  ruby 2.6.3 (2019-04-16) [x86_64-darwin16]
[2019-12-19 11:27:02] INFO  WEBrick::HTTPServer#start: pid=2809 port=9876
http://localhost:9876/をブラウザで開く。
下記の様に表示されるはず。

レスポンスヘッダもばっちり。
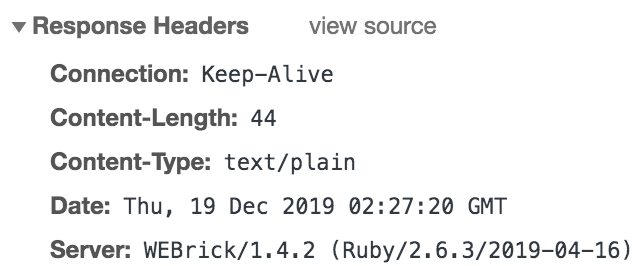
簡単なRackアプリケーションはこんな感じ。シンプルである。
Rackを使ってみる2
Rackアプリケーションの起動方法として便利なコマンド、rackupがある。
rackupはcongfig.ruというrack構成ファイルを元にRackアプリケーションを起動してくれる。
さっきのProcオブジェクトだとRailsをイメージしにくいので、簡単なクラスを定義してみる。
response_bodyとして、引数に渡されるWEBサーバーからのリクエストをjsonにして返そう。
require 'json'

class MyApp

  def call(env)
    response_body = env.to_json

    response = [
      200,
      {"Content-Type" => "application/json; charset=utf-8"},
      [response_body]
    ]

    return response
  end

end
構成ファイルはこんな感じ。
require './my_app'
run MyApp.new
後は下記コマンドで起動。
$ rackup config.ru
http://localhost:9292/を開けばjsonで下記が返ってくるはず。
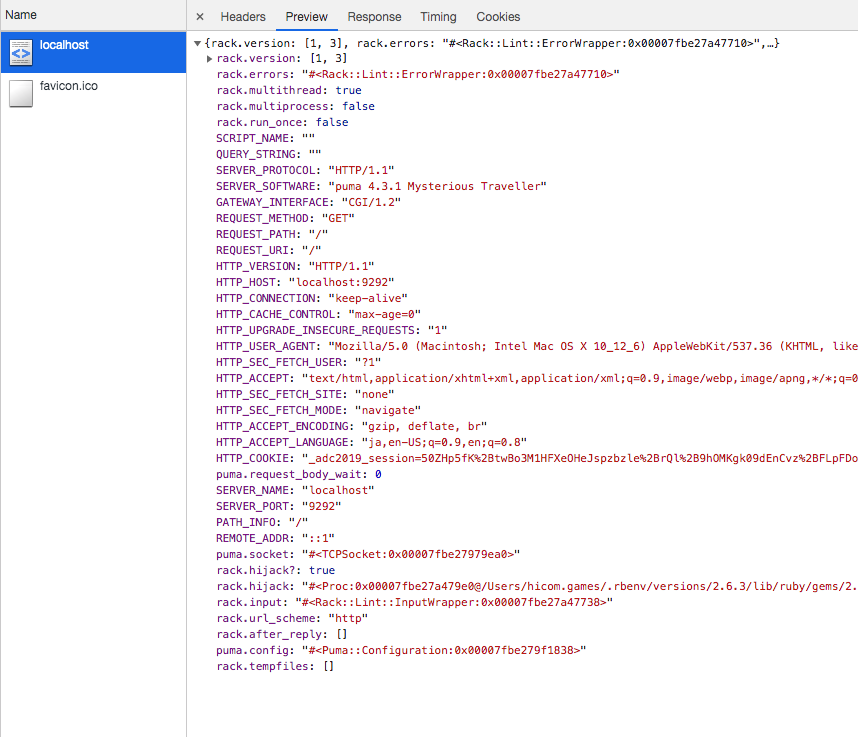
Rackについてはこんな感じで説明は終わる。Railsに戻る。
RackによるRailsアプリケーションの起動
さて、RackがどうやってRackアプリケーションを起動するかわかったところでRailsの場合をみていく。
アプリを作成したディレクトリ直下に構成ファイルであるconfig.ruがある。先程の例同様、この構成ファイルを元にRackはRailsを起動するのである。
# This file is used by Rack-based servers to start the application.

require_relative 'config/environment'

run Rails.application
先程例にあげた構成ファイルとほぼ同じ記述内容であることがわかるだろう。Rails.applicationはもちろんRails newして作ったアプリケーションのことだ。出力すればわかる。
puts Rails.application.class
$ rails s
...
..
〜略〜
.
.

Adc2019::Application
さて、こうなるとRackアプリケーションとして必要なcallメソッドはどこに書いてあるの?という疑問がもちろんわく。
継承関係的に予想はつくけど、まあ念の為もう一度putsする。
puts Rails.application.method(:call).source_location
/Users/かもひこ/.rbenv/versions/2.6.3/lib/ruby/gems/2.6.0/gems/railties-6.0.1/lib/rails/engine.rb
engine.rbで定義されているらしい。
def call(env)
  req = build_request env
  app.call req.env
end
こいつがRailsのRackアプリケーションとしてのcallメソッドとなる。以後、リクエストがくれば、このメソッドにそのリクエストが渡され実行される。
まとめ
流れがわかったところでまとめる。
| 処理の流れ |
|---|
rails serverコマンドを叩く |
| ↓ |
server_command.rbのperformメソッドを実行 |
| ↓ |
| Rack::Server#startを呼び出す。 |
| ↓ |
| config.ruを元にRailsアプリケーションを起動。 |
| ↓ |
| 以降、リクエストはengine.rbのcallメソッドで処理される。 |
長々と書いたが、やっていることは至ってシンプルだった。
RailsアプリケーションをRackアプリケーションとして起動しているだけ。これがrails serverの処理の流れかな。
最後に
長々とコードリーディングして得られたのは、RailsってよりRackについての知見な気がする。
まあ、ソースコードを読んだおかげでRailsへの「なんか動いている」感を少しでもなくせたのは良き収穫。
構成もなんとなく掴めたし、gemとか作ろうと思った時にこの経験は力になるだろう。
てわけで長々と読んでいただきありがとうございました。
間違い等あればコメント欄までお願いします。
ではおやすみ。
参考
railsコマンドを追う
Rack解説 - Rackの構造とRack DSL
Rackとは何か(1)Rackの生まれた背景
What’s Rack?