はじめに
この記事は「Ateam LifeDesign Advent Calendar 2023」で完走賞を狙って25記事書いているうちの12日目の記事です。今年も完走目指して頑張るぞ!
GASを使ってサイトの表示速度を定期的に記録する
GoogleではPageSpeed Insights APIが提供されており、これを使うことで以下のことが実現できます。
- ウェブページのパフォーマンス測定
- ページのパフォーマンス、アクセシビリティ、SEO を改善する最適化案を確認
- ページをプログレッシブ ウェブアプリに変換する方法について確認
今回はGASからこのAPIを呼び出してページのパフォーマンス測定をしてスプレッドシートに記録していきます。
作るもの
弊社が運営ているイーデスというサイトについて、毎日このページのパフォーマンスを測定してスプレッドシートに自動で記録するようにしていきます。
1日1回定期実行してここに1行ずつ追加されていくイメージです。
準備
まずはPageSpeed Insights APIのAPIキーを取得します。APIキーはなくても動くのですが、自動化した方法でAPIを使用して、1秒間に複数回クエリを作成する場合はAPIキーが必要ということなので今回は取得しておこうと思います。
こちらにアクセスして「キーを取得する」をクリック。

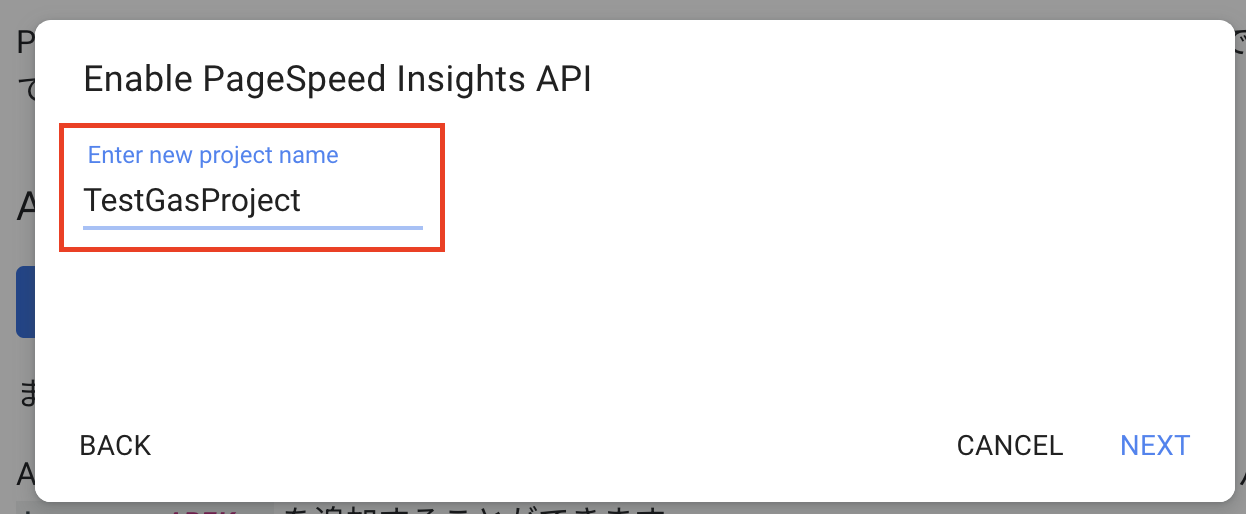
GCPのプロジェクトを選択する画面が出てきます。今回は新たなプロジェクトを作成します。

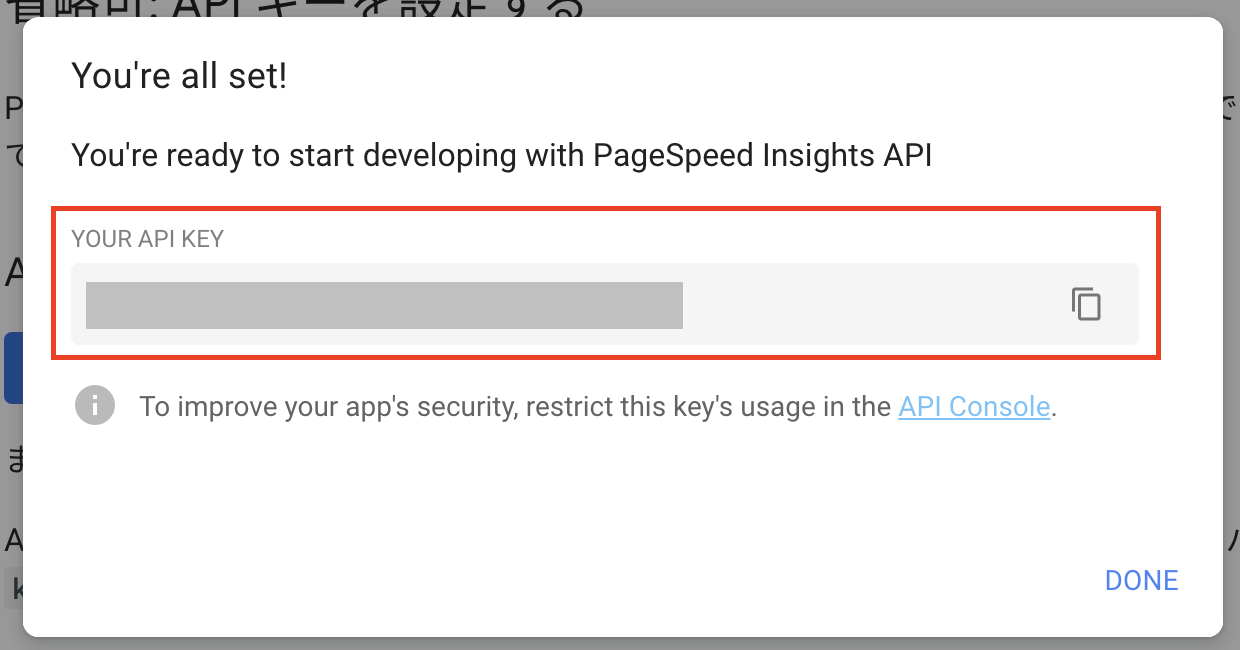
APIキーが取得できました。ここで取得したキーはあとでコード内で使うのでGASのスクリプトプロパティに登録します。スクリプトプロパティへの登録の仕方はこちらの記事に詳しく記載しているので参考にしてください。

今回はPageSpeed_Insights_API_Keyという名前でキーを登録しておきました。
GASを書いていく
  const API_KEY = PropertiesService.getScriptProperties().getProperty('PageSpeed_Insights_API_Key');
  const URL = "https://www.a-tm.co.jp/top/" // 対象となるサイトのURL

  const response = UrlFetchApp.fetch(
    'https://www.googleapis.com/pagespeedonline/v5/runPagespeed' +
    `?url=${URL}` +
    "&locale=ja" +
    `&key=${API_KEY}`
  );

  var result = JSON.parse(response.getContentText());
APIキーは先程スクリプトプロパティに登録したものをPropertiesService.getScriptProperties().getProperty()で呼び出しています。こうすることでキーを安全に取り扱うことができます。
https://www.googleapis.com/pagespeedonline/v5/runPagespeedに対してurlプロパティを渡すだけでもレスポンスを得ることができますが、今回はAPIキーを使うことにしたのでkeyプロパティも渡すようにしています。またlocaleでjaを指定することでレスポンスの中身を日本語にして受け取ることができます。
レスポンスはJSONオブジェクトで帰ってくるのでJSON.parseしてこれ以降の処理で扱いやすいようにしておきます。
  var currentDate = new Date();
  sheet.appendRow([
    currentDate,
    result.loadingExperience.metrics.FIRST_CONTENTFUL_PAINT_MS.category,
    result.loadingExperience.metrics.FIRST_INPUT_DELAY_MS.category,
    result.lighthouseResult.audits['first-contentful-paint'].displayValue,
    result.lighthouseResult.audits['speed-index'].displayValue,
    result.lighthouseResult.audits['interactive'].displayValue,
    result.lighthouseResult.audits['first-meaningful-paint'].displayValue,
  ]);
あとはレスポンス結果を記録していくだけです。
1列目に実行日を記録しておきたかったのでnew Date()の結果を含めるようにしています。このAPIでは様々な値を取得することができるのでレスポンスの詳細についてはこちらを参考にしてください。
記録したいレスポンスを含めたらsheetに対してappendRowすることで最終行に追記するようにしておきます。
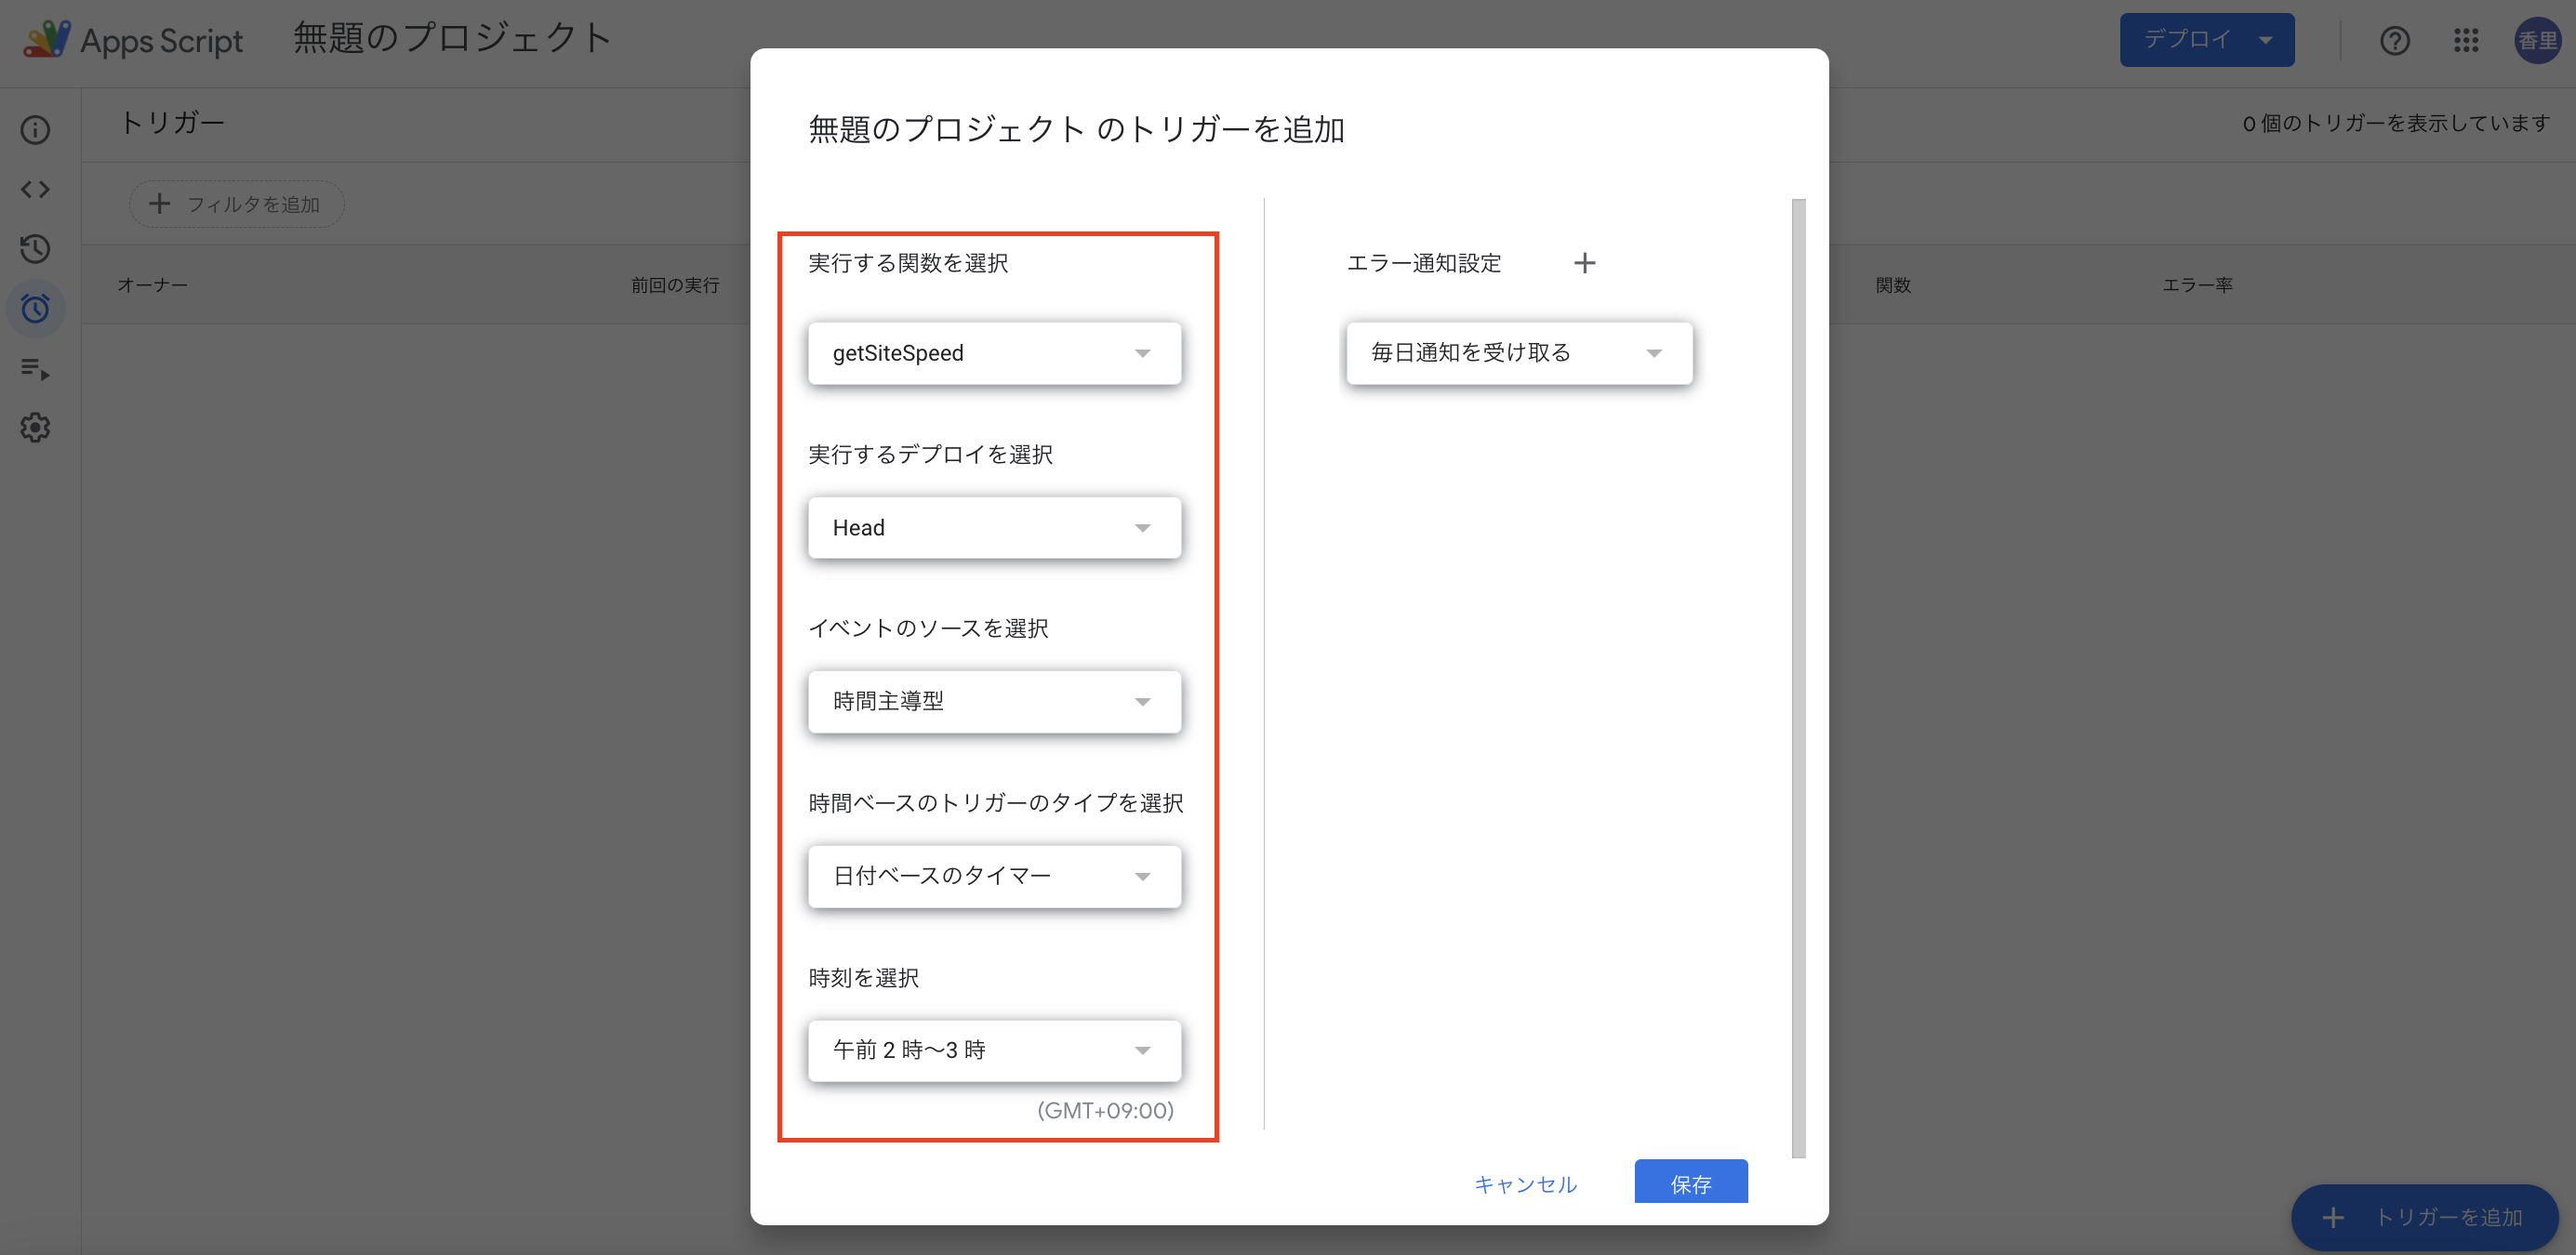
あとはこの関数をトリガーに登録すれば、毎日決まった時間にこの処理を実行することが出来るようになります。
完成品がこちら
GASのコード
function saveSpeedToSheet() {
  const ss = SpreadsheetApp.getActiveSpreadsheet();
  const sheet = ss.getSheetByName('SpeedData'); // データを保存するシート名

  const API_KEY = PropertiesService.getScriptProperties().getProperty('PageSpeed_Insights_API_Key');
  const URL = "https://www.a-tm.co.jp/top/"

  const response = UrlFetchApp.fetch(
    'https://www.googleapis.com/pagespeedonline/v5/runPagespeed' +
    `?url=${URL}` +
    "&locale=ja" +
    `&key=${API_KEY}`
  );

  var result = JSON.parse(response.getContentText());

  var currentDate = new Date();

  sheet.appendRow([
    currentDate,
    result.loadingExperience.metrics.FIRST_CONTENTFUL_PAINT_MS.category,
    result.loadingExperience.metrics.FIRST_INPUT_DELAY_MS.category,
    result.lighthouseResult.audits['first-contentful-paint'].displayValue,
    result.lighthouseResult.audits['speed-index'].displayValue,
    result.lighthouseResult.audits['interactive'].displayValue,
    result.lighthouseResult.audits['first-meaningful-paint'].displayValue,
  ]);
}
実行結果
無事に処理を実行してスコアの記録を行うことができました!
最後に
今回はPageSpeed Insights APIを使ってページの表示速度の記録を行う方法をご紹介しました。今回表示したもの以外にもレスポンスで得られる情報はたくさんあるので、要件に合わせてカスタマイズしてください。
それにしてもPageSpeed Insights APIもGASも無料でここまでのことができるだなんてすごい!


