概要
- NuxtとGraphQLとAWS(Amplify, appsync, dynamodb, cognito, s3....)を用いてWebアプリチュートリアルPart1
- NuxtとGraphQLとAWS(Amplify, appsync, dynamodb, cognito, s3....)用いてWebアプリを作ってみたPart2
- NuxtとGraphQLとAWS(Amplify, appsync, dynamodb, cognito, s3....)を用いてWebアプリチュートリアルPart3
- NuxtとGraphQLとAWS(Amplify, appsync, dynamodb, cognito, s3....)を用いてWebアプリチュートリアルPart4
やること
- 管理者用一覧画面
- ブログ編集
- ブログ削除
フロント実装
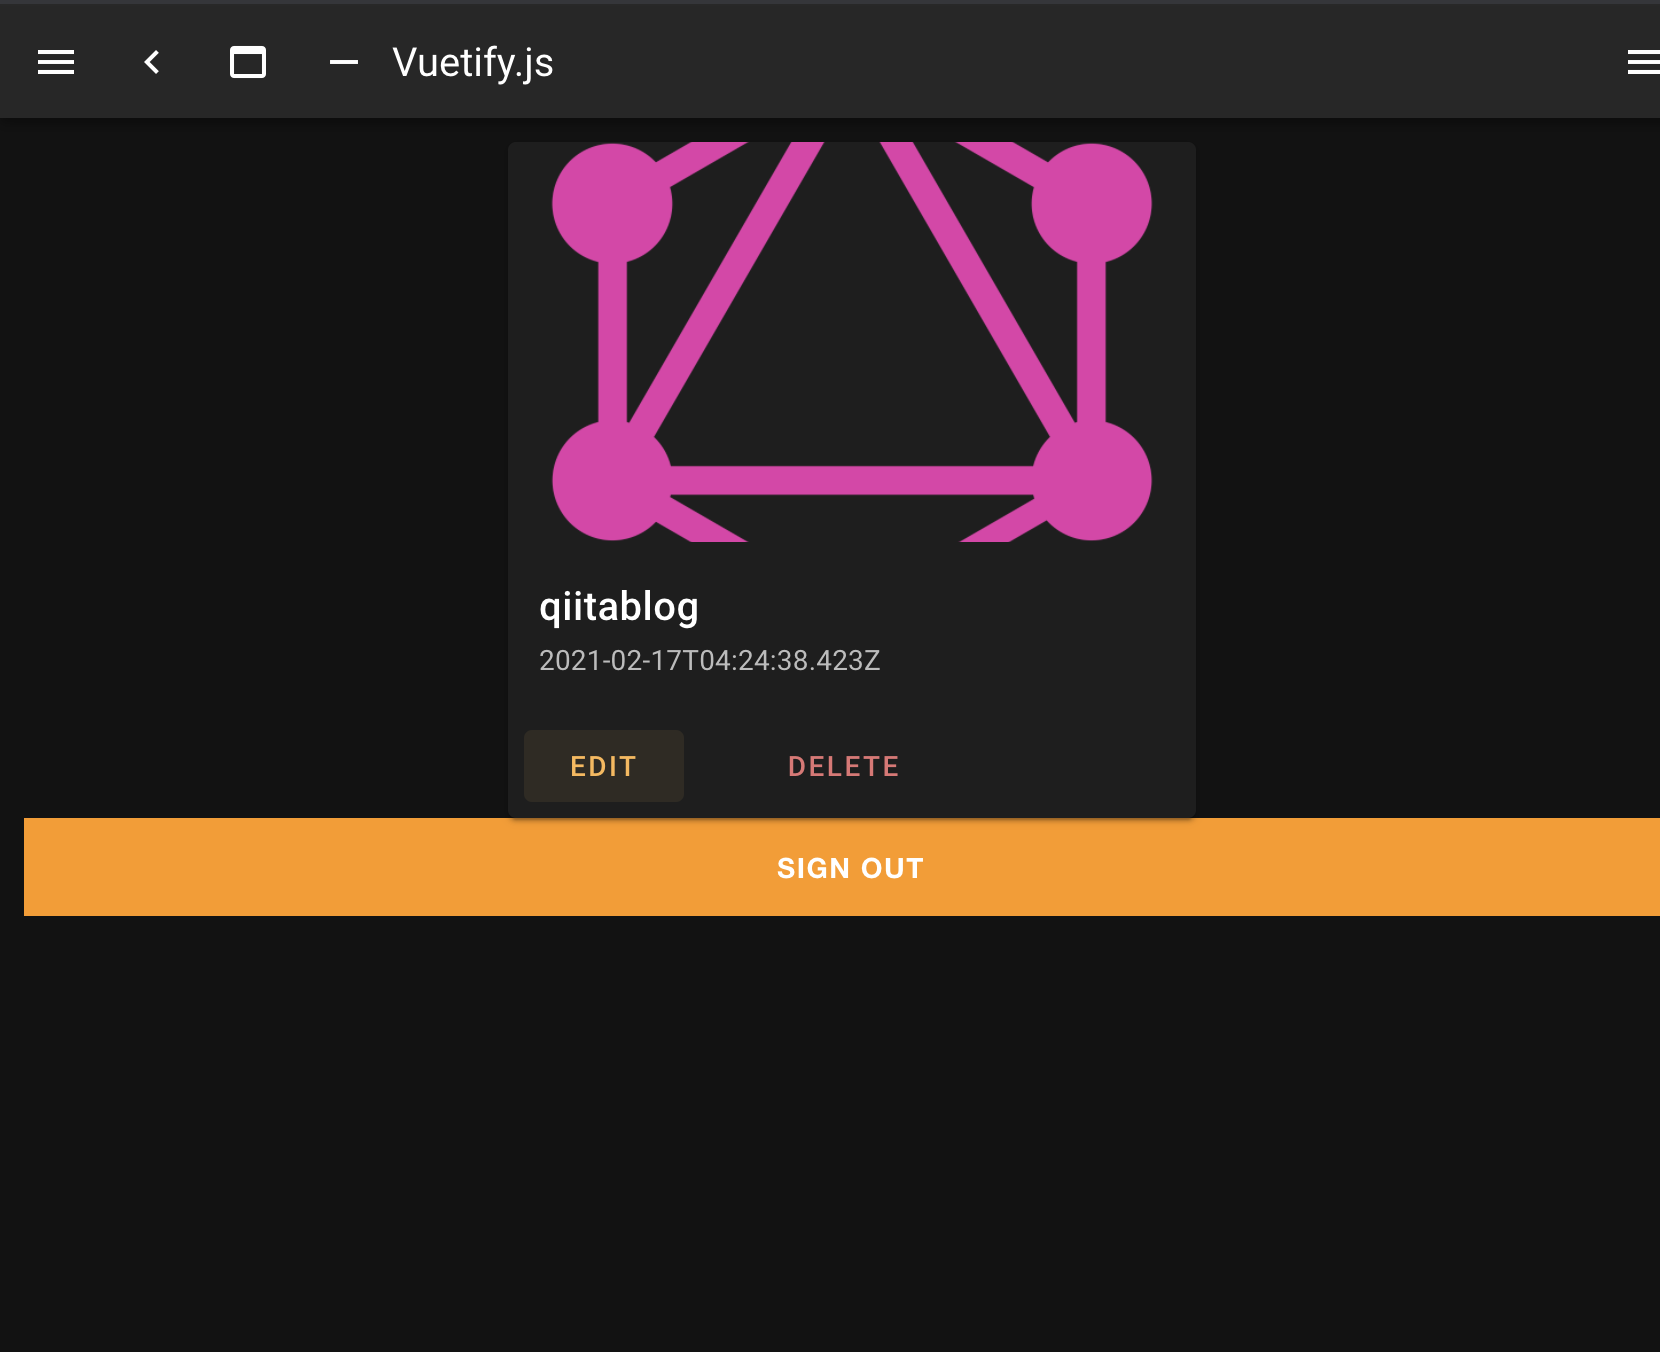
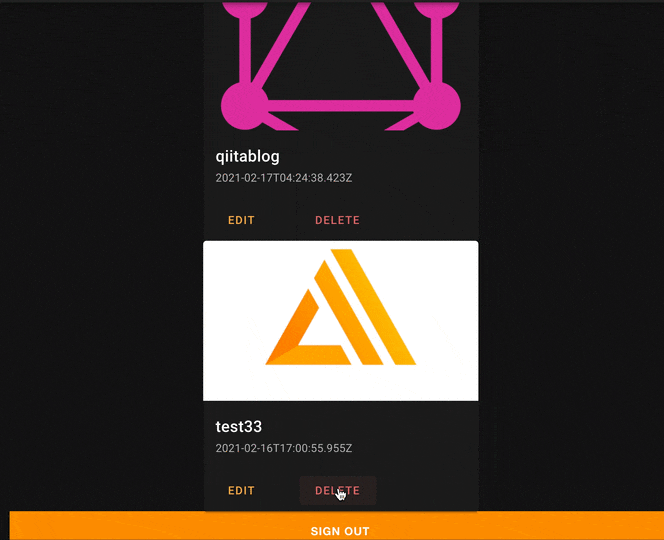
管理者用一覧画面
まずは、part2で書いた一覧表示用のコードをそのままコピーしましょう。
コピー元->作成するファイル
-
./pages/index.vue->./pages/write/index.vue -
./components/readBlog/index.vue->./components/writeBlog/index.vue
では、コピーしたファイルを少し変更します。
./pages/write/index.vue
<template>
<!--認証を追加-->
  <amplify-authenticator>
    <div>
      <Display v-for="post in posts" :key="post.id" :post="post" />
    </div>
    <amplify-sign-out></amplify-sign-out>
  </amplify-authenticator>
</template>

<script>
import { API } from 'aws-amplify'
import Display from '../../components/writeBlog/index'  // ファイルパスの変更
import { listBlogs } from '../../graphql/queries'       // ファイルパスの変更

export default {
  components: {
    Display,
  },
  data() {
    return {
      posts: [],
    }
  },
  created() {
    this.getBlog()
  },
  methods: {
    async getBlog() {
      const posts = await API.graphql({
        query: listBlogs,
      })
      this.posts = posts.data.listBlogs.items
    },
  },
}
</script>
./components/writeBlog/index.vue
<template>
  <v-card class="mx-auto" max-width="344">
    <v-img :src="post.image_url" height="200px"></v-img>

    <v-card-title>{{ post.title }}</v-card-title>

    <v-card-subtitle>{{ post.createdAt }}</v-card-subtitle>

    <v-card-actions>
      <v-btn color="orange lighten-2" text :to="'/detail/' + post.id">
        Explore
      </v-btn>
      <v-spacer></v-spacer>
    </v-card-actions>
  </v-card>
</template>

<script>
export default {
  name: 'PostCard',
  props: ['post'],
}
</script>
これで、ひとまず一覧表示はオッケーです。
ブログ編集
管理者用の一覧画面からブログの編集画面へ遷移できるようにします。
./components/writeBlog/index.vue
<template>
<!--略-->
    <v-card-actions>
      <v-btn color="orange lighten-2" text :to="'/write/edit' + post.id">
        edit
      </v-btn>
      <v-btn color="orange" text> Delete </v-btn>
      <v-spacer></v-spacer>
    </v-card-actions>
  </v-card>
</template>
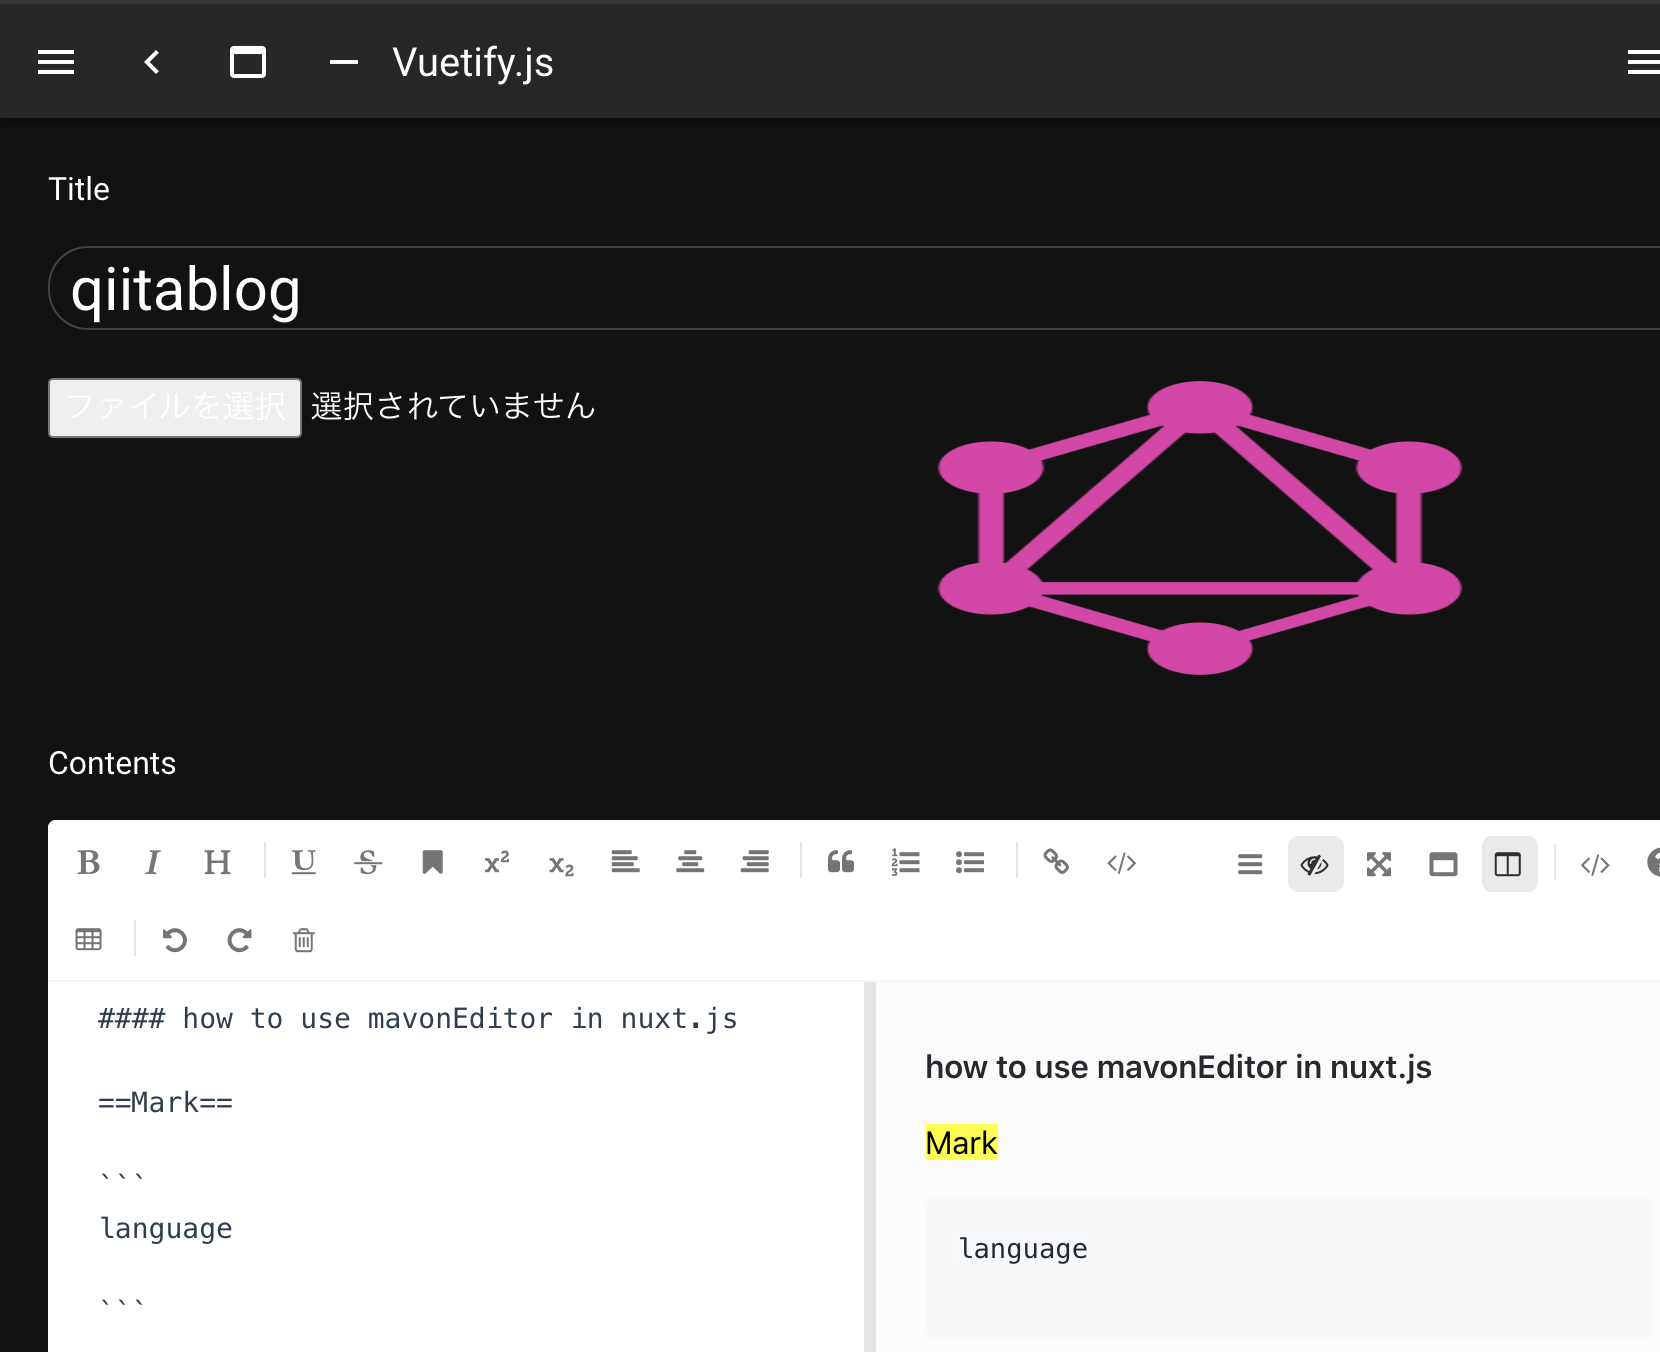
編集用のファイルを作成します。
新規作成と同じように作成していきます。
./pages/write/edit/_id.vue
<template>
  <amplify-authenticator>
    <EditCard :key="blog.id" :blog="blog" />
    <amplify-sign-out></amplify-sign-out>
  </amplify-authenticator>
</template>

<script>
import { API } from 'aws-amplify'
import { getBlog } from '../../../graphql/queries'
import EditCard from '../../../components/writeBlog/edit'

export default {
  name: 'Edit',
  components: {
    EditCard,
  },
  data() {
    return {
      blog: [],
    }
  },
  created() {
    this.getCuisineDetail()
  },
  methods: {
    async getCuisineDetail() {
      const detailBlog = await API.graphql({
        query: getBlog,
        variables: {
          id: this.$route.params.id,
        },
      })
      this.blog = detailBlog.data.getBlog
    },
  },
}
</script>
./components/writeBlog/edit.vue
<template>
<v-container>
<v-row>
<v-col col="12">
<p>Title</p>
<input class="text" v-model="title" type="text" />
</v-col>
</v-row>
<v-row>
<v-col col="6">
<input class="image" type="file" @change="confirmImage" />
</v-col>
<v-col col="6">
<span v-if="confirmedImage">
<img class="c-image" :src="confirmedImage" alt />
</span>
</v-col>
</v-row>
<v-row>
<v-col col="12">
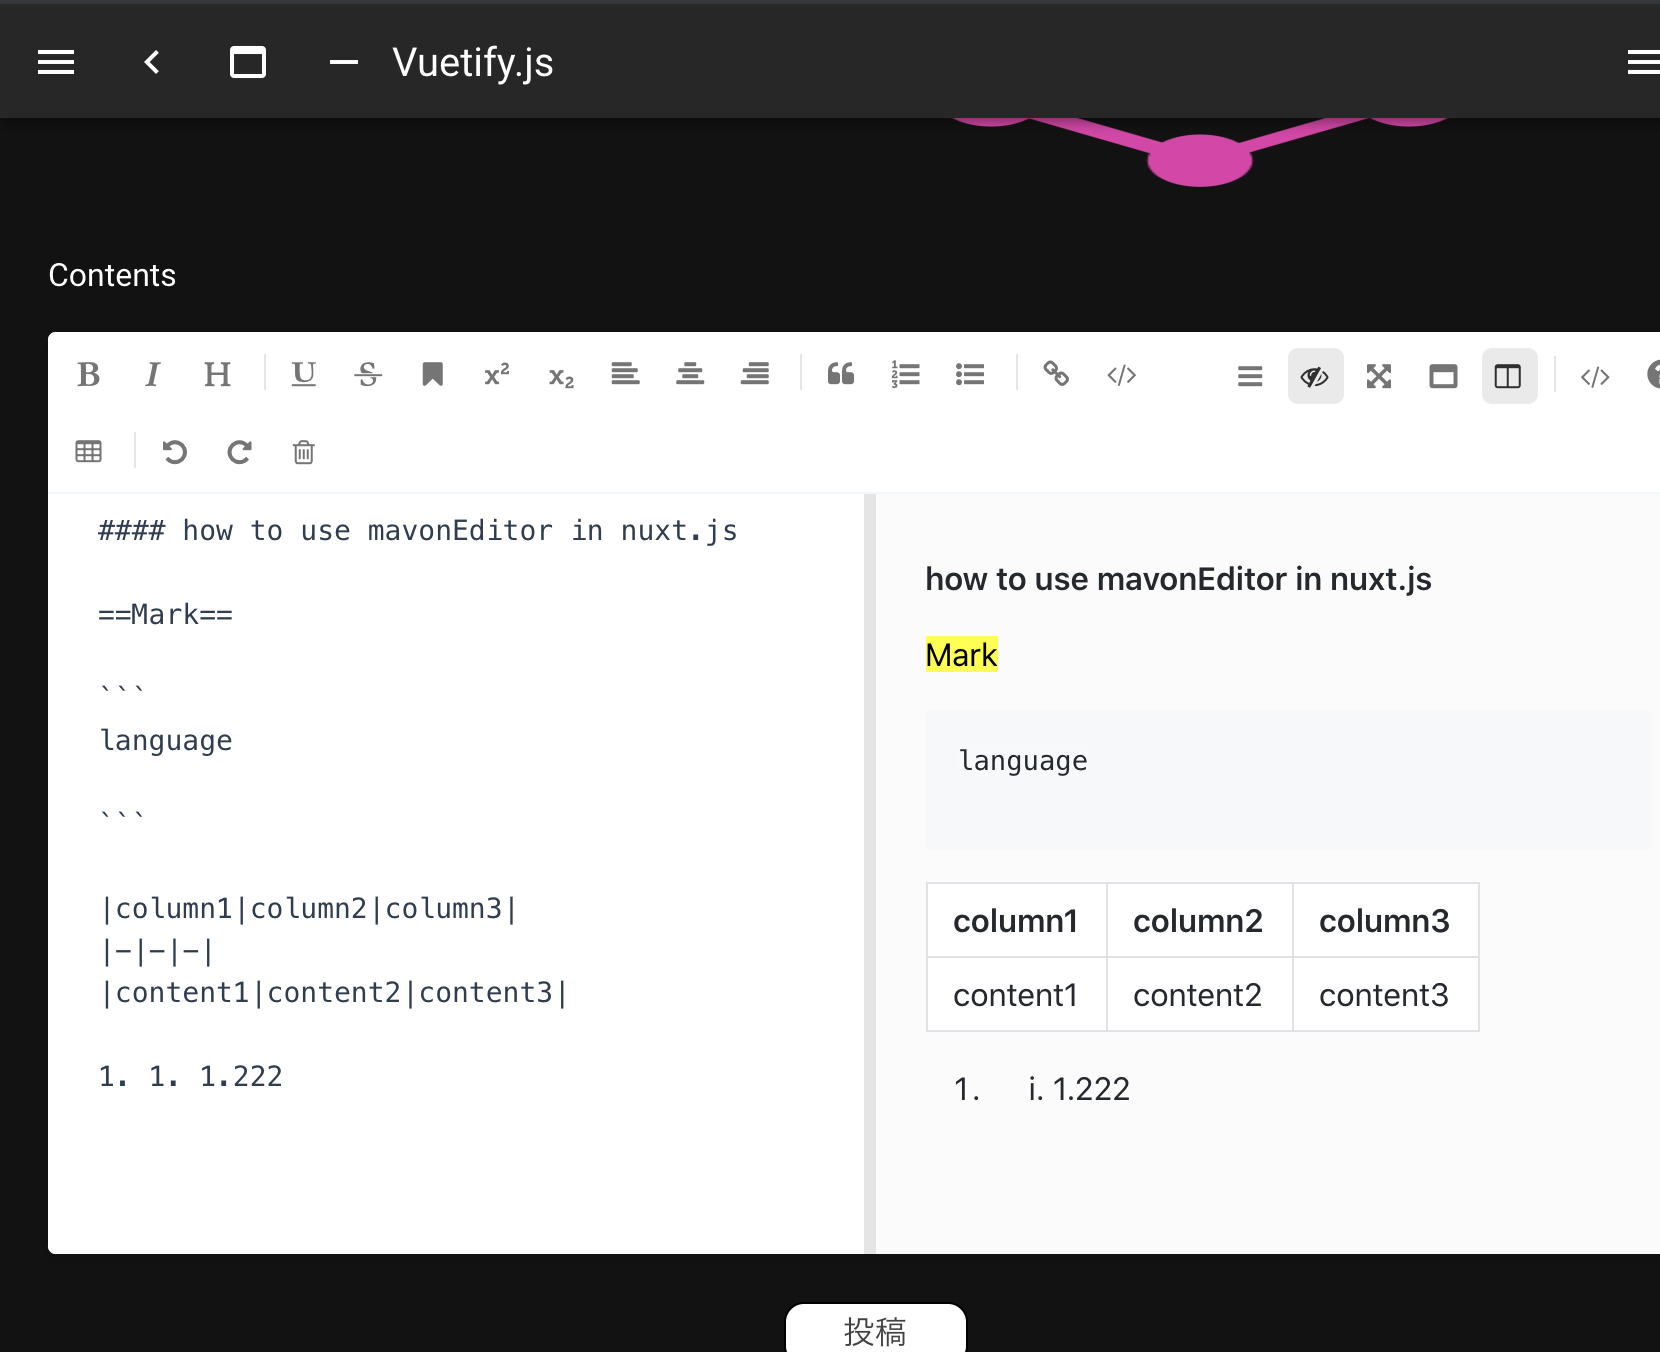
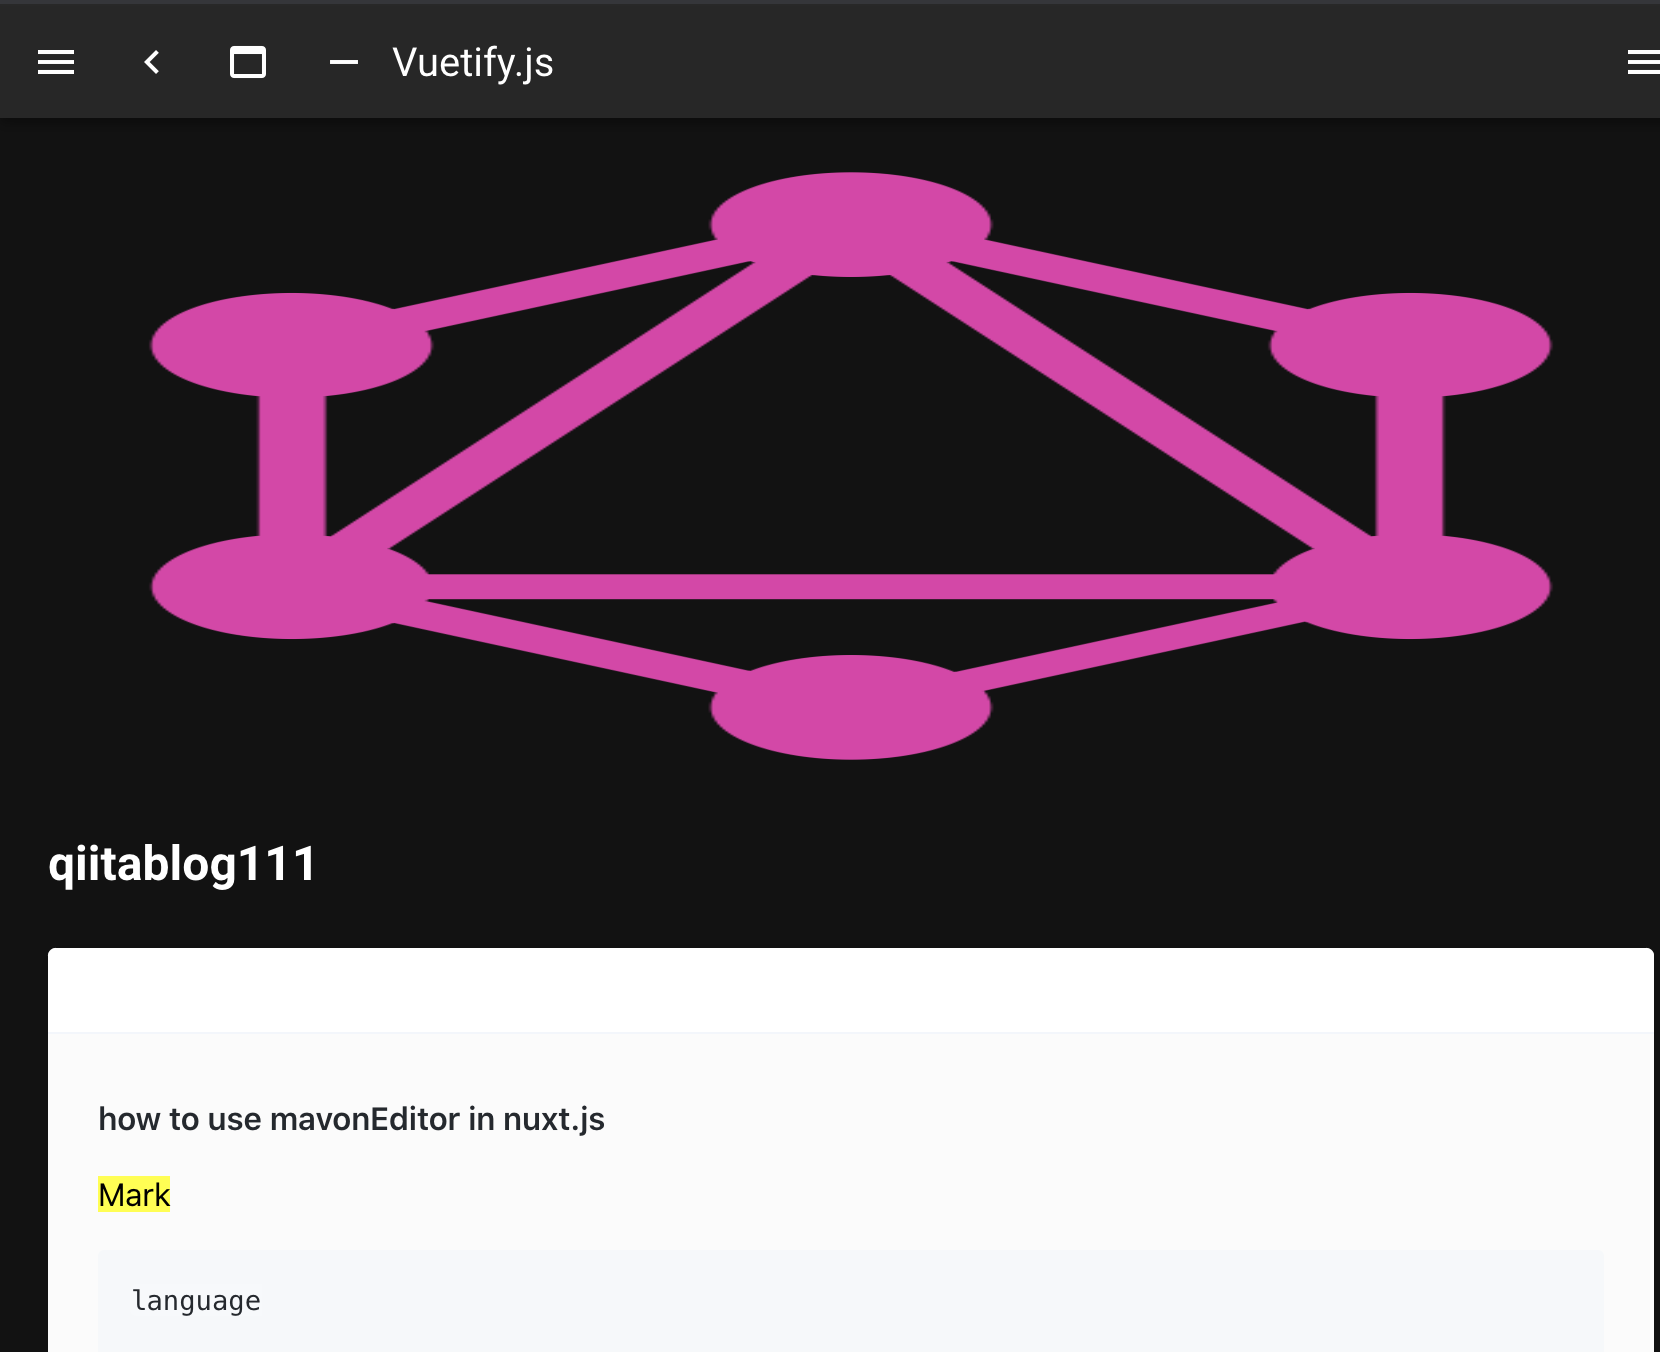
<p>Contents</p>
<div class="mavonEditor">
<no-ssr>
<mavon-editor
v-model="handbook"
:toolbars="markdownOption"
language="en"
/>
</no-ssr>
</div>
</v-col>
</v-row>
<v-row>
<v-col class="btn-box" col="12">
<input class="btn" type="button" @click="submit" value="投稿" />
</v-col>
</v-row>
</v-container>
</template>
<script>
import { API, Storage } from 'aws-amplify'
import awsmobile from '../../aws-exports'
import { updateBlog } from '../../graphql/mutations'
export default {
props: ['blog'], // 追加
data() {
return {
markdownOption: {
bold: true, // 粗体
italic: true, // 斜体
header: true, // hello
underline: true, // 下划线
strikethrough: true, // 中划线
mark: true, // 标记
superscript: true, // 上角标
subscript: true, // 下角标
quote: true, // 引用
ol: true, // 有序列表
ul: true, // 无序列表
link: true, // hi
// imagelink: true, // 图片链接
code: true, // code
table: true, // 表格
fullscreen: true, // 全屏编辑
readmodel: true, // 沉浸式阅读
htmlcode: true, // 展示html源码
help: true, // 帮助
/* 1.3.5 */
undo: true, // 上一步
redo: true, // 下一步
trash: true, // 清空
// save: true, // 保存(触发events中的save事件)
/* 1.4.2 */
navigation: true, // 导航目录
/* 2.1.8 */
alignleft: true, // 左对齐
aligncenter: true, // 居中
alignright: true, // 右对齐
/* 2.2.1 */
subfield: true, // 单双栏模式
preview: true, // 预览
},
// 受け取った値を初期値とするためここで代入しておく
title: this.blog.title,
handbook: this.blog.content,
imageData: '',
confirmedImage: this.blog.image_url,
// imageUrl: '',
message: '',
changeImage: 0, // 画像変更したかどうかの判断用
}
},
methods: {
confirmImage(event) {
this.message = ''
this.imageData = event.target.files[0]
if (!this.imageData.type.match('image.*')) {
this.message = '画像ファイルを選択して下さい'
this.confirmedImage = ''
return
}
this.createImage(this.imageData)
},
createImage(file) {
const reader = new FileReader()
reader.readAsDataURL(file)
reader.onload = (e) => {
this.confirmedImage = e.target.result
}
this.changeImage = 1 // 画像の変更があった場合1とする
},
async submit() {
const filePath = `blog/${this.imageData.name}`
const imageUrlDefault =
'https://' +
awsmobile.aws_user_files_s3_bucket +
'.s3-' +
awsmobile.aws_user_files_s3_bucket_region +
'.amazonaws.com/public/'
// 変更した場合アップロード
if (this.changeImage === 1) {
await Storage.put(filePath, this.imageData).then((result) => {
this.imageUrl = imageUrlDefault + filePath
})
}
// 画像アップロードしなかった場合元のリンクを代入
if (this.changeImage === 0) {
this.imageUrl = this.blog.image_url
}
const contents = this.handbook
const createBlogInfo = {
id: this.blog.id,
title: this.title,
image_url: this.imageUrl,
content: contents,
}
await API.graphql({
query: updateBlog,
variables: { input: createBlogInfo },
})
window.location.href = '/detail/' + this.blog.id // 変更後は詳細画面に遷移
},
},
}
</script>
<style scoped>
.mavonEditor {
width: 100%;
height: 100%;
}
.text {
color: white;
padding: 0px 10px;
font-size: 30px;
border: 1px solid #424242;
border-radius: 20px;
height: 40px;
width: 100%;
}
.image {
height: 150px;
}
.c-image {
width: 300px;
height: 150px;
}
.btn-box {
text-align: center;
}
.btn {
border: 1px solid #000000;
background-color: white;
color: #424242;
width: 90px;
height: 30px;
border-radius: 10px;
}
</style>
これで編集機能完了
削除機能
削除ボタンを押した時削除できるようにします。
管理者用の一覧画面を編集します。
./components/write/index.vue
<template>
<!--略-->
      <v-btn color="orange lighten-2" text :to="'/write/edit/' + post.id">
        edit
      </v-btn>
      <DeleteCard :cardId="post.id" />
      <v-spacer></v-spacer>
<!--略-->
</template>

<script>
import DeleteCard from './delete'
export default {
  name: 'PostCard',
  components: {
    DeleteCard,
  },
// 略
}
</script>
新しくコンポーネントを作成します。
./components/write/edit.vue
<template>
  <v-row justify="center">
    <v-dialog v-model="dialog" persistent max-width="290">
      <template v-slot:activator="{ on, attrs }">
        <v-btn color="red lighten-2" text dark v-bind="attrs" v-on="on">
          DELETE
        </v-btn>
      </template>
      <v-card>
        <v-card-title class="headline">本当に削除しますか? </v-card-title>
        <v-card-actions>
          <v-spacer></v-spacer>
          <v-btn color="green darken-1" text @click="dialog = false">
            いいえ
          </v-btn>
          <v-btn color="green darken-1" text @click="deleteBtn">
            削除する
          </v-btn>
        </v-card-actions>
      </v-card>
    </v-dialog>
  </v-row>
</template>

<script>
import { API } from 'aws-amplify'
import { deleteBlog } from '../../graphql/mutations'

export default {
  name: 'DeleteCard',
  props: ['cardId'],
  data() {
    return {
      dialog: false,
    }
  },
  methods: {
    async deleteBtn() {
      const deleteData = {
        id: this.cardId,
      }
      await API.graphql({
        query: deleteBlog,
        variables: { input: deleteData },
      })
      this.dialog = false
      window.location.href = '/write/'
    },
  },
}
</script>
これで削除もできるようになりました。
以上でパート3終わりです。
ソースコード
part3のソースコードです。