前の記事
WindowsにUbuntuをインストールするのは気持ち良いゾイ!!~Ubuntuの設定編~
git
まぁ、これはないと話しにならんわ。
Githubも使えないしね。
一応、導入法も書いておくけど、Ubuntuには入ってると思う。
$ sudo apt install git
$ git --version
2.17以上が表示されれば大丈夫だと思う。
ただ、これだけじゃまだGithubは使えない。
設定とかSSHでリモートのアカウントと連携しないとね。
設定
$ git config --global user.name <"名前">
$ git config --global user.email <メールアドレス>
$ git config --list
$ git config --global user.name <"名前">で名字と名前の間にスペース入れると、スペース前しか入力されないから注意。
ダブルコロンを入れれば、スペースがあっても大丈夫なので、そのまま入れるように。
$ git config --listでしっかりと入力、期待通りの表示がされているか確認。
されていなかったら、--replace-allオプションを付けて再入力。
あと、エディターをvimにしたい人は以下のコマンドを
$ git config --global core.editor 'vim -c "set fenc=utf-8"'
SSH
$ ssh-keygen -t rsa -b 4096 -C "メールアドレス"
Generating public/private rsa key pair.
Enter file in which to save the key (/home/ユーザー名/.ssh/id_rsa): <指定するディレクトリがなければEnterで大丈夫>
Enter passphrase (empty for no passphrase): <パスワードの入力>
Enter same passphrase again: <パスワードの再入力>
以上を入力すれば、キーが作成される。
id_rsa.pubを開いて、sshからメールアドレスの最後までをコピー。
id_rsa.pubが見つからない人は、隠しファイルを表示してもらえるようにしてみては?


でNew SSH Keyをクリック。
SSHkeyの名前と、コピーした内容を貼り付けて、Add SSH keyすれば完了。
参考資料:
初心者向け—Gitの環境構築時に設定するとすこし幸せになれるコマンドたち— - Qiita
Vim
Vimをテキストエディターとして使うわけじゃないけれど、ちょっとした編集には欠かせない。
$ sudo apt install vim
$ vimtutor
vimtutorはvimのチュートリアル。
vimが動くかどうかだけでなく、一度くらいはやっておくことをオススメ。
zsh
まぁ、これからが本格的な設定ですよ。
zshは処理を早くして、色々なプラグインを使えるようにしてくれるパッケージ(で良いのかな?)
これがあるのとないのとじゃ、大きく差がつくだろうね。
早速、色々とインストールしていきますか。
Installing ZSH · robbyrussell/oh-my-zsh Wiki
$ sudo apt install zsh

$ zsh --version
# 5.0.0以上が表示されればOK

$ chsh -s $(which zsh)
# 処理が終わったら、端末を再起動

$ echo $SHELL
# /bin/zshが表示されているか
# されていなかったら、PCを再起動して、再度確認。

$ $SHELL --version
# zsh --versionと同じ結果が表示されているか
oh-my-zsh
oh-my-zshはなんて説明しようかな…
個人的にテーマを変えられるだけでもだいぶ助かってるし…
いや、それ以外にも色々とすごいんだけどね?
まぁ、実感してみるのが一番ということで。
robbyrussell/oh-my-zsh
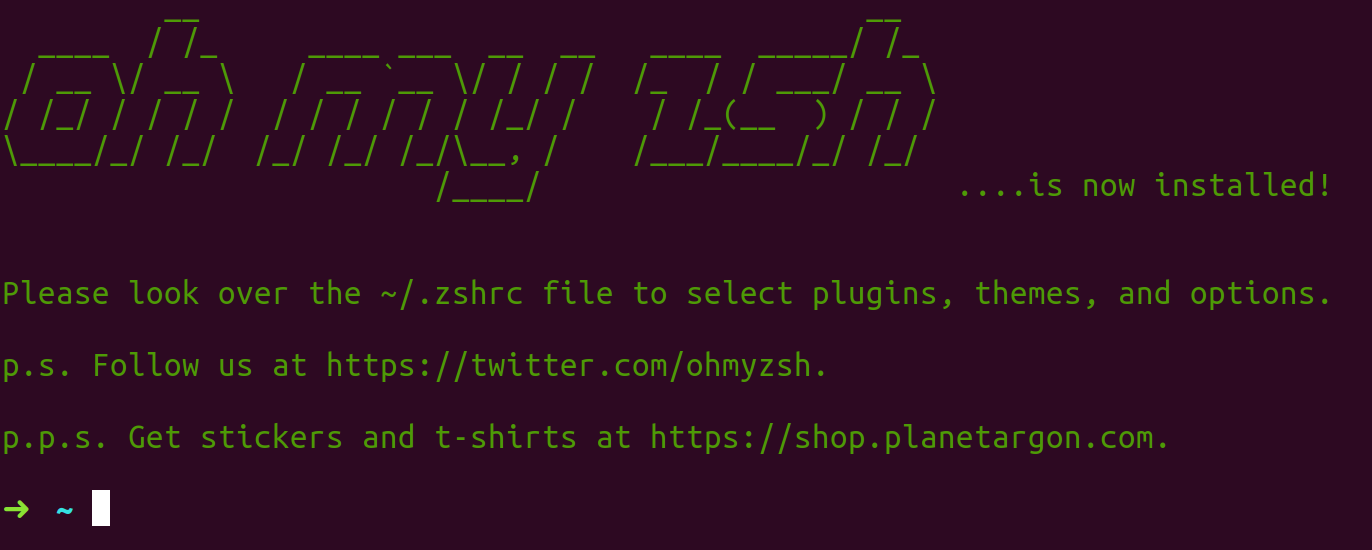
$ sh -c "$(wget https://raw.githubusercontent.com/robbyrussell/oh-my-zsh/master/tools/install.sh -O -)"
自分が選んだテーマはSoliah
ちなみに、テーマの変更は、
$ vim ~/.zshrc
# ZSH_THEME="ここを変更"
$ source ~/.zshrc
でできる。
このテーマの良いところは、githubとの相性が良い点。
自分がどのディレクトリにいるか、どのブランチにいるか、最新のコミットからどのくらいの時間が経ったを教えてくれる。
Githubを使うプログラマーにはぜひとも使ってもらいたい。
このあとはプラグインとか追加するたびに、各プラグインで指定されたとおりにzshrcを編集すれば使えるようになる。
便利な事、この上ないな!!
zgen
zgenは各プラグインの読み込み速度を上げてくれる…はず。
詳しい内容はよくわからんのよね。
とりあえずインストールしますよー、するする。
tarjoilija/zgen
$ git clone https://github.com/tarjoilija/zgen.git "${HOME}/.zgen"
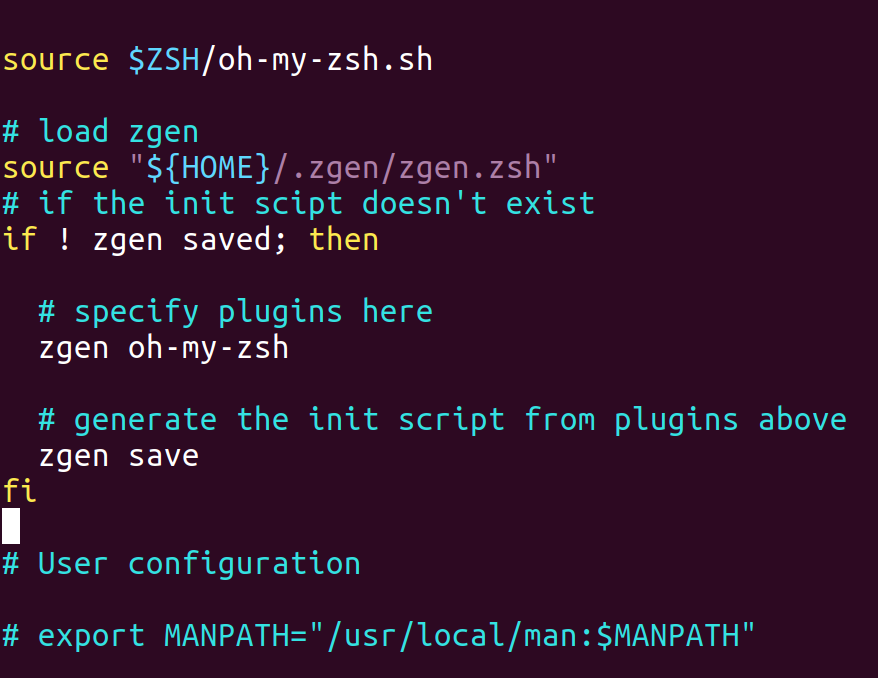
$ vim ~/.zshrc
#下の画像のように編集
$ source ~/.zshrc
$ zgen oh-my-zsh
$ zgen oh-my-zsh plugins/git
一応、コードも載せとく
# load zgen
source "${HOME}/.zgen/zgen.zsh"
# if the init scipt doesn't exist
if ! zgen saved; then

  # specify plugins here
  zgen oh-my-zsh

  # generate the init script from plugins above
  zgen save
fi
zsh-syntax-highlighting
名前の通り、シンタックスハイライト。
コマンドに色を付けてくれる。
ちゃんとコマンドの種類ごとに色分けしてくれてるからわかりやすい。
これだけでもzshを使う価値があるのでは?
$ git clone https://github.com/zsh-users/zsh-syntax-highlighting.git
$ echo "source ${(q-)PWD}/zsh-syntax-highlighting/zsh-syntax-highlighting.zsh" >> ${ZDOTDIR:-$HOME}/.z
shrc
$ source ./zsh-syntax-highlighting/zsh-syntax-highlighting.zsh

$  git clone https://github.com/zsh-users/zsh-syntax-highlighting.git ${ZSH_CUSTOM:-~/.oh-my-zsh/custom}/plugins/zsh-syntax-highlighting
$ vim ~/.zshrc
# pluginsにzsh-syntax-highlightingを追加
$ source ~/.zshrc

$ vim ~/.zshrc
# 最後の行にzgen load zsh-users/zsh-syntax-highlightingを追加
$ source ~/.zshrc
zsh-history-substring-search
これは過去にどんなコマンドを入力したか、出力されたかを見つけてくれるプラグイン。
エラーとか聞くときに便利。
$ git clone https://github.com/zsh-users/zsh-history-substring-search ${ZSH_CUSTOM:-~/.oh-my-zsh/custom}/plugins/zsh-history-substring-search
$ vim ~/.zshrc
# pluginsにhistory-substring-searchを追加
$ source ~/.zshrc
$ source ./zsh-syntax-highlighting/zsh-syntax-highlighting.zsh
$ zgen load zsh-users/zsh-history-substring-search
tmux
これが端末編最後じゃ!!
最強の端末tmux!!
画面を分割してサーバー起動!!
この一言で十分!!
インストールするゾー!
tmux/tmux
公式?を確認してみると、````
libevent
NCURSES – New Curses
が必要みたい。
$ sudo apt install automake libevent-dev libncurses5-dev autoconf libtool pkg-configapt-get build-dep
# 無駄なパッケージがあるかもしれません

$ cd /usr/local/src
$ sudo git clone https://github.com/tmux/tmux.git

$ cd /usr/local/src/tmux
$ sudo ./autogen.sh
$ sudo ./configure --prefix=/usr/local
$ sudo make
$ sudo make install
参考資料:
最新のtmuxをUbuntuにインストール - Qiita
tmux -Vをすると、tmux masterになるため、現時点で最新である2.7にgit checkout
tmux-plugin
tmux-pluginはただでさえ便利なtmuxをより便利にしてくれるpluginを管理するツール。
インストールしない理由はないわな!!
作業はホームディレクトリでOK
tmux-plugins/tpm
$ git clone https://github.com/tmux-plugins/tpm ~/.tmux/plugins/tpm
$ vim .tmux.conf
# 下記の内容を追加
$ tmux
$ tmux source ~/.tmux.conf
# List of plugins
set -g @plugin 'tmux-plugins/tpm'
set -g @plugin 'tmux-plugins/tmux-sensible'

# Other examples:
# set -g @plugin 'github_username/plugin_name'
# set -g @plugin 'git@github.com/user/plugin'
# set -g @plugin 'git@bitbucket.com/user/plugin'

# Initialize TMUX plugin manager (keep this line at the very bottom of tmux.conf)
run '~/.tmux/plugins/tpm/tpm'
使い方は使いたいプラグインを、set -g @plugin 'プラグイン名'で.tmux.confで記載して、Ctrl+b & Iで更新。
これだけで反映されるなんて便利すぎィ!!
tmux-resurrect
Ctrl+b + Ctrl+sで環境の保存、Ctrl+b + Ctrl+rで環境の復元。
聞くだけで便利だな。
tmux-plugins/tmux-resurrect
tmux-continuum
PC起動時にtmuxを起動したり、15分おきに環境を保存してくれたりするプラグイン。
tmux-resurrectと組み合わせることで、よりその進化を発揮する!!
tmux-plugins/tmux-continuum
tmux-yank
tmux上でCtrl+cやCtrl+bなど、クリップボードを通じた操作ができるプラグイン。
まぁ、使わない手がないか。
tmux-plugins/tmux-yank
上の3つのプラグインを導入するなら、.tmux.confは次の通り。
set -g @plugin 'tmux-plugins/tmux-resurrect'
set -g @plugin 'tmux-plugins/tmux-continuum'
set -g @plugin 'tmux-plugins/tmux-yank'
vimで書き終わったら、Ctrl+Iで完了!!
端末起動時にTMUXを起動させる!!
PCを開いて端末をクリックして、TMUXを起動させるのは面倒。
だから、端末起動時にTMUXが動くようにしちゃおう!!
if [ "$TMUX" = "" ]; then
    tmux;
fi
~/.zshrcのどこにでも上のコードを記入して、sourceで読み込めば次からtmuxが起動してくれるようになる。
便利便利
## 次の記事
ようやくシステムの導入に入れる…
ちょっと休憩を…
WindowsにUbuntuをインストールするのは気持ち良いゾイ!!~開発環境編~


