Unity ML-Agents(v0.9.1)をDocker上で動作させてみました。
UnityやUnity ML-Agentsの環境構築などは下記をご参考ください。
Macでhomebrewを使ってUnityをインストールする(Unity Hub、日本語化対応)
https://qiita.com/kai_kou/items/445e614fb71f2204e033
MacでUnity ML-Agentsの環境を構築する(v0.9.1対応) - Qiita
https://qiita.com/kai_kou/items/268ccf6f961f8ca8cba8
手順
基本的には公式のドキュメントに沿えばよい感じです。
Using Docker For ML-Agents
https://github.com/Unity-Technologies/ml-agents/blob/master/docs/Using-Docker.md
Dockerのインストール
Dockerがインストールされていない場合、インストールします。
> brew cask install docker
(略)

> docker --version
Docker version 19.03.1, build 74b1e89
※Dockerを初回起動すると初期設定のためにパスワード入力が求められます。
UnityにLinuxビルドサポートコンポーネントを追加する
Unity Hubを利用してUnityにLinuxビルドサポートコンポーネントを追加します。
Unityのバージョンは2019.1.13f1 を利用しています。
- Unity Hubアプリを起動する
- [Installs] > [On my machine]からUnityリスト右側にある[...]をクリックして[Add Component]を選択する
 - [Add components your install]ダイアログの[Platforms]にある[Linux Build Support]にチェックを入れて[Done]ボタンをクリックする

学習用のappをダウンロードしてビルドする
ML-Agentsリポジトリをダウンロード
適当なディレクトリにリポジトリをダウンロードする。
> mkdir 適当なディレクトリ
> cd 適当なディレクトリ
> git clone https://github.com/Unity-Technologies/ml-agents.git
Unityアプリからサンプルプロジェクトを開く
Unity Hubでアプリを立ち上げます。Unity Hubがインストールされていない場合は下記をご参考ください。
Macでhomebrewを使ってUnityをインストールする(Unity Hub、日本語化対応)
https://qiita.com/kai_kou/items/445e614fb71f2204e033
ML-Agentsを利用するにはUnityのバージョン2017.4 以上が必要となります。今回は2019.1.13f1 を利用しました。
アプリが立ち上がったら「開く」ボタンから任意のディレクトリ/ml-agents/UnitySDK フォルダを選択します。

Unityエディタのバージョンによっては、アップグレードするかの確認ダイアログが立ち上がります。
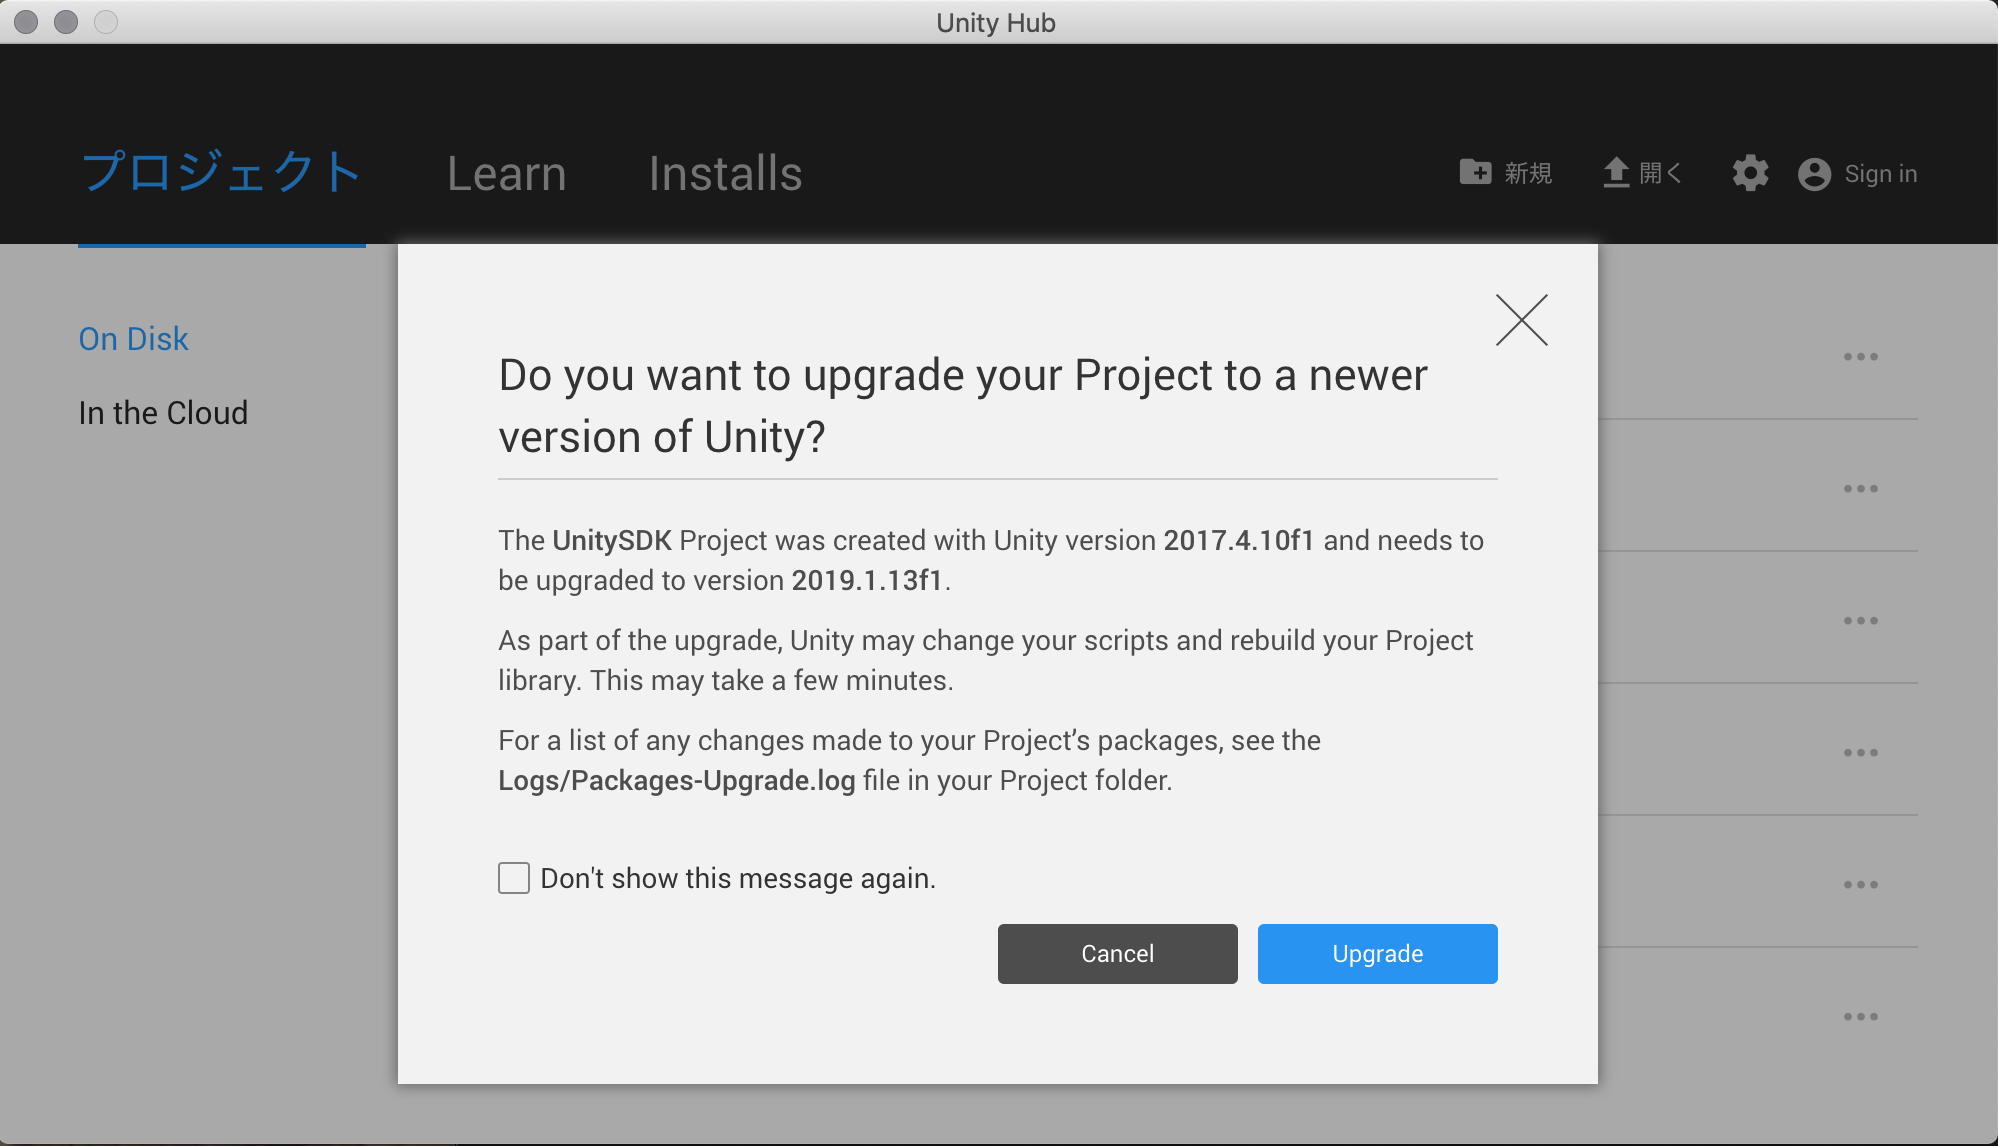
「Upgrade」ボタンをクリックして進めます。
アップグレード処理に少し時間がかかります。

起動しました。
今回は、サンプルとして含まれている[3DBall]Scenesを利用します。
- Unityアプリの下パネルにある[Project]タブから以下のフォルダまで開く
- [Assets] > [ML-Agents] > [Examples] > [3DBall] > [Scenes]
- 開いたら、[3DBall]ファイルがあるので、ダブルクリックして開く

Scenes(シーン)の設定
ML-Agentsで学習させるための設定です。
- Unityアプリの[Edit]メニューから[Project Settings]を開く

- [Inspector]パネルで以下の設定を確認する
- [Resolution and Presentation]の[Run In Background]がチェックされている
- [Display Resolution Dialog]がDisableになっている

Prefabs(プレハブ)の設定
- Unityアプリの下にある[Project]タブから以下のフォルダまで開く
- [Assets] > [ML-Agents] > [Examples] > [3DBall] > [Prefabs]
- Prefabsフォルダ内の[Game]をダブルクリックする
- Unityアプリの左側にある[Hierarchy]パネルから[Game] > [Pratform]を選択する
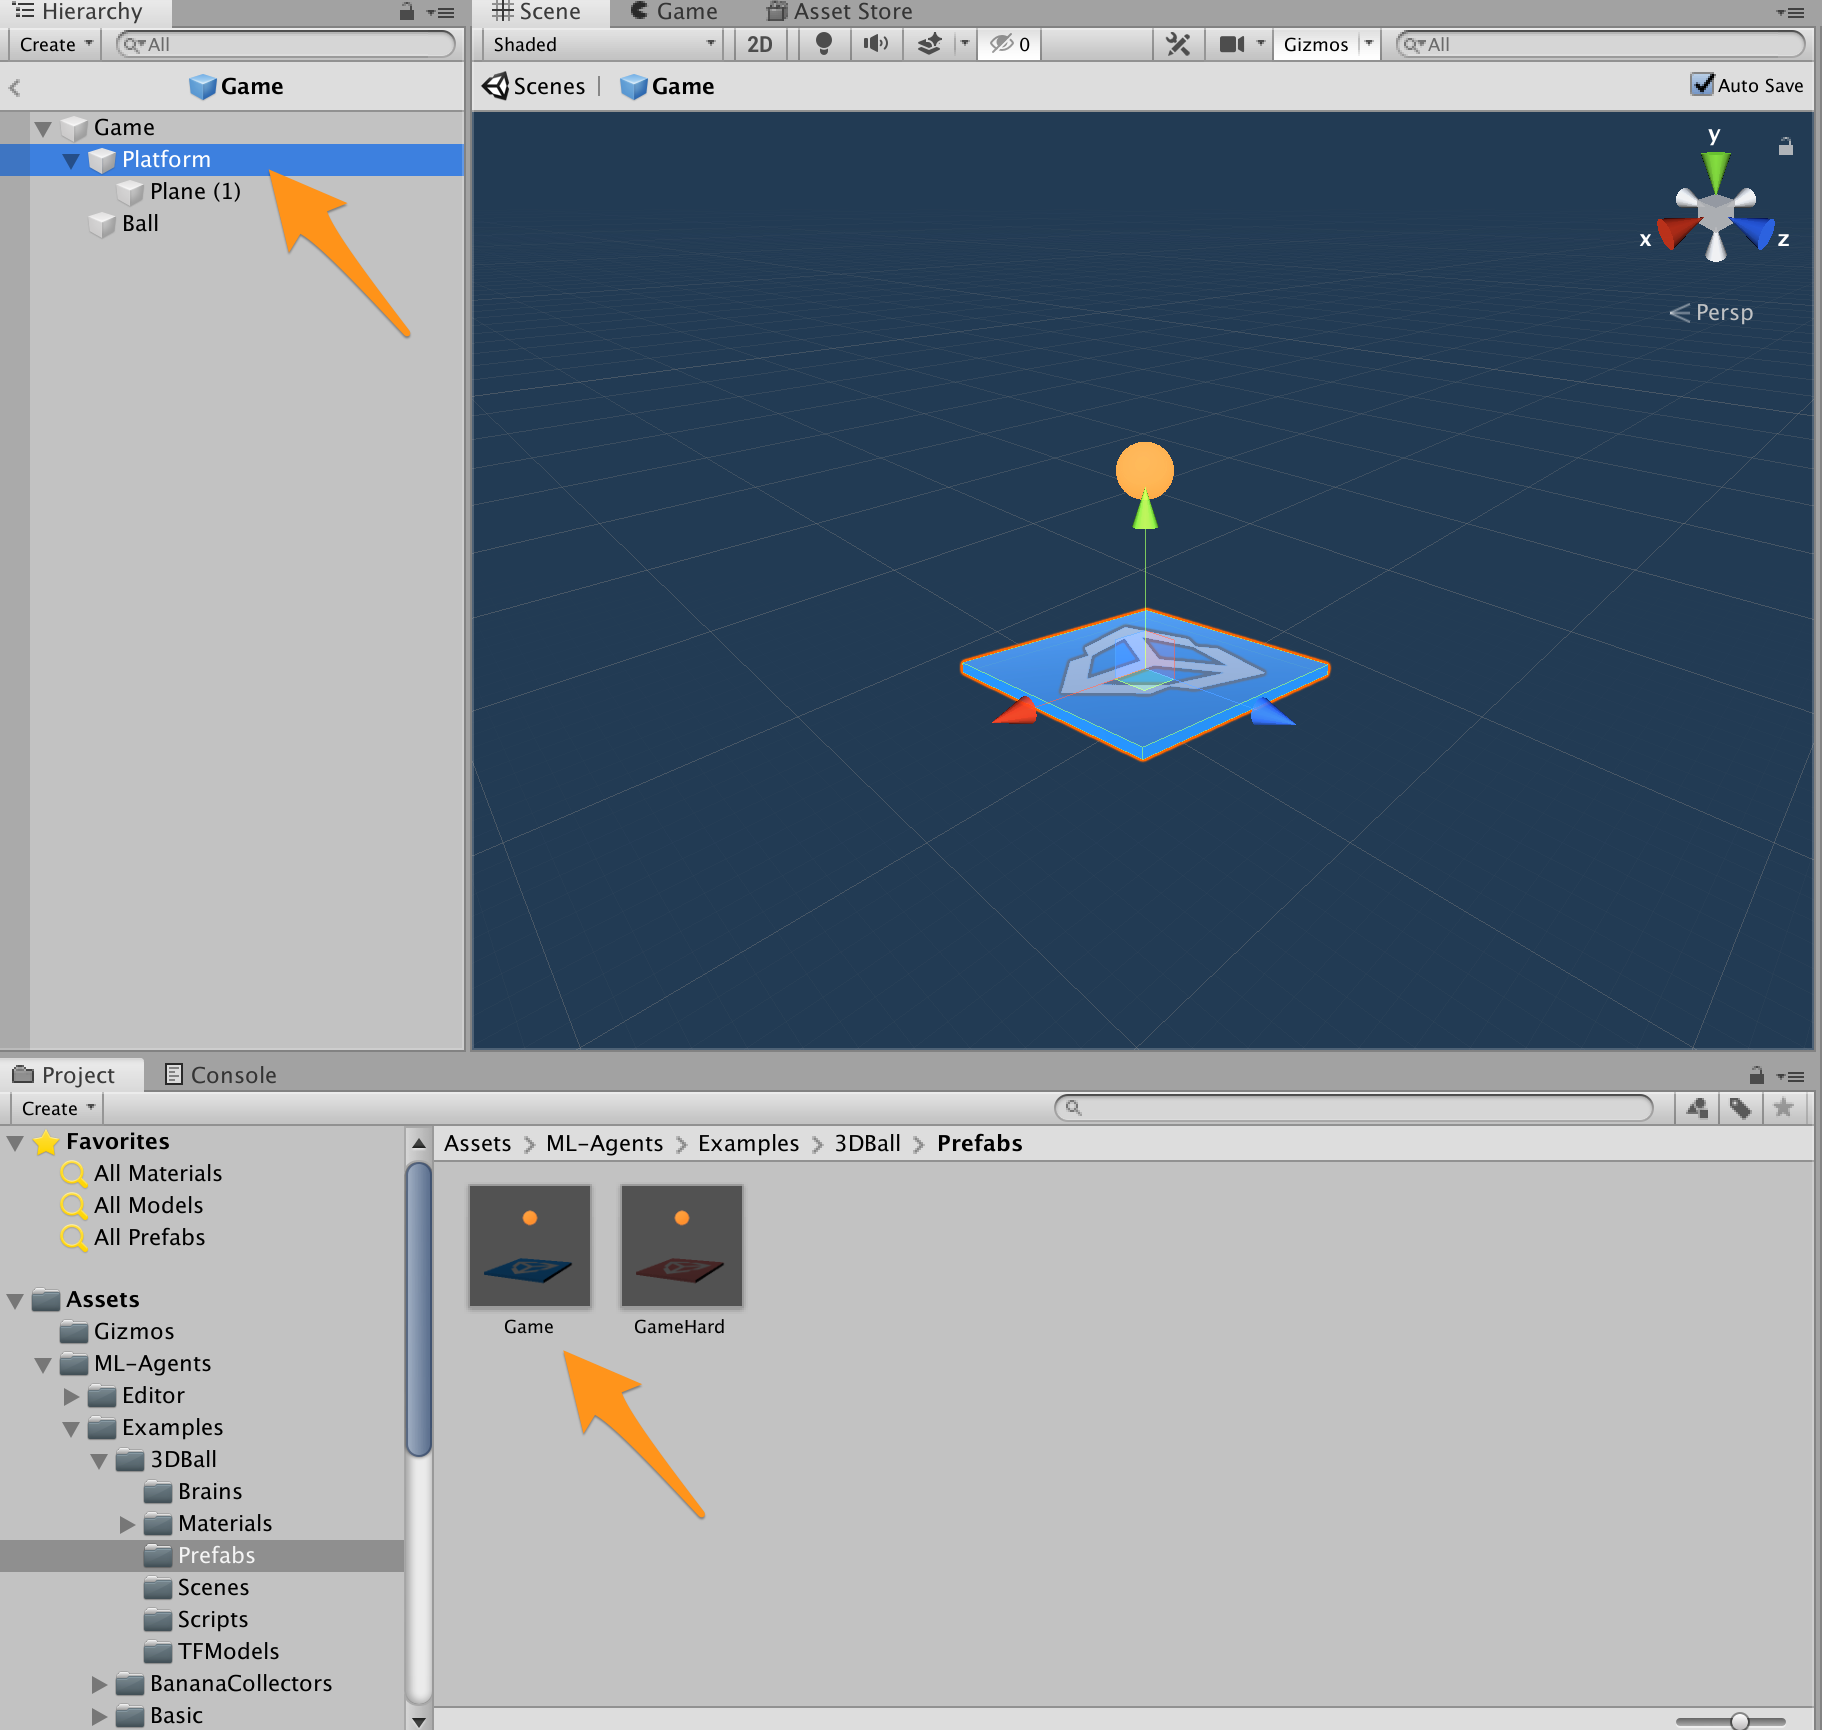
- Unityアプリの右側にある[Inspector]パネルのBall 3D Agent(Script)にあるBrainが[3DBallLearning(LearningBrain)]であることを確認する
- [3DBallLearning(LearningBrain)]ではない場合、
- [Project]タブから以下のフォルダまで開き、
- [Assets] > [ML-Agents] > [Examples] > [3DBall] > [Brains]
- [3DBallLearning]を[Inspector]パネルのBrainにドラッグ&ドロップして指定する
- [Project]タブから以下のフォルダまで開き、
 - [Ctrl] + [s]キーでシーンを保存する
- ※設定変更後、しっかりと保存しないと、ビルド時に設定が反映されなくてハマります。
- [Ctrl] + [s]キーでシーンを保存する
- ※設定変更後、しっかりと保存しないと、ビルド時に設定が反映されなくてハマります。
Brainsの設定
- Unityアプリの下パネルにある[Project]タブから以下のフォルダまで開く
- [Assets] > [ML-Agents] > [Examples] > [3DBall] > [Scenes]
- Unityアプリの左側にある[Hierarchy]パネルから[Ball3DAcademy]を選択する
- Unityアプリの右側にある[Inspector]パネルの[Broadcast Hub] > [Brains]に「3DBallLearning (LearningBrain)」が指定されていることを確認する
- 「3DBallLearning (LearningBrain)」横にある[Control]にチェックを入れる

- [Ctrl] + [s]キーでシーンを保存する
※設定変更後、しっかりと保存しないとビルド時に設定が反映されなくてハマります。
ビルド設定
- Unityアプリの[File]メニューから[Build Settings]を選択する
- [Build Settings]ダイアログで[Add Opne Scenes]をクリックする
- [Scenes In Build]で[ML-Agents/Examples/3DBall/Scenes/3DBall]にチェックを入れる
- [Platform]で
PC, Mac & Linux Standaloneが選択されていることを確認する - [Target Platform]を
Linuxに変更する - [Architecture]を
x86_64に変更する - [Server Build]にチェックを入れる
- 以前は[Headless Mode]でした。
- [Build Settings]ダイアログで[Build]ボタンをクリックする
- ファイル保存ダイアログで以下を指定してビルドを開始する
- ファイル名: 3DBall
- フォルダ名: 任意のディレクトリ/ml-agents/unity-volume


すると、unity-volume に以下フォルダ・ファイルが出力されます。
> ls 任意のディレクトリ/ml-agents/unity-volume

3DBall.x86_64 3DBall_Data
ハイパーパラメーターファイルの用意
ハイパーパラメーターファイルをunity-volume フォルダにコピーしておきます。
> cd 任意のディレクトリ/ml-agents
> cp config/trainer_config.yaml unity-volume
Dockerコンテナを構築する
Dockerが起動していることを確認してから、ml-agentsリポジトリ直下でdockerコンテナを構築します。すでにDockerfileが用意されているので、docker build するだけ。楽々ですね。
> cd 任意のディレクトリ/ml-agents
> docker build -t 3dball-ml-docker .

(略)
Step 20/20 : ENTRYPOINT ["mlagents-learn"]
 ---> Running in 56532e0d2127
Removing intermediate container 56532e0d2127
 ---> 073d8b1040e9
Successfully built 073d8b1040e9
Successfully tagged 3dball-ml-docker:latest
Dockerコンテナの実行
Dockerコンテナが構築できたら実行してみます。
# unity-ml-docker-3dball: コンテナ名(任意)
# 3DBall: Unityでbuild時に付けたアプリの名前(拡張子なし)
# 3dball-ml-docker: Dockerでbuild時に付けた名前
# docker-first-run: 機械学習結果を保存する際の名称(任意)

> docker run -it \
  --name unity-ml-docker-3dball \
  --mount type=bind,source="$(pwd)"/unity-volume,target=/unity-volume \
  -p 5005:5005 \
  -p 6006:6006 \
  3dball-ml-docker:latest \
    trainer_config.yaml \
    --docker-target-name=unity-volume \
    --env=3DBall \
    --train \
    --run-id=docker-first-run
fishシェルで実行する場合は、"$(pwd)" を"$PWD" に置き換えます。
> docker run -it \
  --name unity-ml-docker-3dball \
  --mount type=bind,source="$PWD"/unity-volume,target=/unity-volume \
  -p 5005:5005 \
  -p 6006:6006 \
  3dball-ml-docker:latest \
    trainer_config.yaml \
    --docker-target-name=unity-volume \
    --env=3DBall \
    --train \
    --run-id=docker-first-run
注意点
Unity ML-Agents公式にあるdocker run コマンドのサンプルがおそらく動作検証していなくて、パラメータ指定エラーとなります。(2019/08/20時点)
以下はmlagents-learn コマンドのヘルプです。
Dockerで実行する場合には、Dockerイメージの指定(3dball-ml-docker:latest )の後からが、mlagents-learn コマンドのパラメータ指定となるため、--docker-target-name はtrainer_config.yaml (<trainer-config-path>) の後ろに指定します。
    Usage:
      mlagents-learn <trainer-config-path> [options]
      mlagents-learn --help

    Options:
      --env=<file>                Name of the Unity executable [default: None].
      --curriculum=<directory>    Curriculum json directory for environment [default: None].
      --sampler=<file>            Reset parameter yaml file for environment [default: None].
      --keep-checkpoints=<n>      How many model checkpoints to keep [default: 5].
      --lesson=<n>                Start learning from this lesson [default: 0].
      --load                      Whether to load the model or randomly initialize [default: False].
      --run-id=<path>             The directory name for model and summary statistics [default: ppo].
      --num-runs=<n>              Number of concurrent training sessions [default: 1].
      --save-freq=<n>             Frequency at which to save model [default: 50000].
      --seed=<n>                  Random seed used for training [default: -1].
      --slow                      Whether to run the game at training speed [default: False].
      --train                     Whether to train model, or only run inference [default: False].
      --base-port=<n>             Base port for environment communication [default: 5005].
      --num-envs=<n>              Number of parallel environments to use for training [default: 1]
      --docker-target-name=<dt>   Docker volume to store training-specific files [default: None].
      --no-graphics               Whether to run the environment in no-graphics mode [default: False].
      --debug                     Whether to run ML-Agents in debug mode with detailed logging [default: False].
実行すると、学習が始まります。
trainer_config.yaml のmax_steps で指定されているステップ数が完了するか、ctrl + c キーで学習が終了します。
> docker run (略)

INFO:mlagents.trainers:{'--base-port': '5005',
 '--curriculum': 'None',
 '--debug': False,
 '--docker-target-name': 'unity-volume',
 '--env': '3DBall',
 '--help': False,
 '--keep-checkpoints': '5',
 '--lesson': '0',
 '--load': False,
 '--no-graphics': False,
 '--num-envs': '1',
 '--num-runs': '1',
 '--run-id': 'docker-first-run',
 '--sampler': 'None',
 '--save-freq': '50000',
 '--seed': '-1',
 '--slow': False,
 '--train': True,
 '<trainer-config-path>': 'trainer_config.yaml'}


                        ▄▄▄▓▓▓▓
                   ╓▓▓▓▓▓▓█▓▓▓▓▓
              ,▄▄▄m▀▀▀'  ,▓▓▓▀▓▓▄                           ▓▓▓  ▓▓▌
            ▄▓▓▓▀'      ▄▓▓▀  ▓▓▓      ▄▄     ▄▄ ,▄▄ ▄▄▄▄   ,▄▄ ▄▓▓▌▄ ▄▄▄    ,▄▄
          ▄▓▓▓▀        ▄▓▓▀   ▐▓▓▌     ▓▓▌   ▐▓▓ ▐▓▓▓▀▀▀▓▓▌ ▓▓▓ ▀▓▓▌▀ ^▓▓▌  ╒▓▓▌
        ▄▓▓▓▓▓▄▄▄▄▄▄▄▄▓▓▓      ▓▀      ▓▓▌   ▐▓▓ ▐▓▓    ▓▓▓ ▓▓▓  ▓▓▌   ▐▓▓▄ ▓▓▌
        ▀▓▓▓▓▀▀▀▀▀▀▀▀▀▀▓▓▄     ▓▓      ▓▓▌   ▐▓▓ ▐▓▓    ▓▓▓ ▓▓▓  ▓▓▌    ▐▓▓▐▓▓
          ^█▓▓▓        ▀▓▓▄   ▐▓▓▌     ▓▓▓▓▄▓▓▓▓ ▐▓▓    ▓▓▓ ▓▓▓  ▓▓▓▄    ▓▓▓▓`
            '▀▓▓▓▄      ^▓▓▓  ▓▓▓       └▀▀▀▀ ▀▀ ^▀▀    `▀▀ `▀▀   '▀▀    ▐▓▓▌
               ▀▀▀▀▓▄▄▄   ▓▓▓▓▓▓,                                      ▓▓▓▓▀
                   `▀█▓▓▓▓▓▓▓▓▓▌
                        ¬`▀▀▀█▓


INFO:mlagents.envs:
'Ball3DAcademy' started successfully!
Unity Academy name: Ball3DAcademy
        Number of Brains: 1
        Number of Training Brains : 1
        Reset Parameters :
                scale -> 1.0
                mass -> 1.0
                gravity -> 9.8100004196167
Unity brain name: 3DBallLearning
        Number of Visual Observations (per agent): 0
        Vector Observation space size (per agent): 8
        Number of stacked Vector Observation: 1
        Vector Action space type: continuous
        Vector Action space size (per agent): [2]
        Vector Action descriptions: ,
2019-08-19 09:26:41.207263: I tensorflow/core/platform/cpu_feature_guard.cc:140] Your CPU supports instructions that this TensorFlow binary was not compiled to use: AVX2 FMA
INFO:mlagents.envs:Hyperparameters for the PPOTrainer of brain 3DBallLearning:
        trainer:        ppo
        batch_size:     64
        beta:   0.001
        buffer_size:    12000
        epsilon:        0.2
        hidden_units:   128
        lambd:  0.99
        learning_rate:  0.0003
        max_steps:      5.0e4
        memory_size:    256
        normalize:      True
        num_epoch:      3
        num_layers:     2
        time_horizon:   1000
        sequence_length:        64
        summary_freq:   1000
        use_recurrent:  False
        vis_encode_type:        simple
        reward_signals:
          extrinsic:
            strength:   1.0
            gamma:      0.99
        summary_path:   /unity-volume/summaries/docker-first-run-0_3DBallLearning
        model_path:     /unity-volume/models/docker-first-run-0/3DBallLearning
        keep_checkpoints:       5
INFO:mlagents.trainers: docker-first-run-0: 3DBallLearning: Step: 1000. Time Elapsed: 33.147 s Mean Reward: 1.107. Std of Reward: 0.588. Training.
INFO:mlagents.trainers: docker-first-run-0: 3DBallLearning: Step: 2000. Time Elapsed: 61.621 s Mean Reward: 1.227. Std of Reward: 0.680. Training.
INFO:mlagents.trainers: docker-first-run-0: 3DBallLearning: Step: 3000. Time Elapsed: 94.060 s Mean Reward: 1.511. Std of Reward: 0.973. Training.
INFO:mlagents.trainers: docker-first-run-0: 3DBallLearning: Step: 4000. Time Elapsed: 143.072 s Mean Reward: 1.959. Std of Reward: 1.307. Training.
INFO:mlagents.trainers: docker-first-run-0: 3DBallLearning: Step: 5000. Time Elapsed: 201.150 s Mean Reward: 2.899. Std of Reward: 2.278. Training.
(略)
INFO:mlagents.trainers: docker-first-run-0: 3DBallLearning: Step: 50000. Time Elapsed: 2084.527 s Mean Reward: 100.000. Std of Reward: 0.000. Training.
INFO:mlagents.envs:Saved Model
INFO:mlagents.trainers:List of nodes to export for brain :3DBallLearning
INFO:mlagents.trainers: is_continuous_control
INFO:mlagents.trainers: version_number
INFO:mlagents.trainers: memory_size
INFO:mlagents.trainers: action_output_shape
INFO:mlagents.trainers: action
INFO:mlagents.trainers: action_probs
INFO:tensorflow:Restoring parameters from /unity-volume/models/docker-first-run-0/3DBallLearning/model-50001.cptk
INFO:tensorflow:Froze 14 variables.
INFO:mlagents.trainers:Exported /unity-volume/models/docker-first-run-0/3DBallLearning.nn file
Converted 14 variables to const ops.
Converting /unity-volume/models/docker-first-run-0/3DBallLearning/frozen_graph_def.pb to /unity-volume/models/docker-first-run-0/3DBallLearning.nn
IGNORED: Cast unknown layer
IGNORED: StopGradient unknown layer
GLOBALS: 'is_continuous_control', 'version_number', 'memory_size', 'action_output_shape'
IN: 'vector_observation': [-1, 1, 1, 8] => 'sub_3'
IN: 'epsilon': [-1, 1, 1, 2] => 'mul_1'
OUT: 'action', 'action_probs'
DONE: wrote /unity-volume/models/docker-first-run-0/3DBallLearning.nn file.
TensorBoard を利用して学習の進捗状況を視覚的に確認することもできます。
> docker exec \
  -it unity-ml-docker-3dball \
  tensorboard \
  --logdir=/unity-volume/summaries \
  --host=0.0.0.0

2019-08-19 09:43:12.596652: I tensorflow/core/platform/cpu_feature_guard.cc:140] Your CPU supports instructions that this TensorFlow binary was not compiled to use: AVX2 FMA
TensorBoard 1.7.0 at http://0.0.0.0:6006 (Press CTRL+C to quit)

学習結果をアプリに組み込む
学習結果は、ml-agents/unity-volume フォルダ内に保存されます。
> ls unity-volume/

3DBall.x86_64       3DBall_Data         models              summaries           trainer_config.yaml
Unityアプリの設定
Playerの設定を行います。
- Unityアプリの[Edit]メニューから[Project Settings]を選択する
- [Inspector]ビューの[Other Settings]欄で以下を確認・設定する
- [Scripting Runtime Version]を[.Net 4.x Equivalent]にする

学習結果ファイルの取り込み
ターミナルかFinderで学習結果を以下フォルダにコピーします。
- 学習結果ファイル:
unity-volume/models/docker-first-run-0/3DBallLearnig.nn - 保存先:
UnitySDK/Assets/ML-Agents/Examples/3DBall/TFModels/
※すでに保存先に3DBallLearnig.nn ファイルが存在していますので、リネームしてください。
> cp unity-volume/models/docker-first-run-0/3DBallLearnig.nn UnitySDK/Assets/ML-Agents/Examples/3DBall/TFModels/
- Unityアプリの[Project]パネルで以下ファイルを選択する
- [Assets] > [ML-Agents] > [Examples] > [3DBall] > [Brains] > [3DBallLearning]
- Unityアプリの[Project]パネルで以下フォルダを選択する
- [Assets] > [ML-Agents] > [Examples] > [3DBall] > [TFModels]
- Unityアプリの[Inspector]パネルにある[Model]という項目に[TFModels]フォルダ内の
3DBallLearning.nnファイルをドラッグ&ドロップする
 - Unityアプリの[Hierarchy]パネルから以下を選択する
- [3DBall] > [Ball3DAcademy]
- Unityアプリの[Inspector]パネルにある[Broadcast Hub] > [Brains] > [3DBallLearning(LearningBrain)]横の[Control]のチェックを外す
- Unityアプリの[Hierarchy]パネルから以下を選択する
- [3DBall] > [Ball3DAcademy]
- Unityアプリの[Inspector]パネルにある[Broadcast Hub] > [Brains] > [3DBallLearning(LearningBrain)]横の[Control]のチェックを外す
 - Unity上部にある[▶]ボタンをクリックする
これで、学習結果が組み込まれた状態でアプリが起動します。

参考
Using Docker For ML-Agents
https://github.com/Unity-Technologies/ml-agents/blob/master/docs/Using-Docker.md
MacでUnity ML-Agentsの環境を構築する(v0.9.1対応) - Qiita
https://qiita.com/kai_kou/items/268ccf6f961f8ca8cba8
Docker for Macをインストールしてみた
https://qiita.com/scrummasudar/items/750aa52f4e0e747eed68
Macでhomebrewを使ってUnityをインストールする(Unity Hub、日本語化対応)
https://qiita.com/kai_kou/items/445e614fb71f2204e033