今日は、SSH接続・CUI操作のLinuxにgoogle-drive-ocamlfuseを使ってGoogleDriveをマウントする方法を書きます。
なぜやろうと思ったのか
最近、GCPのSpot Virtual MachinesからGoogleDriveにファイルを移動させることが多々ありました。
その度に、
「VMから手元のPCにSSHでファイルをダウンロードする → GoogleDriveにアップロードする」
という方法を取っており、かなり工数がかかっていました。
今回は、この操作を楽にしたいと思い、直接VMからGoogleDriveにアップロードする方法として、GoogleDriveをVMをマウントさせました。
これにより、GoogleDriveの中身が、VMのディレクトリとしてみれるようになり、cpコマンドやmvコマンドが利用できるようになりました!
前提条件
- マシンスペック: Linux: Debian 11
- GoogleCloudPlatformのGoogleDriveAPIを有効にしてあること
- VMとは別に、ブラウザが利用できる端末をもっていること
設定方法
1. google-drive-ocamlfuseをインストールする
後述しますが、公式に書かれているPPA経由やDEBファイルからインストールする方法はうまくいきませんでした。
そこで、こちらを参考に、opam経由でインストールしました。
sudo apt install opam -y
opam init # プロファイルの設定など不要なところはNを選択
opam install google-drive-ocamlfuse
インストールしたら、~/.bashrcに下記のパスを追加します。
PATH="$PATH:$HOME/.opam/default/bin"
これで、source ~/.bashrcをすれば、google-drive-ocamlfuseコマンドが使えるようになりました。
(失敗した方法その1)PPA経由でgoogle-drive-ocamlfuseをインストールした場合
公式のコマンドを入力してみたところ、
$ sudo apt-get update
$ sudo apt-get install software-properties-common
$ sudo add-apt-repository ppa:alessandro-strada/ppa
$ sudo apt update
下記のようなエラーになりました。
$ sudo apt update
Hit:1 http://deb.debian.org/debian bullseye InRelease
Hit:2 http://deb.debian.org/debian bullseye-updates InRelease
Hit:3 http://security.debian.org/debian-security bullseye-security InRelease
Hit:4 http://deb.debian.org/debian bullseye-backports InRelease
Hit:5 http://packages.cloud.google.com/apt cloud-sdk-bullseye InRelease
Hit:6 http://packages.cloud.google.com/apt google-cloud-packages-archive-keyring-bullseye InRelease
Hit:7 http://packages.cloud.google.com/apt google-compute-engine-bullseye-stable InRelease
Ign:8 http://ppa.launchpad.net/alessandro-strada/ppa/ubuntu mantic InRelease
Err:9 http://ppa.launchpad.net/alessandro-strada/ppa/ubuntu mantic Release
  404  Not Found [IP: 185.125.190.52 80]
Reading package lists... Done
E: The repository 'http://ppa.launchpad.net/alessandro-strada/ppa/ubuntu mantic Release' does not have a Release file.
N: Updating from such a repository can't be done securely, and is therefore disabled by default.
N: See apt-secure(8) manpage for repository creation and user configuration details.
これは、公式Wikiにも書かれているとおり、2020年以降使用できなくなっているようです。
(失敗した方法その2)DEBファイルからgoogle-drive-ocamlfuseをインストールした場合
公式Wikiに書かれている手順に沿って、DEBファイルからのインストールも試しました。
$ sudo apt-get update
$ sudo apt-get install wget
$ wget https://launchpad.net/~alessandro-strada/+archive/ubuntu/ppa/+files/google-drive-ocamlfuse_0.7.30-1ubuntu1_amd64.deb
$ sudo dpkg -i ~/google-drive-ocamlfuse_0.7.30-1ubuntu1_amd64.deb
ここで下記のようなエラーになりました。
dpkg-deb: error: archive '/home/xxx/google-drive-ocamlfuse_0.7.30-1ubuntu1_amd64.deb' uses unknown compression for member 'control.tar.zst', giving up
dpkg: error processing archive /home/xxx/google-drive-ocamlfuse_0.7.30-1ubuntu1_amd64.deb (--install):
 dpkg-deb --control subprocess returned error exit status 2
Errors were encountered while processing:
 /home/xxx/google-drive-ocamlfuse_0.7.30-1ubuntu1_amd64.deb
ChatGPTに聞きならが調べましたが、Debian11では.tar.zstをサポートしていないようでした。
2. GoogleDriveのOAuth認証をする
GUI操作が可能であれば、ブラウザを利用して認証が簡単にできますが、今回はCUIのみで操作していきます。
後述しますが、公式Wikiにはデスクトップアプリの認証情報を利用するようにあります。ただ、これは現在利用できなくなっています。
幸いissueにある通り、すでにウェブアプリケーションで認証する方法は実装されており、今回はこちらを利用します。
GoogleDriveのAPIを有効にする
GCP上でGoogleDriveのAPIを有効にしておきます。
認証情報を作成する
GCPの認証情報から、下記を追加します
- 「OAuthクライアントID」
- アプリケーションの種類: ウェブアプリケーション
- 名前: 任意の表示名
- 承認済みのリダイレクト URI: http://127.0.0.1:8080/oauth2callback
作成すると、クライアントIDとクライアントシークレットが作成されます。
VMのgoogle-drive-ocamlfuseの設定を変更する
google-drive-ocamlfuseの接続設定は~/.gdfuse/default/configにあります。(後述しますが、defaultとあることから分かるように、ラベルをつけて複数の接続を管理することも可能です)
認証時に、リダイレクトできるように、vim等でVMの~/.gdfuse/default/configを下記のように書き換えます。
- oauth2_loopback=false
+ oauth2_loopback=true
これで認証する準備が整いました。
作成した認証情報を使ってVMから認証する
作成した認証情報を使って、VMで下記コマンドを打ちます。
ヘッドレスで、認証情報を付与して認証します。
google-drive-ocamlfuse -headless -id トークンID -secret クライアントシークレットシークレット
このようにURLが表示されます。
Please, open the following URL in a web browser: https://accounts.google.com/o/oauth2/auth?XXXXX
Please enter the verification code:
手元のMacなど任意のブラウザで上記のURLにアクセスし、GoogleDriveを使用したいGoogleアカウントで認証を行います。
認証が完了すると、ページが遷移しますので、その遷移したURLを参照します。
このURLのcodeパラメーターがVMに渡すべきコードになります。
例: URLがhttp://127.0.0.1:8080/oauth2callback?code=1234&scope=https://www.googleapis.com/auth/driveのとき、1234が認証コード
このコードを先ほどのVMのターミナルに入力します。
Please enter the verification code: 1234
これで、ターミナルで、Access token retrieved correctly.と表示されれば認証成功です。
(失敗した方法) デスクトップアプリの認証情報で認証する
公式Wikiには、
When creating a new client ID, you must select "Desktop app" as Application type
とあり、最初はデスクトップアプリの認証情報を作成して接続しました。
すると、ホストでの認証で、下記のようなエラーが発生しました。
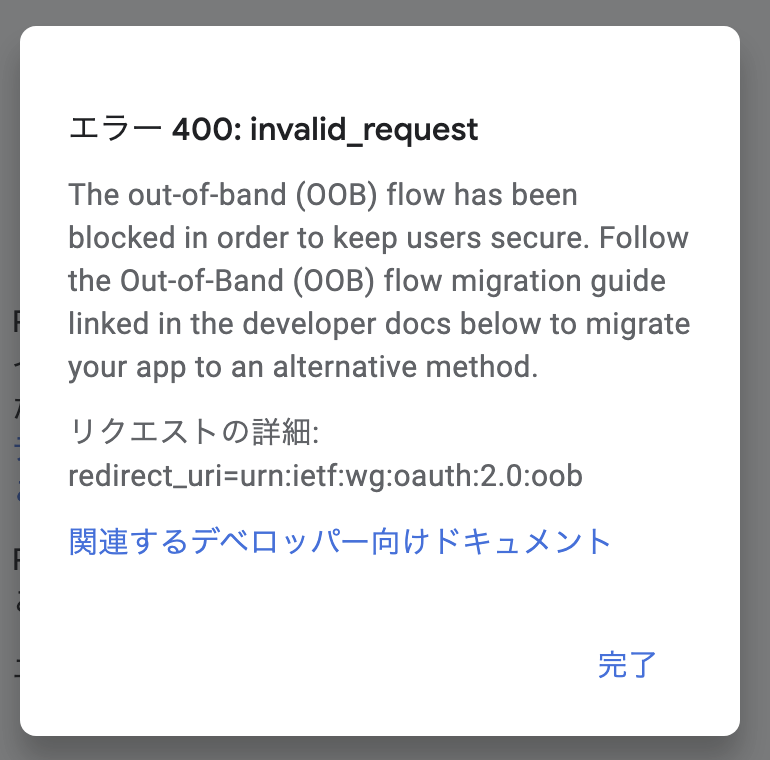
Error 400: invalid_request The out-of-band (OOB) flow has been blocked in order to keep users secure. Follow the Out-of-Band (OOB) flow Migration Guide linked in the developer docs below to migrate your app to an alternative method. Request details: redirect_uri=urn:ietf:wg:oauth:2.0:oob
リンクを参照すると、リダイレクトを持たない手動コピー・貼り付けによる認証は2022年にサポートが終了したとのことです。
[https://developers.google.com/identity/protocols/oauth2/resources/oob-migration?hl=ja:title]
3. GoogleDriveのマイライブをマウント・アンマウントする
デフォルトでは、認証したGoogleアカウントのマイドライブにマウントします。
初回に、VM上でマウントさせるディレクトリを作成します。
mkdir ~/GoogleDrive
指定したディレクトリにマウントします
google-drive-ocamlfuse GoogleDrive/
ディレクトリをアンマウントします
google-drive-ocamlfuse -u GoogleDrive/
共有ドライブにマウント・アンマウントする
今回は共有ドライブにもマウントしてみました。
公式のWikiにも手順は載っています。
共有ドライブにマウント・アンマウントする方法
マウントしたい共有ドライブのチームIDを取得します。
マウントさせたいGoogleDriveのURLを表示し、URLのfolders以下がチームIDです。
例: https://drive.google.com/drive/folders/XXX -> チームID: XXX
これを、VMのgoogle-drive-ocamlfuseの設定ファイル~/.gdfuse/default/configに設定します。
- team_drive_id=
+ team_drive_id=XXX
すでに別のドライブにマウントしていた場合は、キャッシュを削除します。
fusermount -cc
これで、再度マウントすれば、ドライブの内容が見れるようになっているはずです。
複数のドライブを利用する
なお、複数のドライブを持つ場合や、共有ドライブを持つ場合、それぞれにラベルをつけることもできます。
これにより、設定ファイルもそれぞれ~/.gdfuse/{label}/configを持つことになります。
$ google-drive-ocamlfuse -label ラベル名
以上です。
これでファイル転送作業がグッと楽になりそうです!
参考サイト
公式Github。WikiやIssueを読み漁りました。
Debianにgoogle-drive-ocamlfuseをインストールするときに参考にしました。
AWS内の仮想マシンに接続されたブログでした。デスクトップアプリ認証なので少しが異なりますが、認証周りで参考になりました。

