背景
macOS Mojaveでダークモードが実装されたのでjupyter notebookも黒背景にできないかと思い調べてみたところ、jupyterthemesというパッケージを使えばいいということがわかった。
ただ、jupyter notebook 黒背景などと調べて出てきたHPなどでは主にpipを使ってjupyterthemesをインストールしている。
参考
など
しかし筆者はAnacondaを使っており、condaとpipを衝突させたくないため、condaでのインストール法を調べた。
環境
macOS Mojave Version 10.14.1
Anaconda3 Version 4.5.11
jupyterthemesのインストール
conda-forgeからインストールできる。
$ conda install -c conda-forge jupyterthemes
使い方
jupyterthemesのコマンドはjtである。
$ jt -h
usage: jt [-h] [-l] [-t THEME] [-f MONOFONT] [-fs MONOSIZE] [-nf NBFONT]
          [-nfs NBFONTSIZE] [-tf TCFONT] [-tfs TCFONTSIZE] [-dfs DFFONTSIZE]
          [-ofs OUTFONTSIZE] [-mathfs MATHFONTSIZE] [-m MARGINS]
          [-cursw CURSORWIDTH] [-cursc CURSORCOLOR] [-cellw CELLWIDTH]
          [-lineh LINEHEIGHT] [-altp] [-altmd] [-altout] [-P] [-T] [-N] [-kl]
          [-vim] [-r] [-dfonts]

optional arguments:
  -h, --help            show this help message and exit
  -l, --list            list available themes
  -t THEME, --theme THEME
                        theme name to install
  -f MONOFONT, --monofont MONOFONT
                        monospace code font
  -fs MONOSIZE, --monosize MONOSIZE
                        code font-size
  -nf NBFONT, --nbfont NBFONT
                        notebook font
  -nfs NBFONTSIZE, --nbfontsize NBFONTSIZE
                        notebook fontsize
  -tf TCFONT, --tcfont TCFONT
                        txtcell font
  -tfs TCFONTSIZE, --tcfontsize TCFONTSIZE
                        txtcell fontsize
  -dfs DFFONTSIZE, --dffontsize DFFONTSIZE
                        pandas dataframe fontsize
  -ofs OUTFONTSIZE, --outfontsize OUTFONTSIZE
                        output area fontsize
  -mathfs MATHFONTSIZE, --mathfontsize MATHFONTSIZE
                        mathjax fontsize (in %)
  -m MARGINS, --margins MARGINS
                        fix margins of main intro page
  -cursw CURSORWIDTH, --cursorwidth CURSORWIDTH
                        set cursorwidth (px)
  -cursc CURSORCOLOR, --cursorcolor CURSORCOLOR
                        cursor color (r, b, g, p)
  -cellw CELLWIDTH, --cellwidth CELLWIDTH
                        set cell width (px or %)
  -lineh LINEHEIGHT, --lineheight LINEHEIGHT
                        code/text line-height (%)
  -altp, --altprompt    alt input prompt style
  -altmd, --altmarkdown
                        alt markdown cell style
  -altout, --altoutput  set output bg color to notebook bg
  -P, --hideprompt      hide cell input prompt
  -T, --toolbar         make toolbar visible
  -N, --nbname          nb name/logo visible
  -kl, --kernellogo     kernel logo visible
  -vim, --vimext        toggle styles for vim
  -r, --reset           reset to default theme
  -dfonts, --defaultfonts
                        force fonts to browser default
オプションとデフォルトの値などは詳しくはここに記されている。
テーマ
利用可能なテーマは以下の通り。
$ jt -l
Available Themes:
   chesterish
   grade3
   gruvboxd
   gruvboxl
   monokai
   oceans16
   onedork
   solarizedd
   solarizedl
それぞれの見え方はこんな感じ。
このうち暗めの背景のものはchesterish、gruvboxd、monokai、oceans16、onedork、solarizeddである。
設定
テーマをSublime Textで慣れ親しんでいるmonokaiに、コードのフォントをRicty Diminishedのラテン文字に使われているinconsolata に設定する。
$ jt -t monokai -f inconsolata -N -T -fs 11 -nfs 11 -cellw 90% -lineh 140
オプション-Nと-Tでノートブック名とツールバーを表示させている。
また、フォントサイズやセル幅、行間も調整している。
問題
解決策として、~/.jupyter/custom/custom.cssを直接書き換えた。
1729行目辺りにあるdiv.out_prompt_overlay.prompt{}およびdiv.out_prompt_overlay.prompt:hover{}内のmin-widthとwidthを14.5exから11.5exに変更した。
div.out_prompt_overlay.prompt {
 font-family: "Inconsolata-g", monospace, monospace;
 font-size: 9.5pt !important;
 font-weight: bold !important;
 background-color: #232323;
 border-bottom-left-radius: 2px;
 border-top-right-radius: 0px;
 border-top-left-radius: 0px;
 border-bottom-right-radius: 0px;
 min-width: 11.5ex !important;
 width: 11.5ex !important;
 border-right: 2px solid transparent;
 color: transparent;
}
div.out_prompt_overlay.prompt:hover {
 background-color: #49483e;
 box-shadow: none !important;
 border: none;
 border-bottom-left-radius: 2px;
 -webkit-border-: 2px;
 -moz-border-radius: 2px;
 border-top-right-radius: 0px;
 border-top-left-radius: 0px;
 min-width: 11.5ex !important;
 width: 11.5ex !important;
 border-right: 2px solid #49483e !important;
}
jtで設定を変える度に14.5exに戻ってしまったのでその都度編集しなければならない。
設定後
設定後の見た目は以下の通り。
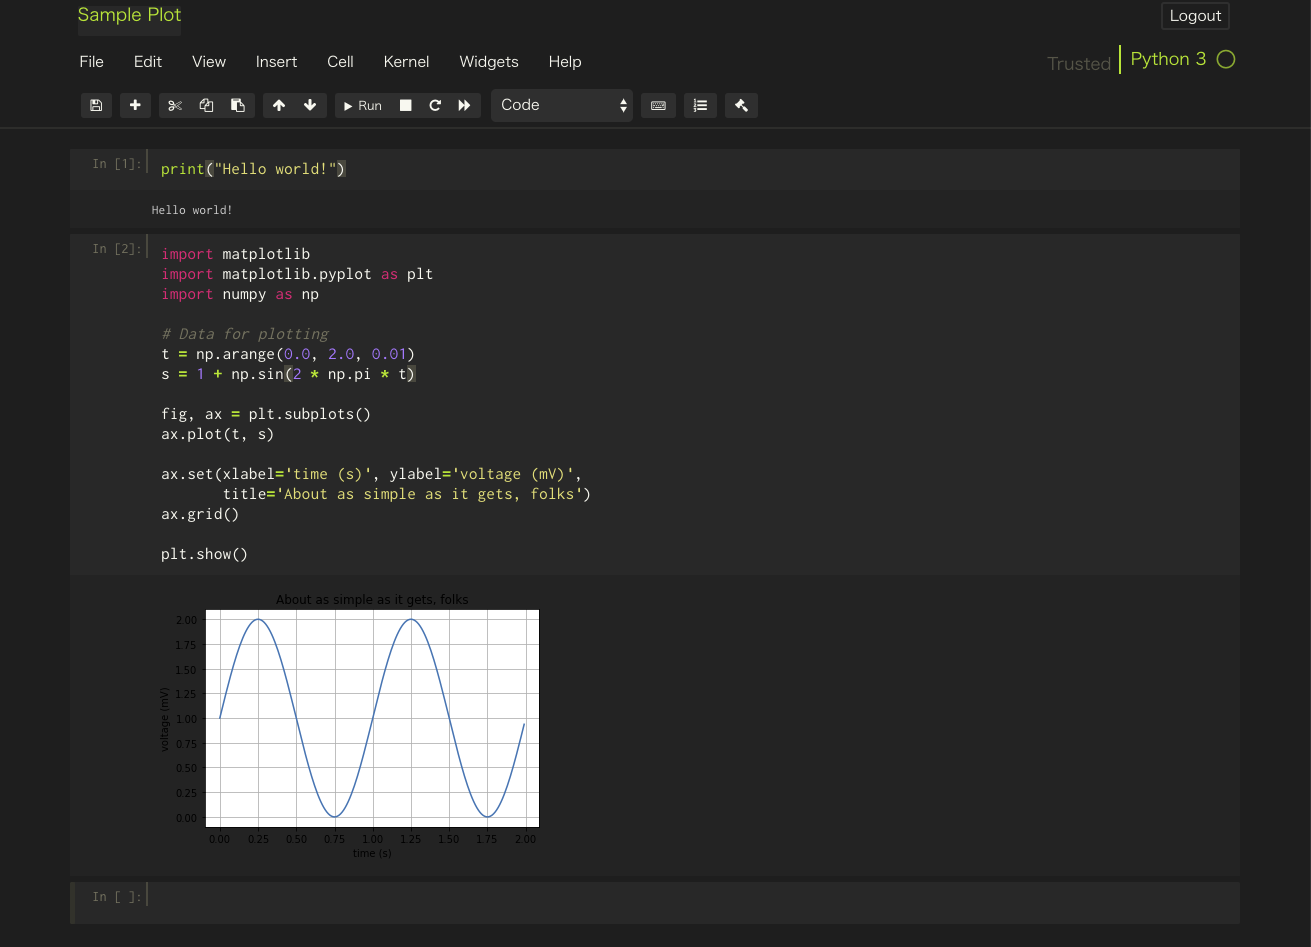
グラフのラベルなどが見にくくなってしまうので、matplotlibの設定などは適宜行ってほしい。
おわりに
以上で、jupyter notebookをmonokaiテーマに設定し、Finder、Sourcetreeなどのダークモード対応アプリなどとも調和が取れた、厨ニ感の増すかっこいいディスプレイになった。