Sambaでファイル共有
Samba(サンバ)を使うことでLinuxマシンとの間で,Windowsのワークグループと同様にファイル共有ができます.
動作確認済み環境
| Ubuntu | |
|---|---|
| OS | Ubuntu 16.04 |
| kernel | 4.15 |
| Raspbian(Raspberry Pi 3B+) | |
|---|---|
| OS | Raspbian Buster Lite |
| kernel | 4.19.97-v7+ |
Sambaサーバ構築手順
Sanbaインストール
$ sudo apt-get install -y samba
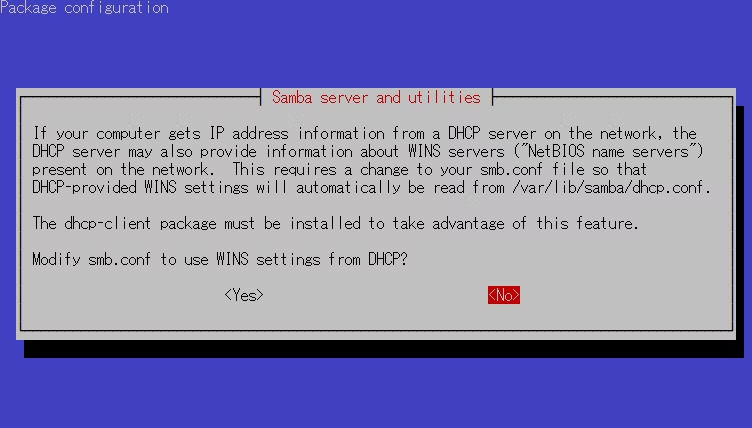
インストール中,「(要約)IPの割り振り方がDHCPの場合,ネットワーク内にあるWINSサーバの情報を的供できます.DHCP から WINS 設定を使うよう smb.conf を変更しますか?」という選択画面が表示されます.
私の場合,マシンを扱う環境でWINSサーバの運用は行っていないことから,Noを選択しました.
(特定ユーザーのみアクセスを許可したい場合)Sambaユーザーを登録
ゲストに対して全員にディレクトリへのアクセスを許可する場合.ユーザー登録は必要ありません.
Sambaでは,独自の認証情報を元にアクセスの許可が可能です.
pdbeditによってSambaで認証するためのユーザを,マシンのユーザとは別に新たに登録できます.
$ sudo pdbedit -a "username"
登録の際,パスワードの設定も要求されるのでパスワードを設定します.
new password:
retype new password:
共有するディレクトリの設定
ここでは,/mnt/shareを共有ディレクトリとします.
$ sudo mkdir /mnt/share
$ sudo chmod 0777 /mnt/share
shmodコマンドはファイル,ディレクトリのアクセス権限を変更するコマンドです.
アクセス権限は読み込み(r),書き込み(w),実行(x)の三区分で設定されます.
0777と指定した場合,全てのユーザーに全てのアクセス権限を許可されます.
Windowsのワークグループ名を確認
LAN内のWindowsマシンで設定しているワークグループ名が必要です.
ワークグループ名の確認,設定は
コントロールパネル->システムとセキュリティ->システム->コンピュータ名、ドメインおよびワークグループの設定の項目で確認できます.
/etc/samba/smb.confを編集
以下のコマンドでsmb.confを開き,編集します.
エディタは,本記事では例としてVimを使用します.
$ sudo vi /etc/samba/smb.conf
まず,24行目如何に
dos charset = CP932
unix charset = UTF-8
を追記します.
 21
 22 #======================= Global Settings =======================
 23
 24 [global]
 25 dos charset = CP932
 26 unix charset = UTF-8
 27
次に,31行目のworkgroupに,先ほど調べたWindowsマシンのWORKSTATIONの名前を書き込みます.
 28 ## Browsing/Identification ###
 29
 30 # Change this to the workgroup/NT-domain name your Samba server will part of
 31    workgroup = <your work group name>
 32
38行目以降のNetworkingの項目は,セキュリティの観点から接続元のIPアドレスを制限したいときに編集します.
 35 #### Networking ####
 34
 35 # The specific set of interfaces / networks to bind to
 36 # This can be either the interface name or an IP address/netmask;
 37 # interface names are normally preferred
 38    interfaces = 127.0.0.0/8 eth0
 39
 40 # Only bind to the named interfaces and/or networks; you must use the
 41 # 'interfaces' option above to use this.
 42 # It is recommended that you enable this feature if your Samba machine is
 43 # not protected by a firewall or is a firewall itself.  However, this
 44 # option cannot handle dynamic or non-broadcast interfaces correctly.
 45     bind interfaces only = yes
 46     map to guest = Bad User
 47
ファイルの最後に以下を追記します.
239 [share]
240    path = /mnt/share
241    writable = yes
242    guest ok = yes
243    guest only = yes
244    create mode = 0777
245    directory mode = 0777
**[share]**には,共有する際のディレクトリ名(Windowsから見える名前)を設定します.
例えば,共有ディレクトリ名をDIRとしたい場合,[DIR]とします.
pathには共有するディレクトリのパスを記入します.
Sambaの実行テスト
testparmコマンドを使うと,smb.confに誤りがないか構文チェックをしてくれます.
logファイルの関係でWARNINGが出る可能性がありますが,
Loaded services file OK.と出れば問題ありません.
$ testparm
Sambaを実行
下記コマンドを実行.
$ sudo systemctl restart smbd nmbd
起動時に自動的に実行して欲しい場合.
$ sudo systemctl enable smbd nmbd
Windowsで共有ファイルにアクセス
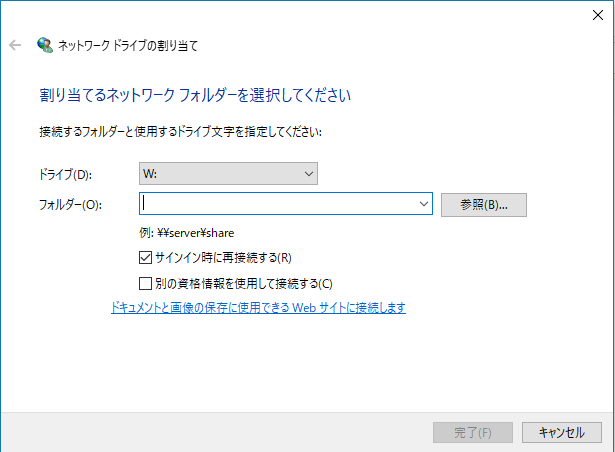
エクスプローラーにて『ネットワークドライブの割り当て』からアクセスします.
『フォルダー』欄に『¥¥SambaサーバのIPアドレス¥先に設定した共有ディレクトリ名』を入力します.
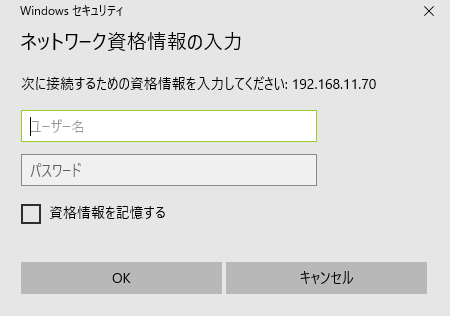
アクセスできた場合,ユーザの認証が要求されるので,アクセス先のマシンのユーザ名とパスワードを,Sambaのユーザを設定している場合はSambaサーバのユーザ名とパスワードを記入します.
アクセスに成功した場合
ネットワークの場所に共有ディレクトリの項目が表示されます.


