ODC REST APIとは何か、最低限使うための実装については上記記事参照。認証情報の取得方法と利用方法については上記記事に譲り、ここでは記述しない。
ODC REST APIを使ってTimerの情報を取れるのか、取れるとしてどこまで取れるのかを見ていく。
ドキュメント
環境情報
ODC Studio (Version 1.6.7)
ODC Personal Edition
Consume REST APIを作成する
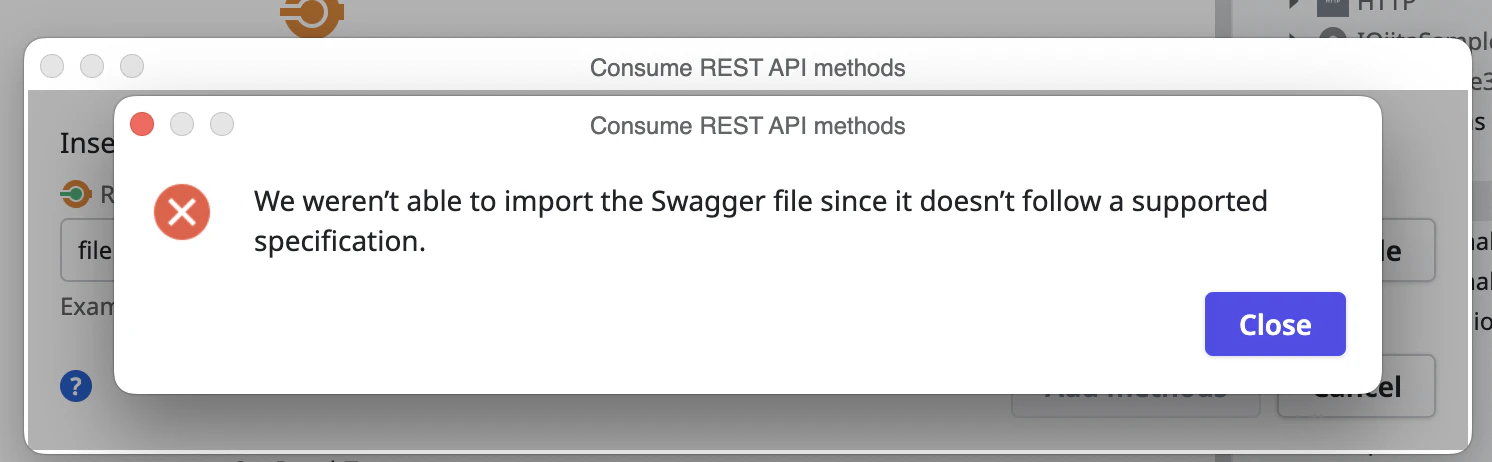
OpenAPI SpecでConsume REST APIを作るとエラーになる
2025/11/21時点で取得できるOpenAPI Specを、Consume REST API作成時のAdd multiple methodsに渡すとエラーになった。
問題点を探ってみる
OpenAPIの仕様に従わない部分があるのかと思って、
https://editor.swagger.io/
にファイルを読み込ませてみた。
すると、以下のエラーが表示された。
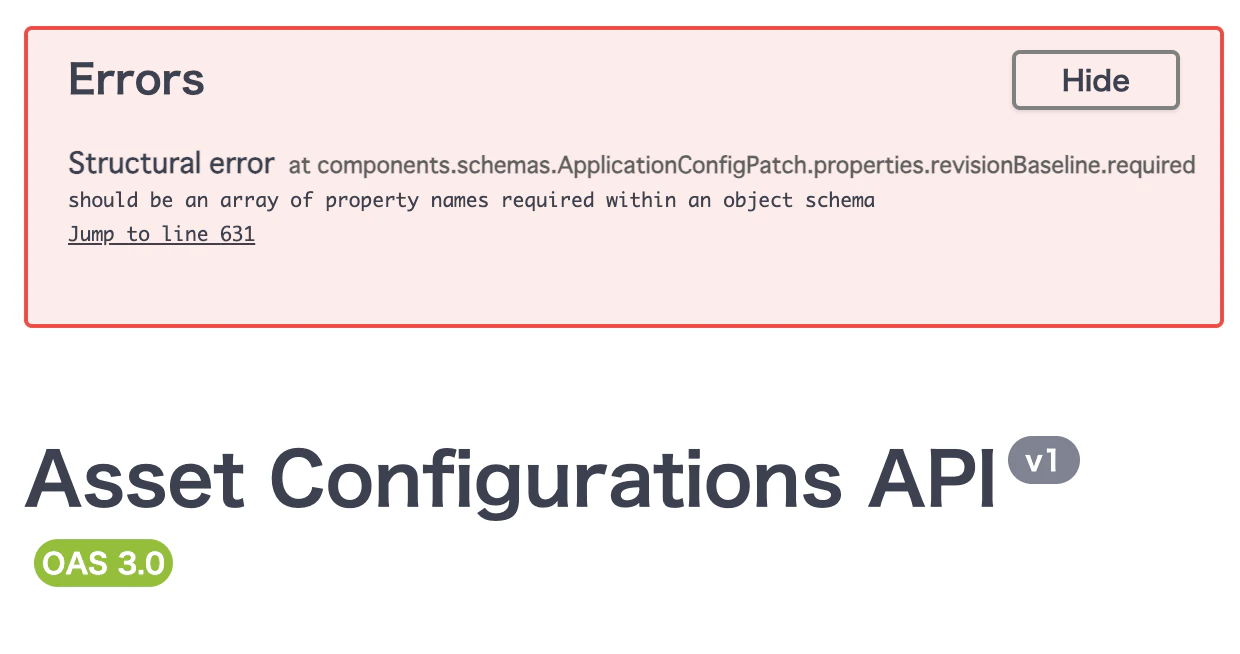
「components.schemas.ApplicationConfigPatch.properties.revisionBaseline.required」という項目はプロパティ名の配列であるべきなのに違う種類の値が入っている、というエラー。
そこで、ファイルの該当部分をチェック。確かに、revisionBaselineのrequiredはtrueなので真偽値であり、配列ではない。

エラーメッセージで検索したときに表示された、GoogleのAI解説も参照すると、おそらく以下のようにrequiredをpropertiesの外に移動した上で配列で対象プロパティ名を指定したらよさそう。
というわけで、「revisionBaseline プロパティ内のrequired: trueを削除し、ApplicationConfigPatchオブジェクトにrequired: ["revisionBaseline"]を追加してみる。」
      "ApplicationConfigPatch": {
        "type": "object",
        "properties": {
          "key": {
            "type": "string",
            "description": "The key identifier of the configuration",
            "nullable": true
          },
          "revisionBaseline": {
            "type": "integer",
            "description": "The asset's revision.",
            "required": true,
            "format": "int32",
            "nullable": true
          },
          "settings": {
            "type": "array",
            "items": {
              "$ref": "#/components/schemas/GenericConfigPatch"
            },
            "description": "The asset's settings.",
            "nullable": true
          },
      "ApplicationConfigPatch": {
        "type": "object",
        "required": ["revisionBaseline"],
        "properties": {
          "key": {
            "type": "string",
            "description": "The key identifier of the configuration",
            "nullable": true
          },
          "revisionBaseline": {
            "type": "integer",
            "description": "The asset's revision.",
            "format": "int32",
            "nullable": true
          },
          "settings": {
            "type": "array",
            "items": {
              "$ref": "#/components/schemas/GenericConfigPatch"
            },
            "description": "The asset's settings.",
            "nullable": true
          },
この変更を加えたファイルを使うことで、Consume REST API作成を行えるようになった。
アクセストークンを取得し、Consume REST APIへ渡す方法については、↑のリンク先を参照。
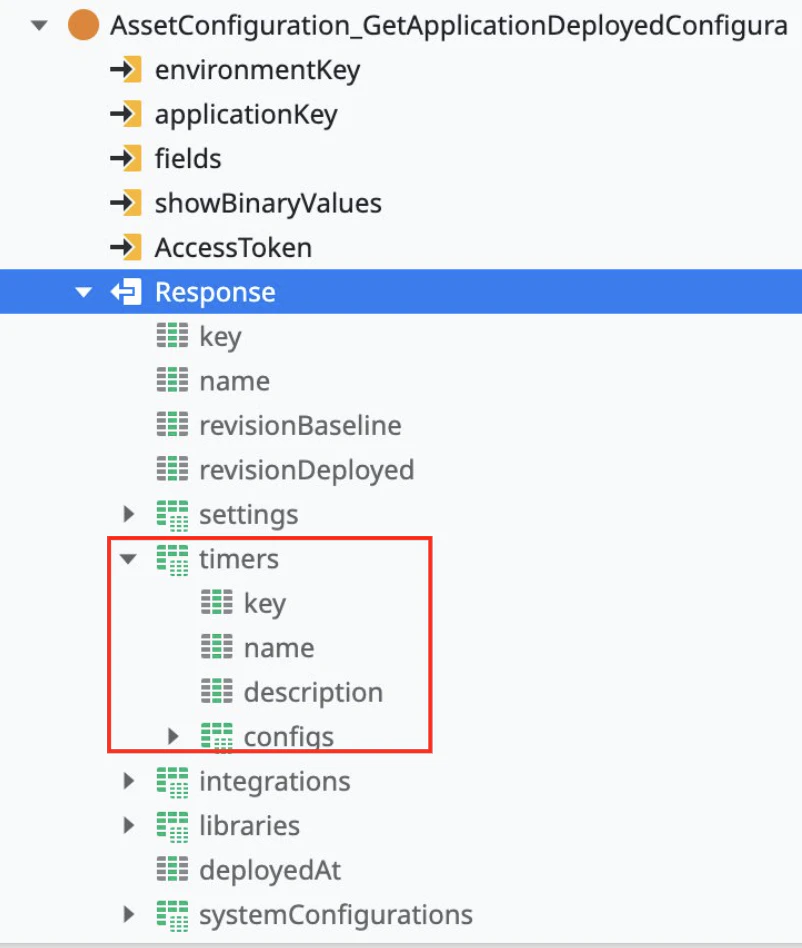
/environments/{environmentKey}/applications/{applicationKey}/revisions/deployed/configurations へのGET
要するに
Stageを指定し、あるAppの最新バージョンの設定情報を取得するAPI。
systemConfigurations, settings, timers, integrations, librariesの五種類の情報を返してくる。
必要な権限
ODC Portal > MANAGE > API clientsページで割り当てる。Configuration management > View configurationsが必要だが、他の権限から継承するもののようで、Edit asset configurations - Manage private gatewaysのいずれかのチェックを入れるとチェックされる。
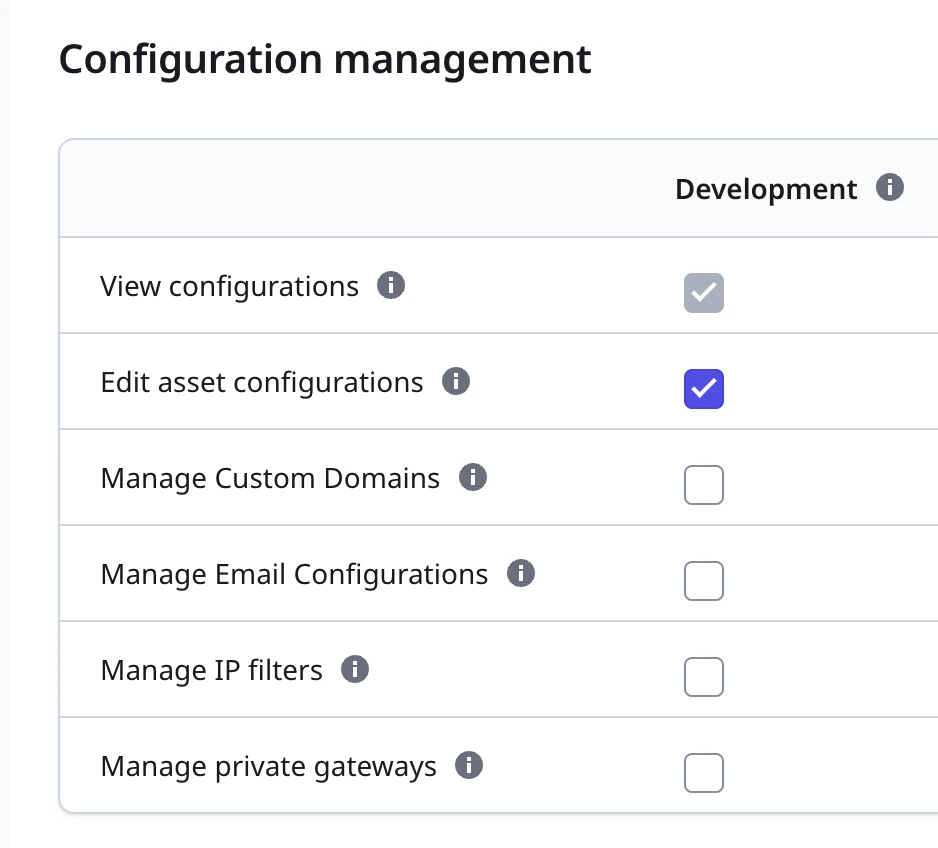
ここではEdit asset configurationsをチェックしたが、この時他にもいろいろな権限にチェックがついたので注意。
インターフェース
のREQUEST欄に書かれているパラメータを検討していく。
- environmentKey: 必須。要するにstageid。ODC Portalでstageを特定するページにアクセスし、そのURLから取得できる。あるいはPortfolio APIの/environmentsでも取得できる
- applicationKey: 必須。ODC PortalでTimer設定を見たいAppを開き、URLのid項目を使えば良い
- fields: 任意。レスポンスに含める情報を指定する(指定しなかった項目は、項目ごとレスポンスから省かれる)。指定できる値は、systemConfigurations, settings, timers, integrations, libraries。よって今回はtimersを指定する
- showBinaryValues: 必須ではないが、Consume REST API作成後、Send Default Value=Yesに設定する必要がある。こうしないと未指定の場合に、空文字列を送られたと認識してエラーになってしまうため
レスポンスからは、赤枠の部分を取り出して使えば良い。
使い方
environmentKeyとapplicationKey、それから手動で追加したAccessTokenは必須。
AccessTokenに渡す値については、この記事先頭にリンクを置いてある別記事参照。
fieldsは"timers"を渡しておいたほうが不要な通信量を削減できる。
メモ
- Timerごとに、configsプロパティにはIsActive・Timeout・Scheduleが含まれる
- 設定値関連の項目はvalue(最後に設定された値)とdefaultValue(いわゆるデフォルト値)・deployedValue(今デプロイされている値。意味は明瞭ではない)がある
- ODC Portalで値を変更してみたら、deployedValueとvalueに同じ値が設定された
- Scheduleで、「Daily at 00:00」の設定をしたとき、valueは「0 0 * * *」だった
- updatedAtで設定変更した日時を取れる
運用への適用案
日時バッチで各Timerの設定値を収集し、記録しておく。あるいは変更があったらレポートにまとめて管理者にメール等で連絡する。
作業の前提条件としてTimerを無効にしたり、スケジュールに条件がある時、まとめて最新のデータを確実に取得する(マニュアル作業なくできる)。
(インフラレベルの作業や、特別な設定のテスト期間のためにTimerを止めておきたいときなどに使う)