ほぼ https://dev.classmethod.jp/articles/sam-cli-pipeline/ の焼き直しのような感じだが、個人的な備忘録・メモとして作成。
動機:
- API Gateway + AWS Lambda(複数)の構成での開発を行いたかった
- 極力ローカル環境で開発を行えるようにしたかった
- gitと連携させて、CI/CDが出来るようにしたかった
やったこと:
- AWS SAM(Serverless Application Model)を使って、ごく簡単な例での環境構築を実施
前提条件
作業環境:
- Ubuntu22.04LTS @WSL2(Windows11)
- dockerをインストールしておく
- iptables周りのせいでdocker serviceを起動できないので、 https://qiita.com/tkc_tsuchiya/items/f7f4d502d8e2728f69c5 を参考にしてdocker serviceを起動する
-
sudo update-alternatives --config iptablesを実行してlecacyの方を選ぶ - また、実行ユーザーをdockerグループに追加し、
sudo無しでdockerコマンドを実行出来るようにしておく - (WSL2環境ではうまく行っていないが、rootlessモードのDockerなどでも問題無さそう)
- dockerをインストールしておく
- AWS環境
-
aws-cli: version 2.6.1 -
aws-sam-cli: version 1.48.0
-
事前準備
Pipelineの起点となるリポジトリの作成を行っておく(今回はCodeCommitを使用)。
aws-cliを使う場合、ここを参考にして例えば
aws codecommit create-repository --repository-name <リポジトリ名> --repository-description "Description of Repository"
# response:
{
    "repositoryMetadata": {
        "accountId": "XXXXXXXXXXXX",
        "repositoryId": "xxxxxxxx-xxxx-xxxx-xxxx-xxxxxxxxxxxx",
        "repositoryName": "RepositoryName",
        "repositoryDescription": "Description of Repository",
        "lastModifiedDate": "2022-05-04T19:24:48.583000+09:00",
        "creationDate": "2022-05-04T19:24:48.583000+09:00",
        "cloneUrlHttp": "https://git-codecommit.ap-northeast-1.amazonaws.com/v1/repos/<repository name>",
        "cloneUrlSsh": "ssh://git-codecommit.ap-northeast-1.amazonaws.com/v1/repos/<repository name>",
        "Arn": "arn:aws:codecommit:ap-northeast-1:XXXXXXXXXXXX:<repository name>"
    }
}
のようにして作れる。(※アカウント名など、公開するとまずそうな情報はXXXなどと伏せ字にしている)
今回はとりあえずリポジトリ名をsam-pipeline-testなどとしておく。
aws codecommit create-repository --repository-name sam-pipeline-test --repository-description "sam pipeline test (runtime: nodejs)"
また、IAMの設定から、作業するユーザーがcodecommit上のgitリポジトリにアクセス出来るようにしておく。
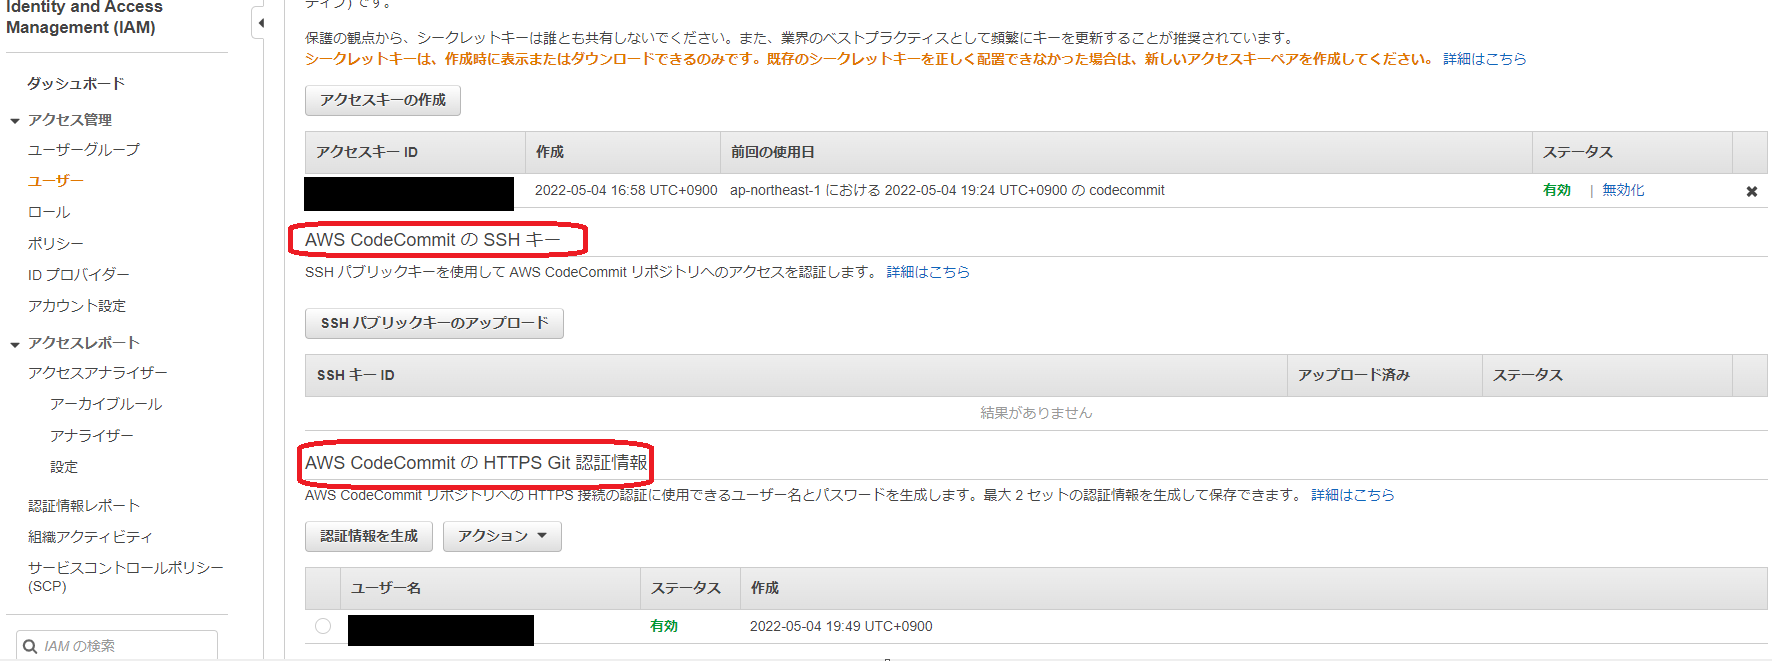
アクセス管理のユーザーから対象のユーザーを選び、「認証情報」を開く。ついでAWS CodeCommitのSSHキーの登録を行うか、HTTPSで接続するための認証情報(ID/PW)を発行するかのいずれかで、gitコマンドで対象のCodeCommitリポジトリにアクセス出来るようになる。
プロジェクトの作成とデプロイ
sam init
今回はhello-worldテンプレートを使い、ランタイムはnodejs14.xで作成する。
sam init <オプション>を実行すると、対話的にパラメータを指定してプロジェクトを作成できる。
今回は以下のようにした:
sam init --runtime nodejs14.x
Which template source would you like to use?
        1 - AWS Quick Start Templates
        2 - Custom Template Location
Choice: 1


Choose an AWS Quick Start application template
        1 - Hello World Example
        2 - Multi-step workflow
        3 - Standalone function
        4 - Scheduled task
        5 - Data processing
        5 - Data processing
        6 - Serverless API
Template: 1

Based on your selections, the only Package type available is Zip.
We will proceed to selecting the Package type as Zip.

Based on your selections, the only dependency manager available is npm.
We will proceed copying the template using npm.

Select your starter template
        1 - Hello World Example
        2 - Hello World Example TypeScript
Template: 1

Would you like to enable X-Ray tracing on the function(s) in your application?  [y/N]: N

Project name [sam-app]: sam-pipeline-test

Cloning from https://github.com/aws/aws-sam-cli-app-templates (process may take a moment)

    -----------------------
    Generating application:
    -----------------------
    Name: sam-pipeline-test
    Runtime: nodejs14.x
    Architectures: x86_64
    Dependency Manager: npm
    Application Template: hello-world
    Output Directory: .

    Next steps can be found in the README file at ./sam-pipeline-test/README.md


    Commands you can use next
    =========================
    [*] Create pipeline: cd sam-pipeline-test && sam pipeline init --bootstrap
    [*] Validate SAM template: sam validate
    [*] Test Function in the Cloud: sam sync --stack-name {stack-name} --watch
以後、自動作成されたsam-pipeline-testディレクトリで作業する
なお、sam-pipeline-testの内部は以下のような感じ:
tree
.
├── README.md
├── events
│   └── event.json
├── hello-world
│   ├── app.js
│   ├── package.json
│   └── tests
│       └── unit
│           └── test-handler.js
└── template.yaml

4 directories, 6 files
ローカル環境でのLambda実行
sudo無しでdockerコマンドを実行出来ることが必要。
以下のコマンド:
sam build --use-container
により、ローカルで実行するためのコンテナをビルド出来る。
※ToDo: そのままやると以下のようなWARNINGが出るため、対処が必要
Your template contains a resource with logical ID "ServerlessRestApi", which is a reserved logical ID in AWS SAM. It could result in unexpected behaviors and is not recommended.
コンテナをビルド後、
sam local invoke -e events/event.json HelloWorldFunction
などとすればローカル環境でLambdaを実行出来る。
(※コマンドの詳細は公式のリファレンス参照)
なお、HelloWorldFunctionはtemplate.yamlの内容などから確認可能(Resourcesの下に記述されている)。
作成直後の状態では、
START RequestId: bc9664a5-0f5c-40dc-81e7-114aa82d80d5 Version: $LATEST
{"statusCode":200,"body":"{\"message\":\"hello world\"}"}END RequestId: bc9664a5-0f5c-40dc-81e7-114aa82d80d5
REPORT RequestId: bc9664a5-0f5c-40dc-81e7-114aa82d80d5  Init Duration: 0.21 ms  Duration: 114.36 ms     Billed Duration: 115 ms Memory Size: 128 MB    Max Memory Used: 128 MB
のような実行結果が得られる。
また、
sam local start-api
とすればローカル上でテスト用のAPIサーバーが立ち上がり(デフォルトでは http://localhost:3000 )、API Gatewayの代わりの役割を果たす。すなわち、curlコマンドなどでapi越しにLambdaをテスト実行出来る:
curl http://localhost:3000/hello

# response:
{"message":"hello world"}
開発時はhello-worldディレクトリ下のファイル(app.jsなど)を編集したり追加したりして、再度sam build --use-containerでビルドを行うことでローカル環境上で完結して行うことが出来る。
(ここまではawsのアクセスキーID、シークレットキーといったcredentials情報は必須でない)
codepipelineによるデプロイ
sam deployでもデプロイは可能だが、今回はgitリポジトリへのpushをトリガーにしたcodepipelineによるCI/CD環境を作りたいので行わない。
代わりに、sam pipelineコマンドでリソースの作成や、pipeline作成のためのcloudformationテンプレートファイルの作成などが出来る。
sam pipeline bootstrap
今回使うpipelineのテンプレートでは2つステージを用意しておく必要があり、
それぞれに対応したリソースは予め以下のコマンド:
sam pipeline bootstrap
によって作成しておく。(対話形式)
今回はそれぞれ以下のようにして作成した:
sam pipeline bootstrap

sam pipeline bootstrap generates the required AWS infrastructure resources to connect
to your CI/CD system. This step must be run for each deployment stage in your pipeline,
prior to running the sam pipeline init command.

We will ask for [1] stage definition, [2] account details, and
[3] references to existing resources in order to bootstrap these pipeline resources.
[1] Stage definition
Enter a configuration name for this stage. This will be referenced later when you use the sam pipeline init command:
Stage configuration name: develop

[2] Account details
The following AWS credential sources are available to use.
To know more about configuration AWS credentials, visit the link below:
https://docs.aws.amazon.com/cli/latest/userguide/cli-configure-files.html
        1 - Environment variables (not available)
        2 - default (named profile)
        q - Quit and configure AWS credentials
Select a credential source to associate with this stage: 2
Associated account XXXXXXXXXXXX with configuration develop.

Enter the region in which you want these resources to be created [ap-northeast-1]:
Enter the pipeline IAM user ARN if you have previously created one, or we will create one for you []:

[3] Reference application build resources
Enter the pipeline execution role ARN if you have previously created one, or we will create one for you []:
Enter the CloudFormation execution role ARN if you have previously created one, or we will create one for you []:
Please enter the artifact bucket ARN for your Lambda function. If you do not have a bucket, we will create one for you []:
Does your application contain any IMAGE type Lambda functions? [y/N]:

[4] Summary
Below is the summary of the answers:
        1 - Account: XXXXXXXXXXXX
        2 - Stage configuration name: develop
        3 - Region: ap-northeast-1
        4 - Pipeline user: [to be created]
        5 - Pipeline execution role: [to be created]
        6 - CloudFormation execution role: [to be created]
        7 - Artifacts bucket: [to be created]
        8 - ECR image repository: [skipped]
Press enter to confirm the values above, or select an item to edit the value:

This will create the following required resources for the 'develop' configuration:
        - Pipeline IAM user
        - Pipeline execution role
        - CloudFormation execution role
        - Artifact bucket
Should we proceed with the creation? [y/N]: y
        Creating the required resources...
        Successfully created!
The following resources were created in your account:
        - Pipeline IAM user
        - Pipeline execution role
        - CloudFormation execution role
        - Artifact bucket
Pipeline IAM user credential:
        AWS_ACCESS_KEY_ID: AKIXXXXXXXXXXXXXXXXX
        AWS_SECRET_ACCESS_KEY: xxxxxxxxxxxxxxxxxxxxxxxxxxxxxxxxxxxxxxxx
View the definition in .aws-sam/pipeline/pipelineconfig.toml,
run sam pipeline bootstrap to generate another set of resources, or proceed to
sam pipeline init to create your pipeline configuration file.

Before running sam pipeline init, we recommend first setting up AWS credentials
in your CI/CD account. Read more about how to do so with your provider in
https://docs.aws.amazon.com/serverless-application-model/latest/developerguide/serverless-generating-example-ci-cd-others.html.
sam pipeline bootstrap

sam pipeline bootstrap generates the required AWS infrastructure resources to connect
to your CI/CD system. This step must be run for each deployment stage in your pipeline,
prior to running the sam pipeline init command.

We will ask for [1] stage definition, [2] account details, and
[3] references to existing resources in order to bootstrap these pipeline resources.

[1] Stage definition
Enter a configuration name for this stage. This will be referenced later when you use the sam pipeline init command:
Stage configuration name: main

[2] Account details
The following AWS credential sources are available to use.
To know more about configuration AWS credentials, visit the link below:
https://docs.aws.amazon.com/cli/latest/userguide/cli-configure-files.html
        1 - Environment variables (not available)
        2 - default (named profile)
        q - Quit and configure AWS credentials
Select a credential source to associate with this stage: 2
Associated account XXXXXXXXXXXX with configuration main.

Enter the region in which you want these resources to be created [ap-northeast-1]:
Pipeline IAM user ARN: arn:aws:iam::XXXXXXXXXXXX:user/aws-sam-cli-managed-develop-pipeline-PipelineUser-DO4ETNJ6QW7T

[3] Reference application build resources
Enter the pipeline execution role ARN if you have previously created one, or we will create one for you []:
Enter the CloudFormation execution role ARN if you have previously created one, or we will create one for you []:
Please enter the artifact bucket ARN for your Lambda function. If you do not have a bucket, we will create one for you []:
Does your application contain any IMAGE type Lambda functions? [y/N]:

[4] Summary
Below is the summary of the answers:
        1 - Account: XXXXXXXXXXXX
        2 - Stage configuration name: main
        3 - Region: ap-northeast-1
        4 - Pipeline user ARN: arn:aws:iam::XXXXXXXXXXXX:user/aws-sam-cli-managed-develop-pipeline-PipelineUser-DO4ETNJ6QW7T
        5 - Pipeline execution role: [to be created]
        6 - CloudFormation execution role: [to be created]
        7 - Artifacts bucket: [to be created]
        8 - ECR image repository: [skipped]
Press enter to confirm the values above, or select an item to edit the value:

This will create the following required resources for the 'main' configuration:
        - Pipeline execution role
        - CloudFormation execution role
        - Artifact bucket
Should we proceed with the creation? [y/N]: y
        Creating the required resources...
        Successfully created!
The following resources were created in your account:
        - Pipeline execution role
        - CloudFormation execution role
        - Artifact bucket
View the definition in .aws-sam/pipeline/pipelineconfig.toml,
run sam pipeline bootstrap to generate another set of resources, or proceed to
sam pipeline init to create your pipeline configuration file.
developとmainステージを用意し、ロールやバケットなどは基本的に自動生成させている。
pipeline作成
sam pipeline initにより、cloudformationのテンプレートファイルなどが生成される。
例によって対話形式での生成となり、以下のように設定した。
(develop環境→main環境となるように設定)
 sam pipeline init

sam pipeline init generates a pipeline configuration file that your CI/CD system
can use to deploy serverless applications using AWS SAM.
We will guide you through the process to bootstrap resources for each stage,
then walk through the details necessary for creating the pipeline config file.

Please ensure you are in the root folder of your SAM application before you begin.

Select a pipeline template to get started:
        1 - AWS Quick Start Pipeline Templates
        2 - Custom Pipeline Template Location
Choice: 1

Cloning from https://github.com/aws/aws-sam-cli-pipeline-init-templates.git (process may take a moment)
Select CI/CD system
        1 - Jenkins
        2 - GitLab CI/CD
        3 - GitHub Actions
        4 - Bitbucket Pipelines
        5 - AWS CodePipeline
Choice: 5
You are using the 2-stage pipeline template.
 _________    _________
|         |  |         |
| Stage 1 |->| Stage 2 |
|_________|  |_________|

Checking for existing stages...

What is the Git provider?
        1 - Bitbucket
        2 - CodeCommit
        3 - GitHub
        4 - GitHubEnterpriseServer
Choice []: 2
What is the CodeCommit repository name?: sam-pipeline-test
What is the Git branch used for production deployments? [main]:
What is the template file path? [template.yaml]:
We use the stage configuration name to automatically retrieve the bootstrapped resources created when you ran `sam pipeline bootstrap`.

Here are the stage configuration names detected in .aws-sam/pipeline/pipelineconfig.toml:
        1 - develop
        2 - main
Select an index or enter the stage 1's configuration name (as provided during the bootstrapping): 1
What is the sam application stack name for stage 1? [sam-app]: sam-pipeline-test
Stage 1 configured successfully, configuring stage 2.

Here are the stage configuration names detected in .aws-sam/pipeline/pipelineconfig.toml:
        1 - develop
        2 - main
Select an index or enter the stage 2's configuration name (as provided during the bootstrapping): 2
What is the sam application stack name for stage 2? [sam-app]: sam-pipeline-test
Stage 2 configured successfully.

To deploy this template and connect to the main git branch, run this against the leading account:
`sam deploy -t codepipeline.yaml --stack-name <stack-name> --capabilities=CAPABILITY_IAM`.
SUMMARY
We will generate a pipeline config file based on the following information:
        What is the Git provider?: CodeCommit
        What is the CodeCommit repository name?: sam-pipeline-test
        What is the Git branch used for production deployments?: main
        What is the template file path?: template.yaml
        Select an index or enter the stage 1's configuration name (as provided during the bootstrapping): 1
        What is the sam application stack name for stage 1?: sam-pipeline-test
        What is the pipeline execution role ARN for stage 1?: arn:aws:iam::XXXXXXXXXXXX:role/aws-sam-cli-managed-develop-PipelineExecutionRole-XCKAL3W2XFRS
        What is the CloudFormation execution role ARN for stage 1?: arn:aws:iam::XXXXXXXXXXXX:role/aws-sam-cli-managed-devel-CloudFormationExecutionR-L9HFWB14XDN0
        What is the S3 bucket name for artifacts for stage 1?: aws-sam-cli-managed-develop-pipel-artifactsbucket-837wzb8ngrui
        What is the ECR repository URI for stage 1?:
        What is the AWS region for stage 1?: ap-northeast-1
        Select an index or enter the stage 2's configuration name (as provided during the bootstrapping): 2
        What is the sam application stack name for stage 2?: sam-pipeline-test
        What is the pipeline execution role ARN for stage 2?: arn:aws:iam::XXXXXXXXXXXX:role/aws-sam-cli-managed-main-pip-PipelineExecutionRole-1UR6WMVEWR2PL
        What is the CloudFormation execution role ARN for stage 2?: arn:aws:iam::XXXXXXXXXXXX:role/aws-sam-cli-managed-main-CloudFormationExecutionR-1S6L7ZTZTKB5R
        What is the S3 bucket name for artifacts for stage 2?: aws-sam-cli-managed-main-pipeline-artifactsbucket-r9liexo7v35e
        What is the ECR repository URI for stage 2?:
        What is the AWS region for stage 2?: ap-northeast-1
Successfully created the pipeline configuration file(s):
        - codepipeline.yaml
        - assume-role.sh
        - pipeline/buildspec_unit_test.yml
        - pipeline/buildspec_integration_test.yml
        - pipeline/buildspec_build_package.yml
        - pipeline/buildspec_feature.yml
        - pipeline/buildspec_deploy.yml
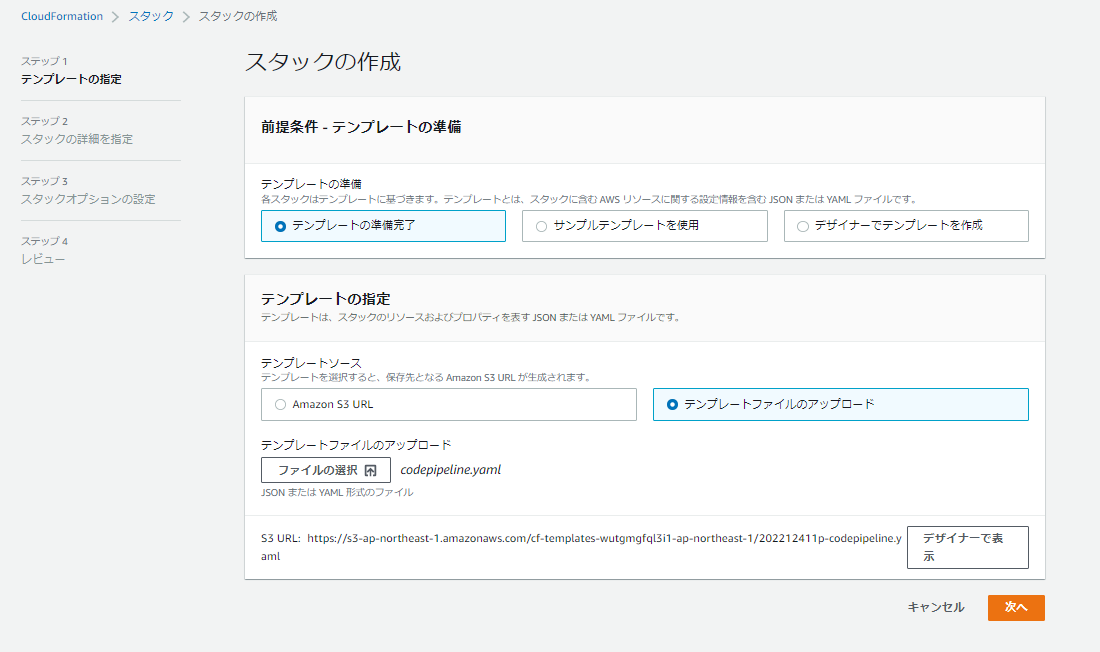
これにより生成されたcodepipeline.yamlを使うことにより、pipelineを構築出来る。
CloudFormationのスタック作成画面より、codepipeline.yamlをアップロードする。
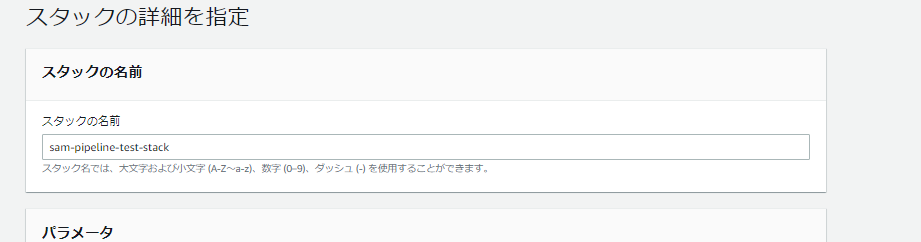
次の画面ではスタック名を適当に指定する。
次の画面もここでは全部デフォルトのままで「次へ」を押し、
最後の画面で「AWS CloudFormation によって IAM リソースが作成される場合があることを承認します」にチェックをつけてスタックの作成を実行する。
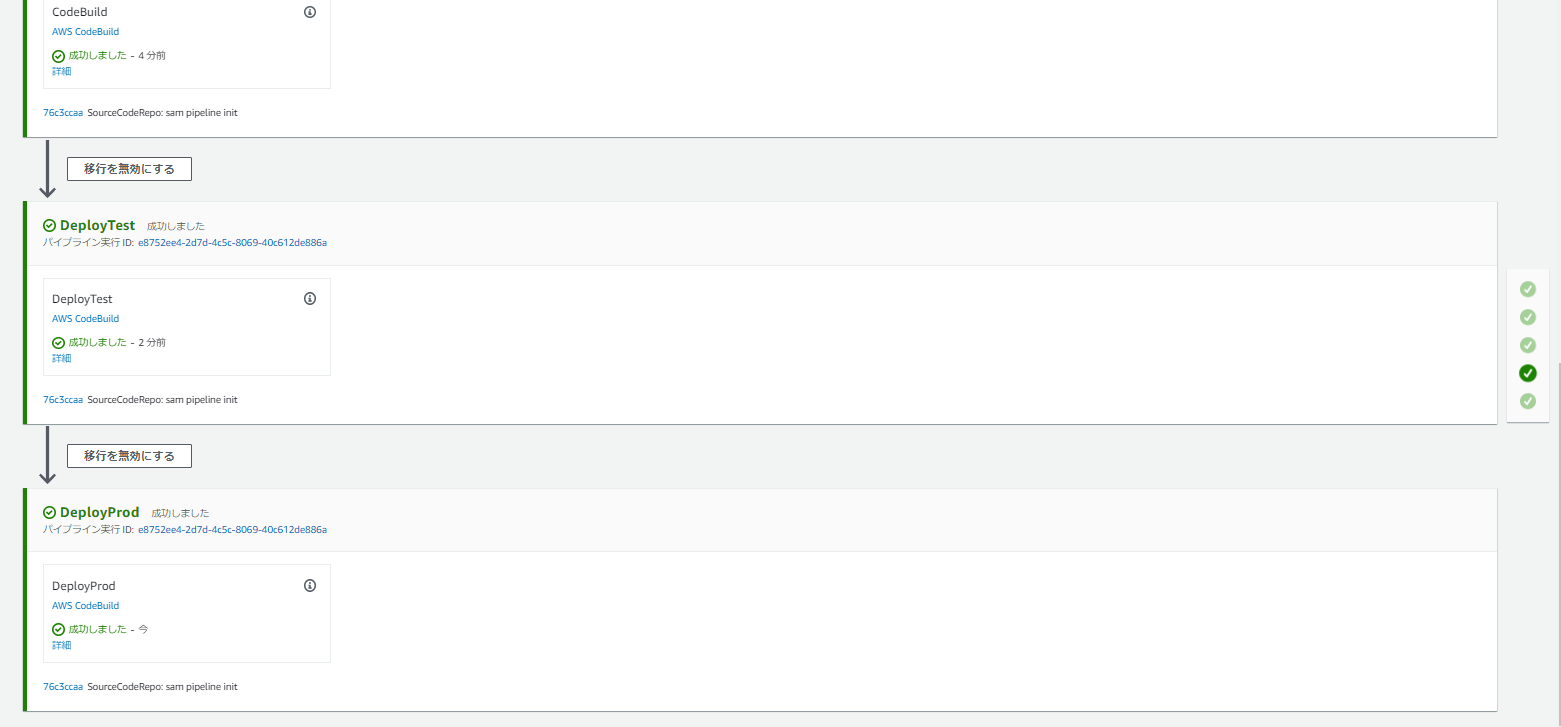
また、ここまでで生成されたファイルをgit commitしてcodecommitのリポジトリ(mainブランチ)にpushすることで、
sam pipeline initにより作成されたファイルによってpipeline内のCodeBuildなどが走り、
最終的にデプロイに至る。
LambdaとAPI Gatewayもちゃんと作成されている

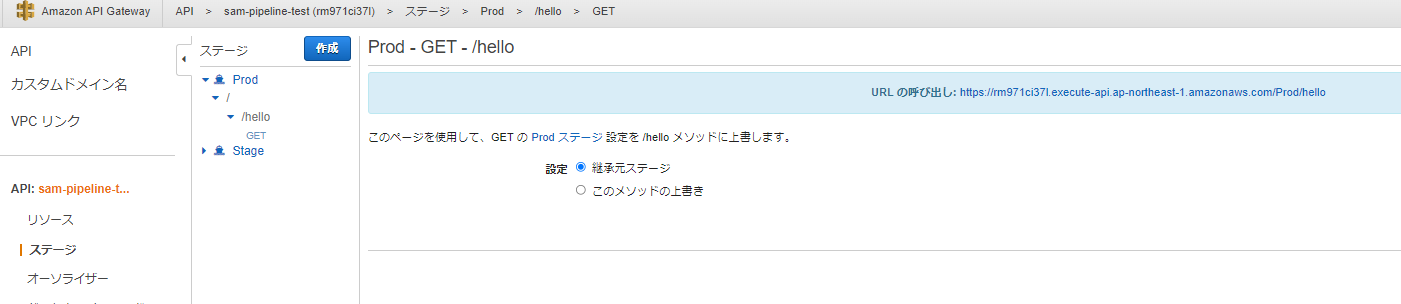
特に認証の設定などはしていないので、curlなどでデプロイされたAPIを叩くことも出来る
curl https://rm971ci37l.execute-api.ap-northeast-1.amazonaws.com/Prod/hello
{"message":"hello world"}
アップデートと再デプロイ
せっかくなので、Lambdaの数を増やしてみる
tree
.
├── README.md
├── assume-role.sh
├── codepipeline.yaml
├── events
│   └── event.json
├── hello-world
│   ├── app.js
│   ├── package.json
│   └── tests
│       └── unit
│           └── test-handler.js
├── hello-world2 # 追加
│   ├── app.js
│   ├── package.json
│   └── tests
│       └── unit
│           └── test-handler.js
├── pipeline
│   ├── buildspec_build_package.yml
│   ├── buildspec_deploy.yml
│   ├── buildspec_feature.yml
│   ├── buildspec_integration_test.yml
│   └── buildspec_unit_test.yml
└── template.yaml # 編集

8 directories, 16 files
cp -r hello-world hello-world2として、hello-world2を作ってみる。
そのままでも良いがオリジナルとの違いがわかりやすいように、内部のapp.jsの中身を編集してみる。
// const axios = require('axios')
// const url = 'http://checkip.amazonaws.com/';
let response;

/**
 *
 * Event doc: https://docs.aws.amazon.com/apigateway/latest/developerguide/set-up-lambda-proxy-integrations.html#api-gateway-simple-proxy-for-lambda-input-format
 * @param {Object} event - API Gateway Lambda Proxy Input Format
 *
 * Context doc: https://docs.aws.amazon.com/lambda/latest/dg/nodejs-prog-model-context.html
 * @param {Object} context
 *
 * Return doc: https://docs.aws.amazon.com/apigateway/latest/developerguide/set-up-lambda-proxy-integrations.html
 * @returns {Object} object - API Gateway Lambda Proxy Output Format
 *
 */
exports.lambdaHandler = async (event, context) => {
    try {
        // const ret = await axios(url);
        response = {
            'statusCode': 200,
            'body': JSON.stringify({
                message: 'hello world2',
                key: 'test value',
                // location: ret.data.trim()
            })
        }
    } catch (err) {
        console.log(err);
        return err;
    }

    return response
};
(レスポンスのJSONの内容を微妙に変えている)
また、template.yamlも編集しておく。
(オリジナル)
AWSTemplateFormatVersion: '2010-09-09'
Transform: AWS::Serverless-2016-10-31
Description: >
  sam-pipeline-test

  Sample SAM Template for sam-pipeline-test

# More info about Globals: https://github.com/awslabs/serverless-application-model/blob/master/docs/globals.rst
Globals:
  Function:
    Timeout: 3

Resources:
  HelloWorldFunction:
    Type: AWS::Serverless::Function # More info about Function Resource: https://github.com/awslabs/serverless-application-model/blob/master/versions/2016-10-31.md#awsserverlessfunction
    Properties:
      CodeUri: hello-world/
      Handler: app.lambdaHandler
      Runtime: nodejs14.x
      Architectures:
        - x86_64
      Events:
        HelloWorld:
          Type: Api # More info about API Event Source: https://github.com/awslabs/serverless-application-model/blob/master/versions/2016-10-31.md#api
          Properties:
            Path: /hello
            Method: get

Outputs:
  # ServerlessRestApi is an implicit API created out of Events key under Serverless::Function
  # Find out more about other implicit resources you can reference within SAM
  # https://github.com/awslabs/serverless-application-model/blob/master/docs/internals/generated_resources.rst#api
  HelloWorldApi:
    Description: "API Gateway endpoint URL for Prod stage for Hello World function"
    Value: !Sub "https://${ServerlessRestApi}.execute-api.${AWS::Region}.amazonaws.com/Prod/hello/"
  HelloWorldFunction:
    Description: "Hello World Lambda Function ARN"
    Value: !GetAtt HelloWorldFunction.Arn
  HelloWorldFunctionIamRole:
    Description: "Implicit IAM Role created for Hello World function"
    Value: !GetAtt HelloWorldFunctionRole.Arn
(変更後)
AWSTemplateFormatVersion: '2010-09-09'
Transform: AWS::Serverless-2016-10-31
Description: >
  sam-pipeline-test

  Sample SAM Template for sam-pipeline-test

# More info about Globals: https://github.com/awslabs/serverless-application-model/blob/master/docs/globals.rst
Globals:
  Function:
    Timeout: 3

Resources:
  HelloWorldFunction:
    Type: AWS::Serverless::Function # More info about Function Resource: https://github.com/awslabs/serverless-application-model/blob/master/versions/2016-10-31.md#awsserverlessfunction
    Properties:
      CodeUri: hello-world/
      Handler: app.lambdaHandler
      Runtime: nodejs14.x
      Architectures:
        - x86_64
      Events:
        HelloWorld:
          Type: Api # More info about API Event Source: https://github.com/awslabs/serverless-application-model/blob/master/versions/2016-10-31.md#api
          Properties:
            Path: /hello
            Method: get
  HelloWorldFunction2:
    Type: AWS::Serverless::Function # More info about Function Resource: https://github.com/awslabs/serverless-application-model/blob/master/versions/2016-10-31.md#awsserverlessfunction
    Properties:
      CodeUri: hello-world2/
      Handler: app.lambdaHandler
      Runtime: nodejs14.x
      Architectures:
        - x86_64
      Events:
        HelloWorld:
          Type: Api # More info about API Event Source: https://github.com/awslabs/serverless-application-model/blob/master/versions/2016-10-31.md#api
          Properties:
            Path: /hello2
            Method: get

Outputs:
  # ServerlessRestApi is an implicit API created out of Events key under Serverless::Function
  # Find out more about other implicit resources you can reference within SAM
  # https://github.com/awslabs/serverless-application-model/blob/master/docs/internals/generated_resources.rst#api
  HelloWorldApi:
    Description: "API Gateway endpoint URL for Prod stage for Hello World function"
    Value: !Sub "https://${ServerlessRestApi}.execute-api.${AWS::Region}.amazonaws.com/Prod/hello/"
  HelloWorldFunction:
    Description: "Hello World Lambda Function ARN"
    Value: !GetAtt HelloWorldFunction.Arn
  HelloWorldFunctionIamRole:
    Description: "Implicit IAM Role created for Hello World function"
    Value: !GetAtt HelloWorldFunctionRole.Arn
  HelloWorldApi2:
    Description: "API Gateway endpoint URL for Prod stage for Hello World function"
    Value: !Sub "https://${ServerlessRestApi}.execute-api.${AWS::Region}.amazonaws.com/Prod/hello2/"
  HelloWorldFunction2:
    Description: "Hello World Lambda Function ARN"
    Value: !GetAtt HelloWorldFunction2.Arn
  HelloWorldFunctionIamRole2:
    Description: "Implicit IAM Role created for Hello World function"
    Value: !GetAtt HelloWorldFunctionRole.Arn
これでsam build --use-containerで再ビルドを行い、
sam local invokeやsam local start-apiなどによって変更を確認出来る。
例: sam loccal start-api
# 諸事情で3002で開けておく
sam local start-api -p 3002
 curl localhost:3002/hello

# response
{"message":"hello world"}

curl localhost:3002/hello2
{"message":"hello world2","key":"test value"}
# response
確かに/hello2が追加されており、レスポンス内容も記述の通りになっている。
この内容を再度gitでcommitし、codecommitにpushしてデプロイする。
API Gatewayのpathが追加されていることが確認できる。

(Lambdaも追加されていることが確認出来る)
API Gateway
その他
sam pipeline bootstrapでステージを作る際にImageを使ったLambdaがあるか、といった旨の項目があり、
YesにするとECRなども作ってくれる。
(Dockerイメージを自分で作成したLambdaを自動デプロイしたい場合に使える)
感想
- AWS SAMを自在に書ければかなり柔軟に色々できそう
- 現時点でも比較的手軽にCodePipelineを使ったCI/CDに近いものが実現出来ているが、
実用的にはまだ足りない部分が多い- pipelineの内容のカスタマイズ
- 生成リソースの詳細な設定(権限管理など)
- lambdaのruntimeで、typescriptがbetaなのでGAに期待したい