はじめに
react-railsという、ReactをAsset Pipelineに乗せて使えるようにしてくれるruby gemsがある。
この記事では、これを使用してReactの公式tutorialを進めていく。
公式のtutorialではサーバ側はすでに実装済みとして進んでいる。
今回はせっかくなのでtutorialを進める中でサーバ側も実装していくことにする。
ちなみに使ってみた個人的な感想としては、RailsのAsset Pipelineに乗せるならすごく順当かなー、という感じ。
browserifyを使いたい。bowerもオワコンと呼ばれてしまう。そんなこの時代。
Asset Pipelineは捨てたい感じがあるけど、既存のアプリケーションを徐々にReactコンポーネント化していく、みたいな時には良いと思う。
方針
- きまぐれで、必要そうなところはReactの説明する。けど英訳とかはしない。
- 章立ては公式Tutorialと揃えているので、併せて読み進めると理解しやすいはず。
- 全くReactの概念が分からない人は、一人React.js Advent Calendar 2014という素晴らしい記事がある。読んでおくときっと理解しやすい。
元となっている資料
おすすめの記事
環境
- ruby 2.2.0
- rails 4.2.1
- react-rails 1.0.0
github
コミットの単位を章立てに合わせているので、tigとかで差分を見ながら進めるとやりやすいかも知れない。
tutorial
下準備
rails newでプロジェクトを作成。
$ rails new react-rails-tutorial
$ cd react-rails-tutorial
react-railsを追加。
$ vi Gemfile
# ...省略
gem 'react-rails', '~> 1.0' # 追加する

$ bundle install
react-railsにはreactを使えるようによしなにしてくれるgeneratorが用意されている。叩く。
$ rails g react:install
react-railsにはReactのビルドオプションを設定することができる。tutorialではいずれも指定の必要はないので飛ばす。参考
Your first component
react-railsにはComponent定義を生成してくれるgeneratorがある。これを叩いて最初のComponentを作る。
rails g react:component CommentBox
app/assets/javascripts/components/comment_box.js.jsxが作られる。
中身を書き変える。
var CommentBox = React.createClass({
  render: function() {
    return (
      <div className="commentBox">
        Hello, world! I am a CommentBox.
      </div>
    );
  }
});
Railsのcontrollerとviewを作成
generatorを使って、Controllerを作成する。
$ rails g controller comments
viewを作成する。
<%= react_component('CommentBox') %>
react-railsをインストールすると、react_componentというhelperメソッドが追加される。
この第一引数に、ここで使うReact Componentを文字列で渡すと、ここにrenderしてくれる。
ルーティングを設定する。
root 'comments#index'
rails serverでサーバを立ち上げて、http://localhost:3000にアクセスしてみる。
「Hello, world! I am a CommentBox.」と表示されればok。
Composing components
comment_box.js.jsxに子Componentの定義を追加する。
// ...省略

var CommentList = React.createClass({
  render: function() {
    return (
      <div className="commentList">
        Hello, world! I am a CommentList.
      </div>
    );
  }
});

var CommentForm = React.createClass({
  render: function() {
    return (
      <div className="commentForm">
        Hello, world! I am a CommentForm.
      </div>
    );
  }
});
追加したモジュールを使うようにCommentBoxを修正。
var CommentBox = React.createClass({
  render: function() {
    return (
      <div className="commentBox">
        <h1>Comments</h1>
        <CommentList />
        <CommentForm />
      </div>
    );
  }
});

# ...省略
最終的はこうなる。
var CommentBox = React.createClass({
  render: function() {
    return (
      <div className="commentBox">
        <h1>Comments</h1>
        <CommentList />
        <CommentForm />
      </div>
    );
  }
});

var CommentList = React.createClass({
  render: function() {
    return (
      <div className="commentList">
        Hello, world! I am a CommentList.
      </div>
    );
  }
});

var CommentForm = React.createClass({
  render: function() {
    return (
      <div className="commentForm">
        Hello, world! I am a CommentForm.
      </div>
    );
  }
});
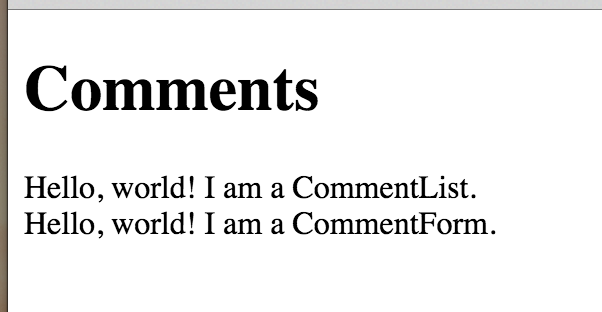
この時点でブラウザからアクセスしてみると、こうなっている。
Using props
ここではReactのpropsを使って、Component間で値の受け渡しをする。
まずはcomment_box.js.jsxに子Componentの定義を追加する。
// ... 省略
var Comment = React.createClass({
  render: function() {
    return (
      <div className="comment">
        <h2 className="commentAuthor">
          {this.props.author}
        </h2>
        {this.props.children}
      </div>
    );
  }
});
JSXの中では、{}で囲うことでComponentの保持している変数にアクセスできる。
ここではthis.props.authorとthis.props.childrenにアクセスしている。
this.props.hogeというのがComponentで保持しているpropsへのアクセス方法で、この値は親Componentから渡される。
Component Properties
comment_box.js.jsxのCommentListを、先ほど定義したCommentを使用するように修正する。
// ... 省略
var CommentList = React.createClass({
  render: function() {
    return (
      <div className="commentList">
        <Comment author="Pete Hunt">This is one comment</Comment>
        <Comment author="Jordan Walke">This is *another* comment</Comment>
      </div>
    );
  }
});
// ... 省略
ここでauthor="Pete Hunt"と書いているところがReactのpropsの受け渡し部分。こうすると、Comment Componentでは、this.props.authorでここで渡された値にアクセスできる。
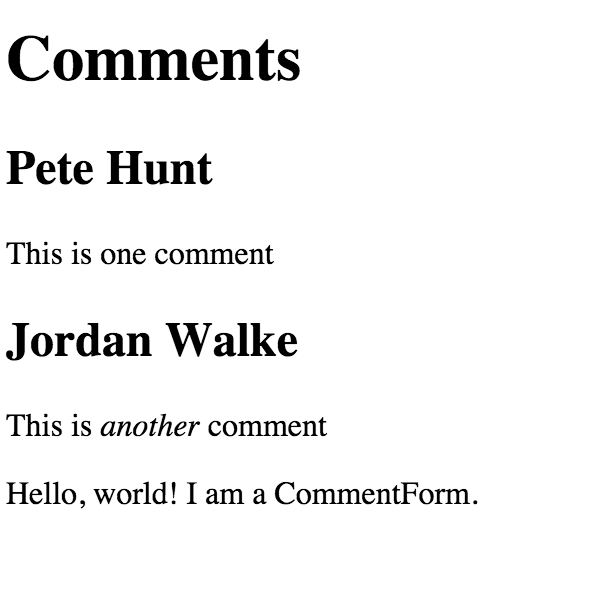
この時点でhttp://localhost:3000にアクセスすると、こうなる。
Adding Markdown
markedを使って、CommentをMarkdown形式で書けるようにする。
$ vi Gemfile
# ...省略
gem 'marked-rails' # 追加

$ bundle install
// ...省略
//= require marked # 追加
Comment Componentでmarkdownを変換するように書き換える。
var Comment = React.createClass({
  render: function() {
    return (
      <div className="comment">
        <h2 className="commentAuthor">
          {this.props.author}
        </h2>
        {marked(this.props.children.toString())}
      </div>
    );
  }
});
このままだと、htmlタグがエスケープして表示される。
これはReactが僕らを危険なコードから守ってくれているからだ。
今回は信頼のおけるコードとして、レンダリングして欲しいので下記のようにする。
var Comment = React.createClass({
  render: function() {
    var rawMarkup = marked(this.props.children.toString(), {sanitize: true});
    return (
      <div className="comment">
        <h2 className="commentAuthor">
          {this.props.author}
        </h2>
        <span dangerouslySetInnerHTML={{__html: rawMarkup}} />
      </div>
    );
  }
});
そうすると意図通りにレンダリングされる。
Hook up the data model
最終的にはサーバからJSONを取得してクライアントでレンダリングするけど、とりあえず現段階ではview(erb)に埋め込んで渡す。
react-railsでは、react_componentメソッドの第2引数にrubyのhashを渡すことで、reactのpropとしてComponentに渡せる。
<%= react_component('CommentBox',
  data: [
    {author: "Pete Hunt", text: "This is one comment"},
    {author: "Jordan Walke", text: "This is *another* comment"}
  ]
) %>
埋め込んだdataを使うように、CommentBoxとCommentListを書き換える。
var CommentBox = React.createClass({
  render: function() {
    return (
      <div className="commentBox">
        <h1>Comments</h1>
        <CommentList data={this.props.data} />
        <CommentForm />
      </div>
    );
  }
});

var CommentList = React.createClass({
  render: function() {
    var commentNodes = this.props.data.map(function (comment) {
      return (
        <Comment author={comment.author}>
          {comment.text}
        </Comment>
      );
    });
    return (
      <div className="commentList">
        {commentNodes}
      </div>
    );
  }
});
localhost:3000にアクセスして、無事ReactのComponentにdataが渡せてレンダリングされていることが確認できればok。
Fetching from the server
先ほどviewに埋め込んだJSONをサーバから受け取るようにする。
まずWebAPI用のコントローラを作成。jsonを返すWebAPIなのでjavascriptやstylesheetは要らない。--no-assetを指定する。
$ rails g controller api/v1/comments --no-assets
Controllerを実装する。
class Api::V1::CommentsController < ApplicationController
  def index
    @data = [
      { author: 'Pete Hunt', text: 'This is one comment' },
      { author: 'Jordan Walke', text: 'This is *another* comment' }
    ]
  end
end
jsonを返すviewを定義する。
json.data(@data) { |d| json.extract!(d, :author, :text) }
routeを定義する。
# ...省略
namespace :api, format: 'json' do
  namespace :v1  do
    resources :comments
  end
end
この段階で http://localhost:3000/api/v1/comments.json にアクセスしてみて、JSONが返却されればok。
CommentBoxにはこのAPIのurlを渡すようにする。
<%= react_component('CommentBox', url: '/api/v1/comments.json') %>
まだurlを渡すようにしただけで、APIにはアクセスしていない。
現段階でhttp://localhost:3000にアクセスすると、エラーになる。
Reactive state
ここでstateという概念が出てくる。
既に出てきているpropsは、これまで必ず親コンポーネントから渡されている。
propsの値は親Componentで管理するので、決してReactのComponentの中で変更してはいけない。
これを守ることで、ReactのComponentは同じpropsを渡される限りは、必ず同じレンダリング結果になるので、immutableなComponentとして扱えることになる。これ重要!
じゃあ親Componentでは値の変更はどうするの、というとこれはstateという、Componentの状態を保持するための変数に適用する。
下記の記事を読むとよく分かる。
CommentBoxにおいては、urlがpropsでWebAPIで取得したdataはstateになる。
stateはgetInitialState()というメソッドで初期値を与えられる。
CommentBoxを、dataの初期値には空配列を与えて、CommentListにはthis.state.dataを与えるように変更する。
var CommentBox = React.createClass({
  getInitialState: function() {
    return {data: []};
  },
  render: function() {
    return (
      <div className="commentBox">
        <h1>Comments</h1>
        <CommentList data={this.state.data} />
        <CommentForm />
      </div>
    );
  }
});
# ...省略
こうするとhttp://localhost:3000にアクセスした時のエラーは消える。ただしまだWebAPIにはアクセスしていないので、Commentは空になる。
Updating state
ReactのComponent内で使えるcomponentDidMount()というメソッドがある。これはReactのComponentが最初にrenderされる時に時に呼び出される。
このメソッド内でWebAPIにアクセスして、データを取得するように実装する。
var CommentBox = React.createClass({
  getInitialState: function() {
    return {data: []};
  },
  componentDidMount: function() {
    $.ajax({
      url: this.props.url,
      dataType: 'json',
      success: function(result) {
        this.setState({data: result.data});
      }.bind(this),
      error: function(xhr, status, err) {
        console.error(this.props.url, status, err.toString());
      }.bind(this)
    });
  },
  render: function() {
    return (
      <div className="commentBox">
        <h1>Comments</h1>
        <CommentList data={this.state.data} />
        <CommentForm />
      </div>
    );
  }
});
// ....省略
これで/api/v1/comments.jsonにアクセスして取得したJSONを元にcomponentがrenderできるようになる。
this.setState()メソッドを用いてstateを変更していることに注目する。stateを変更する時は、必ずthis.setState()メソッドで変更しなければならない。
Reactはこのメソッドを通じてstateが変更された時に、Componentを再度renderする。
このままではページを開いた時にしかrenderされないので、簡単なpollingを実装してリアルタイムに値の変更が適用されるようにする。
ComponentBoxの呼び出し時にpollIntervalを与えるように修正。
<%= react_component('CommentBox', url: '/api/v1/comments.json', pollInterval: 2000) %>
WebAPIにアクセスする処理をloadCommentsFromServer()というメソッドに切り出す。
componentDidMount()メソッドで渡されたpollInterval間隔でloadCommentsFromServer()メソッドを呼び出すようにする。
var CommentBox = React.createClass({
  loadCommentsFromServer: function() {
    $.ajax({
      url: this.props.url,
      dataType: 'json',
      success: function(result) {
        this.setState({data: result.data});
      }.bind(this),
      error: function(xhr, status, err) {
        console.error(this.props.url, status, err.toString());
      }.bind(this)
    });
  },
  getInitialState: function() {
    return {data: []};
  },
  componentDidMount: function() {
    this.loadCommentsFromServer();
    setInterval(this.loadCommentsFromServer, this.props.pollInterval);
  },
  render: function() {
    return (
      <div className="commentBox">
        <h1>Comments</h1>
        <CommentList data={this.state.data} />
        <CommentForm />
      </div>
    );
  }
});
// ...省略
http://localhost:3000にアクセスして、開発者ツールでネットワークキャプチャしてみると、2秒毎にアクセスしているのが見られる。
サーバを実装する
ここはtutorialには無い内容。
現在のところ、実装したWebAPIは固定のJSONを返却している。
データベースにアクセスしてJSONを返却できるように実装する。
modelの作成
$ rails g model comment author:string text:text
$ rake db:migrate
controllerの実装
get
class Api::V1::CommentsController < ApplicationController
  def index
    @data = Comment.all
  end
end
データベースからアクセスしてjsonを返却するようにした。
まだデータがないので、localhost:3000にアクセスしても1件もCommentは表示されない。
rails consoleよりデータを作成してみる。
$ rails c
irb(main):001:0> Comment.create!({author: 'Pete Hunt',text: 'This is one comment'})
   (0.1ms)  begin transaction
  SQL (0.4ms)  INSERT INTO "comments" ("author", "text", "created_at", "updated_at") VALUES (?, ?, ?, ?)  [["author", "Pete Hunt"], ["text", "This is one comment"], ["created_at", "2015-04-29 07:12:53.220217"], ["updated_at", "2015-04-29 07:12:53.220217"]]
   (0.7ms)  commit transaction
=> #<Comment id: 1, author: "Pete Hunt", text: "This is one comment", created_at: "2015-04-29 07:12:53", updated_at: "2015-04-29 07:12:53">
再度localhost:3000にアクセスすると、作成したCommentが表示される。
post
次にCommentを作成できるAPIを実装する。
tutorialのサーバは、getしようとpostしようとcomment全件を配列で返す!というちょっと乱暴な感じで実装されている。
それはどうかなー、という感じがするので、POSTした時は作成したComment 1件を返す、という実装にする。
まずは返却するjsonを定義する。
json.extract!(@comment, :author, :text)
次にcreateアクションを実装する。
class Api::V1::CommentsController < ApplicationController
  # ...省略

  def create
    @comment = Comment.create(comment_params)
    render :show, status: :created
  end

  private

  def comment_params
    params.permit(:author, :text)
  end
end
試しにcurlでPOSTを投げてCommentを作成したい。そのためにもう一箇所変更する。
RailsではCSRFの対策が入っていて、CSRF tokenが一致しない場合には例外を投げるという動作をする。
すげー便利!なんだけど今回はセッションの認証とかないのでこの動作を、一致しない場合はセッションを空にする、に変更する。
class ApplicationController < ActionController::Base
  protect_from_forgery with: :null_session
end
デフォルトではprotect_from_forgery with: :exceptionになっているはず。これを:null_sessionに変える。
curlでPOSTを投げる。
$ curl -X POST http://localhost:3000/api/v1/comments.json -H 'content-type: application/json' -d '{"author": "Jordan Walke", "text": "This is *another* comment"}'
http://localhost:3000にアクセスして、Commentが作成されてればok。
Adding new comments
CommentFormにCommentを入力できるFormを実装する。
// ...省略
var CommentForm = React.createClass({
  render: function() {
    return (
      <form className="commentForm">
        <input type="text" placeholder="Your name" />
        <input type="text" placeholder="Say something..." />
        <input type="submit" value="Post" />
      </form>
    );
  }
});
// ...省略
次にFormをsubmitした時の動作を実装する。
// ...省略
var CommentForm = React.createClass({
  handleSubmit: function(e) {
    e.preventDefault();
    var author = React.findDOMNode(this.refs.author).value.trim();
    var text = React.findDOMNode(this.refs.text).value.trim();
    if (!text || !author) {
      return;
    }
    // TODO: send request to the server
    React.findDOMNode(this.refs.author).value = '';
    React.findDOMNode(this.refs.text).value = '';
    return;
  },
  render: function() {
    return (
      <form className="commentForm" onSubmit={this.handleSubmit}>
        <input type="text" placeholder="Your name" ref="author" />
        <input type="text" placeholder="Say something..." ref="text" />
        <input type="submit" value="Post" />
      </form>
    );
  }
});
// ...省略
submitイベントが発行された時に、handleSubmit()を実行するようにした。
実装したのはsubmitされた時にauthorとtextの入力値にアクセスできるようにしたのと、イベント終了時にinputを空にするところ。
まだサーバへPOSTはしていない。ここで重要なのはinputの属性でref="author"と指定しているところ。
こうしておくと、ReactのComponentの中でthis.refs.hogeで要素にアクセスできるようになる。
次にサーバへPOSTを投げてCommentを作成する処理を実装したい、がその前にその処理がどこで実行されるべきか、ということについて考える。
今回実装しているComponentの構成は以下になる。
CommentBox
├── CommentList
│   └── Comment
└── CommentForm
Commentが作成された時に実際に増えるのは、CommentListの管理しているCommentで、それはCommentBoxのstateが渡されている。
var CommentBox = React.createClass({
// ...省略
  render: function() {
    return (
      <div className="commentBox">
        <h1>Comments</h1>
        <CommentList data={this.state.data} /> // ここ!
        <CommentForm />
      </div>
    );
  }
});
// ...省略
つまりデータの大元はCommentBoxで保持しているstateになる。
Reactでは、データの変更ができるのはstateのみで、propsは決して直接いじってはいけない。(これ重要!)
今回はPOSTした後にはすぐに画面をリフレッシュしたいので、stateをいじる必要がある。
ということで、stateを持っているCommentBoxに処理を実装するのが正しい。
まずはCommentFormのsubmitイベントが実行された時に、CommentBoxに実装されたメソッドが呼ばれるようにする。
CommentBoxからCommentFormにcallbackを渡すことでこれを実現する。
var CommentBox = React.createClass({
  // ...省略
  handleCommentSubmit: function(comment) {
    // TODO: submit to the server and refresh the list
  },
  // ...省略
  render: function() {
    return (
      <div className="commentBox">
        <h1>Comments</h1>
        <CommentList data={this.state.data} />
        <CommentForm onCommentSubmit={this.handleCommentSubmit} /> //ここでcallback渡す!
      </div>
    );
  }
});

// ...省略

var CommentForm = React.createClass({
  handleSubmit: function(e) {
    e.preventDefault();
    var author = React.findDOMNode(this.refs.author).value.trim();
    var text = React.findDOMNode(this.refs.text).value.trim();
    if (!text || !author) {
      return;
    }
    this.props.onCommentSubmit({author: author, text: text}); // ここでcallback実行する!
    React.findDOMNode(this.refs.author).value = '';
    React.findDOMNode(this.refs.text).value = '';
    return;
  },
  // ...省略
});
これでcallbackは渡せた。試しにhandleCommentSubmit()メソッドでconsole.logしてみれば、ちゃんとメソッドが呼び出されていることが確認できるはず。
handleCommentSubmit()にajaxでPOSTを投げる処理を実装する。
var CommentBox = React.createClass({
  // ...省略
  handleCommentSubmit: function(comment) {
    $.ajax({
      url: this.props.url,
      dataType: 'json',
      type: 'POST',
      data: comment,
      success: function(data) {
        this.setState({data: this.state.data.concat([data])});
      }.bind(this),
      error: function(xhr, status, err) {
        console.error(this.props.url, status, err.toString());
      }.bind(this)
    });
  },
  // ...省略
});
POSTのレスポンスのbodyには作成したCommentが返却されるように実装したので、
this.setState({data: this.state.data.concat([data])});
で返却されたCommentをstateに追加するように実装している。
ここでArray#concatを使っているのは、変更前に保持していたstateを直接変更したくないため。
下記の記事が非常に分かりやすい。
Optimization: optimistic updates
ここはsubmitが実行された時にサーバ通信する前にstateを変更することで、ユーザへのフィードバックを早めよう!という内容。
今回はPOST時のレスポンスをtutorialと変えているのでそのまま適用できないけど、やるとしたらこんな感じ。
var CommentBox = React.createClass({
  // ...省略
  handleCommentSubmit: function(comment) {
    this.setState({data: this.state.data.concat([comment])});
    $.ajax({
      url: this.props.url,
      dataType: 'json',
      type: 'POST',
      data: comment,
      success: function(data) {
      }.bind(this),
      error: function(xhr, status, err) {
        console.error(this.props.url, status, err.toString());
      }.bind(this)
    });
  },
  // ...省略
});
successの処理を頭に持ってきただけ。
でもこれって短い間(最大2秒)とはいえ、失敗した時には間違った結果がrenderされていることになる。どうなんだろう。
Congrats!
おわりです。お疲れ様でした!


