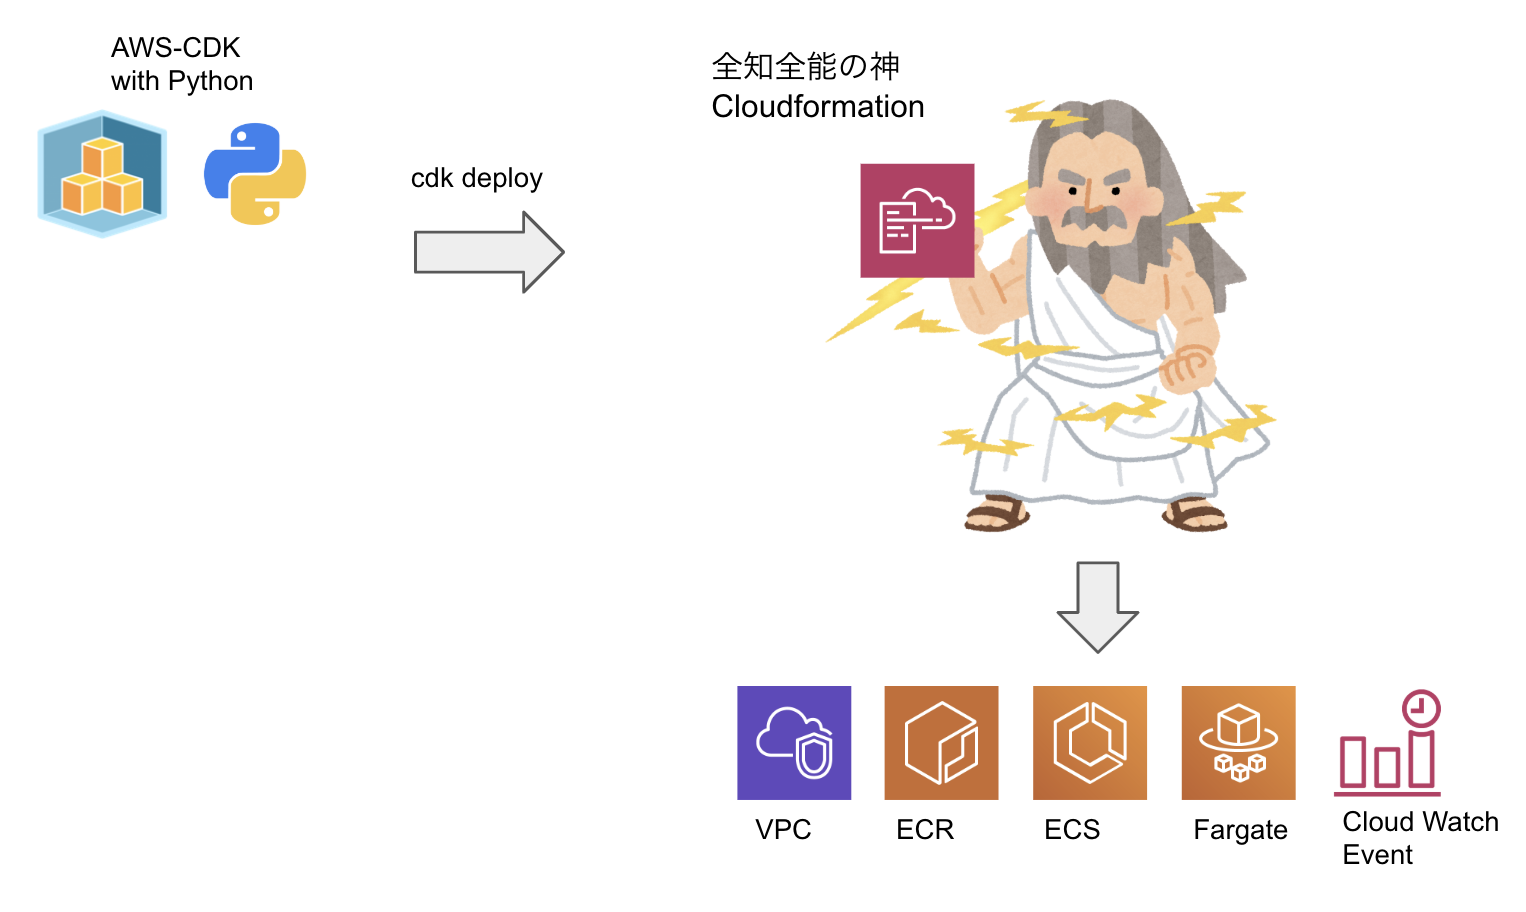
前回やったこと
下記の記事でAWS CDKでPythonのFargateバッチをデプロイする方法を紹介させていただきました。
前回記事: Fargateで起動するPythonの定期バッチをAWS-CDKで構築する

今回やること
前回作成したCDKをデプロイするCodePipelineをCDKの別スタックで構築します。

CodePipelineを構築するスタックの初回デプロイのみ、手動で「cdk deploy」コマンドを打つ必要がありますが、
その後はGitHubにプッシュするだけで、CodePipelineによってCDKがデプロイされるようにします。
少し図が複雑になったように見えますが、
CDKを使用すれば、エディタの恩恵を受けながら、100行程度のPythonコードで実現できます。
ソースコードは前回同様全てこちらのリポジトリにあります。
Cloud9の環境構築やCDKの基本的な使い方については前回の記事を参照してください。
それでは、書いていきましょう!
構築開始
必要ライブラリのインストール
# 仮想環境へ入る
$ pipenv shell
# 必要なライブラリをインストール
$ pipenv install boto3 aws_cdk.core aws_cdk.aws_iam aws_cdk.aws_codepipeline_actions aws_cdk.aws_codepipeline aws_cdk.aws_codebuild aws_cdk.app_delivery
※コマンドはpipenvを使用している想定なので、各自使用しているパッケージマネージャに読み替えてください。
前回の構成
前回FargateのPythonバッチを作成した時点では、
CDKのプロジェクトは下記のようなフォルダ配置になっていました。
$ tree
├── app.py
├── aws_cdk_fargate_batch
│   ├── aws_cdk_fargate_batch_stack.py  # VPCやECR,ECSのリソース定義
│   └── __init__.py
├── batch
├── cdk.context.json
├── cdk.json
├── cdk.out
├── Pipfile
├── Pipfile.lock
└── README.md
app.pyも下記のようにAwsCdkFargateBatchStackだけをデプロイするシンプルな構成です。
# !/usr/bin/env python3
from aws_cdk import core
from aws_cdk_fargate_batch.aws_cdk_fargate_batch_stack import AwsCdkFargateBatchStack

app = core.App()
AwsCdkFargateBatchStack(app, "aws-cdk-fargate-batch")

app.synth()
CodePipelineStack用のディレクトリとファイル作成
今回作成するCodePipelineのリソースは、
これまで作成したリソースと、次元が違いライフサイクルが異なるので、
別ディレクトリを作成し下記のようなファイルを作成しました。
$ tree
├── app.py
├── aws_cdk_fargate_batch
│   ├── aws_cdk_fargate_batch_stack.py
│   └── __init__.py
├── continuous_delivery                 # 新規作成
│   ├── continuous_delivery_stack.py    # 新規作成
│   └── __init__.py                     # 新規作成
├── batch
├── cdk.context.json
├── cdk.json
├── cdk.out
├── Pipfile
├── Pipfile.lock
└── README.md
実装 - continuous_delivery.py
新しく作成したファイルcontinuous_delivery.pyに、
CodePipelineのリソースを定義した全文がこちらです。
from aws_cdk import core
from aws_cdk import aws_iam
from aws_cdk import app_delivery
from aws_cdk import aws_codebuild
from aws_cdk import aws_codecommit
from aws_cdk import aws_codepipeline
from aws_cdk import aws_codepipeline_actions
import boto3

class ContinuousDeliveryStack(core.Stack):

    def __init__(self, scope: core.Construct, id: str, deploy_stack: core.Stack, **kwargs) -> None:
        super().__init__(scope, id, **kwargs)

        # ========================================
        # CodePipeline
        # ========================================
        codepipeline = aws_codepipeline.Pipeline(
            self,
            id='sample_pipeline',
            pipeline_name='sample_pipeline',
        )


        # ============ source stage start ============
        source_output = aws_codepipeline.Artifact('source_output')

        # Change to your setting.
        owner = 'joe-king-sh'
        repo = 'aws-cdk-fargate-batch'
        branch = 'master'
        oauth_token = get_parameters('GITHUB_OAUTH_TOKEN')

        # Create source collect stage.
        source_action = aws_codepipeline_actions.GitHubSourceAction(
            action_name='source_collect_action_from_github',
            owner=owner,
            repo=repo,
            trigger=aws_codepipeline_actions.GitHubTrigger.POLL,
            oauth_token=core.SecretValue.plain_text(oauth_token),
            output=source_output
        )
        # Add source stage to my pipeline.
        codepipeline.add_stage(
            stage_name='Source',
            actions=[source_action]
        )
        # ============ source stage end ==============


        # ============ build stage start =============
        # Create build project.
        project = aws_codebuild.PipelineProject(
            self,
            id='sample_build_project',
            project_name='sample_build_project'
        )

        # Add policies to code build role to allow access to the Parameter store.
        project.add_to_role_policy(
            aws_iam.PolicyStatement(
                resources=['*'],
                actions=['ssm:GetParameters']
            )
        )

        # Add build stage to my pipeline.
        build_output = aws_codepipeline.Artifact('build_output')
        codepipeline.add_stage(
            stage_name='Build',
            actions=[
                aws_codepipeline_actions.CodeBuildAction(
                    action_name='CodeBuild',
                    project=project,
                    input=source_output,
                    outputs=[build_output]
                )
           ]
        )
        # ============ build stage end ===============

        # ============ deploy stage start ============
        # Add deploy stage to pipeline.
        codepipeline.add_stage(
            stage_name='Deploy',
            actions=[
                app_delivery.PipelineDeployStackAction(
                    stack=deploy_stack,
                    input=build_output,
                    admin_permissions=True,
                    change_set_name='sample-change-set'
                )
            ]
        )
        # ============ deploy stage end ==============


def get_parameters(param_key):
    """
    Get parameter encrypted from parameter store.
    """
    ssm = boto3.client('ssm', region_name='ap-northeast-1')
    response = ssm.get_parameters(
        Names=[
            param_key,
        ],
        WithDecryption=True
    )
    return response['Parameters'][0]['Value']
一つずつ順番に追っていっていきましょう。
1. CodePipeline用のStackとCodePipelineリソースを定義
from aws_cdk import core
from aws_cdk import aws_iam
from aws_cdk import app_delivery
from aws_cdk import aws_codebuild
from aws_cdk import aws_codecommit
from aws_cdk import aws_codepipeline
from aws_cdk import aws_codepipeline_actions
import boto3

class ContinuousDeliveryStack(core.Stack):

    # deploy_stackはこのPipelineでデプロイするCDKのStack
    def __init__(self, scope: core.Construct, id: str, deploy_stack: core.Stack, **kwargs) -> None:
        super().__init__(scope, id, **kwargs)

        # ========================================
        # CodePipeline
        # ========================================
        codepipeline = aws_codepipeline.Pipeline(
            self,
            id='sample_pipeline',
            pipeline_name='sample_pipeline',
        )
ContinuousDeliveryStackのコンストラクタにdeploy_stackを追加しました。
このPipelineを使用してデプロイするスタックを、外(app.py)から渡す想定です。
aws_codepipeline.Pipelineには最低限の引数を渡してあげます。
2. Source Stageを定義
-
GitHubTokenを取得
今回はGitHubをリポジトリに使用しているのでこちらを参考にGitHubのOauthトークンを取得します。 -
コーディング
        # Source StageのOutputのArtifact
        source_output = aws_codepipeline.Artifact('source_output')

        # 自身の設定に変更すること
        owner = 'joe-king-sh'
        repo = 'aws-cdk-fargate-batch'
        branch = 'master']

        # GitHub oauth_tokenをSSMから取得する
        oauth_token = get_parameters('GITHUB_OAUTH_TOKEN')

        # GitHubのSourceActionを定義
        source_action = aws_codepipeline_actions.GitHubSourceAction(
            action_name='source_collect_action_from_github',
            owner=owner,
            repo=repo,
            trigger=aws_codepipeline_actions.GitHubTrigger.POLL,
            oauth_token=core.SecretValue.plain_text(oauth_token),
            output=source_output
        )
        # PipelineにSource Stageを追加し、GitHubからソースを取得するActionを追加
        codepipeline.add_stage(
            stage_name='Source',
            actions=[source_action]
        )
get_parametersは後の方に定義したSSMを扱うヘルパー関数です。
※リポジトリにCodeCommitを使用する場合
CodeCommitを使用したい場合はActionを下記にように書けば良いです。
        # ARNからCodeCommitのリポジトリを取得
        repository = codecommit.Repository.from_repository_arn(self, 'sample-repository', 'arn:XXXXX')

        # CodeCommitからソースを取得するアクションを定義
        source_action =  codepipeline_actions.CodeCommitSourceAction(
            repository=repository,
            branch='master',
            action_name='source_collect_action_from_codecommit',
            output=source_output,
            trigger=codepipeline_actions.CodeCommitTrigger.EVENTS
        )
3. Build Stageを定義
        # CodeBuildProjectの定義
        project = aws_codebuild.PipelineProject(
            self,
            id='sample_build_project',
            project_name='sample_build_project_name'
        )

        # CodeBuild実行ロールでParameterStoreにアクセスできるようにPolicyを追加
        project.add_to_role_policy(
            aws_iam.PolicyStatement(
                resources=['*'],
                actions=['ssm:GetParameters']
            )
        )

        # PipelineにBuild Stageを追加
        build_output = aws_codepipeline.Artifact('build_output')
        codepipeline.add_stage(
            stage_name='Build',
            actions=[
                aws_codepipeline_actions.CodeBuildAction(
                    action_name='CodeBuild',
                    project=project,
                    input=source_output,
                    outputs=[build_output]
                )
           ]
        )
ssm:GetParametersをCodeBuildロールに付与しないと、
Buildステージで権限不足でビルド失敗するので注意。
4. Deploy Stageを追加
        # Add deploy stage to pipeline.
        codepipeline.add_stage(
            stage_name='Deploy',
            actions=[
                app_delivery.PipelineDeployStackAction(
                    stack=deploy_stack,
                    input=build_output,
                    admin_permissions=True,
                    change_set_name='sample-change-set'
                )
            ]
        )
app_delivery.PipelineDeployStackActionのstackに、デプロイするstackを指定します。
実装 - app.py
# !/usr/bin/env python3
from aws_cdk import core
from aws_cdk_fargate_batch.aws_cdk_fargate_batch_stack import AwsCdkFargateBatchStack
from continuous_delivery.continuous_delivery_stack import ContinuousDeliveryStack
app = core.App()

fargate_batch_stack = AwsCdkFargateBatchStack(app, "aws-cdk-fargate-batch")

ContinuousDeliveryStack(app, id="continuous-delivery", deploy_stack=fargate_batch_stack)

app.synth()
fargate_batch_stackを今回新たに作成したContinuousDeliveryStackに渡します。
実装 - buildspec.yml
version: 0.2

phases:
  install:
    runtime-versions:
      python: 3.7
    commands:
      - |
        # AWS-CDKとPython実行環境をインストール
        echo Instaling packages started..

        python3 -m pip install pipenv
        npm install -g aws-cdk
        pipenv install

  build:
    commands:
      - |
        # Python仮想環境を立ち上げ
        echo Launching virtual environments started..
        export VENV_HOME_DIR=$(pipenv --venv)
        . $VENV_HOME_DIR/bin/activate

        # CDKからCloudformationに変換
        echo Translating into cloudformation started..
        cdk synth aws-cdk-fargate-batch

artifacts:
  base-directory: cdk.out
  files: '**/*'
いざデプロイ
下記コマンドでCodePipelineのスタックのみを手動でデプロイします。
$ cdk deploy continuous-delivery

continuous-deliveryスタックのデプロイが終わるとCodePipeLineが構築されています。
先程のPipelineを通して、無事AwsCdkFargateBatchStack達がデプロイされました![]()
お掃除
下記cdkコマンドでStackを削除します。
$ cdk ls
aws-cdk-fargate-batch
continuous-delivery
$ cdk destroy aws-cdk-fargate-batch
Are you sure you want to delete: aws-cdk-fargate-batch (y/n)? y
$ cdk destroy continuous-delivery
Are you sure you want to delete: continuous-delivery (y/n)? y
必ずaws-cdk-fargate-batchから消すこと。
先にcodepipelineを消すと色々と面倒になる可能性があります。
※前回同様ECRとCloudWatchLogGroupに加え、
Codepipelineで使用するArtifact格納用のS3は自動では消えません。手動で削除してください。
まとめ
通常のCfnでCfnをデプロイするCodePipelineを作成する場合と違い、
CDKでは、Codebuildの中で「cdk synth」してCloudformationを出力する必要があります。
今回は、例として前回構築したFargateバッチを使用しましたが、
PipelineStackに渡すStackを変更すれば、色々と応用が効くと思います。
次回は、CDKでSAMがデプロイできると聞いたので、調べて書いてみようと思います。
それではまた![]()
参考にさせていただきました
[AWS CDK] CodePipelineのソース元を色々指定してみました(CodeCommitとか、Githubとか、S3 Bucketとか、BacklogのGitとか)
CloudFormationの全てを味わいつくせ!「AWSの全てをコードで管理する方法〜その理想と現実〜」 #cmdevio
Continuous Integration / Continuous Delivery for CDK Applications


