データのグラフ化が簡単にできるWebサービスAmbientのWio LTE向けのライブラリを作りました。
Wio LTEについてはWio LTEをJavaScriptで開発を参照ください。
今回作ったのArduino環境向けのライブラリです。
Ambientの概要
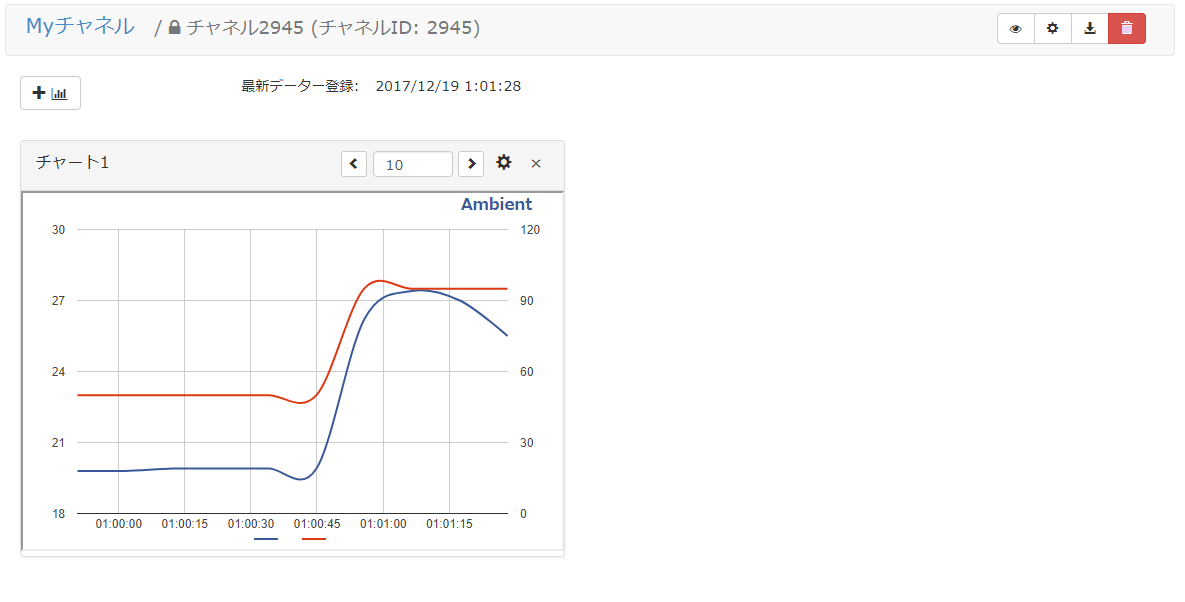
Ambientは無料のユーザー登録とWeb側のちょっとした設定であっというまにリアルタイムにデータのグラフ化ができるサービスです。
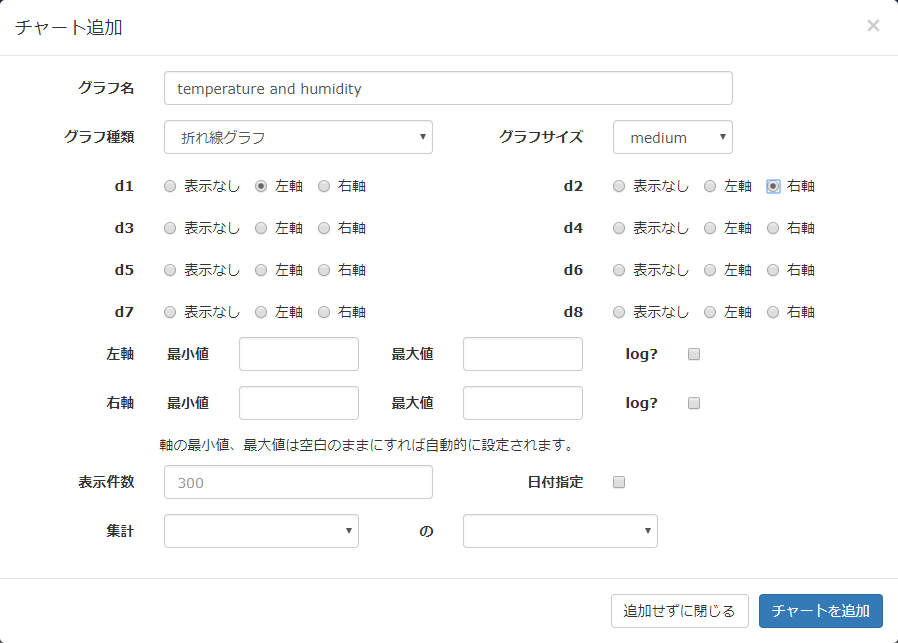
グラフ設定画面はこんな感じです。
ライブラリの使い方
他のライブラリと同じように以下のページからZIP形式でダウンロードして、Arduino IDEでインポートすればライブラリとして取り込まれます。
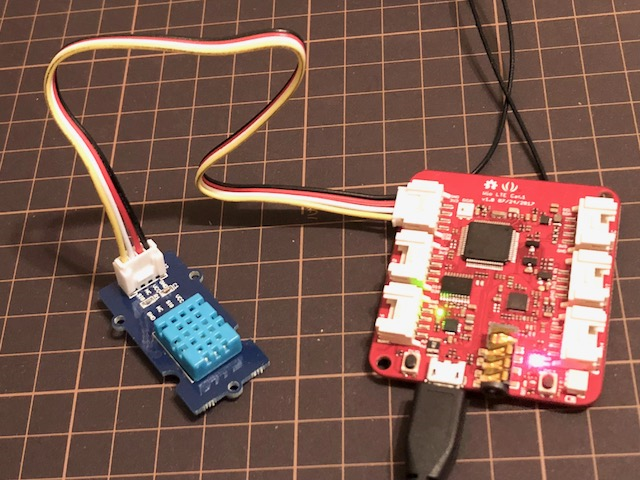
スケッチ例は10秒ごとにカウントアップしていく値をAmbientにアップロードするスケッチとGroveの温湿度センサーの値をアップロードするスケッチを同封してます。
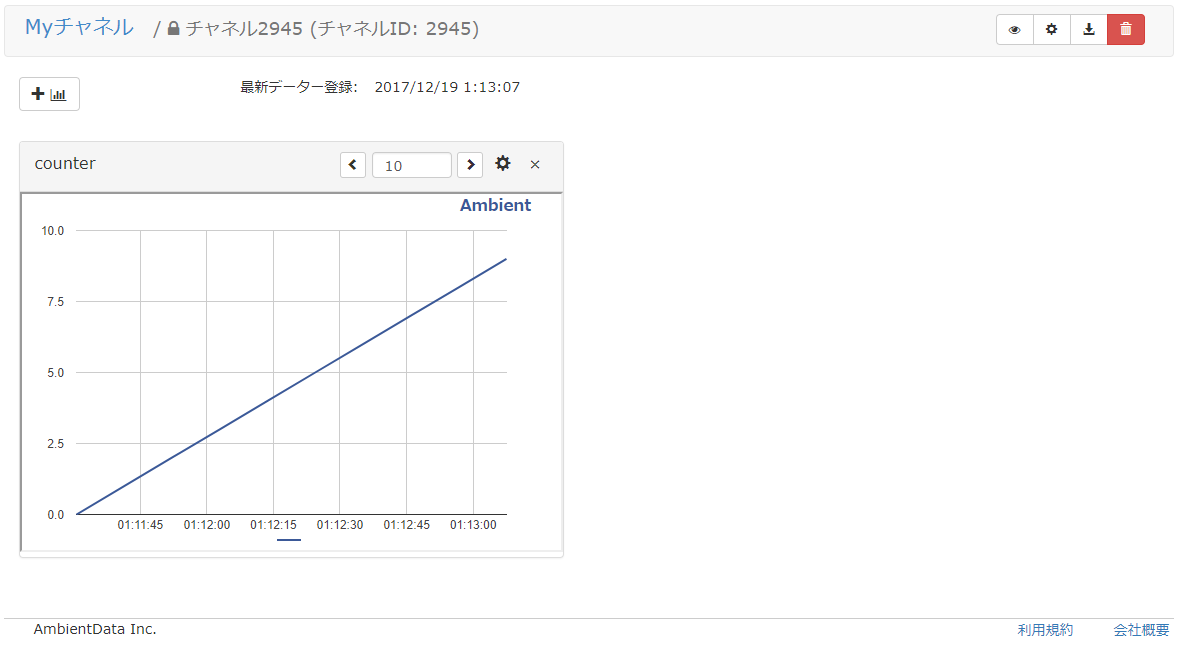
以下のスケッチは10秒ごとにカウントアップしていく値をAmbientにアップロードするスケッチ例です。
/*
 * 10秒ごとにカウントアップする値をAmbientに送る
 */
# include <WioLTEforArduino.h>
# include <WioLTEClient.h>
# include "Ambient.h"

# define APN               "soracom.io"
# define USERNAME          "sora"
# define PASSWORD          "sora"

# define PERIOD 10000 // milliceconds

WioLTE Wio;
WioLTEClient WioClient(&Wio);

unsigned int channelId = 100;
const char* writeKey = "...writeKey...";
const char* userKey = "...userKey...";
Ambient ambient;

int counter = 0;

void setupLTE() {
  delay(200);

  SerialUSB.println("");
  SerialUSB.println("--- START ---------------------------------------------------");

  SerialUSB.println("### I/O Initialize.");
  Wio.Init();

  SerialUSB.println("### Power supply ON.");
  Wio.PowerSupplyLTE(true);
  delay(5000);

  SerialUSB.println("### Turn on or reset.");
  if (!Wio.TurnOnOrReset()) {
    SerialUSB.println("### ERROR! ###");
    return;
  }

  SerialUSB.println("### Connecting to \""APN"\".");
  delay(5000);
  if (!Wio.Activate(APN, USERNAME, PASSWORD)) {
    SerialUSB.println("### ERROR! ###");
    return;
  }
}

void setup() {
  setupLTE();
  ambient.begin(channelId, writeKey, &WioClient);
}

void loop() {
  unsigned long stime = millis();

  SerialUSB.print("counter=");
  SerialUSB.println(counter);
  ambient.set(1, counter);
  ambient.send();

  counter++;

  unsigned long elapse = millis() - stime;
  if (elapse < PERIOD) {
      delay(PERIOD - elapse);
  }
}
自分のアカウントのグラフに表示するのはAmbientのグラフ情報でwriteKeyとuserKeyを調べて、プログラムに書き込むだけです。
このプログラムを動作させると次のようなグラフになります。
Ambient設定方法
Ambientのユーザー登録や設定方法についてはオフィシャルのチュートリアルを参考にしてください。
扱い方はESP8266版とほぼ同じです。