先日、「VS Codeでrmateを通してVagrant上のファイルを直編集」という記事を投稿しました。その記事を作成した途中、**Remote Workspaceというプラグインを見つかりました。こちらのプラグインはRemote VSCode**よりもはるかに汎用性が良いので、紹介いたします。
リモート環境の設定
本記事ではVagrantを利用して、使い方をデモストレーションします。
SSHでサーバーに入ってみる
Vagrant環境を直でSSHする方法は前編の記事VS Codeでrmateを通してVagrant上のファイルを直編集を参考してください。
$ ssh -p 2222 vagrant@localhost
一応Demo用レポジトリを作成
[vagrant@localhost ~]$ mkdir demo_repo
[vagrant@localhost ~]$ cd demo_repo/
[vagrant@localhost demo_repo]$ git init
Initialized empty Git repository in /home/vagrant/demo_repo/.git/
[vagrant@localhost demo_repo]$ echo 'Test Repo' >> test.txt
[vagrant@localhost demo_repo]$ cat test.txt
Test Repo
Remote Workspaceの設定
まずは_VS Codeがインストールしたマシン_に <適当な名前>.code-workspace というファイルを作成します。できるだけ真っさらのフォルダの中に作るのがおすすめです。
$ touch demo_repo-vagrant.code-workspace
$ code .
VS Codeが起動した時はこのようなメッセージが出しますが、一旦無視します。

.code-workspaceファイルの編集
{
  "folders": [
    {
      "uri": "sftp://vagrant:vagrant@localhost:2222/home/vagrant/demo_repo",
      "name": "Demo Repo"
    }
  ]
}
ここのURLのフォーマットはこんな感じです。
sftp://[user:password@]host[:port][/path/to/a/folder][?param1=value1¶m2=value2]
VS Codeでworkspaceを開く
先ほど.code-workspaceファイルを編集する時、右下にはこのようなボタンがあるはずです。

このボタンをクリックすると、VS Codeのセッションがリセットされ、リモートセッションが開かれます。
また、下記のコマンド一発でもできます。
$ code demo_repo-vagrant.code-workspace
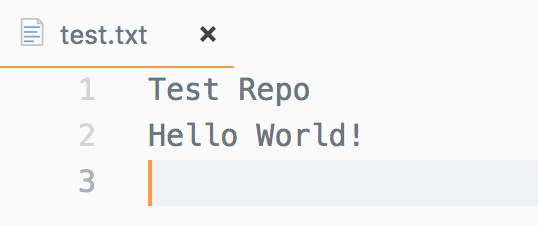
順調であれば、先ほど作成したtest.txtというファイルが見えるはずです。

編集&保存
 VS Codeの中のファイルを編集し、保存すれば、直ちにVagrant側に反映されます。
[vagrant@localhost demo_repo]$ cat test.txt
Test Repo
Hello World!
秘密鍵でリモートのリポジトリを編集
先ほどVagrantにアクセスする際、パスワードで入りましたが、セキュリティー上の視点では公開秘密鍵でのアクセスがより多く用いられています。
キーペアを生成
$ ssh-keygen -f demo_repo-vagrant.key
生成された demo_repo-vagrant.key.pub を Vagrantの ~/.ssh/authorized_keys に追記しまし、キーが使えるかどうかを確認します。
$ ssh -p 2222 vagrant@localhost -i demo_repo-vagrant.key
Work Spaceの設定
$ touch demo_repo-vagrant-key.code-workspace
{
  "folders": [
    {
      "uri": "sftp://vagrant@localhost:2222/home/vagrant/demo_repo?key=/PATH/TO/demo_repo-vagrant.key",
      "name": "Demo Repo"
    }
  ]
}
ここの /PATH/TO/demo_repo-vagrant.key はキーファイルの絶対パスが必要です。ただし、$HOME/.ssh配下に置かれたキーはファイル名だけで読み取れます。
また、キーファイルのパスじゃなくて、キーファイルの内容をBase64化して、直書きすることも可能です。
先ほどと同じようにWork Spaceを開けます。
$ code demo_repo-vagrant.code-workspace
URLのparamsをJSONファイルに記入
先ほどは ?key=/PATH/TO/KEY で記入した部分は、別ファイルのJSONに記入することもできます。
まずは <適当な名前>.json を作成します。
$ touch params.json
{
  "key": "/PATH/TO/demo_repo-vagrant.key"
}
{
  "folders": [
    {
-      "uri": "sftp://vagrant@localhost:2222/home/vagrant/demo_repo?key=/PATH/TO/demo_repo-vagrant.key",
+      "uri": "sftp://vagrant@localhost:2222/home/vagrant/demo_repo?params=/PATH/TO/params.json",
      "name": "Demo Repo"
    }
  ]
}
ここの /PATH/TO/params.json も絶対パスが必要です。
同じようにWork Spaceを開けます。
$ code demo_repo-vagrant.code-workspace
落とし穴
ここに一個Bugが存在しています。
OpenSSHが作ったキーは-----BEGIN RSA PRIVATE KEY-----から始まる旧方式と-----BEGIN OPENSSH PRIVATE KEY-----から始まる新方式があります。本文が作成した際、新方式のキーを使ってテストしたところ、どうしても入りませんでした。まさかの落とし穴でした。とりあえず、旧式のキーを使えば無難です。一応Issueを出しました。
参考: sshの鍵の種別と変換