はじめに
本記事は以下チュートリアルを補足したものです。
チュートリアルを進める上で嵌った個所などについて補足してみました。
環境
Windows 10 Home
前提
以下がインストール済みであること。
git version 2.14.1.windows.1
nodejs v14.15.4
Docker Desktop 20.10.7
MongoDB Compass 1.28.4
Visual Studio Code
MongoDBコンテナ作成
コマンドを実行し、MongoDBのDockerイメージを取得します。
docker pull mongo
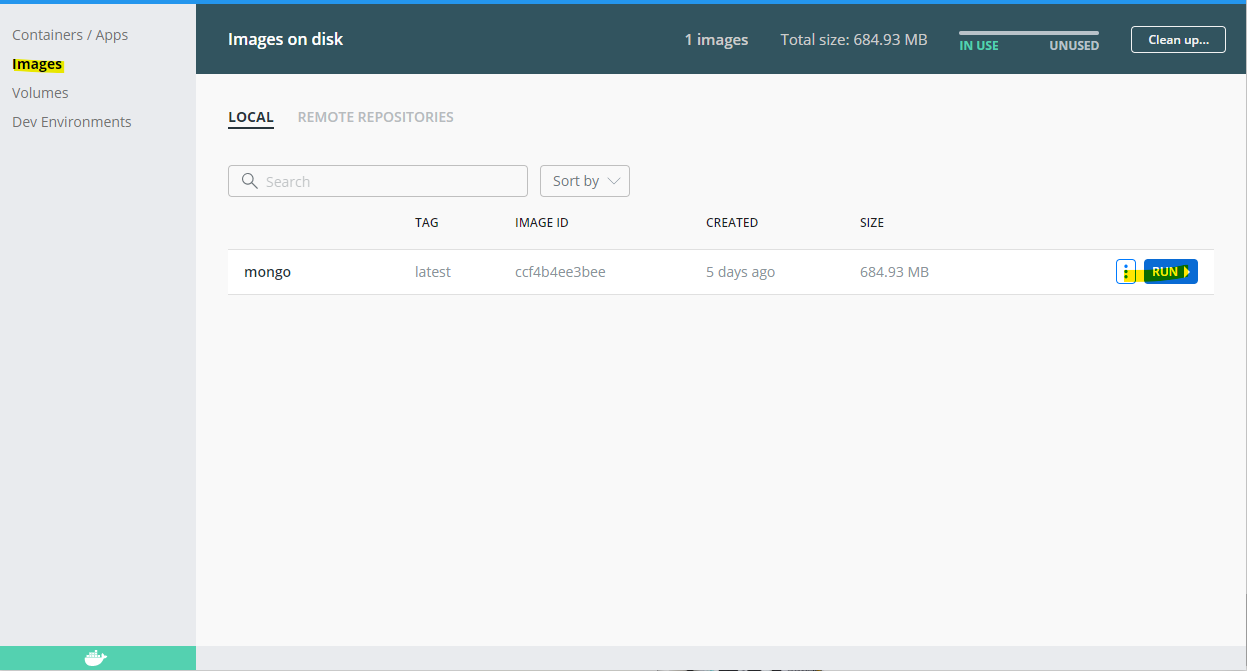
Docker Desktopを起動し、images > RUNを押下します。

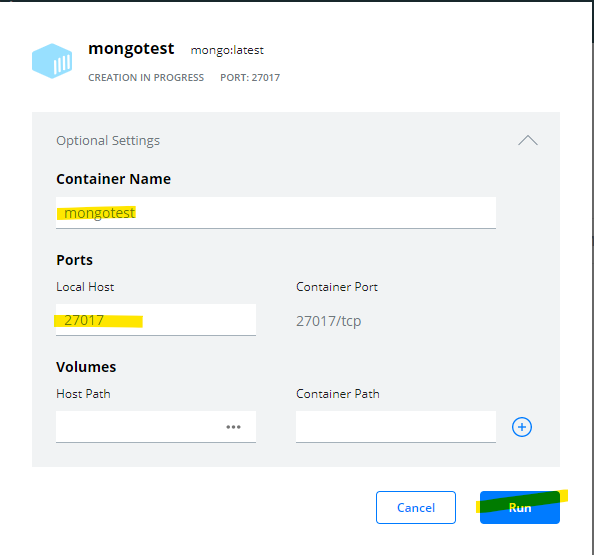
Container NameとPortsを入力し、Runを押下します。

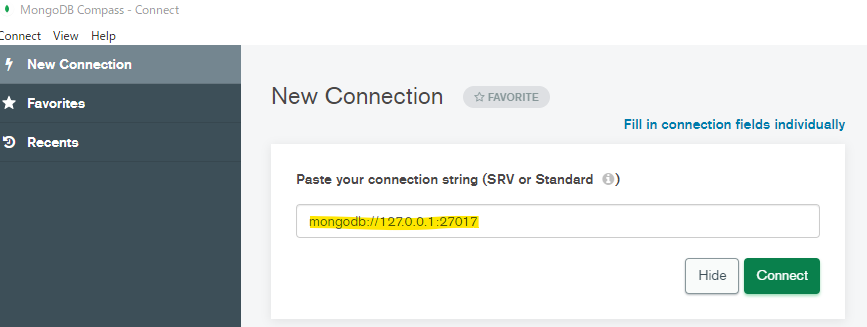
MongoDB Compassで接続に成功することを確認します。
mongodb://127.0.0.1:27017/
サンプルコードのダウンロードと実行
- Visual Studio Codeを開きます。
- F1 キーを押してコマンド パレットを表示します。
- コマンド パレットのプロンプトに
gitclと入力し、Git: Clone コマンドを選択して、Enter キーを押します。 -
リポジトリの URL の入力を求められたら、
https://github.com/scotch-io/node-todoと入力し、Enter キーを押します。 - プロジェクトの複製先となるローカル ディレクトリを選択 (または作成) します。
- Ctrl+` キーを押して Visual Studio Code の統合ターミナルを表示します。
-
npm install -gと入力し、Enterを押します。 - server.jsを開き、12行目の
mongoose.connect(database.localUrl);のlocalUrlにマウスカーソルを合わせ、Ctrl+Shift+F12 キーを押します。 - localUrlを次のように変更します。
localUrl: 'mongodb://127.0.0.1:27017' - server.jsのタブがアクティブになっている状態でF5 キーを押下します。
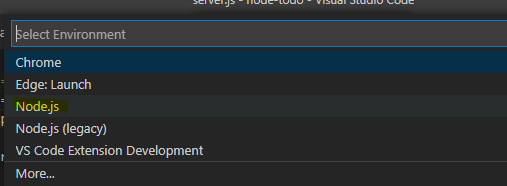
- Node.jsを選択します。

動作確認
ブラウザを開いて http://localhost:8080 に移動し、エラーなくアプリが表示されることを確認します。
おわりに
おわりです。

