概要
今回はCloudFrontの署名付きURLでS3にアクセスする方法に関する内容を書いてみました。
手順は下記のようになります。
・S3作成
・CloudFront作成
・CloudFrontの署名付きURL発行
・CloudFrontの署名付きURLでS3にアクセス
S3作成
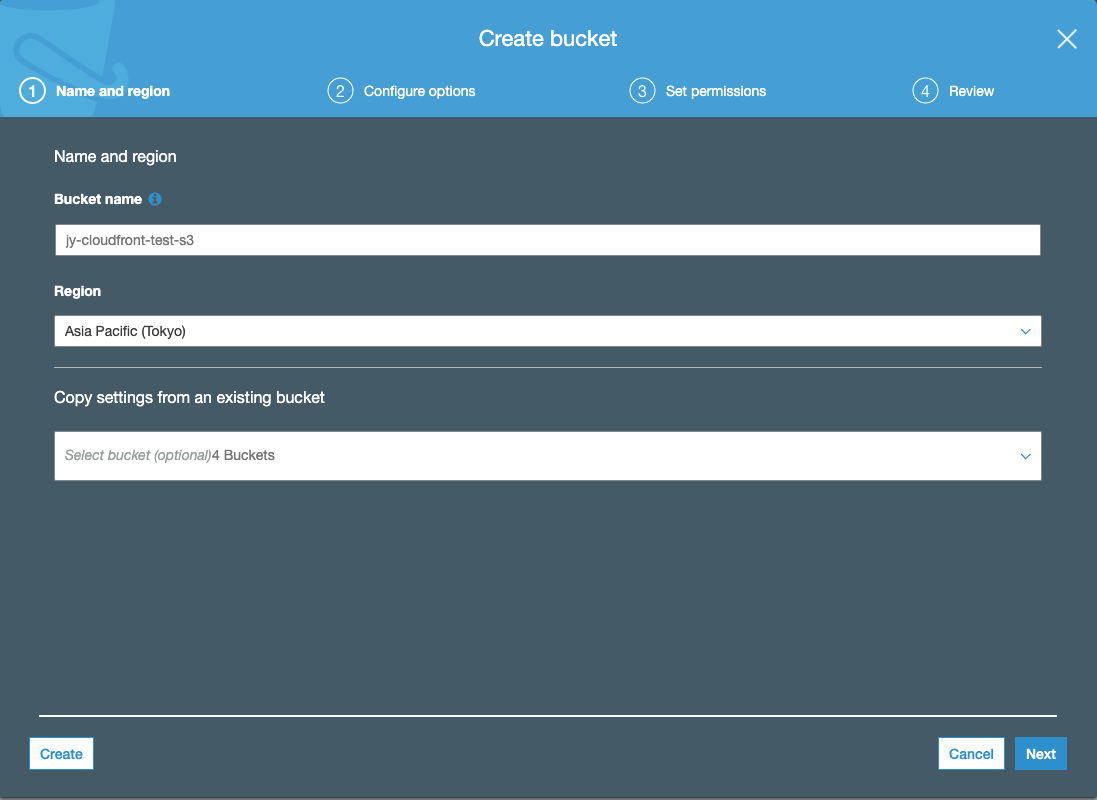
BucketNameを入れて、② > ③(Block all public access全部チェック) > ④を進んでS3を作成してください。
その後、簡単なindex.htmlファイルをS3にアップロードしてください。
CloudFront作成
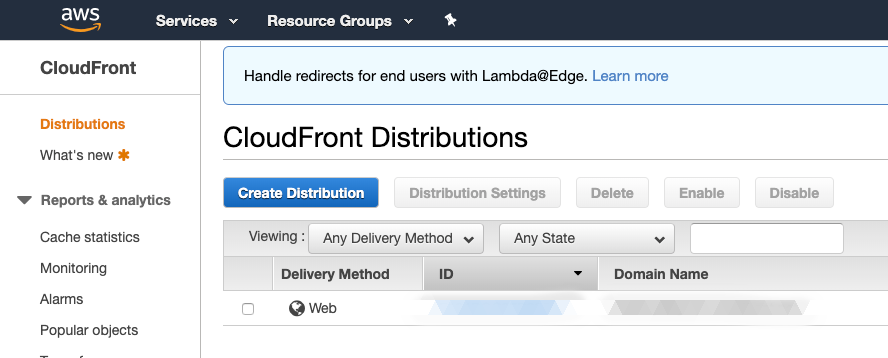
CloudFrontに移動して「Create Distribution」をクリックします。
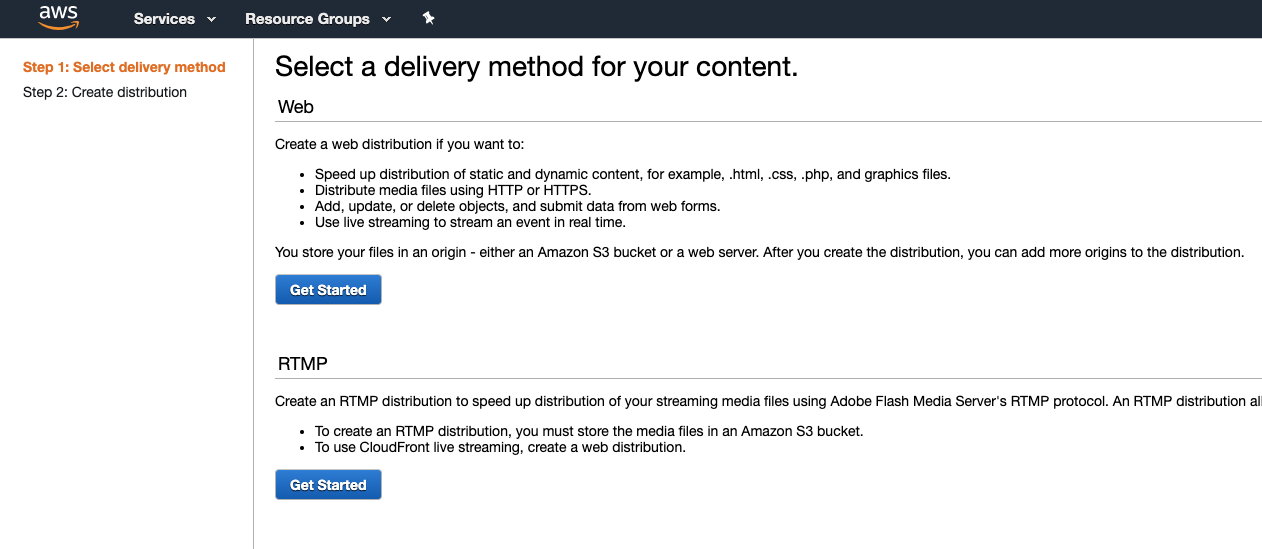
Delivery MethodはWebを選択します。
RTMPは Streaming serviceです。
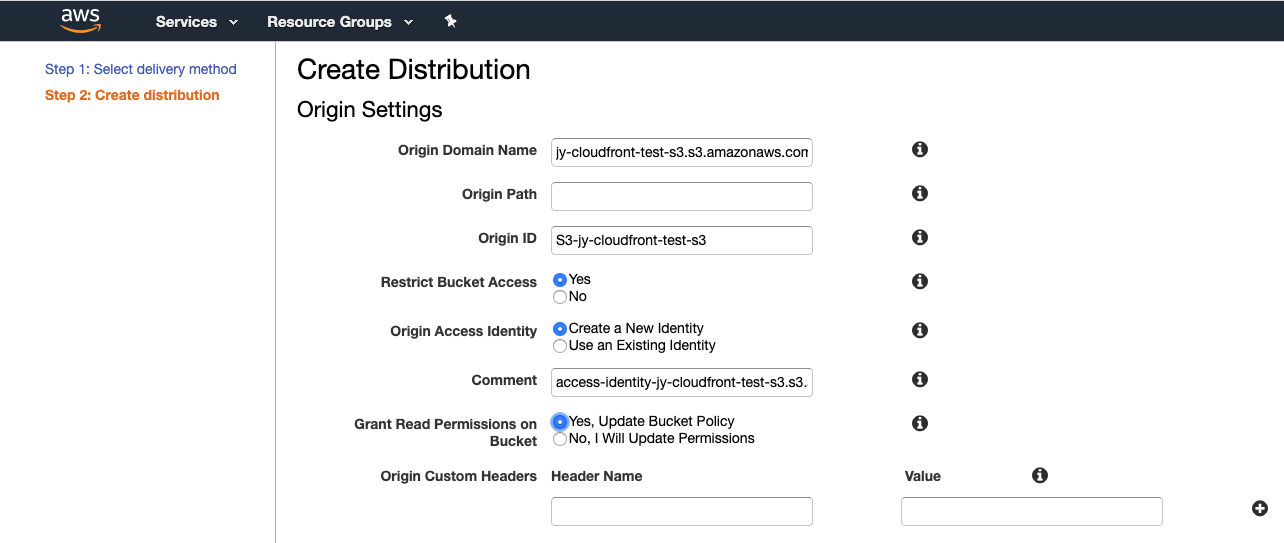
- Origin Domain Name: S3のリストの中で、最初作成したS3を選択します。
- **Origin Path:**S3 SubBucketFolderですが、今回作成していないので、空欄でOKです。
- **Origin ID:**Origin Domain Name選択すると、勝手に表示されます。
- **Restrict Bucket Access:**S3にCloudFrontのみアクセス可能にする設定なので、「Yes」を選択します。
- **Origin Access Identity:**初めて作成する場合、「Create a New Identity」を選択します。
- **Grant Read Permissions on Bucket:**Block all public accessしているので、CloudFrontからS3にアクセスするために権限を与えます。
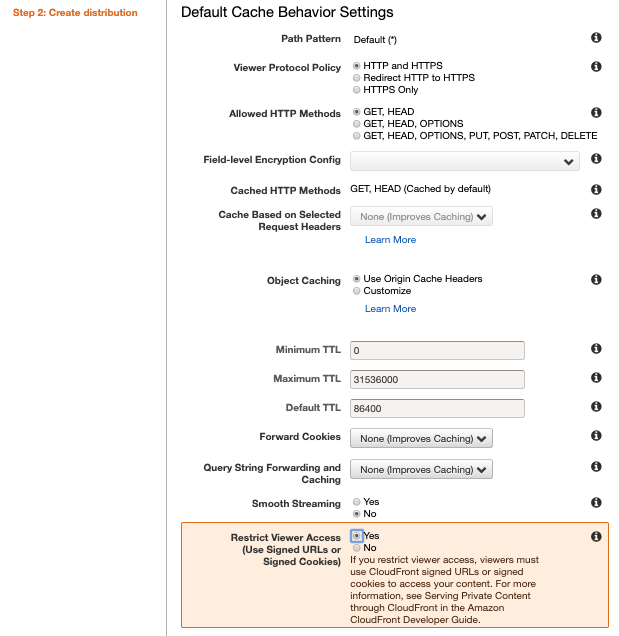
- **Viewer Protocol Policy:**今回は証明書なしに行うので、「Http and Https」を選択します。
- **Restrict Viewer Access:**署名付きURLのみアクセスを許可するために、「Yes」を選択します。
そして、「Create Distribution」をクリックしてCloudFrontを作成してください。
おそらく、StatusがDeployedまで15分くらいかかると思います。。
Deployedが表示されたら、S3 Policy確認と、Domain Nameでアクセスしましょう。
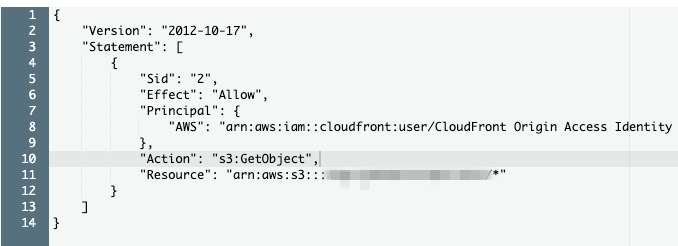
まず、S3 PolicyはGrant Read Permissions on Bucketによって更新されていると思います。
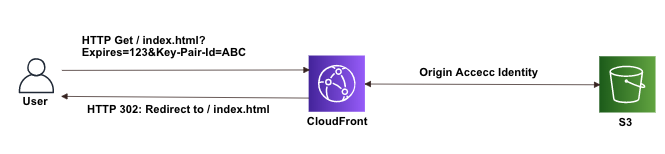
そして、Domain Nameでアクセスすると、
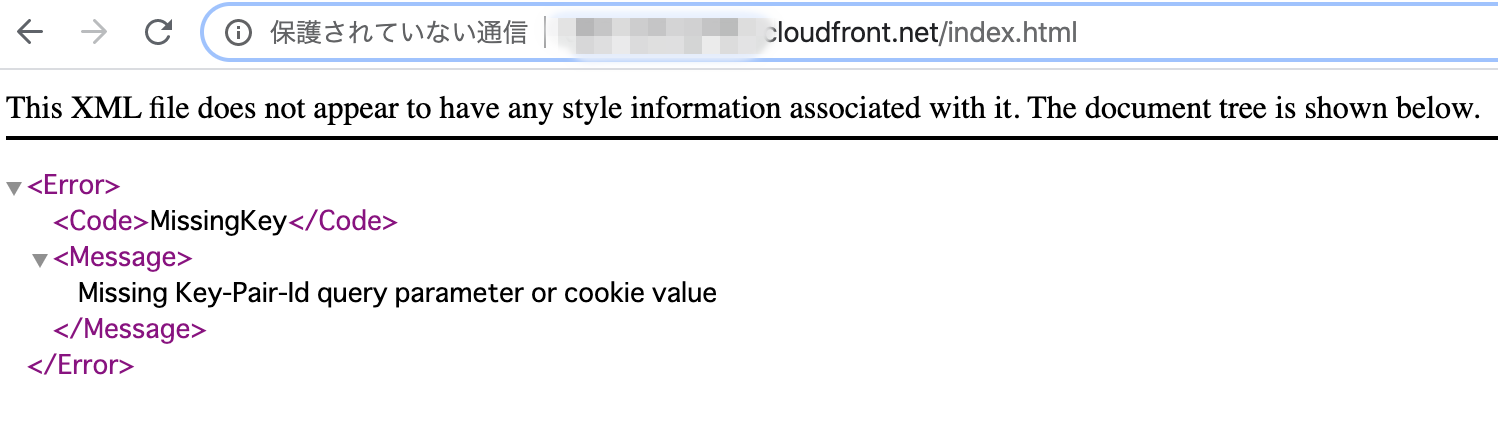
MissingKeyだと言われます。先ほどRestrict Viewer Accessを「Yes」にしたので、
別途に署名付きURLを発行しないと、アクセスできません。
では、CloudFrontの署名付きURLを発行しましょう。
ちなみに、index.htmlのように、特定のObjectではないURLをRequestする場合、下記の設定を行ってください。
Distribution Settings > Edit > Default Root Objectにindex.htmlを入力 > Yes, Editをクリックして、15分待ち。。
CloudFrontの署名付きURL発行
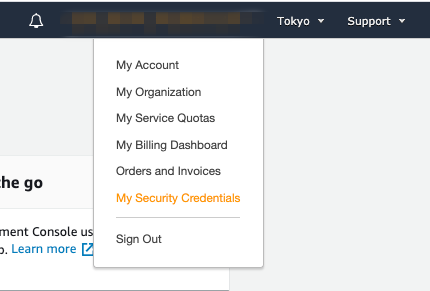
Root Userで 「My Security Credentials」に移動します。
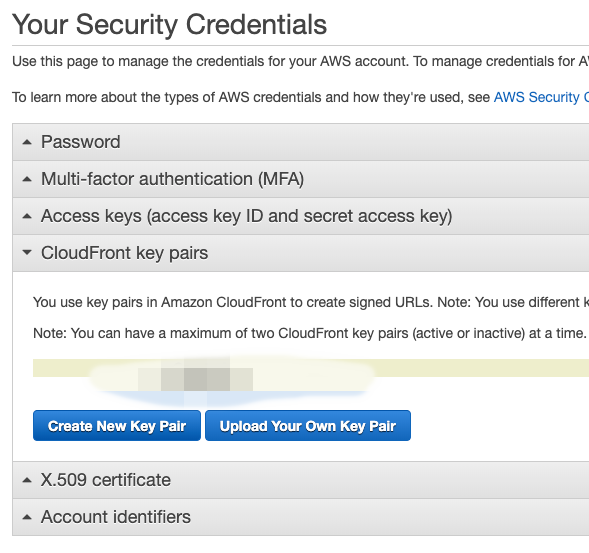
CloudFront key pairs > 「Create New Key Pair」をクリックして、PrivateキーとPublicキーをダウンロードしてください。
CloudFrontの署名付きURLでS3にアクセス
これで、S3にアクセスする準備ができたと思います。
筆者はLaravelでCloudFrontの署名付きURLを発行してみます。
AWS_ACCESS_KEY_ID= // AWS Access Key
AWS_SECRET_ACCESS_KEY= // AWS Secret Access Key
AWS_DEFAULT_REGION= // AWS region
AWS_BUCKET= // S3 bucket name
CLOUDFRONT_DOMAIN_NAME= //cloudfront Domain Name
RESOURCE_KEY=index.html
CLOUDFRONT_EXPIRES=60 //1分
CLOUDFRONT_PRIVATE_KEY= // Security Credentials private key path
CLOUDFRONT_KEY_PAIR_ID= // Security Credentials CloudFront key pairs Access Key ID
       $sdk = new Sdk([
            'region'  => env('AWS_DEFAULT_REGION'),
            'version' => 'latest',
            'credentials' => [
                'key'    => env('AWS_ACCESS_KEY_ID'),
                'secret' => env('AWS_SECRET_ACCESS_KEY')
            ]
        ]);

        $client = $sdk->createCloudFront();
        $expires = time() + env('CLOUDFRONT_EXPIRES');

        $cloudFrontUrl = $client->getSignedUrl([
            'url'         => env('CLOUDFRONT_DOMAIN_NAME') . '/' . env('RESOURCE_KEY'),
            'expires'     => $expires,
            'private_key' => storage_path('app') . '/' . env('CLOUDFRONT_PRIVATE_KEY'),
            'key_pair_id' => env('CLOUDFRONT_KEY_PAIR_ID')
        ]);

        dump($cloudFrontUrl);
        exit;
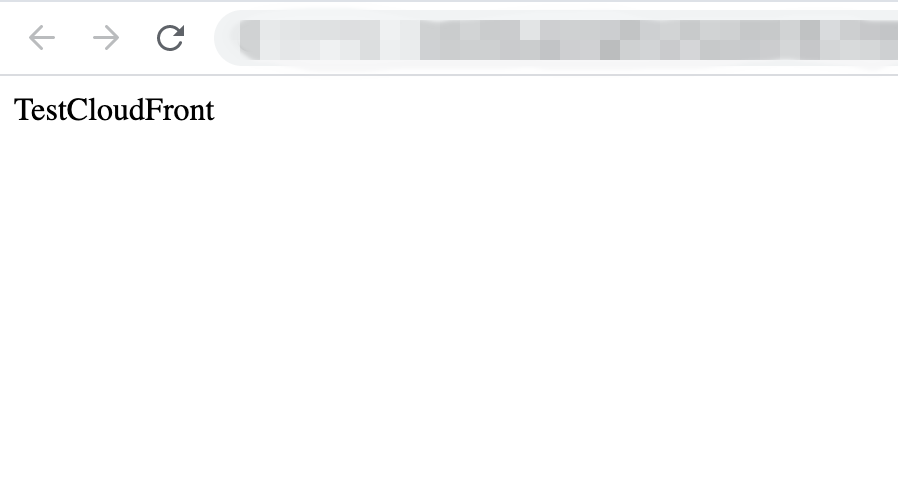
発行したURLでアクセスすると、S3にアップロードしたindex.htmlが表示されます。
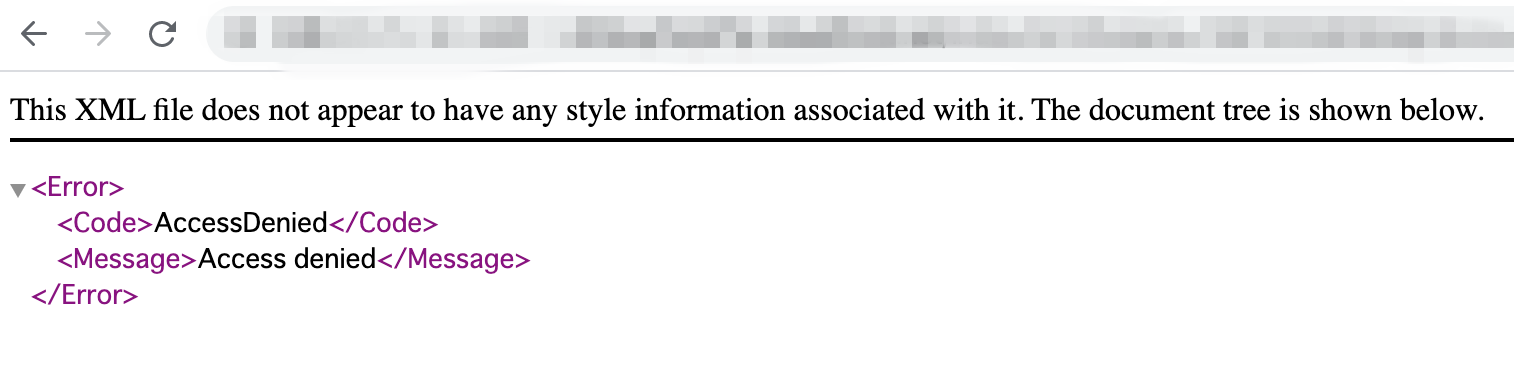
そして、1分経ってアクセスすると、Access Deniedが表示され、アクセスできなくなります。
参考
Authorization@Edge using cookies: Protect your Amazon CloudFront content from being downloaded by unauthenticated users
[CloudFront + S3]特定バケットに特定ディストリビューションのみからアクセスできるよう設定する