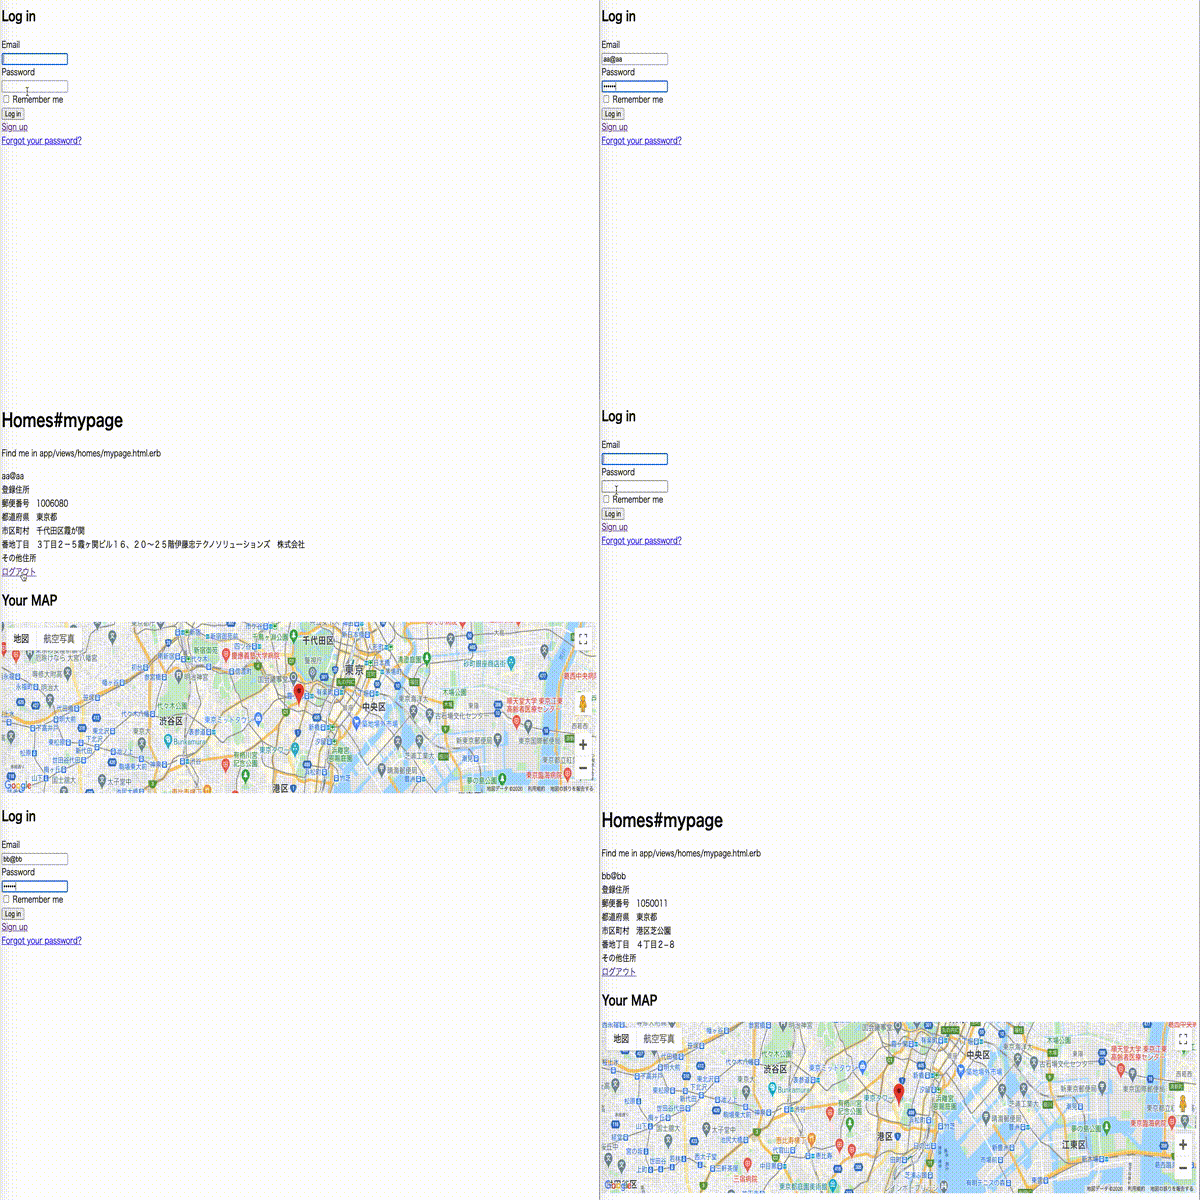
目標
開発環境
ruby 2.5.7
Rails 5.2.4.3
OS: macOS Catalina
前提
※ ▶◯◯ を選択すると、説明等が出てきますので、
よくわからない場合の参考にしていただければと思います。
- 【Ruby on Rails】郵便番号から住所を自動入力
- GoogleAPIキー発行済(GeocodingAPI MapsJavaScriptAPI)
- こちらで分かりやすく説明してくれていました
- Rails5でGoogleMapを表示してみるまで
今回は経緯緯度をGeocodingAPIを使い取得し、MAPに表示させます。
流れ
1 gemの導入
2 .envファイルを作成 <-- 1番大事です
3 viewの編集
1 gemの導入
下記をGemfileに追加。
Gemfile
gem "dotenv-rails"
ターミナル
$ bundle install
補足
dotenv-railsは.envファイルを読み込んでくれる環境変数を管理する事が出来るgemです。2 .envファイルを作成 <-- 1番大事です
Gemfileと同じ階層に .envファイルを作成
.env
SECRET_KEY=自分のAPIキー
# 追加する部分に <%= ENV['SECRET_KEY'] %> と入力すると使用可能)
.gitignoreファイルの一番下に下記を追加。
.gitignore
/.env
重要
この記述を忘れてしまい、仮にGithub上に公開してしまうと、ネットに自身のAPIキーがネットに公開され、不正利用されてしまう場合があります。 もし記述し忘れで上がってしまった場合、googleに登録しているメールアドレス宛に警告メールが届くので指示に従っていただければと思います。 流れとしては、GitHubのリポジトリを削除orAPIキーの再発行(両方やるのがベストです)になるので、焦らず対処してください。3 viewの編集
表示場所はどこでもOKです。
今回は下記ページに記載。
app/views/homes/mypage.html.erb
<h2>Your MAP</h2>
<div id='map' class="<%= current_user.prefecture_code + current_user.city + current_user.street %>"></div>

<style>
# map{
  height: 300px;
}
</style>

<script>

let map
let geocoder

function initMap(){
  geocoder = new google.maps.Geocoder()
  geocoder.geocode( { 'address': $('#map').attr('class')}, function(results, status) {
    if (status == 'OK') {
      map.setCenter(results[0].geometry.location);
      var marker = new google.maps.Marker({
          map: map,
          position: results[0].geometry.location
      });
    } else {
      alert('Geocode was not successful for the following reason: ' + status);
    }
  });

  map = new google.maps.Map(document.getElementById('map'), {
  center: {lat: -35.6809591, lng: 139.7673068},
  zoom: 13
  });
}

function codeAddress(){
  let inputAddress = document.getElementById('address').value;
}
</script>
<script src="https://maps.googleapis.com/maps/api/js?key=<%= ENV['SECRET_KEY'] %>&callback=initMap" async defer></script>
下記は補足を加えたコードになります。
app/views/homes/mypage.html.erb
<h2>Your MAP</h2>
<!-- id=mapのclassに登録住所を代入。 -->
<div id='map' class="<%= current_user.prefecture_code + current_user.city + current_user.street %>"></div>

<!-- id=mapの大きさを指定。※stylesheetにまとめてもOK -->
<style>
# map{
  height: 300px;
}
</style>

<script>
// 下記codeAddressでも使うため、mapを関数の外で定義、geocoderも用意
let map
let geocoder

function initMap(){
  // geocoderを初期化
  geocoder = new google.maps.Geocoder()
  // geocoderのgeocode()methodで、経緯緯度をGeocoderAPIにリクエストを送信。
  // geocode()methodでaddressにid=mapのclassの登録住所を代入し、経緯緯度を取得。
  geocoder.geocode( { 'address': $('#map').attr('class')}, function(results, status) {
  	// もしエラーがなければ、
  	if (status == 'OK') {
    // map.setCenterで上記記述の経緯緯度に地図が移動。
      map.setCenter(results[0].geometry.location);

    // google.maps.MarkerでGoogleMap上の指定位置にマーカが立つ
      var marker = new google.maps.Marker({
          map: map,
          position: results[0].geometry.location
      });
    // エラーが出た場合には
    } else {
    // statusにエラー状況が表示されるので、その文言を調べれば解決できます。
      alert('Geocode was not successful for the following reason: ' + status);
    }
  });

  // mapの初期位置を指定。
  // latは経緯、lngは緯度。(下記は東京駅を指定しています)
  map = new google.maps.Map(document.getElementById('map'), {
  center: {lat: -35.6809591, lng: 139.7673068},
  // お好みでズームサイズを変更できます。
  // 数字が大きければ、拡大です。
  zoom: 13
  });
}

function codeAddress(){
  // 入力を取得
  let inputAddress = document.getElementById('address').value;
  // geocodingしたあとmapを移動
}
</script>
<!-- GoogleAPIキーを読み込むための記述になります。 -->
<script src="https://maps.googleapis.com/maps/api/js?key=<%= ENV['SECRET_KEY'] %>&callback=initMap" async defer></script>
