前書き
全てのプログラマーは写経から始まる。 by俺
この記事は機械学習入門用ではありません。良質な写経元を提供するためにあります。無駄のないコードと無駄のない説明を用意したつもりです。kerasコーディングを忘れかけた時に立ち返られる原点となれば幸いです。
実行環境
- python (3.7.10)
- tensorflow (2.4.1)
- keras (2.4.3)
対象者
pythonを自分の環境で動かせる人
かつ
keras初心者
■ kerasとは
python で書かれた高水準のニューラルネットワークライブラリ。 (keras公式)
もっとわかりやすく言うと...
ディープラーニングを自力で全部作るのは大変。
でも、kerasを使うと簡単だよ!
■ kerasコーディングの流れ
- データを用意する。
- モデルを構築する。
- モデルにデータを学習させる。
- モデルを評価する。
※モデルとは、データを解析し分類したりするものだと考えてください。
1.データを用意する。
機械学習において最も地道で煩わしい作業ですが、kearsはいくつかのデータセットを用意してくれています。
-
画像分類
- MNIST・・・手書き数字(0~9)が70000枚。
- CIFAR10・・・10種類の画像が60000枚。10種類とは、airplane, automobile, bird, cat, deer, dog, frog, horse, ship, truck
- CIFAR100・・・100種類の画像が60000枚。
- Fashion-MNIST・・・服の白黒画像70000枚が10種類の服の種類にラベル付けされている。
-
自然言語処理
- IMDB・・・映画レビュー感情分類。
- ロイターニュース・・・ロイターニュースの記事にトピックがラベル付けされている。
-
回帰
- StatLib・・・ボストン近郊の異なる住宅に関する10の属性値。その属性値から住宅価格を予測する。
今回は、この中でも最も簡単なMNISTデータセットを扱います。
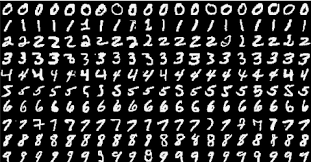
mnistについてちょっと説明
こんな感じで数字の手書き画像がいっぱいある。
写経してみよう!
データをロード
from keras.datasets import mnist

(x_train, y_train), (x_test, y_test) = mnist.load_data()
前処理
from keras.utils.np_utils import to_categorical


# 画像を1次元化
x_train = x_train.reshape(60000, 784)
x_test = x_test.reshape(10000, 784)

# 画素を0~1の範囲に変換(正規化)
x_train = x_train.astype('float32') / 255
x_test = x_test.astype('float32') / 255

# 正解ラベルをone-hot-encoding
y_train = to_categorical(y_train, 10)
y_test = to_categorical(y_test, 10)
2.モデルを構築
モデルの構築方法は2種類あります。
- Sequentialモデル
- Finctional モデル
今回は、より簡単なSequentialモデルを構築します。
写経してみよう!
from keras.models import Sequential
from keras.layers import Dense

model = Sequential()
model.add(Dense(64, activation='relu', input_dim=784))
model.add(Dense(10, activation='softmax'))

model.compile(optimizer='rmsprop',
              loss='categorical_crossentropy',
              metrics=['accuracy'])
こんな感じで、
modelにlayerをadd!
modelにlayerをadd!
modelにlayerをadd!
を繰り返すだけ。
3.モデルにデータを学習させる
写経してみよう!
model.fit(x_train, y_train,
            batch_size=100,
            epochs=12,
            verbose=1)
4.モデルを評価する
写経してみよう!
score = model.evaluate(x_test, y_test)
print(score[0])
print(score[1])
■ さらなるkerasへ
これで基本的な実装方法の導入は終わりです。
より複雑なモデルを構築するためには先人達の美しいコードを写経することが最良の方法です。
kerasが公式に公開しているサンプルコードの中で、mnistを扱ったモデルばかり記載しました。是非写経してみてください。
参照先:keras exapmle
◆ mnist_mlp.py
ディープニューラルネットワークで実装したモデル。
import keras
from keras.datasets import mnist
from keras.models import Sequential
from keras.layers import Dense, Dropout
from keras.optimizers import RMSprop

batch_size = 128
num_classes = 10
epochs = 20

# the data, split between train and test sets
(x_train, y_train), (x_test, y_test) = mnist.load_data()

x_train = x_train.reshape(60000, 784)
x_test = x_test.reshape(10000, 784)
x_train = x_train.astype('float32')
x_test = x_test.astype('float32')
x_train /= 255
x_test /= 255
print(x_train.shape[0], 'train samples')
print(x_test.shape[0], 'test samples')

# convert class vectors to binary class matrices
y_train = keras.utils.to_categorical(y_train, num_classes)
y_test = keras.utils.to_categorical(y_test, num_classes)

model = Sequential()
model.add(Dense(512, activation='relu', input_shape=(784,)))
model.add(Dropout(0.2))
model.add(Dense(512, activation='relu'))
model.add(Dropout(0.2))
model.add(Dense(num_classes, activation='softmax'))

model.summary()

model.compile(loss='categorical_crossentropy',
              optimizer=RMSprop(),
              metrics=['accuracy'])

history = model.fit(x_train, y_train,
                    batch_size=batch_size,
                    epochs=epochs,
                    verbose=1,
                    validation_data=(x_test, y_test))
score = model.evaluate(x_test, y_test, verbose=0)
print('Test loss:', score[0])
print('Test accuracy:', score[1])
◆ mnist_cnn.py
畳み込みニューラルネットワークを使用したモデル。
from __future__ import print_function
import keras
from keras.datasets import mnist
from keras.models import Sequential
from keras.layers import Dense, Dropout, Flatten
from keras.layers import Conv2D, MaxPooling2D
from keras import backend as K

batch_size = 128
num_classes = 10
epochs = 12

# input image dimensions
img_rows, img_cols = 28, 28

# the data, split between train and test sets
(x_train, y_train), (x_test, y_test) = mnist.load_data()

if K.image_data_format() == 'channels_first':
   x_train = x_train.reshape(x_train.shape[0], 1, img_rows, img_cols)
   x_test = x_test.reshape(x_test.shape[0], 1, img_rows, img_cols)
   input_shape = (1, img_rows, img_cols)
else:
   x_train = x_train.reshape(x_train.shape[0], img_rows, img_cols, 1)
   x_test = x_test.reshape(x_test.shape[0], img_rows, img_cols, 1)
   input_shape = (img_rows, img_cols, 1)

x_train = x_train.astype('float32')
x_test = x_test.astype('float32')
x_train /= 255
x_test /= 255
print('x_train shape:', x_train.shape)
print(x_train.shape[0], 'train samples')
print(x_test.shape[0], 'test samples')

# convert class vectors to binary class matrices
y_train = keras.utils.to_categorical(y_train, num_classes)
y_test = keras.utils.to_categorical(y_test, num_classes)

model = Sequential()
model.add(Conv2D(32, kernel_size=(3, 3),
                activation='relu',
                input_shape=input_shape))
model.add(Conv2D(64, (3, 3), activation='relu'))
model.add(MaxPooling2D(pool_size=(2, 2)))
model.add(Dropout(0.25))
model.add(Flatten())
model.add(Dense(128, activation='relu'))
model.add(Dropout(0.5))
model.add(Dense(num_classes, activation='softmax'))

model.compile(loss=keras.losses.categorical_crossentropy,
             optimizer=keras.optimizers.Adadelta(),
             metrics=['accuracy'])

model.fit(x_train, y_train,
         batch_size=batch_size,
         epochs=epochs,
         verbose=1,
         validation_data=(x_test, y_test))
score = model.evaluate(x_test, y_test, verbose=0)
print('Test loss:', score[0])
print('Test accuracy:', score[1])
◆ mnist_irnn.py
RNNという時系列データを扱うモデルを画像認識に応用した。
import keras
from keras.datasets import mnist
from keras.models import Sequential
from keras.layers import Dense, Activation
from keras.layers import SimpleRNN
from keras import initializers
from keras.optimizers import RMSprop

batch_size = 32
num_classes = 10
epochs = 200
hidden_units = 100

learning_rate = 1e-6
clip_norm = 1.0

# the data, split between train and test sets
(x_train, y_train), (x_test, y_test) = mnist.load_data()

x_train = x_train.reshape(x_train.shape[0], -1, 1)
x_test = x_test.reshape(x_test.shape[0], -1, 1)
x_train = x_train.astype('float32')
x_test = x_test.astype('float32')
x_train /= 255
x_test /= 255
print('x_train shape:', x_train.shape)
print(x_train.shape[0], 'train samples')
print(x_test.shape[0], 'test samples')

# convert class vectors to binary class matrices
y_train = keras.utils.to_categorical(y_train, num_classes)
y_test = keras.utils.to_categorical(y_test, num_classes)

print('Evaluate IRNN...')
model = Sequential()
model.add(SimpleRNN(hidden_units,
                    kernel_initializer=initializers.RandomNormal(stddev=0.001),
                    recurrent_initializer=initializers.Identity(gain=1.0),
                    activation='relu',
                    input_shape=x_train.shape[1:]))
model.add(Dense(num_classes))
model.add(Activation('softmax'))
rmsprop = RMSprop(lr=learning_rate)
model.compile(loss='categorical_crossentropy',
              optimizer=rmsprop,
              metrics=['accuracy'])

model.fit(x_train, y_train,
          batch_size=batch_size,
          epochs=epochs,
          verbose=1,
          validation_data=(x_test, y_test))

scores = model.evaluate(x_test, y_test, verbose=0)
print('IRNN test score:', scores[0])
print('IRNN test accuracy:', scores[1])
