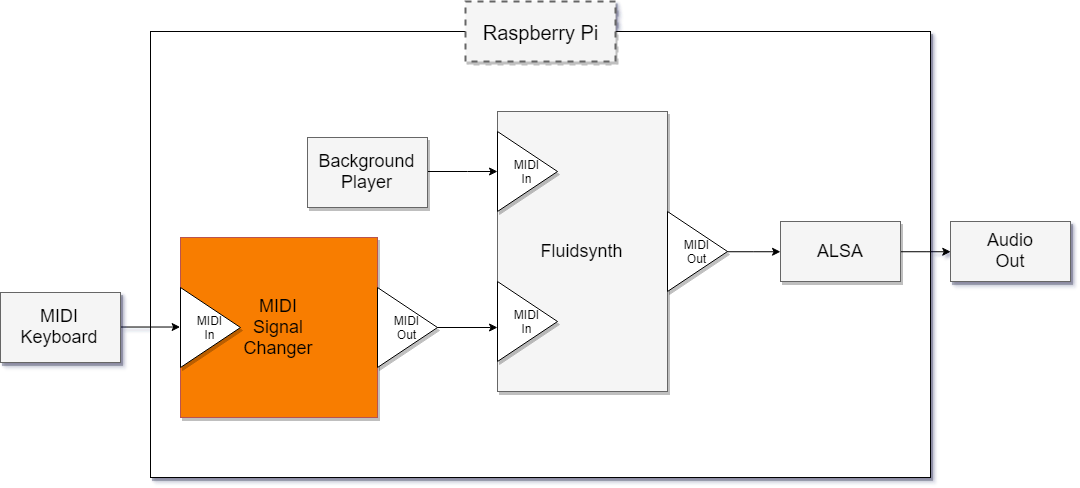
この記事は Raspberry PiとMIDIインターフェースでデバイス開発をする のシリーズ記事です。
シリーズ目次
- Raspberry PiとMIDIインターフェースでデバイス開発をする
- RtMidiライブラリを使って、MIDIインターフェースを作成する
- SMF (Standard Midi Format)を解析し、MIDIインターフェースに流し込む(プロトタイプ編)
- (作成中)SMF (Standard Midi Format)を解析し、MIDIインターフェースに流し込む(クラス編)
今回はMIDIインターフェースエミュレータを作り、FluidSynthを経由して音を出します。
第1回で記述の通り言語はC++でRtMidiライブラリを使います。
Midiインターフェースは、アウトプット用、インプット用(その両用)の種類があり、OSに認識されているMidiインターフェースは aconnect -l で一覧できます。
> aconnect -l
client 0: 'System' [type=kernel]
    0 'Timer           '
    1 'Announce        '
client 14: 'Midi Through' [type=kernel]
    0 'Midi Through Port-0'
Midiインターフェースを作成し、指定された名前を含むインターフェースに接続するクラスを作成します。
midi.hpp
# include <iostream>
# include "RtMidi.h"

enum struct MidiDirection {
	IN,
	OUT,
};

class MidiInterface {
private:
	const char * name;
public:
	MidiInterface(const char * interfaceName);
	RtMidi * connect(std::string target, MidiDirection direction);
};
midi.cpp
# include "midi.hpp"


MidiInterface::MidiInterface(const char * interfaceName) {
	name = interfaceName;
}

RtMidi * MidiInterface::connect(std::string target, MidiDirection direction) {
	char clientName[256] = "";
	sprintf(clientName, "%s Midi %s Client", name, direction == MidiDirection::IN ? "Input" : "Output");
	RtMidi * midi = direction == MidiDirection::IN ?
		(RtMidi *)new RtMidiIn (RtMidi::UNSPECIFIED, clientName) :
		(RtMidi *)new RtMidiOut(RtMidi::UNSPECIFIED, clientName);

	unsigned int portCount = midi->getPortCount();
	for (unsigned int i=0; i<portCount; i++) {
		std::string portName = midi->getPortName(i).c_str();
		std::string::size_type index = portName.find(target, 0);
		if (index != std::string::npos) {
			char portName[256] = "";
			sprintf(portName, "%s Midi %s Port", name, direction == MidiDirection::IN ? "Input" : "Output");
			midi->openPort(i, portName);
			return midi;
		}
	}
	return NULL;
}
Midiインターフェース同士の接続状況も aconnect -l コマンドで調べることができます。
create_midi_interface.cpp
# include <iostream>
# include "midi.hpp"

int main () {
	MidiInterface * p = new MidiInterface("foobar");
	p->connect("Midi Through", MidiDirection::OUT);
	while (true) std::cin.getc();
	exit(0);
}
$ aconnect -l
client 0: 'System' [type=kernel]
    0 'Timer           '
    1 'Announce        '
client 14: 'Midi Through' [type=kernel]
    0 'Midi Through Port-0'
$ ./create_midi_interface.o &
$ aconnect -l
client 0: 'System' [type=kernel]
    0 'Timer           '
    1 'Announce        '
client 14: 'Midi Through' [type=kernel]
    0 'Midi Through Port-0'
        Connected From: 128:0[real:0]
client 128: 'foobar Midi Output Client' [type=user,pid=1528]
    0 'foobar Midi Output Port'
        Connecting To: 14:0[real:0]
新しく foobar Midi Output Client の foobar Midi Output Portが作られポート14:0(Midi Through)と接続されているのがわかります。
解説
特になし
| 前 | 次 |
|---|---|
| Raspberry PiとMIDIインターフェースでデバイス開発をする | SMF (Standard Midi Format)を解析し、MIDIインターフェースに流し込む |
