はじめに
Androidでカメラ画像を入力して、何らかの画像処理を行うためのサンプルプロジェクトです。
以前別の記事( Androidで OpenCV 4を使う方法とカメラライブビューの表示 )で、カメラ読み込みもOpenCVを使った方法を記載しましたが、最新のAndroid SDKだと使えないようでした。
Camera APIが廃止され、Camera2 APIを使うことが推奨されていましたが非常に使いづらいです。より簡単にAndroid上でカメラを触れるCameraXというものが存在しました。今回はこれを使ってみます。
CameraXは使い方が簡単で、チュートリアルも充実しています (https://developer.android.com/training/camerax ) 。ネット上のほとんどのサンプルがKotolin向けだったので、ここではJavaで書いてみようと思います。
今回は、入力画像と前フレームの画像との差分を計算して、変化したところが分かるような簡単な画像処理をサンプルにしてみます。
↓の動画は、上がオリジナルのカメラ画像(CameraXのプレビュー画像)、下が画像処理をした結果になります。
qiita用 pic.twitter.com/HXYE9fq2Ej
— iwatake (@iwatake2222) June 27, 2020
環境
- Host
- Windows 10 64-bit
- Android Studio 4.0
- Android SDK API Level 30
- 多少低くても大丈夫なはず
- Android NDK Version 21.3.6528147
- NDKは不要かも
- opencv-4.3.0-android-sdk.zip
- Target
- Galaxy S7 (Android 8.0.0)
プロジェクトの用意
プロジェクトを作る
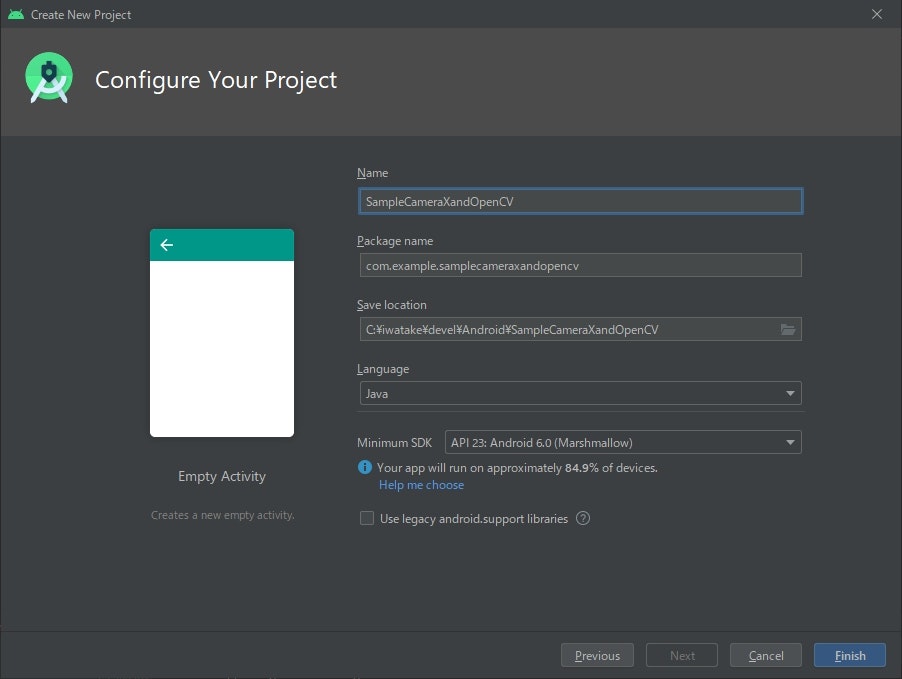
Android StudioのCreate New Projectから、Empty Activityを作ります。
Minimum SDKはAPI23としておきました。CameraXがサポートするAndroid 5.0(API レベル 21)以降であれば何でも大丈夫なはずです。
Manifestの設定
カメラを使用するので、そのための設定をします。
AndroidManifest.xml を開き、以下のように編集します。(「追加」で検索)
<?xml version="1.0" encoding="utf-8"?>
<manifest xmlns:android="http://schemas.android.com/apk/res/android"
    package="com.example.samplecameraxandopencv">

<!--    ↓↓↓ 追加 ↓↓↓    -->
    <uses-permission android:name="android.permission.CAMERA"/>
    <uses-permission android:name="android.permission.WRITE_EXTERNAL_STORAGE"/>
    <uses-feature android:name="android.hardware.camera" android:required="false"/>
    <uses-feature android:name="android.hardware.camera.autofocus" android:required="false"/>
<!--    ↑↑↑ 追加 ↑↑↑    -->

    <application
        android:allowBackup="true"
省略
    </application>

</manifest>
OpenCVを取り込む
-
https://github.com/opencv/opencv/releases からopencv-4.3.0-android-sdk.zipをダウンロードして解凍します
- バージョンは4以降なら何でも大丈夫です。3以前だと少しやり方が変わると思います
- メニューバー -> File -> New -> Import Module で、
OpenCV-android-sdk/sdkの場所を指定します - メニューバー -> File -> Project Structure の、Dependenciesを開き、appを選択します。
Declared Dependencies内で+->3 Moduel Dependencyをクリックして追加したsdkを選択します。
手順詳細はこちら (https://qiita.com/iwatake2222/items/2642669419fdaa20a8a6#opencvのダウンロード ) を参照。
CameraXを使えるようにする
CameraXのチュートリアルの通りです。(https://codelabs.developers.google.com/codelabs/camerax-getting-started/#1 )
build.gradle(Module: app) を開き、android セクションと dependencies セクションを以下のように編集します。(「追加」で検索)
apply plugin: 'com.android.application'

android {
    compileSdkVersion 30
    buildToolsVersion "30.0.0"

    defaultConfig {
        applicationId "com.example.samplecameraxandopencv"
        minSdkVersion 23
        targetSdkVersion 30
        versionCode 1
        versionName "1.0"

        testInstrumentationRunner "androidx.test.runner.AndroidJUnitRunner"
    }

    buildTypes {
        release {
            minifyEnabled false
            proguardFiles getDefaultProguardFile('proguard-android-optimize.txt'), 'proguard-rules.pro'
        }
    }

    //    ↓↓↓ 追加 ↓↓↓
    compileOptions {
        sourceCompatibility JavaVersion.VERSION_1_8
        targetCompatibility JavaVersion.VERSION_1_8
    }
    //    ↑↑↑ 追加 ↑↑↑
}

dependencies {
    implementation fileTree(dir: "libs", include: ["*.jar"])
    implementation 'androidx.appcompat:appcompat:1.1.0'
    implementation 'androidx.constraintlayout:constraintlayout:1.1.3'
    testImplementation 'junit:junit:4.12'
    androidTestImplementation 'androidx.test.ext:junit:1.1.1'
    androidTestImplementation 'androidx.test.espresso:espresso-core:3.2.0'

//    ↓↓↓ 追加 ↓↓↓
    def camerax_version = "1.0.0-beta03"
// CameraX core library using camera2 implementation
    implementation "androidx.camera:camera-camera2:$camerax_version"
// CameraX Lifecycle Library
    implementation "androidx.camera:camera-lifecycle:$camerax_version"
// CameraX View class
    implementation "androidx.camera:camera-view:1.0.0-alpha10"
//    ↑↑↑ 追加 ↑↑↑
}
編集後、右上にSync Now と表示されるのでクリックします。
ここまで完了したら、一度ビルドと実行が出来ることを確認することをお勧めします。
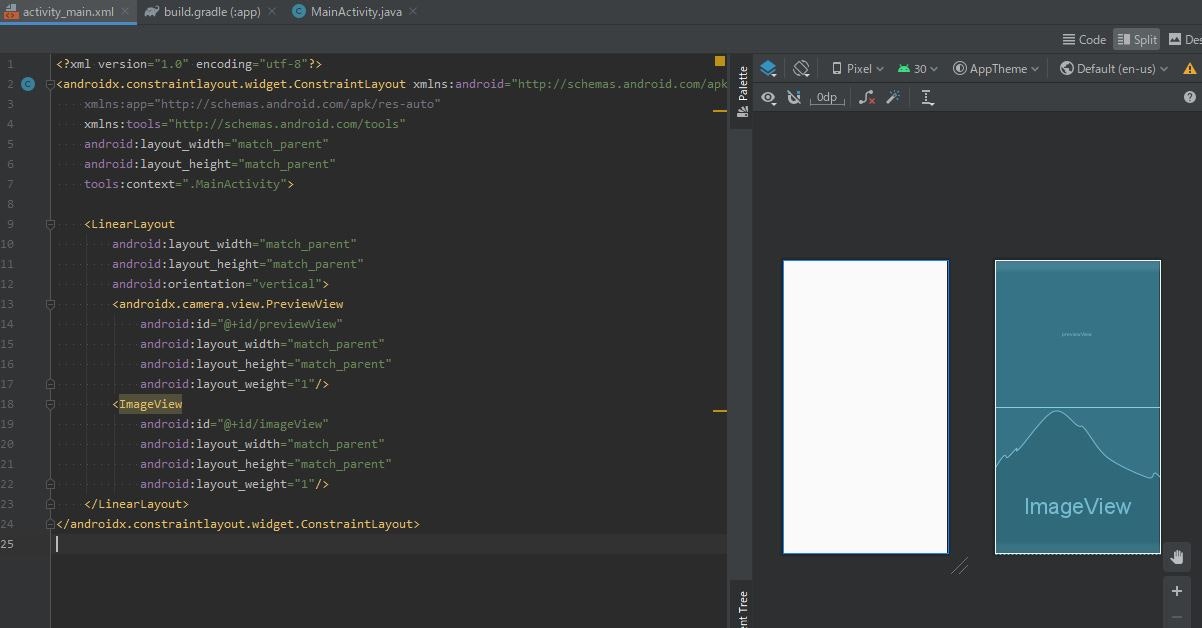
レイアウトを作る
まず最初にレイアウトを作ります。
res->layout->activity_main.xmlを開き、コードを表示します。
デフォルトで用意されているTextView は消して、LinearLayout でCameraXのプレビュー用のandroidx.camera.view.PreviewView と処理結果表示用のImageView を上下に並べます。
<?xml version="1.0" encoding="utf-8"?>
<androidx.constraintlayout.widget.ConstraintLayout xmlns:android="http://schemas.android.com/apk/res/android"
    xmlns:app="http://schemas.android.com/apk/res-auto"
    xmlns:tools="http://schemas.android.com/tools"
    android:layout_width="match_parent"
    android:layout_height="match_parent"
    tools:context=".MainActivity">

    <LinearLayout
        android:layout_width="match_parent"
        android:layout_height="match_parent"
        android:orientation="vertical">
        <androidx.camera.view.PreviewView
            android:id="@+id/previewView"
            android:layout_width="match_parent"
            android:layout_height="match_parent"
            android:layout_weight="1"/>
        <ImageView
            android:id="@+id/imageView"
            android:layout_width="match_parent"
            android:layout_height="match_parent"
            android:layout_weight="1"/>
    </LinearLayout>

</androidx.constraintlayout.widget.ConstraintLayout>
コード説明
onCreate()
プレビュー表示と結果表示用のviewを取得します。その後、カメラ使用の権限を取得し、カメラ処理開始関数(startCamera )を呼びます。
startCamera()
チュートリアル(https://codelabs.developers.google.com/codelabs/camerax-getting-started/#3 )に倣ってCameraXの設定をしています。
CameraXではUseCaseという概念で、カメラに関係する処理を登録するようです。チュートリアルでは以下の3つを使用していました。
- Preview
- ImageCapture
- ImageAnalysis
ImageCaptureは静止画撮影用ですが、今回は未使用です。
ImageAnalysisは各フレーム画像を解析して、何らかの処理を行うことが出来ます。チュートリアルでは平均輝度を計算するだけでしたが、今回はこの部分にOpenCVを用いた画像処理を実装します。
独自のImageAnalysisを行うためには、ImageAnalysis.Analyzer インターフェイスを持つクラスを実体化して指定します。今回はMyImageAnalyzer というクラスを作りました。
MyImageAnalyzerクラス
public void analyze(@NonNull ImageProxy image) という関数を持つクラスを自分で定義します。この中で処理を行います。
ImageProxy imageにYUV(NV21)形式の画像が入力され、毎フレーム呼ばれます(image.close(); するまで次の処理は呼ばれない模様)。
最初に、入力されるNV21画像をOpenCVのmatに変換します。変換処理は https://stackoverflow.com/questions/30510928/convert-android-camera2-api-yuv-420-888-to-rgb を参考にしました (getMatFromImage() )。
次に、入力画像を適切に回転します。過去の方法でAndroidカメラを使ったことがある方には常識的な処理ですが、どうもCameraXのプレビューだとCameraX側で適切に処理してくれているようです。一方、この関数に入ってくる画像に対してはケアされていないようなので、自分で回転処理をする必要があります。今回はここでもOpenCVを使って回転・反転処理を行いました (fixMatRotation() )。
OpenCVのmat(RGB)になったら、後は好きな処理をするだけです。
今回は前回フレームとの画素値差分を計算して、変化のあったところだけ表示するような処理にしてみました。
ついでに、適当に四角形と文字を出力してみました。
最後に、OpenCVのmatをBitmapに変換し、ImageViewに出力します。ImageViewへの描画はUIスレッドで行っています。
コード全文
package com.example.samplecameraxandopencv;

import androidx.annotation.NonNull;
import androidx.appcompat.app.AppCompatActivity;
import androidx.camera.core.Camera;
import androidx.camera.core.CameraSelector;
import androidx.camera.core.ImageAnalysis;
import androidx.camera.core.ImageProxy;
import androidx.camera.core.Preview;
import androidx.camera.lifecycle.ProcessCameraProvider;
import androidx.camera.view.PreviewView;
import androidx.core.app.ActivityCompat;
import androidx.core.content.ContextCompat;
import androidx.lifecycle.LifecycleOwner;

import android.Manifest;
import android.app.Activity;
import android.content.Context;
import android.content.pm.PackageManager;
import android.graphics.Bitmap;
import android.os.Bundle;
import android.util.Log;
import android.view.Surface;
import android.widget.ImageView;

import com.google.common.util.concurrent.ListenableFuture;

import org.opencv.android.Utils;
import org.opencv.core.Core;
import org.opencv.core.CvType;
import org.opencv.core.Mat;
import org.opencv.core.Point;
import org.opencv.core.Rect;
import org.opencv.core.Scalar;
import org.opencv.imgproc.Imgproc;

import java.nio.ByteBuffer;
import java.util.concurrent.ExecutorService;
import java.util.concurrent.Executors;

public class MainActivity extends AppCompatActivity {
    /*** Fixed values ***/
    private static final String TAG = "MyApp";
    private int REQUEST_CODE_FOR_PERMISSIONS = 1234;;
    private final String[] REQUIRED_PERMISSIONS = new String[]{"android.permission.CAMERA", "android.permission.WRITE_EXTERNAL_STORAGE"};

    /*** Views ***/
    private PreviewView previewView;
    private ImageView imageView;
    /*** For CameraX ***/
    private Camera camera = null;
    private Preview preview = null;
    private ImageAnalysis imageAnalysis = null;
    private ExecutorService cameraExecutor = Executors.newSingleThreadExecutor();

    static {
        System.loadLibrary("opencv_java4");
    }

    @Override
    protected void onCreate(Bundle savedInstanceState) {
        super.onCreate(savedInstanceState);
        setContentView(R.layout.activity_main);

        previewView = findViewById(R.id.previewView);
        imageView = findViewById(R.id.imageView);

        if (checkPermissions()) {
            startCamera();
        } else {
            ActivityCompat.requestPermissions(this, REQUIRED_PERMISSIONS, REQUEST_CODE_FOR_PERMISSIONS);
        }
    }

    private void startCamera() {
        final ListenableFuture<ProcessCameraProvider> cameraProviderFuture = ProcessCameraProvider.getInstance(this);
        Context context = this;
        cameraProviderFuture.addListener(new Runnable() {
            @Override
            public void run() {
                try {
                    ProcessCameraProvider cameraProvider = cameraProviderFuture.get();
                    preview = new Preview.Builder().build();
                    imageAnalysis = new ImageAnalysis.Builder().build();
                    imageAnalysis.setAnalyzer(cameraExecutor, new MyImageAnalyzer());
                    CameraSelector cameraSelector = new CameraSelector.Builder().requireLensFacing(CameraSelector.LENS_FACING_BACK).build();

                    cameraProvider.unbindAll();
                    camera = cameraProvider.bindToLifecycle((LifecycleOwner)context, cameraSelector, preview, imageAnalysis);
                    preview.setSurfaceProvider(previewView.createSurfaceProvider(camera.getCameraInfo()));
                } catch(Exception e) {
                    Log.e(TAG, "[startCamera] Use case binding failed", e);
                }
            }
        }, ContextCompat.getMainExecutor(this));
    }

    private class MyImageAnalyzer implements ImageAnalysis.Analyzer {
        private Mat matPrevious = null;

        @Override
        public void analyze(@NonNull ImageProxy image) {
            /* Create cv::mat(RGB888) from image(NV21) */
            Mat matOrg = getMatFromImage(image);

            /* Fix image rotation (it looks image in PreviewView is automatically fixed by CameraX???) */
            Mat mat = fixMatRotation(matOrg);

            Log.i(TAG, "[analyze] width = " + image.getWidth() + ", height = " + image.getHeight() + "Rotation = " + previewView.getDisplay().getRotation());
            Log.i(TAG, "[analyze] mat width = " + matOrg.cols() + ", mat height = " + matOrg.rows());

            /* Do some image processing */
            Mat matOutput = new Mat(mat.rows(), mat.cols(), mat.type());
            if (matPrevious == null) matPrevious = mat;
            Core.absdiff(mat, matPrevious, matOutput);
            matPrevious = mat;

            /* Draw something for test */
            Imgproc.rectangle(matOutput, new Rect(10, 10, 100, 100), new Scalar(255, 0, 0));
            Imgproc.putText(matOutput, "leftTop", new Point(10, 10), 1, 1, new Scalar(255, 0, 0));

            /* Convert cv::mat to bitmap for drawing */
            Bitmap bitmap = Bitmap.createBitmap(matOutput.cols(), matOutput.rows(),Bitmap.Config.ARGB_8888);
            Utils.matToBitmap(matOutput, bitmap);

            /* Display the result onto ImageView */
            runOnUiThread(new Runnable() {
                @Override
                public void run() {
                    imageView.setImageBitmap(bitmap);
                }
            });

            /* Close the image otherwise, this function is not called next time */
            image.close();
        }

        private Mat getMatFromImage(ImageProxy image) {
            /* https://stackoverflow.com/questions/30510928/convert-android-camera2-api-yuv-420-888-to-rgb */
            ByteBuffer yBuffer = image.getPlanes()[0].getBuffer();
            ByteBuffer uBuffer = image.getPlanes()[1].getBuffer();
            ByteBuffer vBuffer = image.getPlanes()[2].getBuffer();
            int ySize = yBuffer.remaining();
            int uSize = uBuffer.remaining();
            int vSize = vBuffer.remaining();
            byte[] nv21 = new byte[ySize + uSize + vSize];
            yBuffer.get(nv21, 0, ySize);
            vBuffer.get(nv21, ySize, vSize);
            uBuffer.get(nv21, ySize + vSize, uSize);
            Mat yuv = new Mat(image.getHeight() + image.getHeight() / 2, image.getWidth(), CvType.CV_8UC1);
            yuv.put(0, 0, nv21);
            Mat mat = new Mat();
            Imgproc.cvtColor(yuv, mat, Imgproc.COLOR_YUV2RGB_NV21, 3);
            return mat;
        }

        private Mat fixMatRotation(Mat matOrg) {
            Mat mat;
            switch (previewView.getDisplay().getRotation()){
                default:
                case Surface.ROTATION_0:
                    mat = new Mat(matOrg.cols(), matOrg.rows(), matOrg.type());
                    Core.transpose(matOrg, mat);
                    Core.flip(mat, mat, 1);
                    break;
                case Surface.ROTATION_90:
                    mat = matOrg;
                    break;
                case Surface.ROTATION_270:
                    mat = matOrg;
                    Core.flip(mat, mat, -1);
                    break;
            }
            return mat;
        }
    }

    private boolean checkPermissions(){
        for(String permission : REQUIRED_PERMISSIONS){
            if(ContextCompat.checkSelfPermission(this, permission) != PackageManager.PERMISSION_GRANTED){
                return false;
            }
        }
        return true;
    }

    @Override
    public void onRequestPermissionsResult(int requestCode, @NonNull String[] permissions, @NonNull int[] grantResults) {
//        super.onRequestPermissionsResult(requestCode, permissions, grantResults);
        if(requestCode == REQUEST_CODE_FOR_PERMISSIONS){
            if(checkPermissions()){
                startCamera();
            } else{
                Log.i(TAG, "[onRequestPermissionsResult] Failed to get permissions");
                this.finish();
            }
        }
    }
}