Nuxt.jsで作成したWebアプリにGooglePay決済を実装したので、まとめておきます。
ApplePayは色々と準備が必要でしたが、GooglePayは比較的簡単に実装できました。
ApplePayの準備についてはこちらにまとめています。
nuxt-stripe-moduleをインストール
まずは、 nuxt-stripe-moduleをインストールしましょう。
npm install --save nuxt-stripe-module
次に nuxt.config.js へ設定を追加します。
publishableKey には、Stripeの管理画面から取得したAPIの公開可能キーを設定してください。
apiVersion には、StripeAPIのバージョンを指定します。
例では現時点の最新版である '2020-08-27' を指定しています。
modules: [
  'nuxt-stripe-module'
],

stripe: {
  publishableKey: 'pk_xxxxxxxxxx',
  apiVersion: '2020-08-27'
},
支払いボタンを表示
GooglePayの支払いボタンを実装します。
基本的には、こちらのドキュメント通りです。
まずは、 <div id="payment-request-button" /> でボタンを配置します。
<template>
  <div class="container">
    <div id="payment-request-button" />
  </div>
</template>

<script>
export default {}
</script>

<style>
.container {
  min-height: 100vh;
}

# payment-request-button {
  margin: 50px auto;
  width: 200px;
}
</style>
次に、支払いボタンに対して設定をマウントします。
<template>
  <div class="container">
    <div id="payment-request-button" />
  </div>
</template>

<script>
export default {

  // ここから追加
  data() {
    return {
      amount: 1000
    };
  },
  mounted() {
    const paymentRequest = this.$stripe.paymentRequest({
      country: 'JP',
      currency: 'jpy',
      total: {
        label: 'Demo total',  // 支払いラベルを指定
        amount: this.amount,  // 支払い金額を指定
      },
      requestPayerName: true,
      requestPayerEmail: true,
    });

    const elements = this.$stripe.elements();
    const prButton = elements.create('paymentRequestButton', {
      paymentRequest: paymentRequest
    });

    paymentRequest.canMakePayment().then((result) => {
      if (result) {
        prButton.mount('#payment-request-button');
      } else {
        document.getElementById('payment-request-button').style.display = 'none';
      }
    });
  }
  // ここまで追加

}
</script>

<style>
.container {
  min-height: 100vh;
}

# payment-request-button {
  margin: 50px auto;
  width: 200px;
}
</style>
ここまでで、下記のように支払いボタンが表示されます。
httpsで無ければ表示されないので、ローカルでの開発時は ngrok などを使用してhttpsで確認してください。
参考:ngrokの利用方法
ボタンのスタイルは、このドキュメントを参考に下記のように変更可能です。
elements.create('paymentRequestButton', {
  paymentRequest: paymentRequest,
  style: {
    paymentRequestButton: {
      type: 'default',
      // One of 'default', 'book', 'buy', or 'donate'
      // Defaults to 'default'

      theme: 'dark',
      // One of 'dark', 'light', or 'light-outline'
      // Defaults to 'dark'

      height: '64px'
      // Defaults to '40px'. The width is always '100%'.
    },
  },
});
また、自分で作成したボタンに対しても、クリック時に paymentRequest.show() を呼び出してあげることで使用可能になります。
<template>
  <div class="container">
    <button @click="showPaymentRequest">GooglePay</button>
  </div>
</template>

<script>
export default {
  data() {
    return {
      amount: 1000,
      paymentRequest: null
    };
  },
  mounted() {
    this.paymentRequest = this.$stripe.paymentRequest({
      country: 'JP',
      currency: 'jpy',
      total: {
        label: 'Demo total',
        amount: this.amount,
      },
      requestPayerName: true,
      requestPayerEmail: true,
    });

    const elements = this.$stripe.elements();
    const prButton = elements.create('paymentRequestButton', {
      paymentRequest: this.paymentRequest
    });

    this.paymentRequest.canMakePayment().then((result) => {
      if (result) {
        // 支払い確認成功時の処理
      } else {
        // 支払い確認失敗時の処理
      }
    });
  },
  methods: {
    showPaymentRequest() {
      this.paymentRequest.show();
    }
  }
}
</script>

<style>
.container {
  min-height: 100vh;
}
</style>
PaymentIntentの作成
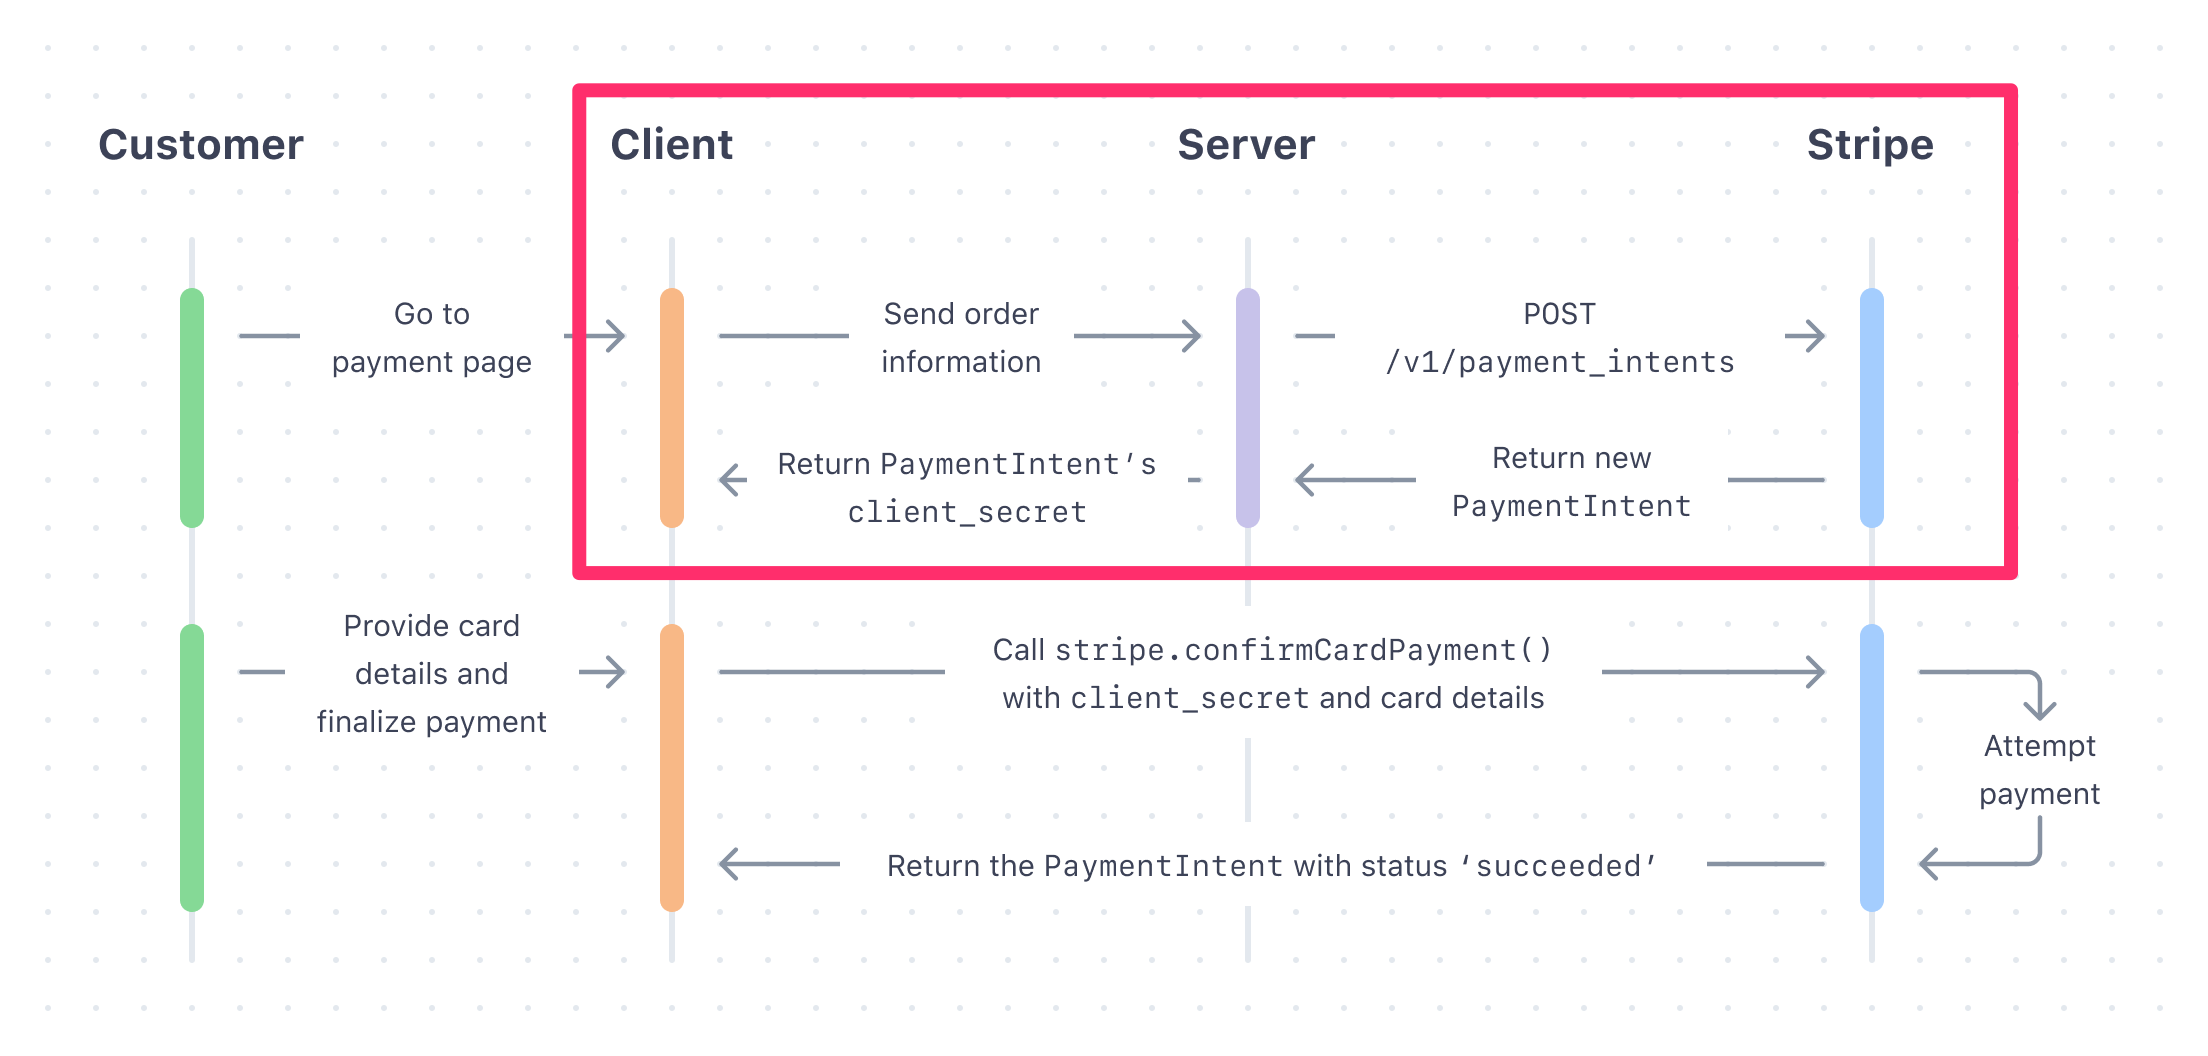
実際に支払いを行うには、PaymentIntentを作成します。
PaymentIntent の作成はサーバー側で行います。
サーバー側で、StripeAPIの Create a PaymentIntent を呼びだして PaymentIntent を作成します。
クライアントから amount と currency を投げて、 サーバー側で PaymentIntent を作成し、作成後に取得できる client_secret をクライアント側に返すようなAPIを用意しましょう。
amount と currency は必須パラメータで、最低これだけで動作しますが、その他にも支払いを行った顧客情報を渡すなど色々できます。
詳しくはドキュメントを確認してください。
client_secret を取得したら、クライアント側に支払い完了後の処理を追加します。
client_secret は支払いの度に作成する必要があります。
<template>
  <div class="container">
    <div id="payment-request-button" />
  </div>
</template>

<script>
export default {
  data() {
    return {
      amount: 1000
    };
  },
  mounted() {
    const paymentRequest = this.$stripe.paymentRequest({
      country: 'JP',
      currency: 'jpy',
      total: {
        label: 'Demo total',
        amount: this.amount,
      },
      requestPayerName: true,
      requestPayerEmail: true,
    });

    const elements = this.$stripe.elements();
    const prButton = elements.create('paymentRequestButton', {
      paymentRequest: paymentRequest
    });

    paymentRequest.canMakePayment().then((result) => {
      if (result) {
        prButton.mount('#payment-request-button');
      } else {
        document.getElementById('payment-request-button').style.display = 'none';
      }
    });

    // ここから追加

    // ここでサーバーからclient_secretを取得する処理

    paymentRequest.on('paymentmethod',(ev) => {
      this.$stripe.confirmCardPayment(
        'pi_xxxx_secret_xxxx',  // ここにサーバーから取得したclient_secretを指定
        {payment_method: ev.paymentMethod.id},
        {handleActions: false}
      ).then((confirmResult) => {
        if (confirmResult.error) {
          ev.complete('fail');
          // 支払い失敗時の処理
        } else {
          ev.complete('success');
          // 支払い成功時の処理
        }
      });
    });
    // ここまで追加
  }
}
</script>

<style>
.container {
  min-height: 100vh;
}

# payment-request-button {
  margin: 50px auto;
  width: 200px;
}
</style>
以上で設定は完了です!
支払いボタンからGooglePay決済を実行すると、Stripeの管理画面上に支払い結果が表示されます。
GooglePayの実装は簡単で良いですね!


