はじめに
この記事ではVue.jsでSymbolのブロック生成を監視するWEBプログラミングを作成します。
また、ある程度はプログラミングが出来る人を前提に話を進めます。(Vue.jsの詳しい解説はしません)
このプログラムはWEBブラウザでファイルを開くだけで実行出来るのでVue.jsはわからないけどちょっと試してみたい、と思っている人も是非やってみてください。
この記事ではすべて Symbolテストネット で行っています。XYMを送信される場合などに間違えないように気をつけてください。
必要なもの
- PC
- インターネット接続環境
- テキストエディタ(VSCodeを推奨)
- Google Chromeブラウザ
- めげない心
いきなりソースコード全文いきます。(後で解説します)
まずは、下記のコードをwebsocket_test.htmlと名前を付けてPCのデスクトップに保存してください。
<!DOCTYPE html>
<html lang="ja">
<head>
  <meta charset="UTF-8">
  <meta http-equiv="X-UA-Compatible" content="IE=edge">
  <meta name="viewport" content="width=device-width, initial-scale=1.0">
  <link href="https://cdn.jsdelivr.net/npm/bootstrap@5.0.0-beta1/dist/css/bootstrap.min.css" rel="stylesheet" integrity="sha384-giJF6kkoqNQ00vy+HMDP7azOuL0xtbfIcaT9wjKHr8RbDVddVHyTfAAsrekwKmP1" crossorigin="anonymous">
  <title>リスナーイベント</title>
</head>
<body>
  <div id="app">
    <div class="container">
      <div class="card mt-3">
        <div class="card-body">
          <div class="mb-3 text-left">
            <label for="address" class="form-label">アドレス</label>
            <input v-model="rawAddress" type="text" class="form-control" id="address" placeholder="Tから始まるテストネットのアドレス39文字" />
          </div>
          <div class=" text-center">
            <template v-if="isListen">
              <div>
                <button type="button" class="btn btn-info" @click="closeConnection">リスナー停止</button>
              </div>
            </template>
            <template v-else>
              <div>
                <button type="button" class="btn btn-primary" @click="startConnection">リスナー開始</button>
              </div>
            </template>
          </div>
        </div>
      </div>
    </div>
    <div class="container-fluid">
      <div class="row">
        <div class="col">
          <div class="card mt-3">
            <div class="card-body">
              <div class="card-title">最新ブロック情報</div>
              <div class="card-text overflow-auto" style="max-height: 600px;">
                <div v-for="(block, index) in blocks" :key="index">
                  <p class="text-break">
                    {{ block }}
                  </p>
                  <hr>
                </div>
              </div>
            </div>
          </div>
        </div>
        <div class="col">
          <div class="card mt-3">
            <div class="card-body">
              <div class="card-title">指定したアドレスへのトランザクション受信情報</div>
              <div class="card-text overflow-auto" style="max-height: 600px;">
                <div v-for="(history, index) in histories" :key="index">
                  <p class="text-break">
                    {{ history }}
                  </p>
                  <hr>
                </div>
              </div>
            </div>
          </div>
        </div>
      </div>
    </div>
  </div>
  <script src="https://cdn.jsdelivr.net/npm/bootstrap@5.0.0-beta1/dist/js/bootstrap.bundle.min.js" integrity="sha384-ygbV9kiqUc6oa4msXn9868pTtWMgiQaeYH7/t7LECLbyPA2x65Kgf80OJFdroafW" crossorigin="anonymous"></script>
  <script src="https://cdn.jsdelivr.net/npm/vue@2"></script>
  <script src="https://xembook.github.io/nem2-browserify/symbol-sdk-1.0.2.js"></script>
  <script>
    nem = require("/node_modules/symbol-sdk")
    op = require("/node_modules/rxjs/operators")
    node = 'https://sym-test.opening-line.jp:3001'
    var app = new Vue({
      el: '#app',
      data: {
        rawAddress: 'TDFW5JTEZBWIIL6IM5AO27TMIYIUELH2UDMI56A',
        repositoryFactory: null,
        isListen: false,
        listener: null,
        nsRepo: null,
        txRepo: null,
        blocks: [],
        histories: [],
        mosaicId: new nem.MosaicId('3A8416DB2D53B6C8'),
      },
      mounted() {
        this.$nextTick(() => {
          this.repositoryFactory = new nem.RepositoryFactoryHttp(node)
          this.nsRepo = this.repositoryFactory.createNamespaceRepository()
          this.txRepo = this.repositoryFactory.createTransactionRepository()
        })
      },
      methods: {
        startConnection(){
          console.log("Starting connection to WebSocket Server")
          let wsUrl = node.replace('https', 'wss');
          const wsEndpoint = wsUrl + "/ws";
          this.listener = new nem.Listener(wsEndpoint, this.nsRepo, WebSocket)
          this.listener.open().then(() => {
            console.log("listener open!")
            this.isListen = true
            //最新ブロックを購読
            this.listener.newBlock().subscribe(
              (block) => {
                console.log(block);
                this.getNewInfo(block);
              },
              (err) => {
                console.error("リスナー", err)
              }
            );
          });
        },
        closeConnection() {
          this.listener.close()
          this.listener = null
          this.isListen = false
        },
        getNewInfo(block){
          this.blocks.unshift(block)
          if(this.rawAddress == '') return;
          const recipientAddress = nem.Address.createFromRawAddress(this.rawAddress);
          this.txRepo.search({
            address: recipientAddress,
            height: block.height,
            group: nem.TransactionGroup.Confirmed,
            transferMosaicId: this.mosaicId
          })
          .subscribe(_ =>{
            if(_.data.length > 0){
              _.data.forEach(tx => {
                console.log(tx);
                if(tx.recipientAddress.address === recipientAddress.plain()){
                  this.histories.unshift(tx)
                }
              });
            }
          })
        }
      },
    })
  </script>
</body>
</html>
websocket_test.htmlとして保存したらファイルをGoogle Chromeへドラッグして放り込むと下記のように表示されると思います。
 |
|---|
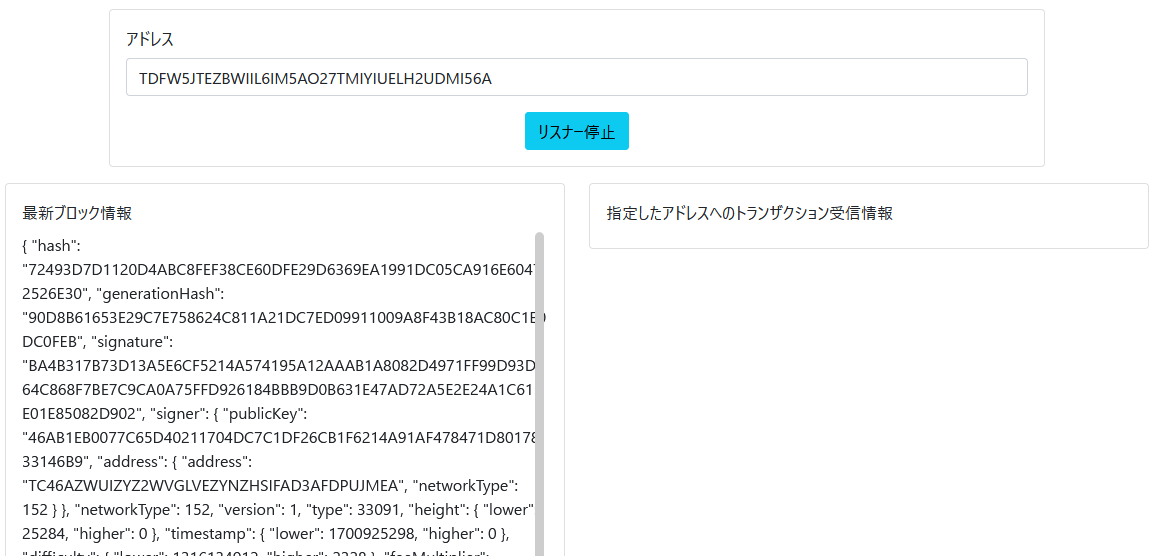
「リスナー開始」ボタンを押すと「リスナー停止」と表示が変わります。
 |
|---|
しばらくすると、下記のようにブロックの情報が表示されます。
 |
|---|
Sybmolの1ブロック生成の時間は約30秒です。約30秒ごとに左側のブロックの情報が増えていきます。
ソースコードの解説
bootstrap、vuejs、nem2-browserifyの準備
<link href="https://cdn.jsdelivr.net/npm/bootstrap@5.0.0-beta1/dist/css/bootstrap.min.css" rel="stylesheet" integrity="sha384-giJF6kkoqNQ00vy+HMDP7azOuL0xtbfIcaT9wjKHr8RbDVddVHyTfAAsrekwKmP1" crossorigin="anonymous">

...略

<script src="https://cdn.jsdelivr.net/npm/bootstrap@5.0.0-beta1/dist/js/bootstrap.bundle.min.js" integrity="sha384-ygbV9kiqUc6oa4msXn9868pTtWMgiQaeYH7/t7LECLbyPA2x65Kgf80OJFdroafW" crossorigin="anonymous"></script>
<script src="https://cdn.jsdelivr.net/npm/vue@2"></script>
<script src="https://xembook.github.io/nem2-browserify/symbol-sdk-1.0.2.js"></script>
<script>

...略

</script>
ライブラリのインポート、ノードの宣言
ノードは Opening Line さんのノードをお借りしました。
nem = require("/node_modules/symbol-sdk")
op = require("/node_modules/rxjs/operators")
node = 'https://sym-test.opening-line.jp:3001'
Vuejs部分
(vuejsの書き方等はここでは解説しません)
ソースコード上にコメントを追記しましたのでそちらを参照してください。
var app = new Vue({
  el: '#app',
  data: {
    rawAddress: 'TDFW5JTEZBWIIL6IM5AO27TMIYIUELH2UDMI56A',                  //受信検知用アドレス
    repositoryFactory: null,                                                //リポジトリ変数
    isListen: false,                                                        //ボタンの出し分けを行う変数
    listener: null,                                                         //リスナー変数
    nsRepo: null,                                                           //NamespaceRepository変数
    txRepo: null,                                                           //TransactionRepository変数
    blocks: [],                                                             //新規生成ブロック情報を入れる変数
    histories: [],                                                          //トランザクション受信履歴
    mosaicId: new nem.MosaicId('3A8416DB2D53B6C8'),                         //テストネットXYMモザイク
  },
  mounted() {
    this.$nextTick(() => {
      this.repositoryFactory = new nem.RepositoryFactoryHttp(node)          //RepositoryFactoryHttpを生成
      this.nsRepo = this.repositoryFactory.createNamespaceRepository()      //NamespaceRepositoryを生成
      this.txRepo = this.repositoryFactory.createTransactionRepository()    //TransactionRepositoryを生成
    })
  },
  methods: {
    startConnection(){                                                      //リスナー開始ボタンを押したときの処理
      console.log("Starting connection to WebSocket Server")
      let wsUrl = node.replace('https', 'wss');
      const wsEndpoint = wsUrl + "/ws";
      this.listener = new nem.Listener(wsEndpoint, this.nsRepo, WebSocket)  //リスナーを生成
      this.listener.open().then(() => {                                     //リスナーをオープン
        console.log("listener open!")
        this.isListen = true
        //最新ブロックを購読
        this.listener.newBlock().subscribe(
          (block) => {
            console.log(block);
            this.getNewInfo(block);
          },
          (err) => {
            console.error("リスナー", err)
          }
        );
      });
    },
    closeConnection() {
      this.listener.close()
      this.listener = null
      this.isListen = false
    },
    getNewInfo(block){
      this.blocks.unshift(block)                                          //新規ブロック情報を配列に保持
      if(this.rawAddress == '') return;
      const recipientAddress = nem.Address.createFromRawAddress(this.rawAddress);
      this.txRepo.search({                                                //TransactionRepositoryを検索
        address: recipientAddress,
        height: block.height,
        group: nem.TransactionGroup.Confirmed,
        transferMosaicId: this.mosaicId
      })
      .subscribe(_ =>{
        if(_.data.length > 0){
          _.data.forEach(tx => {
            console.log(tx);
            if(tx.recipientAddress.address === recipientAddress.plain()){
              this.histories.unshift(tx)
            }
          });
        }
      })
    }
  },
})
基本的にはリファレンスに書いてあることをやっているだけです。
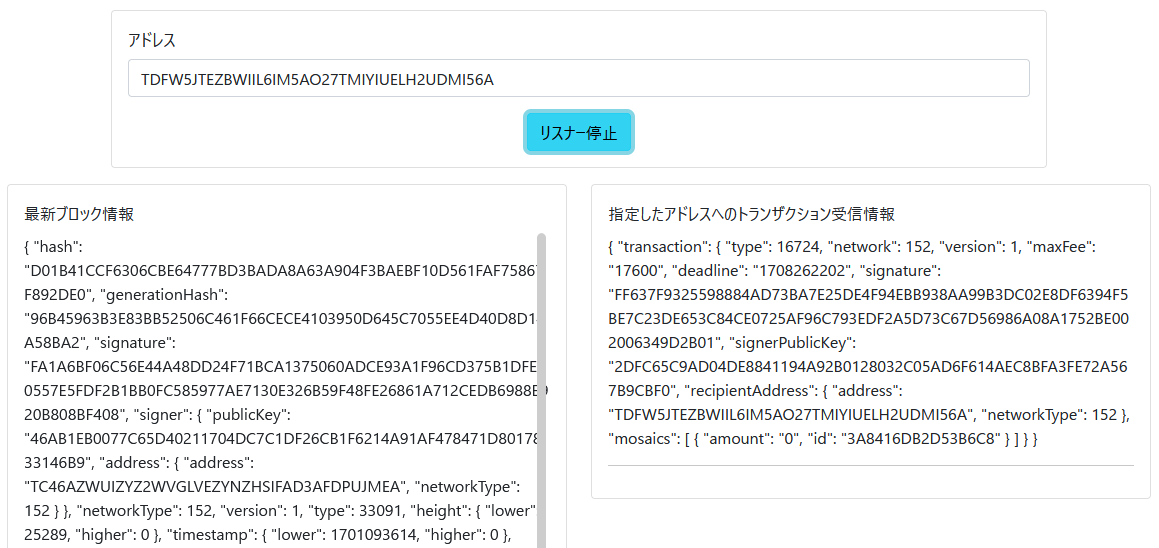
この記事はおまけとして「アドレス:TDFW5JTEZBWIIL6IM5AO27TMIYIUELH2UDMI56A」にトランザクションを送ると(XYMを送る等)右側の情報ウィンドウにトランザクション情報が表示されます。試しに「TDFW5JTEZBWIIL6IM5AO27TMIYIUELH2UDMI56A」へ適当にXYM(0XYMでもOK)を送ってみてください。
アドレス欄に自分のアドレスを入れて自分宛てに送ってもいいです。
 |
|---|
終わりに
この記事では新規ブロック生成を監視して、ブロックが生成された際にページに情報を表示するようにしていますが、新規生成されたブロック情報を使えば、
- 新規生成ブロック情報からトランザクション情報を検索して特定のアドレスのみ処理を行う
- ハーベストの検知(誰がハーベストしたか)
などをリアルタイムに表示・通知することができるようになります。
また、リスナーではその他にも色々と監視できるので興味がある方はリファレンスをご覧ください。