VMwareのBlogでvSphere上でRayクラスタを展開するためのPluginが追加されたことが記載されている。
これを試してみる。
Rayとは
RayはPythonのワークロードをスケールするためのOSSのフレームワークで、AWS Glue for Rayなんかで提供されていたり、GKEで動かす方法がGoogle Cloudから提供されていたり、ML界隈ではメジャーなフレームワークのようだ。
オフィシャルサイトの概要はこちらにある。
AIではよく以下の3つの役割が出てくる。
- インフラエンジニア
- アプリケーションエンジニア
- データサイエンティスト
Rayではこれに対応する形で以下が提供される。
- Ray AI Library
- Ray Core
- Ray Cluster
vSphereとの連携部分はRay Clusterが該当する。
vSphere上へのRayの展開
RayのLaunching Ray Clusters on vSphereというドキュメントを参照して実施する。
前提条件
以下を用意する。
- vSphere 8.0以上
- DHCPが利用できるネットワーク
Frozen VMの作成
Rayとその依存関係が既にインストールされたVM(Frozen VM)を予め用意する必要がある。
RayではこのFrozen VMをCloneしてオートスケールに使用する。
こちらのUser Guide for building a Frozen VM
に従ってFrozen VMを作成する。
Frozen VM作成のための前提作業
ここでは以下のVMを使って作業を進める。
- OS:Ubuntu22.04
- スペック
- CPU:2
- メモリ:8G
- ディスク:100G
Frozon VMの作る際の前提として以下が記載されている。
- Dockerがインストール済み
- ssh-keygenがインストール済み
- vCenterにアクセス可能
- Internetにアクセス可能
- 非rootユーザでの作業
DockerはFrozenVMのイメージ作成時にビルド用コンテナを起動して、その中でPackerを使ってビルド作業をするのに利用する。
Docker以外の要件は満たしていたので、Dockerをインストールする。
for pkg in docker.io docker-doc docker-compose docker-compose-v2 podman-docker containerd runc; do sudo apt-get remove $pkg; done
sudo apt-get update
sudo apt-get install ca-certificates curl gnupg
sudo install -m 0755 -d /etc/apt/keyrings
curl -fsSL https://download.docker.com/linux/ubuntu/gpg | sudo gpg --dearmor -o /etc/apt/keyrings/docker.gpg
sudo chmod a+r /etc/apt/keyrings/docker.gpg
echo \
  "deb [arch=$(dpkg --print-architecture) signed-by=/etc/apt/keyrings/docker.gpg] https://download.docker.com/linux/ubuntu \
  $(. /etc/os-release && echo "$VERSION_CODENAME") stable" | \
  sudo tee /etc/apt/sources.list.d/docker.list > /dev/null
sudo apt-get update
sudo apt-get install docker-ce docker-ce-cli containerd.io docker-buildx-plugin docker-compose-plugin -y
sudo systemctl restart docker
sudo usermod -aG docker $USER
exit
FrozenVMの作成
イメージビルド用のスクリプトを取得するために、リポジトリをCloneする。
git clone https://github.com/vmware-ai-labs/vm-packer-for-ray.git
cd vm-packer-for-ray/
script/config.hclを編集する。
なお、パラメータの意味は以下の通り。
| パラメータ | 意味 |
|---|---|
| vsphere_endpoint | vCenterのIP/FQDN |
| vsphere_username | vCenterのユーザ |
| vsphere_password | vCenterのパスワード |
| vsphere_cluster | vSphere Cluster名 |
| vsphere_host | ESXiのIP/FQDN |
| vsphere_network | VMのNetwork |
| vsphere_datastore | FrozenVMのvmdkを格納するデータストア名 |
| common_iso_datastore | FrozenVMのISOイメージを格納するデータストア名 |
| iso_path | FrozenVMのISOをアップロードするパス |
| common_content_library_name | FrozonVMのOVFをexportするためのコンテンツライブラリ名 |
| common_ray_docker_image | ビルドに使うRayのコンテナイメージ名 |
| common_ray_docker_repo | Rayのイメージのリポジトリ |
| common_ray_docker_username | イメージレジストリのログインユーザ |
| common_ray_docker_password | イメージレジストリのログインパスワード |
なお、これ以外のパラメータもあるが、そちらについてはここで紹介しない。
必要に応じてこちらのAdvanced User guide for using VM Packer for Ray
を参照してほしい。
ここでは使いまわしが効くよう、一度環境変数に設定した後まとめて置換する。
cat <<EOF > ./env.sh
VSPHERE_ENDPOINT="10.215.73.174"
VSPHERE_USERNAME="administrator@vsphere.local"
VSPHERE_PASSWORD="xxxx"
VSPHERE_CLUSTER="vSAN-Cluster"
VSPHERE_HOST="10.215.66.23"
VSPHERE_NETWORK="VM Network"
VSPHERE_DATASTORE="vsanDatastore"
COMMON_ISO_DATASTORE="vsanDatastore"
ISO_PATH="iso_files/"
COMMON_CONTENT_LIBRARY_NAME="ray"
COMMON_RAY_DOCKER_IMAGE="rayproject/ray:2.7.0"
COMMON_RAY_DOCKER_REPO="docker.io"
COMMON_RAY_DOCKER_USERNAME="myaccount"
COMMON_RAY_DOCKER_PASSWORD="xxxx"
EOF
script/config.hclを更新する。
. ./env.sh
sed -i.bak \
  -e "s|^vsphere_endpoint .*|vsphere_endpoint = \"$VSPHERE_ENDPOINT\"|g" \
  -e "s|^vsphere_username .*|vsphere_username = \"$VSPHERE_USERNAME\"|g" \
  -e "s|^vsphere_password .*|vsphere_password = \"$VSPHERE_PASSWORD\"|g" \
  -e "s|^vsphere_cluster .*|vsphere_cluster = \"$VSPHERE_CLUSTER\"|g" \
  -e "s|^vsphere_network .*|vsphere_network = \"$VSPHERE_NETWORK\"|g" \
  -e "s|^vsphere_host .*|vsphere_host = \"$VSPHERE_HOST\"|g" \
  -e "s|^vsphere_datastore .*|vsphere_datastore = \"$VSPHERE_DATASTORE\"|g" \
  -e "s|^common_iso_datastore .*|common_iso_datastore = \"$COMMON_ISO_DATASTORE\"|g" \
  -e "s|^iso_path .*|iso_path = \"$ISO_PATH\"|g" \
  -e "s|^common_content_library_name .*|common_content_library_name = \"$COMMON_CONTENT_LIBRARY_NAME\"|g" \
  -e "s|^common_ray_docker_image .*|common_ray_docker_image = \"$COMMON_RAY_DOCKER_IMAGE\"|g" \
  -e "s|^common_ray_docker_repo .*|common_ray_docker_repo = \"$COMMON_RAY_DOCKER_REPO\"|g" \
  -e "s|^common_ray_docker_username .*|common_ray_docker_username = \"$COMMON_RAY_DOCKER_USERNAME\"|g" \
  -e "s|^common_ray_docker_password .*|common_ray_docker_password = \"$COMMON_RAY_DOCKER_PASSWORD\"|g" \
  scripts/config.hcl
DockerHubのRateLimit対策としてログインしておく。
docker login -u $COMMON_RAY_DOCKER_USERNAME -p $COMMON_RAY_DOCKER_PASSWORD
create-frozen-vm.shを実行してFrozenVMを作成する。
bash create-frozen-vm.sh
しばらく待つと、以下のような出力とともに終了する。
==> vsphere-iso.linux-debian: Running post-processor:  (type manifest)
Build 'vsphere-iso.linux-debian' finished after 13 minutes 1 second.

==> Wait completed after 13 minutes 1 second

==> Builds finished. The artifacts of successful builds are:
--> vsphere-iso.linux-debian: frozen-vm-1
--> vsphere-iso.linux-debian: frozen-vm-1
/home/packer/scripts
Packer build finished.
コンテンツライブラリにOVF Templateが格納され、frozen-vm-1というVMが停止した状態で作成される。
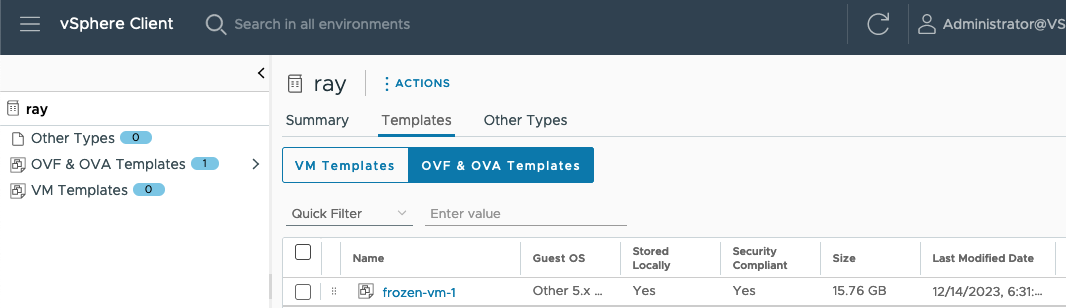
別のvSphereクラスタでRayを利用する場合、このOVFをエクスポート&インポートすることで再構築なしで利用することが出来る。
Rayクラスタランチャーのインストール
RayクラスタランチャーはrayCLIの一機能であるため、rayCLIを用意する。
rayCLIはpipで配布されているため、まずpipをインストールする。
sudo apt install python3-pip -y
rayCLIをインストールする。
pip install -U ray[default]
インストールパスが$HOME/.local/binになっているため、パスを通す。
echo "PATH=$PATH:$HOME/.local/bin" >> ~/.bashrc
. ~/.bashrc
vSphere Automation SDK for Pythonのインストール
vSphereをPythonで操作するためのSDKをpipでインストールする。
pip install 'git+https://github.com/vmware/vsphere-automation-sdk-python.git'
Rayクラスタを起動する
RayクラスタはYAMLで定義される。YAMLの仕様はこちら。
ここではサンプルのクラスタ構成YAMLを利用して起動する。
最初にサンプルのYAMLを取ってくる。
wget https://raw.githubusercontent.com/ray-project/ray/master/python/ray/autoscaler/vsphere/example-full.yaml
vSphereにアクセスするための環境変数を設定する。今回はFrozenVM作成時に設定した環境変数を流用した。
export VSPHERE_SERVER=$VSPHERE_ENDPOINT
export VSPHERE_USER=$VSPHERE_USERNAME
export VSPHERE_PASSWORD=$VSPHERE_PASSWORD
example-full.yamlを編集する。ここでは以下の変更を行った。
@@ -46,7 +46,7 @@
         frozen_vm:
             # The name of the frozen VM, or the prefix for a set of frozen VMs. Can only be unset when
             # "frozen_vm.resource_pool" is set and pointing to an existing resource pool of Frozen VMs.
-            name: frozen-vm
+            name: frozen-vm-1
             # The library item of the OVF template of the frozen VM. If set, the frozen VM or a set of frozen VMs will
             # be deployed from an OVF template specified by library item.
             library_item:
@@ -57,11 +57,11 @@
             # The vSphere cluster name, only makes sense when "frozen_vm.library_item" is set and
             # "frozen_vm.resource_pool" is unset. Indicates to deploy a single frozen VM on the vSphere cluster
             # from OVF template.
-            cluster:
+            cluster: vSAN-Cluster
             # The target vSphere datastore name for storing the vmdk of the frozen VM to be deployed from OVF template.
             # Will take effect only when "frozen_vm.library_item" is set. If "frozen_vm.resource_pool" is also set,
             # this datastore must be a shared datastore among the ESXi hosts.
-            datastore:
+            datastore: vsanDatastore
         # The GPU related configurations
         gpu_config:
             # If using dynamic PCI passthrough to bind the physical GPU on an ESXi host to a Ray node VM.
@@ -143,7 +143,9 @@
 # List of commands that will be run before `setup_commands`. If docker is
 # enabled, these commands will run outside the container and before docker
 # is setup.
-initialization_commands: []
+#initialization_commands: []
+initialization_commands:
+    - docker login -u myaccount -p 'xxxx'

 # List of shell commands to run to set up nodes.
 setup_commands: []
provider.vsphere_config.frozen_vm.nameはFrozenVMの名前を設定するため、先程作成されたFrozenVMの名前に合わせた。
provider.vsphere_config.frozen_vm.cluster、provider.vsphere_config.frozen_vm.datastoreはそれぞれvSphere Cluster、データストアの名前を設定した。
またDockerHubのRateLimitの問題に引っかかり、イメージレジストリへの認証情報を設定する項目がなかったため、initialization_commandsでDockerHubにログインするようにした。
Rayクラスタを起動する。
ray up example-full.yaml -y
無事走り切ると、以下のような出力が表示される。
Local node IP: 10.215.65.245

--------------------
Ray runtime started.
--------------------

Next steps
  To add another node to this Ray cluster, run
    ray start --address='10.215.65.245:6379'

  To connect to this Ray cluster:
    import ray
    ray.init()

  To submit a Ray job using the Ray Jobs CLI:
    RAY_ADDRESS='http://10.215.65.245:8265' ray job submit --working-dir . -- python my_script.py

  See https://docs.ray.io/en/latest/cluster/running-applications/job-submission/index.html
  for more information on submitting Ray jobs to the Ray cluster.

  To terminate the Ray runtime, run
    ray stop

  To view the status of the cluster, use
    ray status

  To monitor and debug Ray, view the dashboard at
    10.215.65.245:8265

  If connection to the dashboard fails, check your firewall settings and network configuration.
Shared connection to 10.215.65.245 closed.
  New status: up-to-date

Useful commands
  Monitor autoscaling with
    ray exec /home/ubuntu/example-full.yaml 'tail -n 100 -f /tmp/ray/session_latest/logs/monitor*'
  Connect to a terminal on the cluster head:
    ray attach /home/ubuntu/example-full.yaml
  Get a remote shell to the cluster manually:
    ssh -tt -o IdentitiesOnly=yes -i /home/ubuntu/ray-bootstrap-key.pem ray@10.215.65.245 docker exec -it ray_container /bin/bash
サンプルコードとしてオフィシャルのリポジトリで配布しているexample.pyを利用する。
サンプルをダウンロードする。
wget https://raw.githubusercontent.com/ray-project/ray/master/doc/yarn/example.py
このサンプルの中身を見る感じ、100個のタスクを各ノードで実行し、各ノードのホスト名(platform.node())とどれだけのタスクをどのホストが実行したかを出力するようになっているようだ。
example.py内にノードの待ち合わせ箇所があり、4台揃うまで待つようになっているが、今回の環境はexample-full.yaml内でmax_workers: 2を定義していたため、待ち合わせ数を2に変更する。
def main():
    wait_for_nodes(2)
ray up時に表示されたコマンドにならって、以下のようにpythonを実行する。
RAY_ADDRESS='http://10.215.65.245:8265' ray job submit --working-dir . -- python example.py
実行すると、以下のようにジョブが実行されたことが分かる。
なお、実行するWorkerが足りない場合は自動的にVMがmax_workersの数まで作成される。
Job submission server address: http://10.215.65.245:8265
2023-12-14 10:58:35,512	INFO dashboard_sdk.py:338 -- Uploading package gcs://_ray_pkg_926387d59421381a.zip.
2023-12-14 10:58:35,513	INFO packaging.py:530 -- Creating a file package for local directory '.'.

-------------------------------------------------------
Job 'raysubmit_e9YmenNpxgv5dQWB' submitted successfully
-------------------------------------------------------
:(省略)
Iteration 8
Counter({('f978d40c-2449-413f-bc25-ddc142283068', '1a1b51ea-58c9-4667-9324-b9565ff59e5b'): 32, ('1a1b51ea-58c9-4667-9324-b9565ff59e5b', 'f978d40c-2449-413f-bc25-ddc142283068'): 30, ('f978d40c-2449-413f-bc25-ddc142283068', 'f978d40c-2449-413f-bc25-ddc142283068'): 25, ('1a1b51ea-58c9-4667-9324-b9565ff59e5b', '1a1b51ea-58c9-4667-9324-b9565ff59e5b'): 13})
Iteration 9
Counter({('f978d40c-2449-413f-bc25-ddc142283068', '1a1b51ea-58c9-4667-9324-b9565ff59e5b'): 31, ('1a1b51ea-58c9-4667-9324-b9565ff59e5b', 'f978d40c-2449-413f-bc25-ddc142283068'): 27, ('f978d40c-2449-413f-bc25-ddc142283068', 'f978d40c-2449-413f-bc25-ddc142283068'): 21, ('1a1b51ea-58c9-4667-9324-b9565ff59e5b', '1a1b51ea-58c9-4667-9324-b9565ff59e5b'): 21})
Success!

------------------------------------------
Job 'raysubmit_e9YmenNpxgv5dQWB' succeeded
------------------------------------------
結果内のf978d40c-2449-413f-bc25-ddc142283068などはvSphere ClientのDNS NameなどからRayクラスタ内のノードのホスト名であることが分かる。
上手く分散されて実行したようだ。
評価が終わったのでクラスタを停止する。
ray down example-full.yaml -y
RayクラスタのVMが全て削除された。
コマンド1つで分散実行環境が簡単に作成・削除出来ることが確認できた。