概要
通常、WorkSpacesのパッチ適用は自動で行われますが、こちらの記事に記載があるように、WSUSなどを使用したセルフアップデートの設定も可能です。本記事では、WorkSpacesをPatch Managerで管理する方法を記載します。
Systems Managerの設定
Patch ManagerはSystems Managerの機能を利用します。パッチ適用対象はSystems Managerの管理対象である必要があります。しかしWorkSpacesは通常のEC2と異なりIAMロールが直接設定できません。そのためハイブリッドアクティベーションを使用します。
ハイブリッドアクティベーションとは
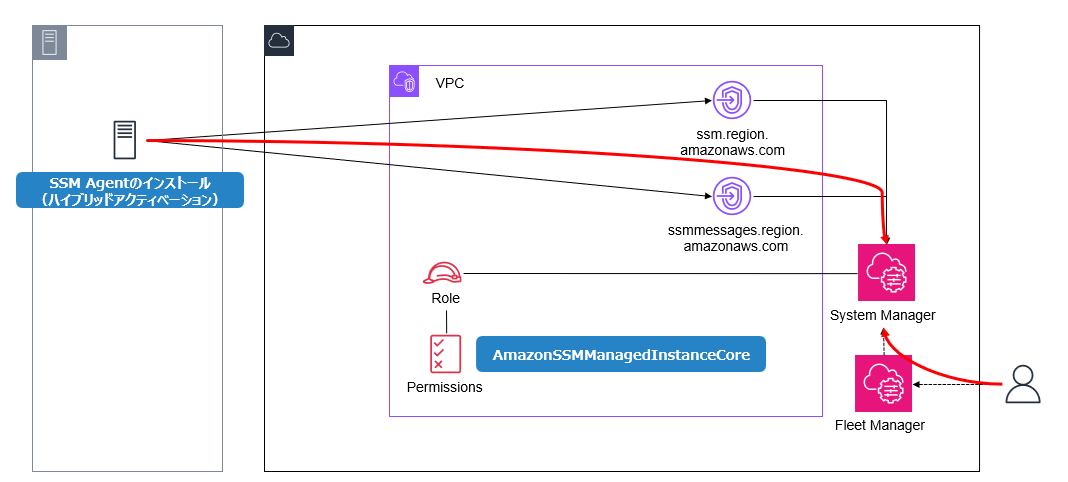
ハイブリッドアクティベーションは、オンプレミスのサーバをSystems Managerの管理対象とする機能です。以前、下記の記事に記載を行いました。
上記記事では、ハイブリッドアクティベーションを使用してオンプレミスサーバを管理対象とし、Fleet Managerを使用してAWS側から管理する構成を記載しました。
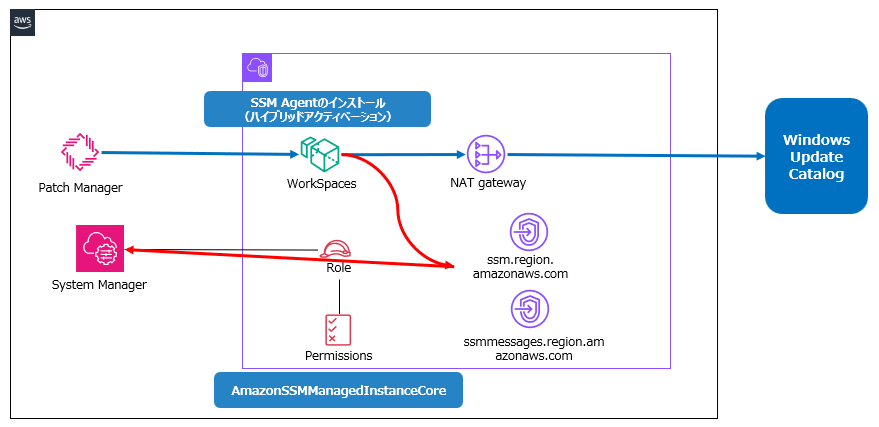
同様の手法で、WorkSpacesをSystems Managerの管理対象とします。事前準備として下記を実施しておきます。
-
ネットワーク設定
WorkSpacesからインターネット上のWindows Update Catalogに接続できるよう、NAT Gateway、Internet Gatewayを構成 -
VPCエンドポイント
Systems Managerアクセス用のVPCエンドポイントを作成。下記構成ではインターネット経由でもアクセス可能ですが、閉域環境でのテストを想定してVPCエンドポイントを作成しておきます。
注意点
アドバンストインスタンス層への変更が必要
Systems Managerには標準インスタンス層とアドバンストインスタンス層の2つがあります。EC2以外のノードにパッチ適用を行う場合、アドバンストインスタンス層への変更が必要です。そしてアドバンストインスタンス層は追加で利用料金が発生します。
登録されているハイブリッドアクティベーションノードが1,000未満であっても、アドバンストインスタンス層が必要なシナリオが2つあります:
- EC2以外のノードに接続するためにSession Managerを使用したい
- EC2以外のノードでMicrosoftがリリースしたアプリケーション(OS以外)にパッチを適用したい
具体的な設定変更はFleet Managerの設定項目から行えます。

下記画面で「設定を変更」をクリックして変更します。

Systems Managerの対応OSについて
Patch Managerの前提条件によると、Patch Managerの管理対象はサーバOSです。Windows Serverであれば下記が対応OSとなります。
- Windows Server 2012〜Windows Server 2025(R2バージョンを含む)
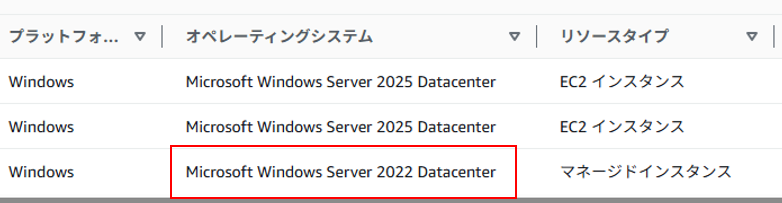
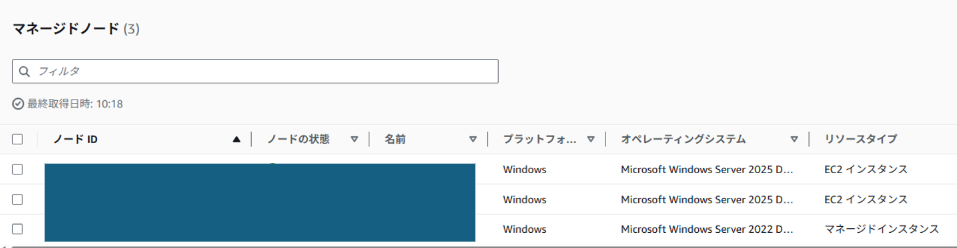
WorkSpacesはWindowsクライアント環境を提供するサービスですが、ベースはサーバOSのため、Patch Managerで管理可能です。以下のFleet Manager管理画面で確認すると、WorkSpaces(一番下)がWindows Server 2022であることが分かります。
設定手順
ハイブリッドアクティベーション
Systems Managerコンソールからハイブリッドアクティベーションを選択します。インスタンス制限数と有効期限(30日以内の日付)を入力してアクティベーションコードを発行します。
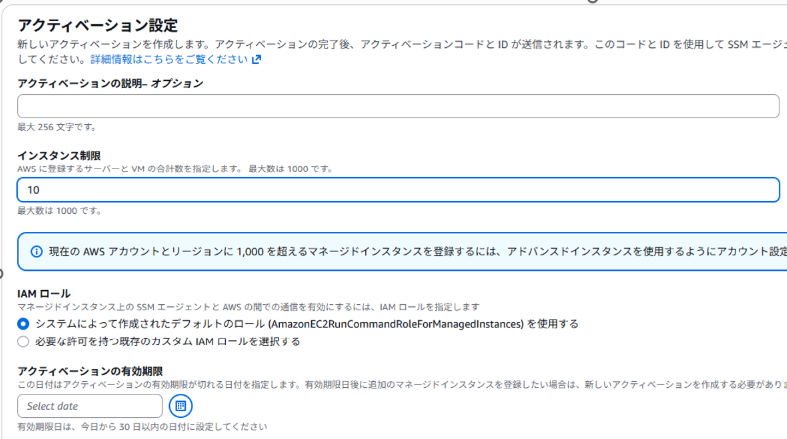
アクティベーションコードが発行されます。

WorkSpacesにログイン後、PowerShellを管理者権限で起動し、以下のコマンドを実行します。
[System.Net.ServicePointManager]::SecurityProtocol = 'TLS12'
$code = "xxxxxxxxxxxxxxxxxxxxxxxxxxxxxxxxxxxxxx"
$id = "xxxxxxxxxxxxxxxxxxxxxxxxxxxxxxxxxxxxxx"
$region = "ap-northeast-1"
$dir = $env:TEMP + "\ssm"
New-Item -ItemType directory -Path $dir -Force
cd $dir
(New-Object System.Net.WebClient).DownloadFile("https://amazon-ssm-$region.s3.$region.amazonaws.com/latest/windows_amd64/ssm-setup-cli.exe", $dir + "\ssm-setup-cli.exe")
./ssm-setup-cli.exe -register -activation-code="$code" -activation-id="$id" -region="$region"
Get-Content ($env:ProgramData + "\Amazon\SSM\InstanceData\registration")
Get-Service -Name "AmazonSSMAgent"
Fleet ManagerのコンソールでWorkSpacesが管理対象として登録されたことを確認します。
Patch Managerの設定
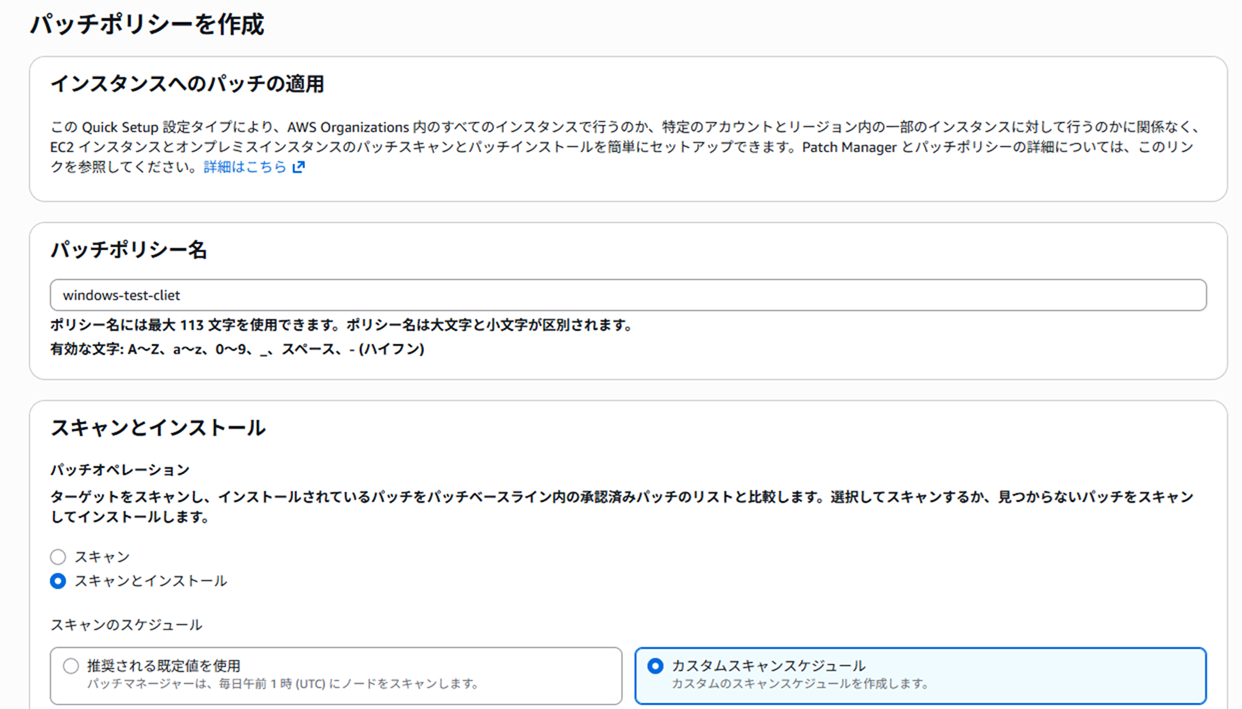
ここからは通常のPatch Manager設定と同様です。パッチポリシーを構成し、スケジュール設定、パッチベースラインの指定、その他必要な設定を行います。
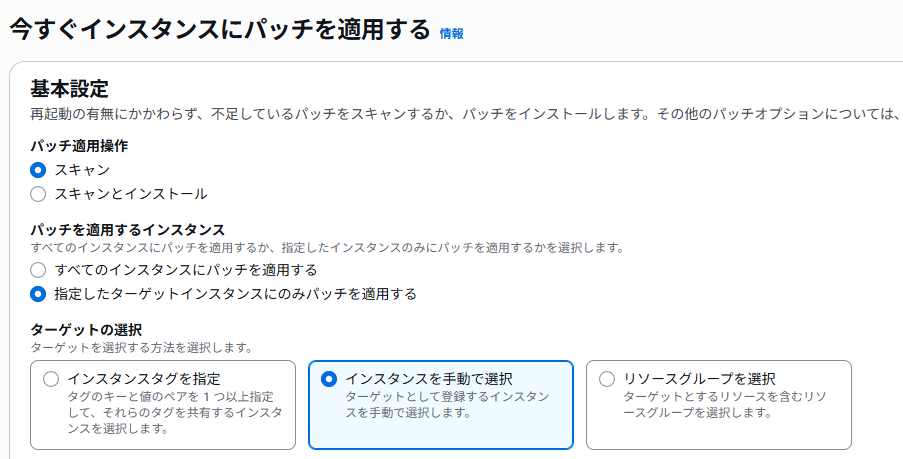
設定完了後、「今すぐパッチを適用する」をクリックしてテストを行います。「スキャン」を選択後、対象WorkSpacesを手動で選択します。
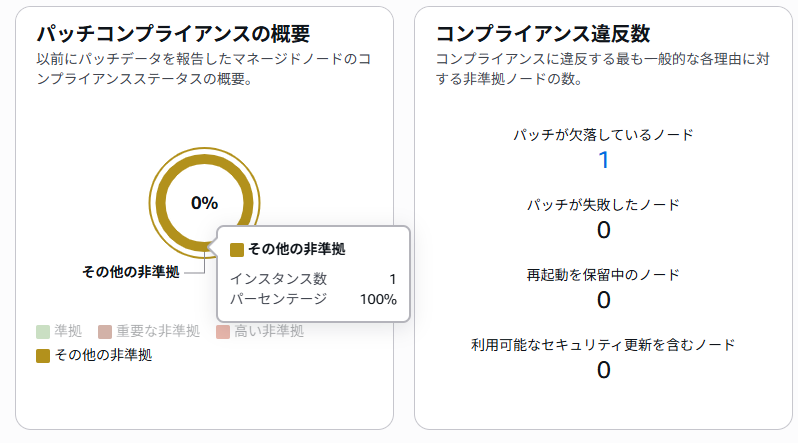
スキャンが完了し、非準拠状態のノードが1つ増加していることを確認します。
まとめ
ハイブリッドアクティベーションを使用することで、WorkSpacesをSystems Managerの管理対象にできます。Systems Managerの管理対象にすることでPatch Managerを利用してWorkSpacesのパッチ管理を一元化できます。