ESP32にてMicroPythonを使ってLCD制御
組み込みソフトウェア開発にMicroPythonを用いるのはトレンディの一つ。Pythonをまともに使ったことがなかったので、LCD制御を題材にトライ。
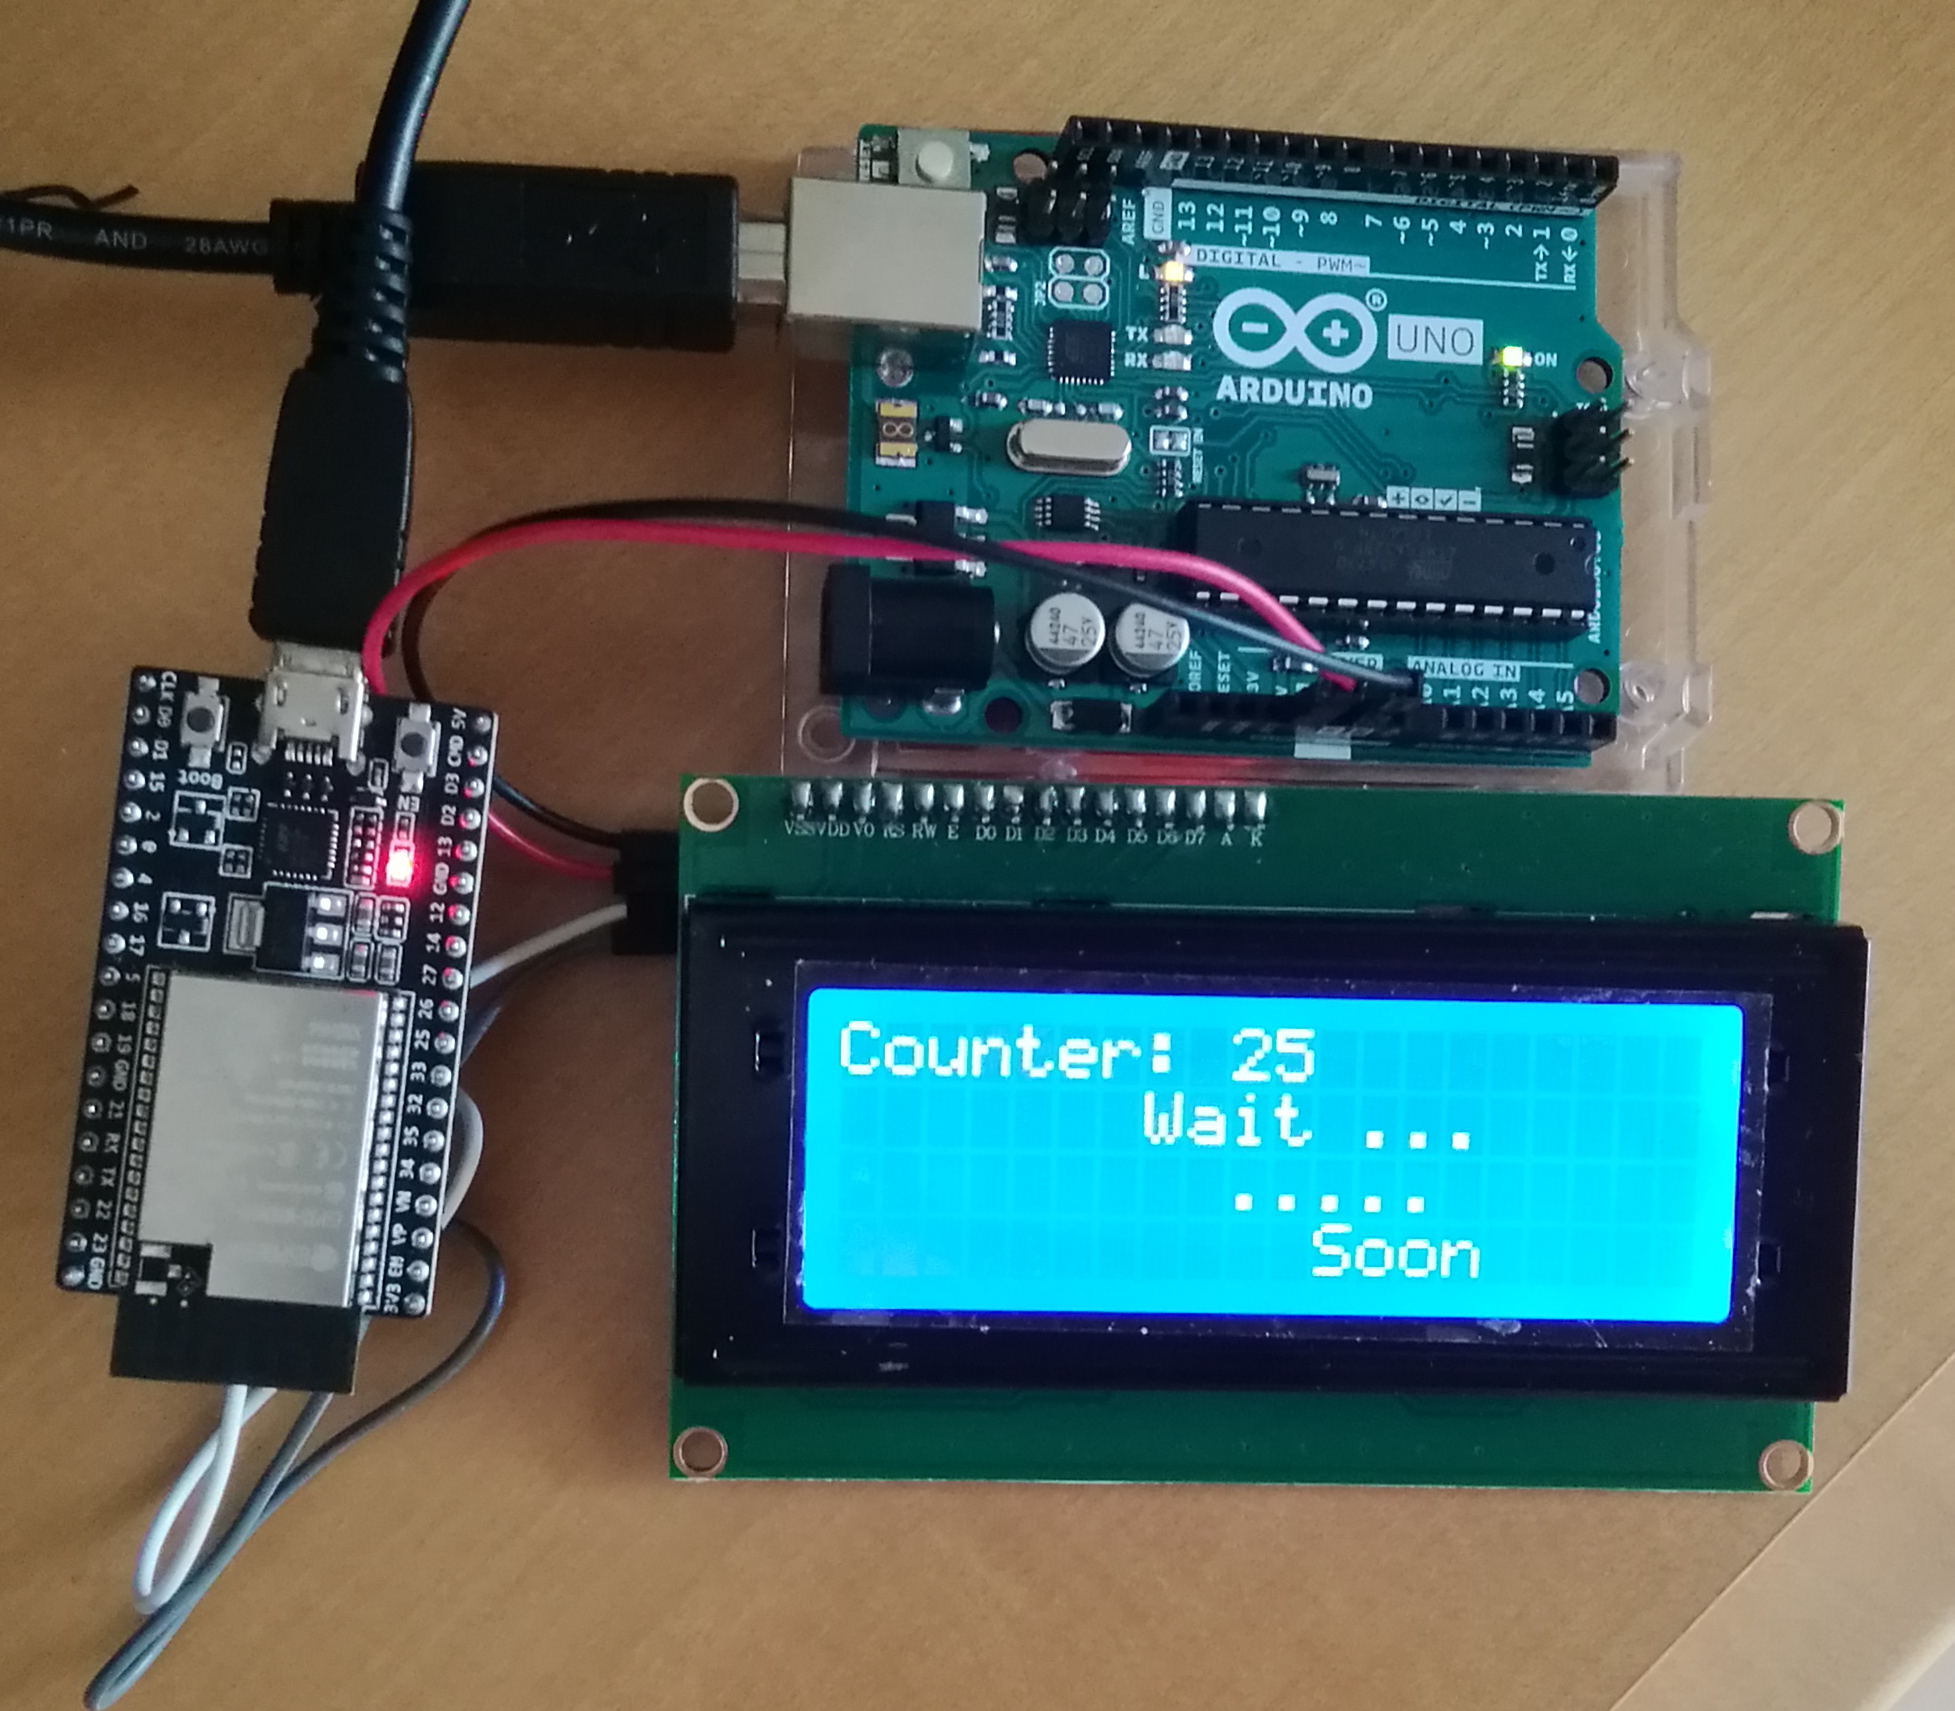
使ったもの
- 秋月電子などで売られているESP32 DevKitボード
- IO Expander PCF8574を搭載した、20x4 LCD。例えば、これ。
- 5Vを供給するためだけのArduino(使用するLCDが5V駆動のため)
ESP32でのMicroPython開発環境
環境構築には、こちらのサイトなどを参照した。また、ESP32用のMicroPython Firmwareは、本家サイトにある次のもの
まず、各種ツールをインストールする。
Python
WindowsにてPythonをインストール。詳細略。
コマンド系ツール
MicroPython FirmwareをESP32に書き込むためのesptoolをpipにてインストール。
> pip install esptool
コマンドラインから、プログラムを操作するampyをインストール。(オプション)
> pip install adafruit-ampy
uPyCraft IDE
GUI上で、FirmwareやProgramの書き込みを行うアプリケーション。今回はこれを多用。ここからダウンロードできる。
uPyCraft操作
ESP32用MicroPython Firmwareの書き込み
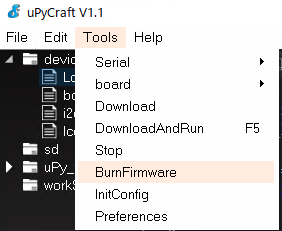
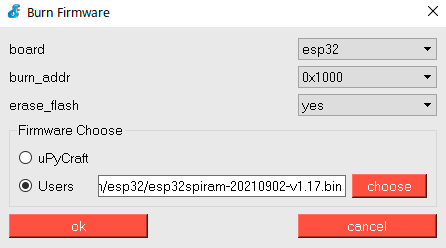
「BurnFimrware」を選ぶと、
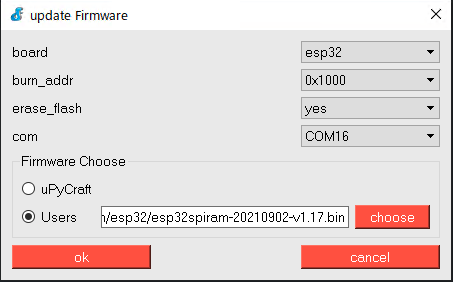
または
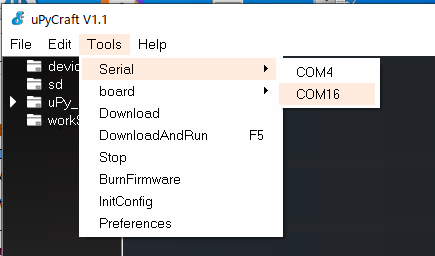
が表示されるはず。ここでは、すでに”choose”をクリックして書き込むFirmwareを選択済みとなっている。burn_addrは0x1000、COMポートを確認して、OKで書き込み。すると、
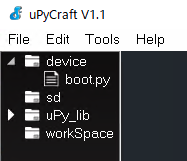
となる(boot.pyが見える)。また、uPyCraftを再起動したときは、適切なCOMポートを選択する。
LCD制御
IO Expander PCF8574を搭載したLCDをMicroPythonから制御する。このサイトにあるコードをほぼそのまま利用。
LCD APIおよびI2Cライブラリのインストール
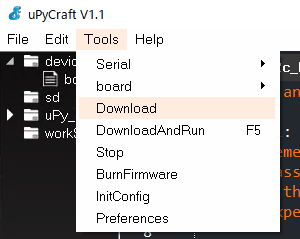
上記サイトにある「lcd_api.py」および「i2c_lcd.py」をそのままCopy&Pasteしてファイル化する。これらをuPyCraftでOpenし、ESP32に書き込む(Downloadをクリック)。
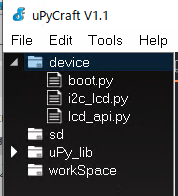
両ファイルのDownload後には次のようになる。
サンプルコード
次に先ほどのサイトのを参考にコードを作成。
from time import sleep_ms, ticks_ms
from machine import I2C, Pin
from i2c_lcd import I2cLcd

I2C_ADDR = 0x27
COLUMN = 20
LINE = 4

i2c = I2C(scl=Pin(22), sda=Pin(21), freq=400000)
lcd = I2cLcd(i2c, I2C_ADDR, LINE, COLUMN)

lcd.clear()
lcd.putstr('LCD TEST')
sleep_ms(3000)
count = 0

while True:
    print('Counter: {}'.format(count))
    lcd.clear() # Clears the LCD,
                # Sets the cursor position to 0,0
    lcd.putstr('Counter: {}' .format(count))
    lcd.move_to(count%10+2, 1)
    lcd.putstr('Wait ...')
    lcd.move_to(count%10+4, 2)
    lcd.putstr('.....')
    lcd.move_to(count%10+6, 3)
    lcd.putstr('Soon')
    count = count + 1
    sleep_ms(1000)
ESP32のI2Cのピン(SCL:22, SDA:21)を設定し、LCD(PCF8574)のI2Cアドレスはデフォルトの0x27、20列および4行を設定する。このファイルをuPyCraftでOpenし、DownloadAndRunすれば実行できる。

実行
備考
LCD制御API
先ほどのサイトの情報から引用。
# 1. To print a string to the LCD:
#    lcd.putstr('Hello world')
# 2. To clear the display:
#	 lcd.clear()
# 3. To control the cursor position:
# 	 lcd.move_to(2, 1)
# 4. To show the cursor:
#  	 lcd.show_cursor()
# 5. To hide the cursor:
#	 lcd.hide_cursor()
# 6. To set the cursor to blink:
#	 lcd.blink_cursor_on()
# 7. To stop the cursor on blinking:
#	 lcd.blink_cursor_off()
# 8. To hide the currently displayed character:
#	 lcd.display_off()
# 9. To show the currently hidden character:
#	 lcd.display_on()
# 10. To turn off the backlight:
#	 lcd.backlight_off()
# 11. To turn ON the backlight:
#	 lcd.backlight_on()
# 12. To print a single character:
#	 lcd.putchar('x')
# 13. To print a custom character:
#	 happy_face = bytearray([0x00, 0x0A, 0x00, 0x04, 0x00, 0x11, 0x0E, 0x00])
#	 lcd.custom_char(0, happy_face)
#	 lcd.putchar(chr(0))
uPyCraft
実行中プログラムの強制Stop

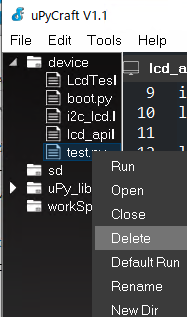
ファイルの操作
アプリケーションを右クリックすると各種操作が可能。下記はプログラム削除の選択。
起動(電源ON)時プログラムの選択
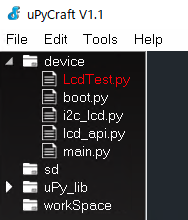
プログラムを選んで右クリックし、
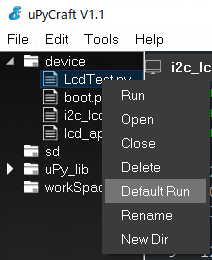
「Default Run」を選択する。すると、そのProgramが赤字表示となり、電源ON時に起動される「main.py」が作成される。