Luckfox Mini Pico
ある講演会にて、無料で配られていた、Luckfox Mini Pico(たぶんB)を試したときの記録。本家サイトは下記。
ARM Cortex-A7を搭載し(Rockchip RV1103)、2000円以下(どこかの国の有名サイトでは200円以下(ある時点))でLinuxを動作させることができるもの。
イメージ
本家サイトからイメージを入手(またはBuild)
最初にMisc
- 小生のWindows11では、wiki記載のDriver(2. Install Driver)がインストールできず、Windows10にインストール(&ツール実行)
- DownloadイメージもBuildしたイメージも、小生の環境では、SPI NAND Flashへの書き込みできず(詳細不明)、以降、Micro SDへイメージを書き込んで実施。
Buildroot
Ubuntuバイナリイメージも存在するが、ここでは、Buildroot利用。Micro SDへのイメージの書き込みは、「4.2 Flashing Image to TF Card」参照。
検証
気がついた事項を適当にピックアップし、トライした事項を記載。
標準でUSBがネットワークI/F
Downloadしたイメージ、Buildしたイメージ、双方とも、ボードのUSB Type-CがシリアルI/Fではなく、ネットワークI/Fとなっている。シリアル経由でのアクセスのため、USBシリアル変換ボードを用いることとした。下記がその様子で、左がLuckfox Mini Picoボード、右が変換ボードである。
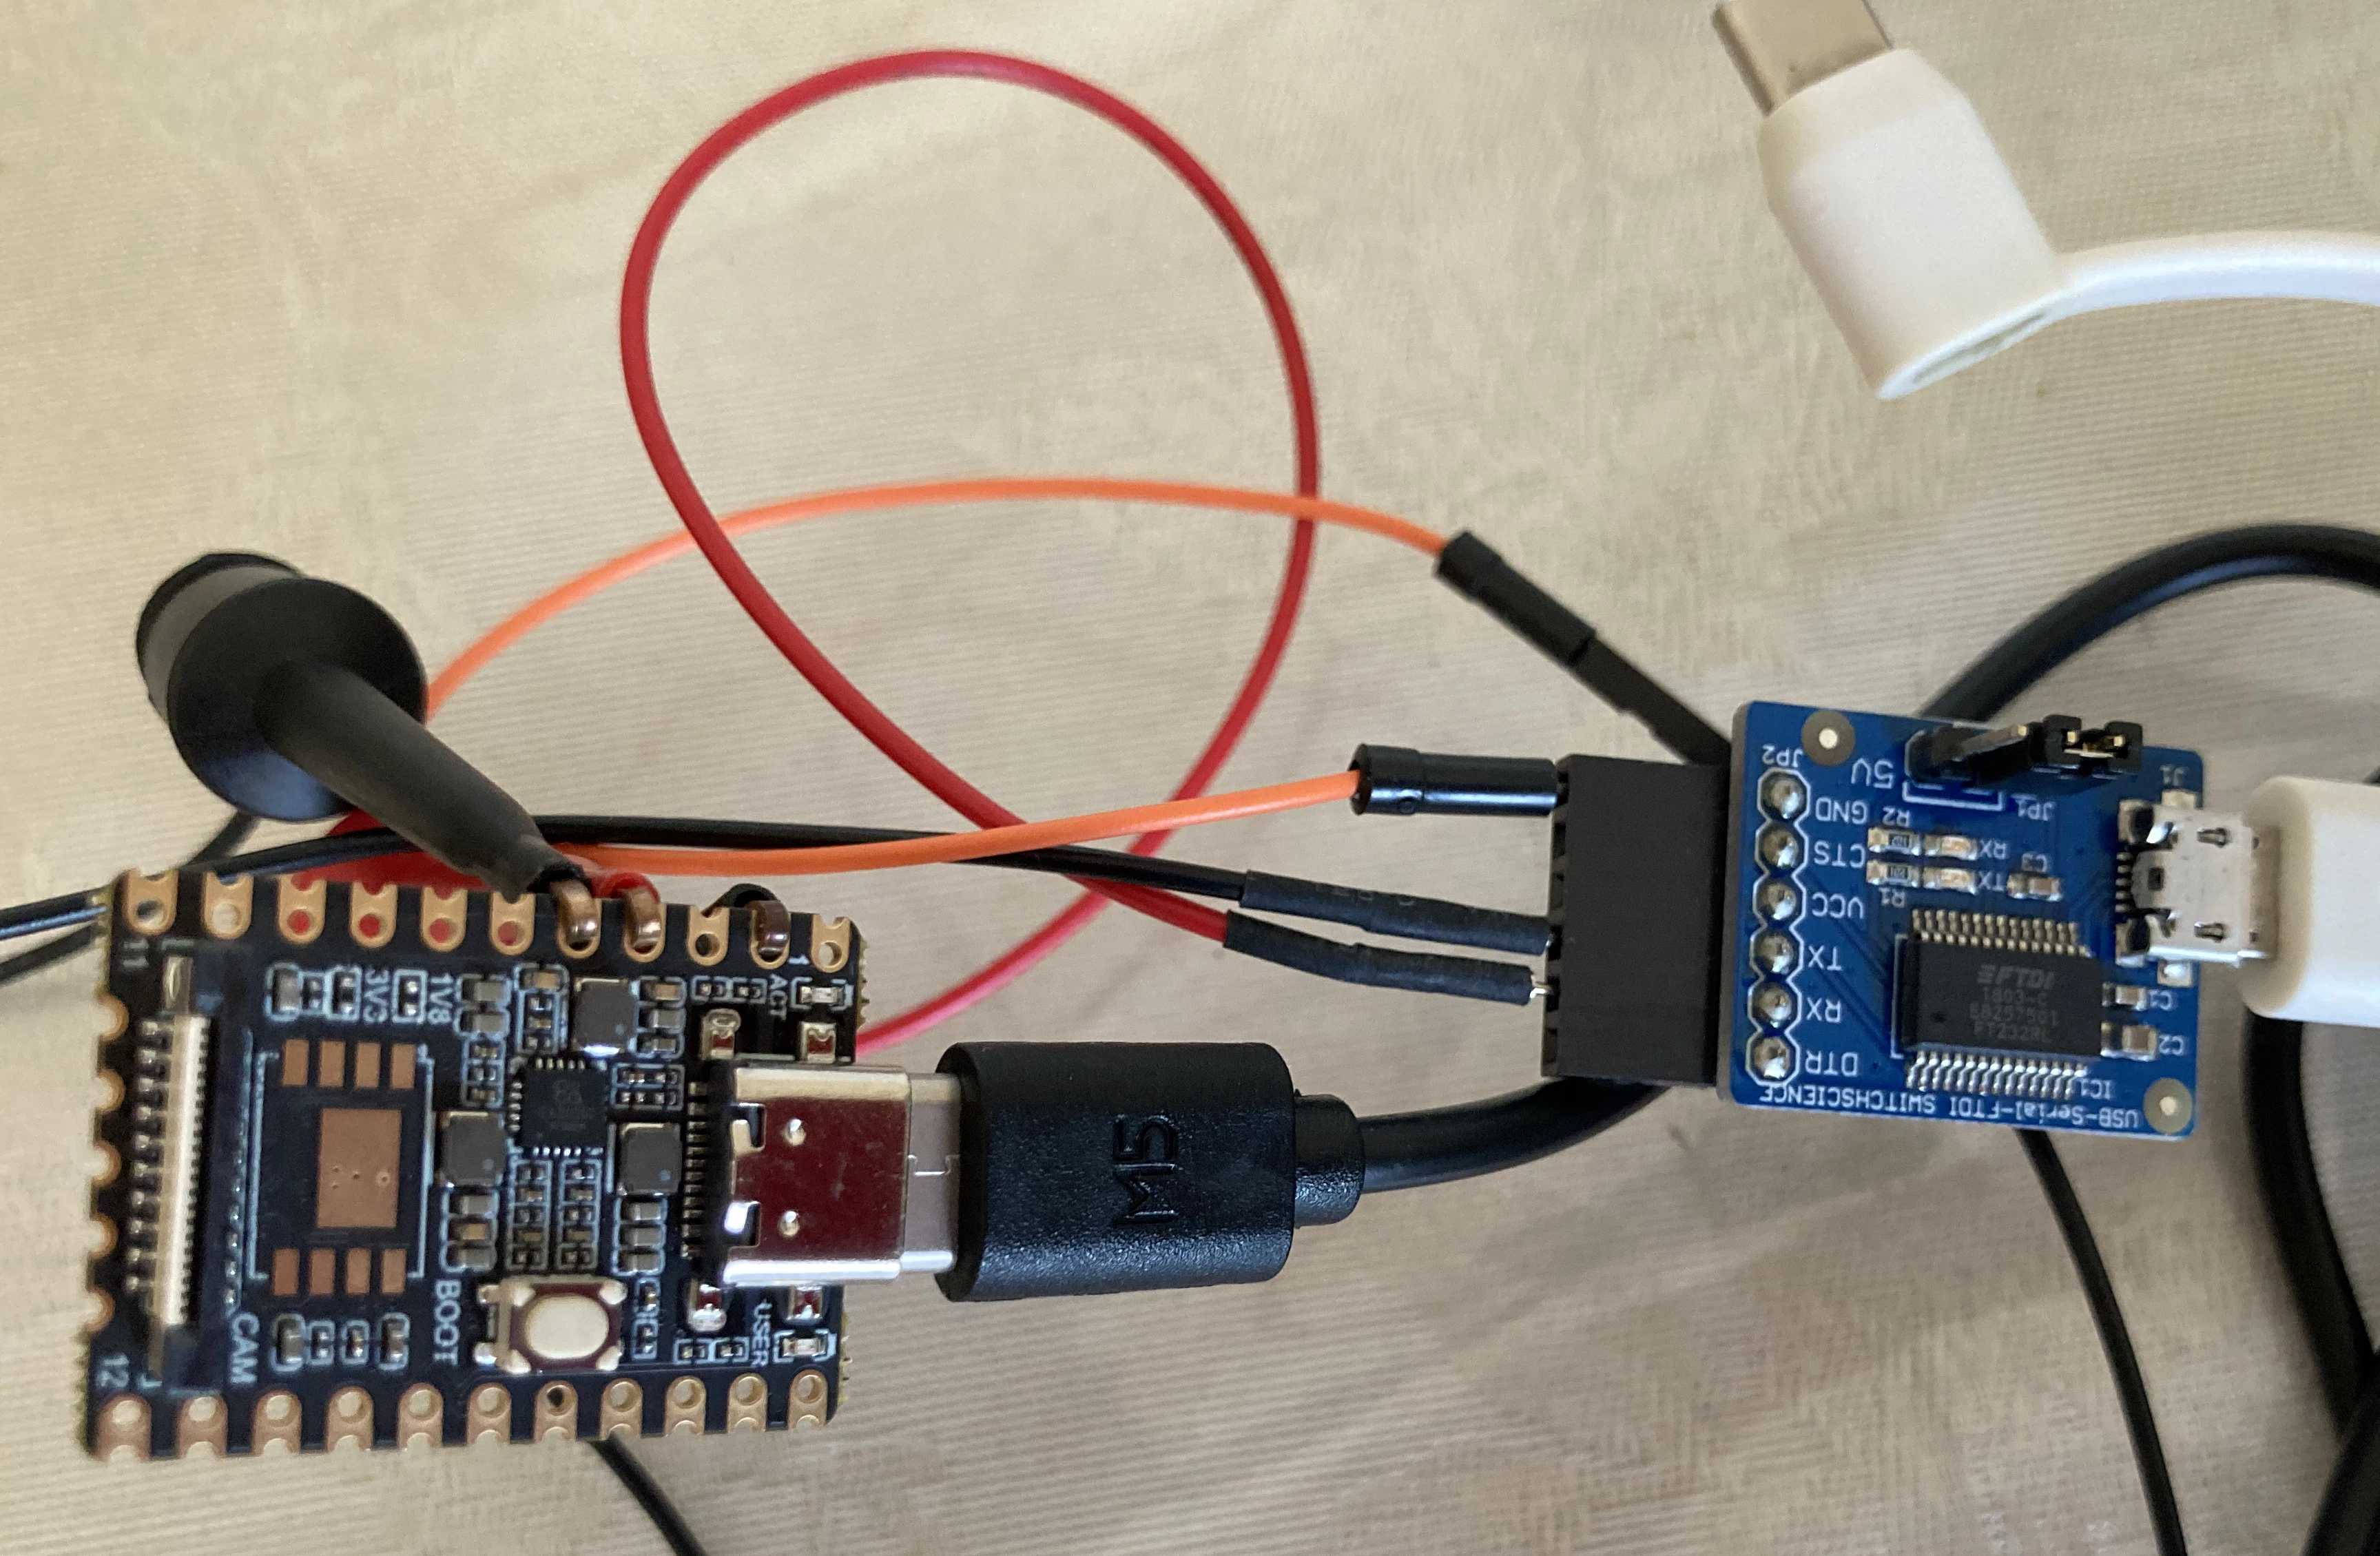
シリアル接続方法(ピン情報など)は下記を参照されたし。
Serial Console
起動後のシリアルコンソールの状況は下記となる。
Starting kernel ...

[    0.000000] Booting Linux on physical CPU 0x0
[    0.000000] Linux version 5.10.160 (undeux3@aspero) (arm-rockchip830-linux-uclibcgnueabihf-gcc (crosstool-NG 1.24.0) 8.3.0, GNU ld (crosstool-NG 1.24.0) 2.32) #1 Sun Dec 7 13:13:56 JST 2025
[    0.000000] CPU: ARMv7 Processor [410fc075] revision 5 (ARMv7), cr=50c53c7d
[    0.000000] CPU: div instructions available: patching division code
[    0.000000] CPU: PIPT / VIPT nonaliasing data cache, VIPT aliasing instruction cache
[    0.000000] OF: fdt: Machine model: Luckfox Pico Mini
[    0.000000] Memory policy: Data cache writeback
[    0.000000] cma: Reserved 24576 KiB at 0x02800000

略

[    4.547089] usb0: HOST MAC da:9d:4c:QQ:YY:79
[    4.547126] usb0: MAC 1a:c0:ae:YY:QQ:16

略

current_ip = 172.32.0.70
TARGET_IP = 172.32.0.93
luckfox : set usb0 ip
172.32.0.93
usb0 config success

Welcome to luckfox pico
luckfox login:
固定IPアドレス”172.32.0.93”が割り当てられている。ID:root、Password:luckfoxでログインする。
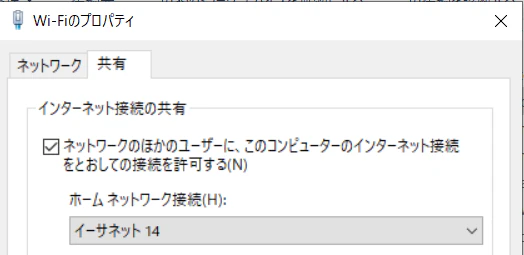
インターネット接続(DHCPによるIPアドレス取得)
インターネット接続するためには、本ボードを接続するPCにて、インターネット共有を行い、PCからDHCPによりIPアドレスを取得するのがベター。ここでは、PCのWiFiを共有。PC側の状況は下記。
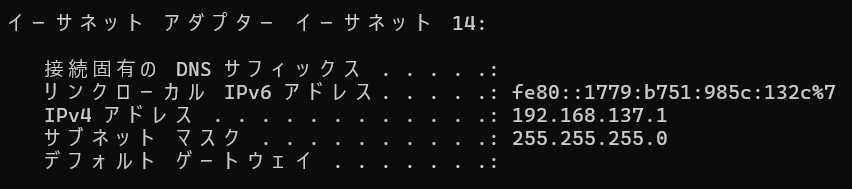
次に、ボードにてDHCPクライアントを起動させる。参考までに、起動前状況も記載。
[root@luckfox root]# ip a
1: lo: <LOOPBACK,UP,LOWER_UP> mtu 65536 qdisc noqueue qlen 1000
    link/loopback 00:00:00:00:00:00 brd 00:00:00:00:00:00
    inet 127.0.0.1/8 scope host lo
       valid_lft forever preferred_lft forever
2: usb0: <BROADCAST,MULTICAST,UP,LOWER_UP> mtu 1500 qdisc pfifo_fast qlen 1000
    link/ether 1a:c0:ae:bf:74:16 brd ff:ff:ff:ff:ff:ff
    inet 172.32.0.93/16 brd 172.32.255.255 scope global usb0
       valid_lft forever preferred_lft forever
[root@luckfox root]#
[root@luckfox root]# udhcpc -i useb0
udhcpc: started, v1.36.1
udhcpc: broadcasting discover
udhcpc: broadcasting select for 192.168.137.99, server 192.168.137.1
udhcpc: lease of 192.168.137.99 obtained from 192.168.137.1, lease time 604800
deleting routers
adding dns 192.168.137.1
PCで設定されたネットワーク情報を取得している。この状態で外部へping実行。
[root@luckfox root]# historyping google.com -c 2
PING google.com (142.250.194.78): 56 data bytes
64 bytes from 142.250.194.78: seq=0 ttl=117 time=6.189 ms
64 bytes from 142.250.194.78: seq=1 ttl=117 time=6.029 ms

--- google.com ping statistics ---
2 packets transmitted, 2 packets received, 0% packet loss
round-trip min/avg/max = 6.029/6.109/6.189 ms
OK。
Partition拡大
デフォルトでは、ルートパーティションとして6GBが割り当てられている。増やせないか、調べると下記が見つかる。
ソースコードを持ってきて、Buildすることとした。
$ git clone https://gitee.com/LuckfoxTECH/luckfox-pico.git
下記ファイルを下記のように修正(16GBのMicro SDだったので12GBへ拡張;最終行の最後のところ)。
# config partition in environment
# RK_PARTITION_CMD_IN_ENV format:
#     <partdef>[,<partdef>]
#       <partdef> := <size>[@<offset>](part-name)
# Note:
#   If the first partition offset is not 0x0, it must be added. Otherwise, it needn't adding.
export RK_PARTITION_CMD_IN_ENV="32K(env),512K@32K(idblock),256K(uboot),32M(boot),512M(oem),256M(userdata),12G(rootfs)"
Build後、Micro SDへ書き込む。起動後、ルートパーティションが拡張されたことを確認する。
[root@luckfox sbin]# df -h
Filesystem                Size      Used Available Use% Mounted on
/dev/root                11.7G     74.9M     11.3G   1% /
devtmpfs                 16.3M         0     16.3M   0% /dev
tmpfs                    16.4M         0     16.4M   0% /dev/shm
tmpfs                    16.4M    148.0K     16.3M   1% /tmp
tmpfs                    16.4M    204.0K     16.2M   1% /run
/dev/mmcblk1p7           11.7G     74.9M     11.3G   1% /mnt/sdcard
/dev/block/by-name/userdata
                        237.9M     16.0K    228.6M   0% /userdata
/dev/block/by-name/oem
                        487.6M     18.7M    453.0M   4% /oem
OK。
I2C
I2Cデバイスを接続し、Raspbianなどと同様にi2cdetectコマンドで動作を確認しようとしたが、全く表示されず。まずは、対策前の状況。
[root@luckfox root]# i2cdetect -l
i2c-4	i2c       	rk3x-i2c                        	I2C adapter
ピン配置を確認すると、I2C3という表示となっていた。
ChatGPTなどに問い合わせると、i2c-4は内蔵カメラ用で、ピン接続でI2C3(i2c-3)を利用するには、Buildのし直しが必要とのこと。
/**********I2C**********/
/* I2C3_M1 */
&i2c3 {
        status = "okay";
        clock-frequency = <100000>;
};
statusを"okay"に変更して("disabled"が元の値)、Buildを実施し、Micro SDへ書き込む。これだけでは不十分で、下記コマンドにより、i2c3の有効化が必要。
[root@luckfox root]# luckfox-config
”Advanced Options”およびI2C3を選択。
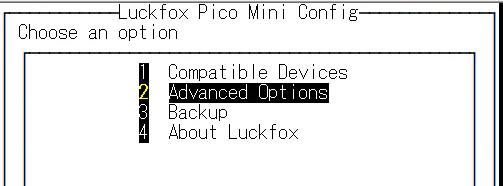


有効化(enable)し、速度(100000bps)を設定。
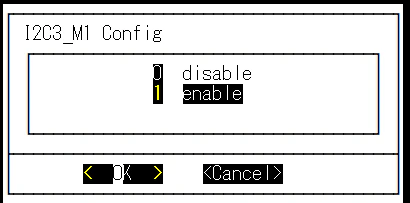
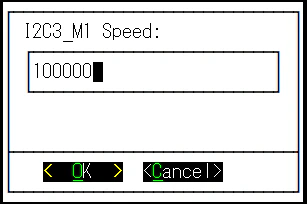
有効化されると、”*”マークが先頭に付加される。

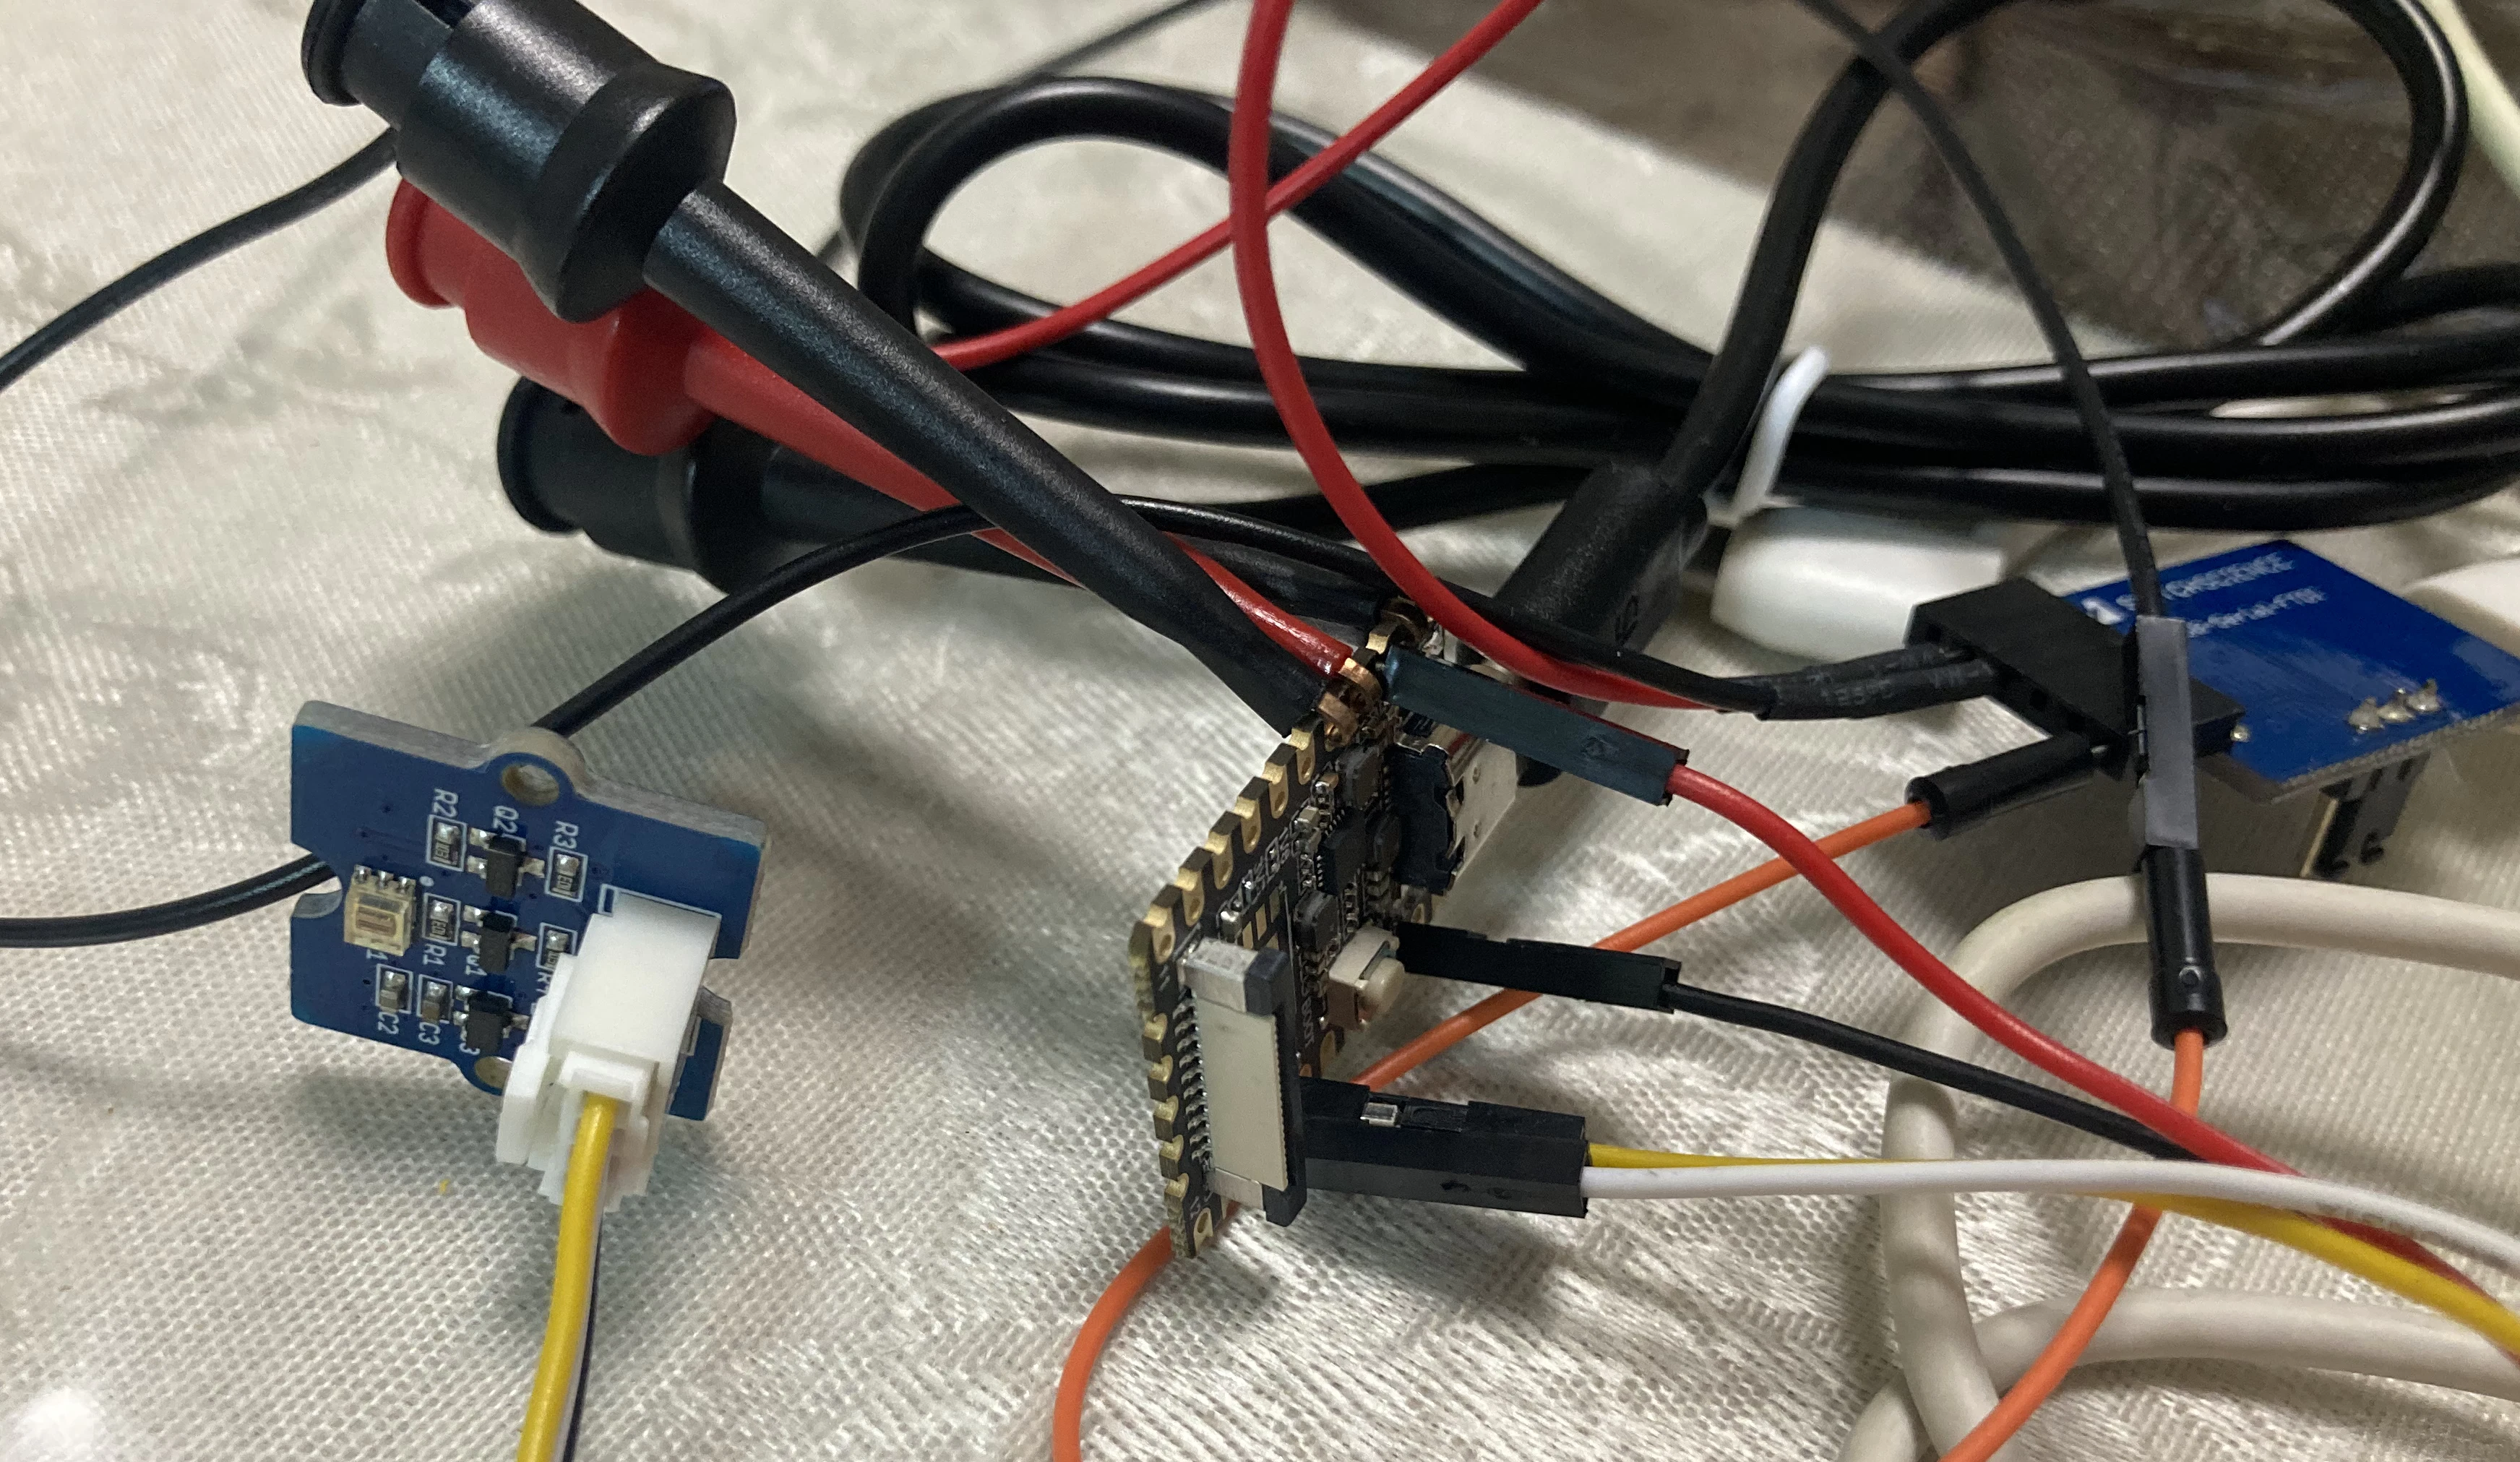
この後、正常に認識される。下記にて、中央が本ボード、左がI2Cデバイスである。
[root@luckfox root]# i2cdetect -l
i2c-3	i2c       	rk3x-i2c                        	I2C adapter
i2c-4	i2c       	rk3x-i2c                        	I2C adapter
[root@luckfox root]# i2cdetect -a -y 3
     0  1  2  3  4  5  6  7  8  9  a  b  c  d  e  f
00: -- -- -- -- -- -- -- -- -- -- -- -- -- -- -- --
10: -- -- -- -- -- -- -- -- -- -- -- -- -- -- -- --
20: -- -- -- -- -- -- -- -- -- 29 -- -- -- -- -- --
30: -- -- -- -- -- -- -- -- -- -- -- -- -- -- -- --
40: -- -- -- -- -- -- -- -- -- -- -- -- -- -- -- --
50: -- -- -- -- -- -- -- -- -- -- -- -- -- -- -- --
60: -- -- -- -- -- -- -- -- -- -- -- -- -- -- -- --
70: -- -- -- -- -- -- -- -- -- -- -- -- -- -- -- --
成功。
GPIO
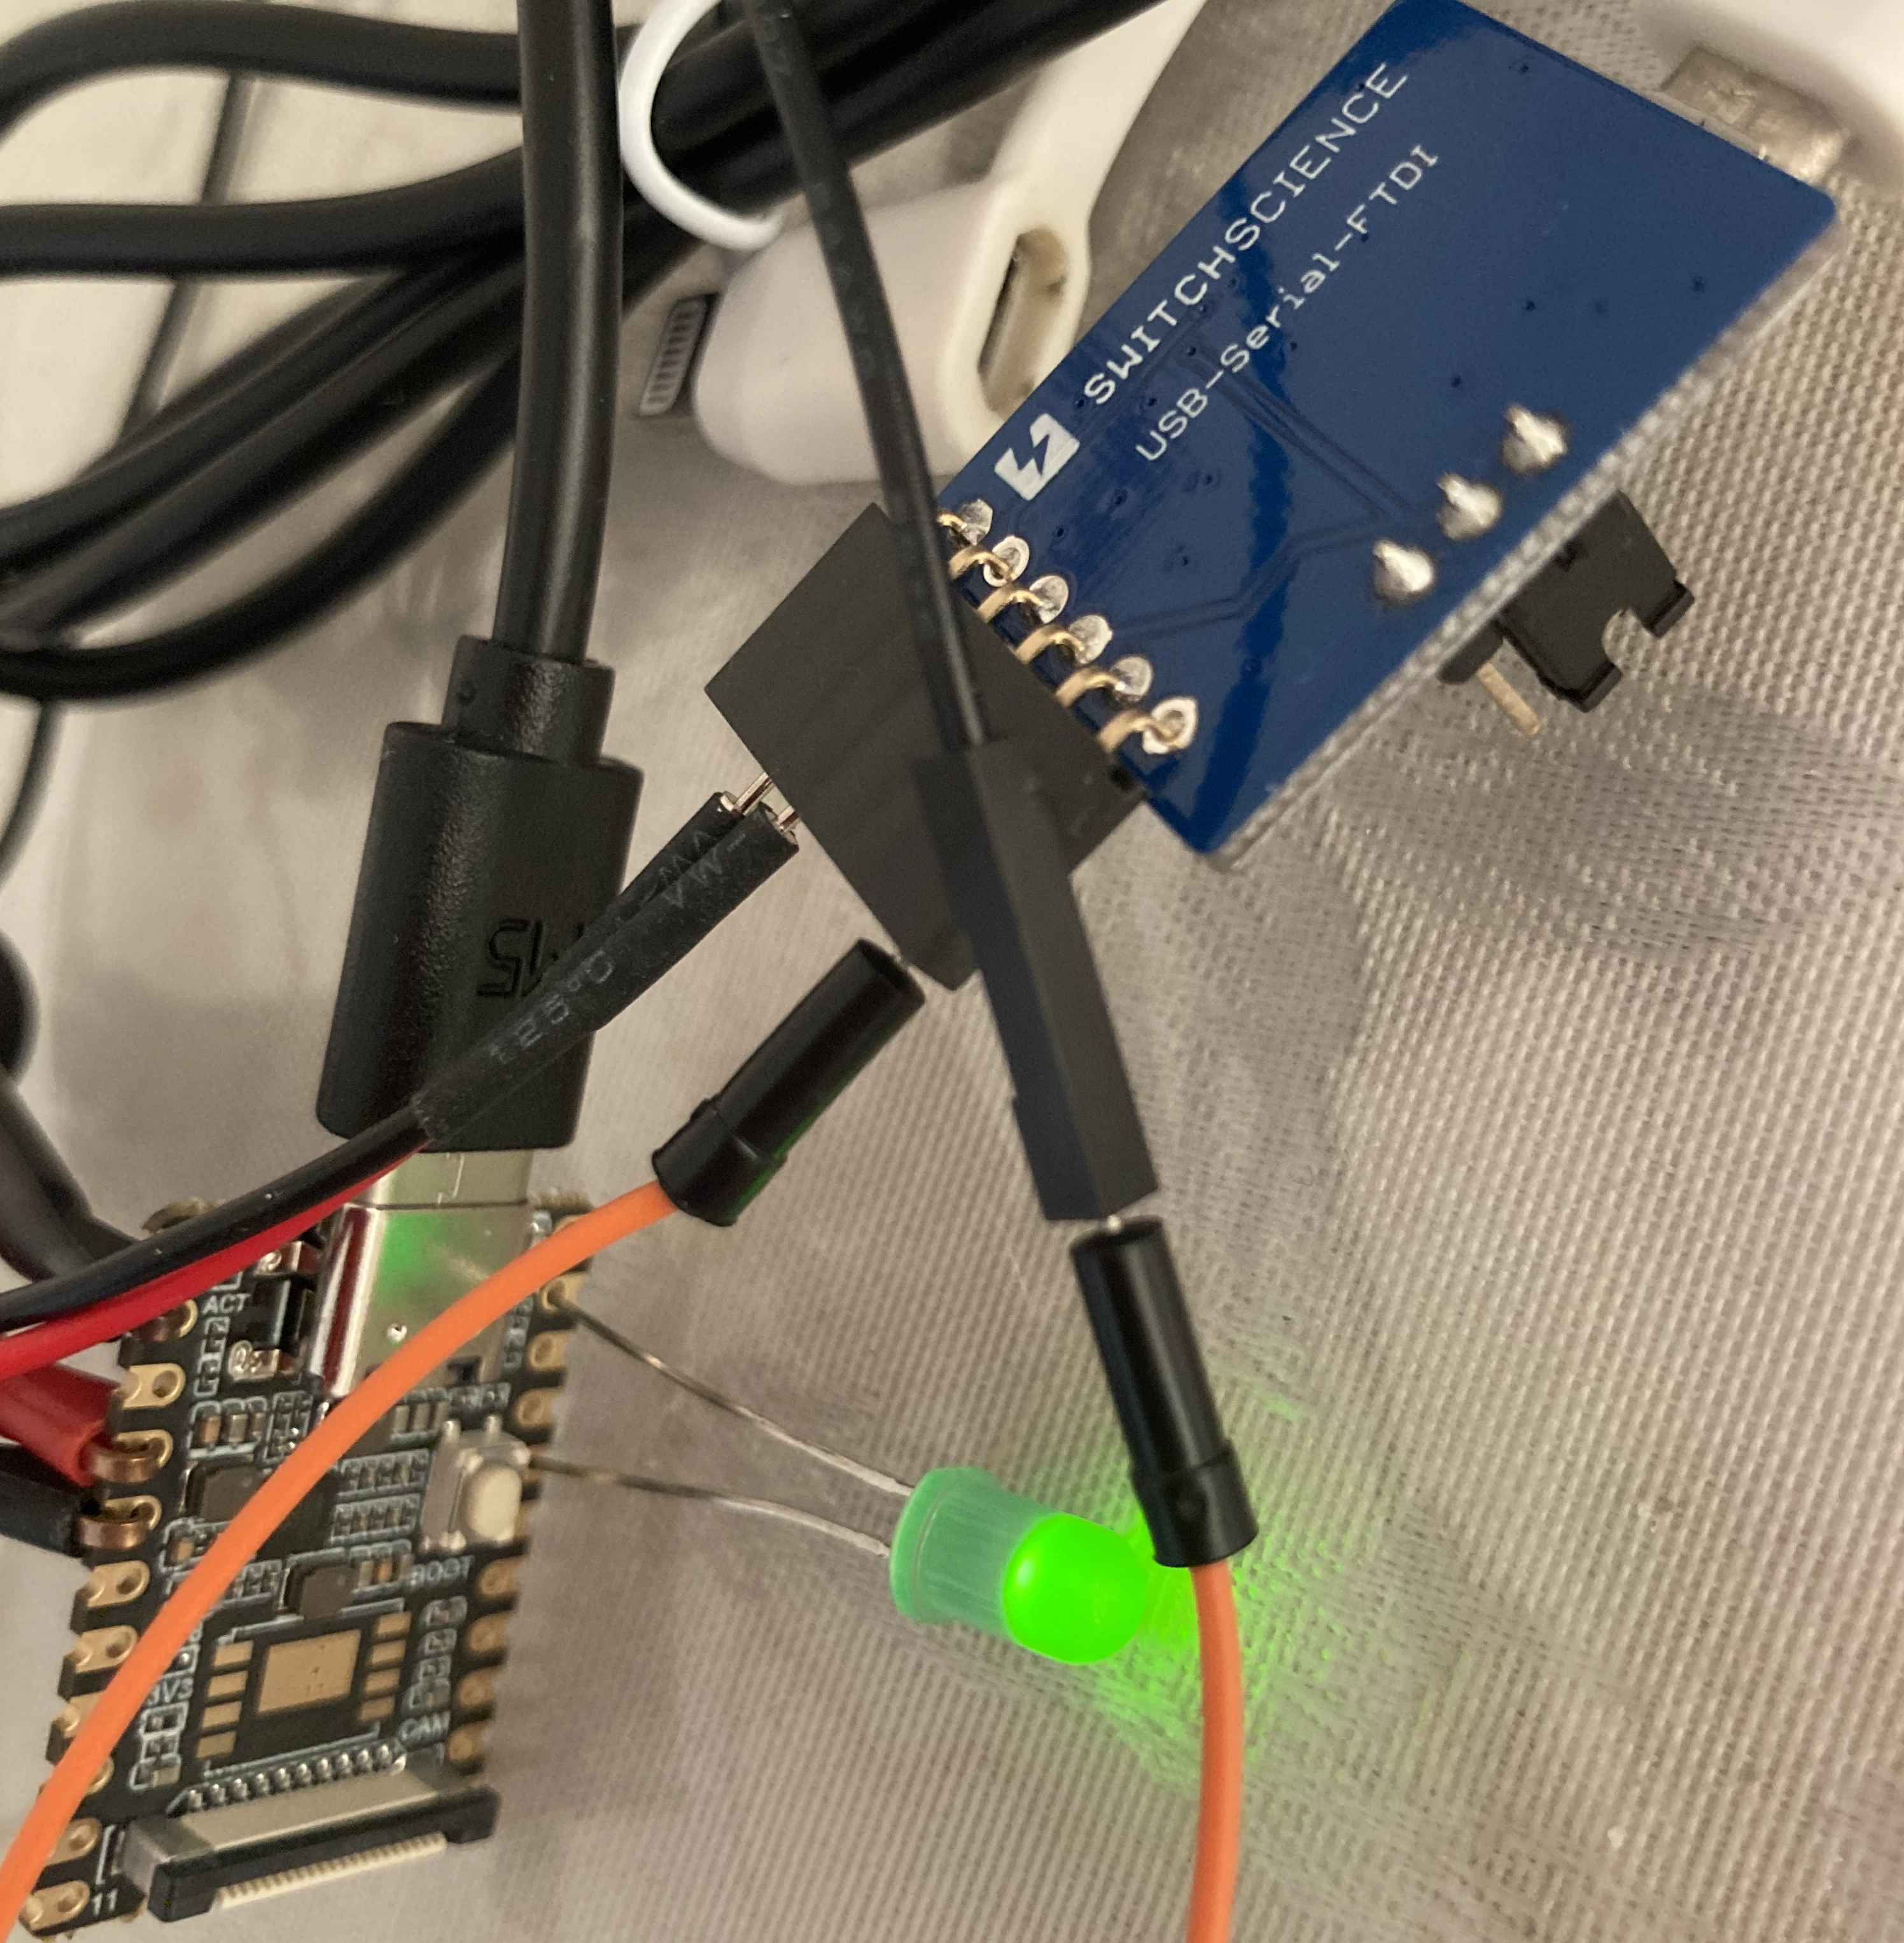
こちらの確認はRaspbianと同様。先ほどと同様、ピン配置や番号を確認。ここでは、LEDをGPIO4に接続。
[root@luckfox ~]# echo 4 > /sys/class/gpio/export
出力設定。
[root@luckfox ~]# echo out > /sys/class/gpio/gpio4/direction
ON。
[root@luckfox ~]# echo 1 > /sys/class/gpio/gpio4/value
OFF。
[root@luckfox ~]# echo 0 > /sys/class/gpio/gpio4/value
OK。
終わりに
安価にLinuxを動かせる、、、が最大の特徴。何かセンサー類と組み合わせるのであれば、それなりに役立ちそう。