MacからGPIO制御してみる
RaspberryPiやArduinoからLチカする記事はよく見かけますが、MacやPCからLチカするものはあまり見たことがなかったのでここに記録する。
USB to GPIO基板
とは言え、MacやPCはGPIOピンを持っていないので、USBをGPIOに変換するUSBシリアルI2C変換基板を用いた。I2CだけではなくGPIOへの変換も可能。

SC18IM700詳細
この基板にはSC18IM700というICが搭載されている。データシートを解読する。
Macから送るコマンド

今回は主にレジスター設定(0x57)とGPIO Read(0x49)を用いた。
レジスター設定(0x57)
レジスター(一部)
GPIO Read(0x49)
GPIO6を使用

Input、Outputの両方に使える"GPIO6"を利用した。
CoolTerm
Macでのシリアル通信制御ソフトはCoolTermを利用。
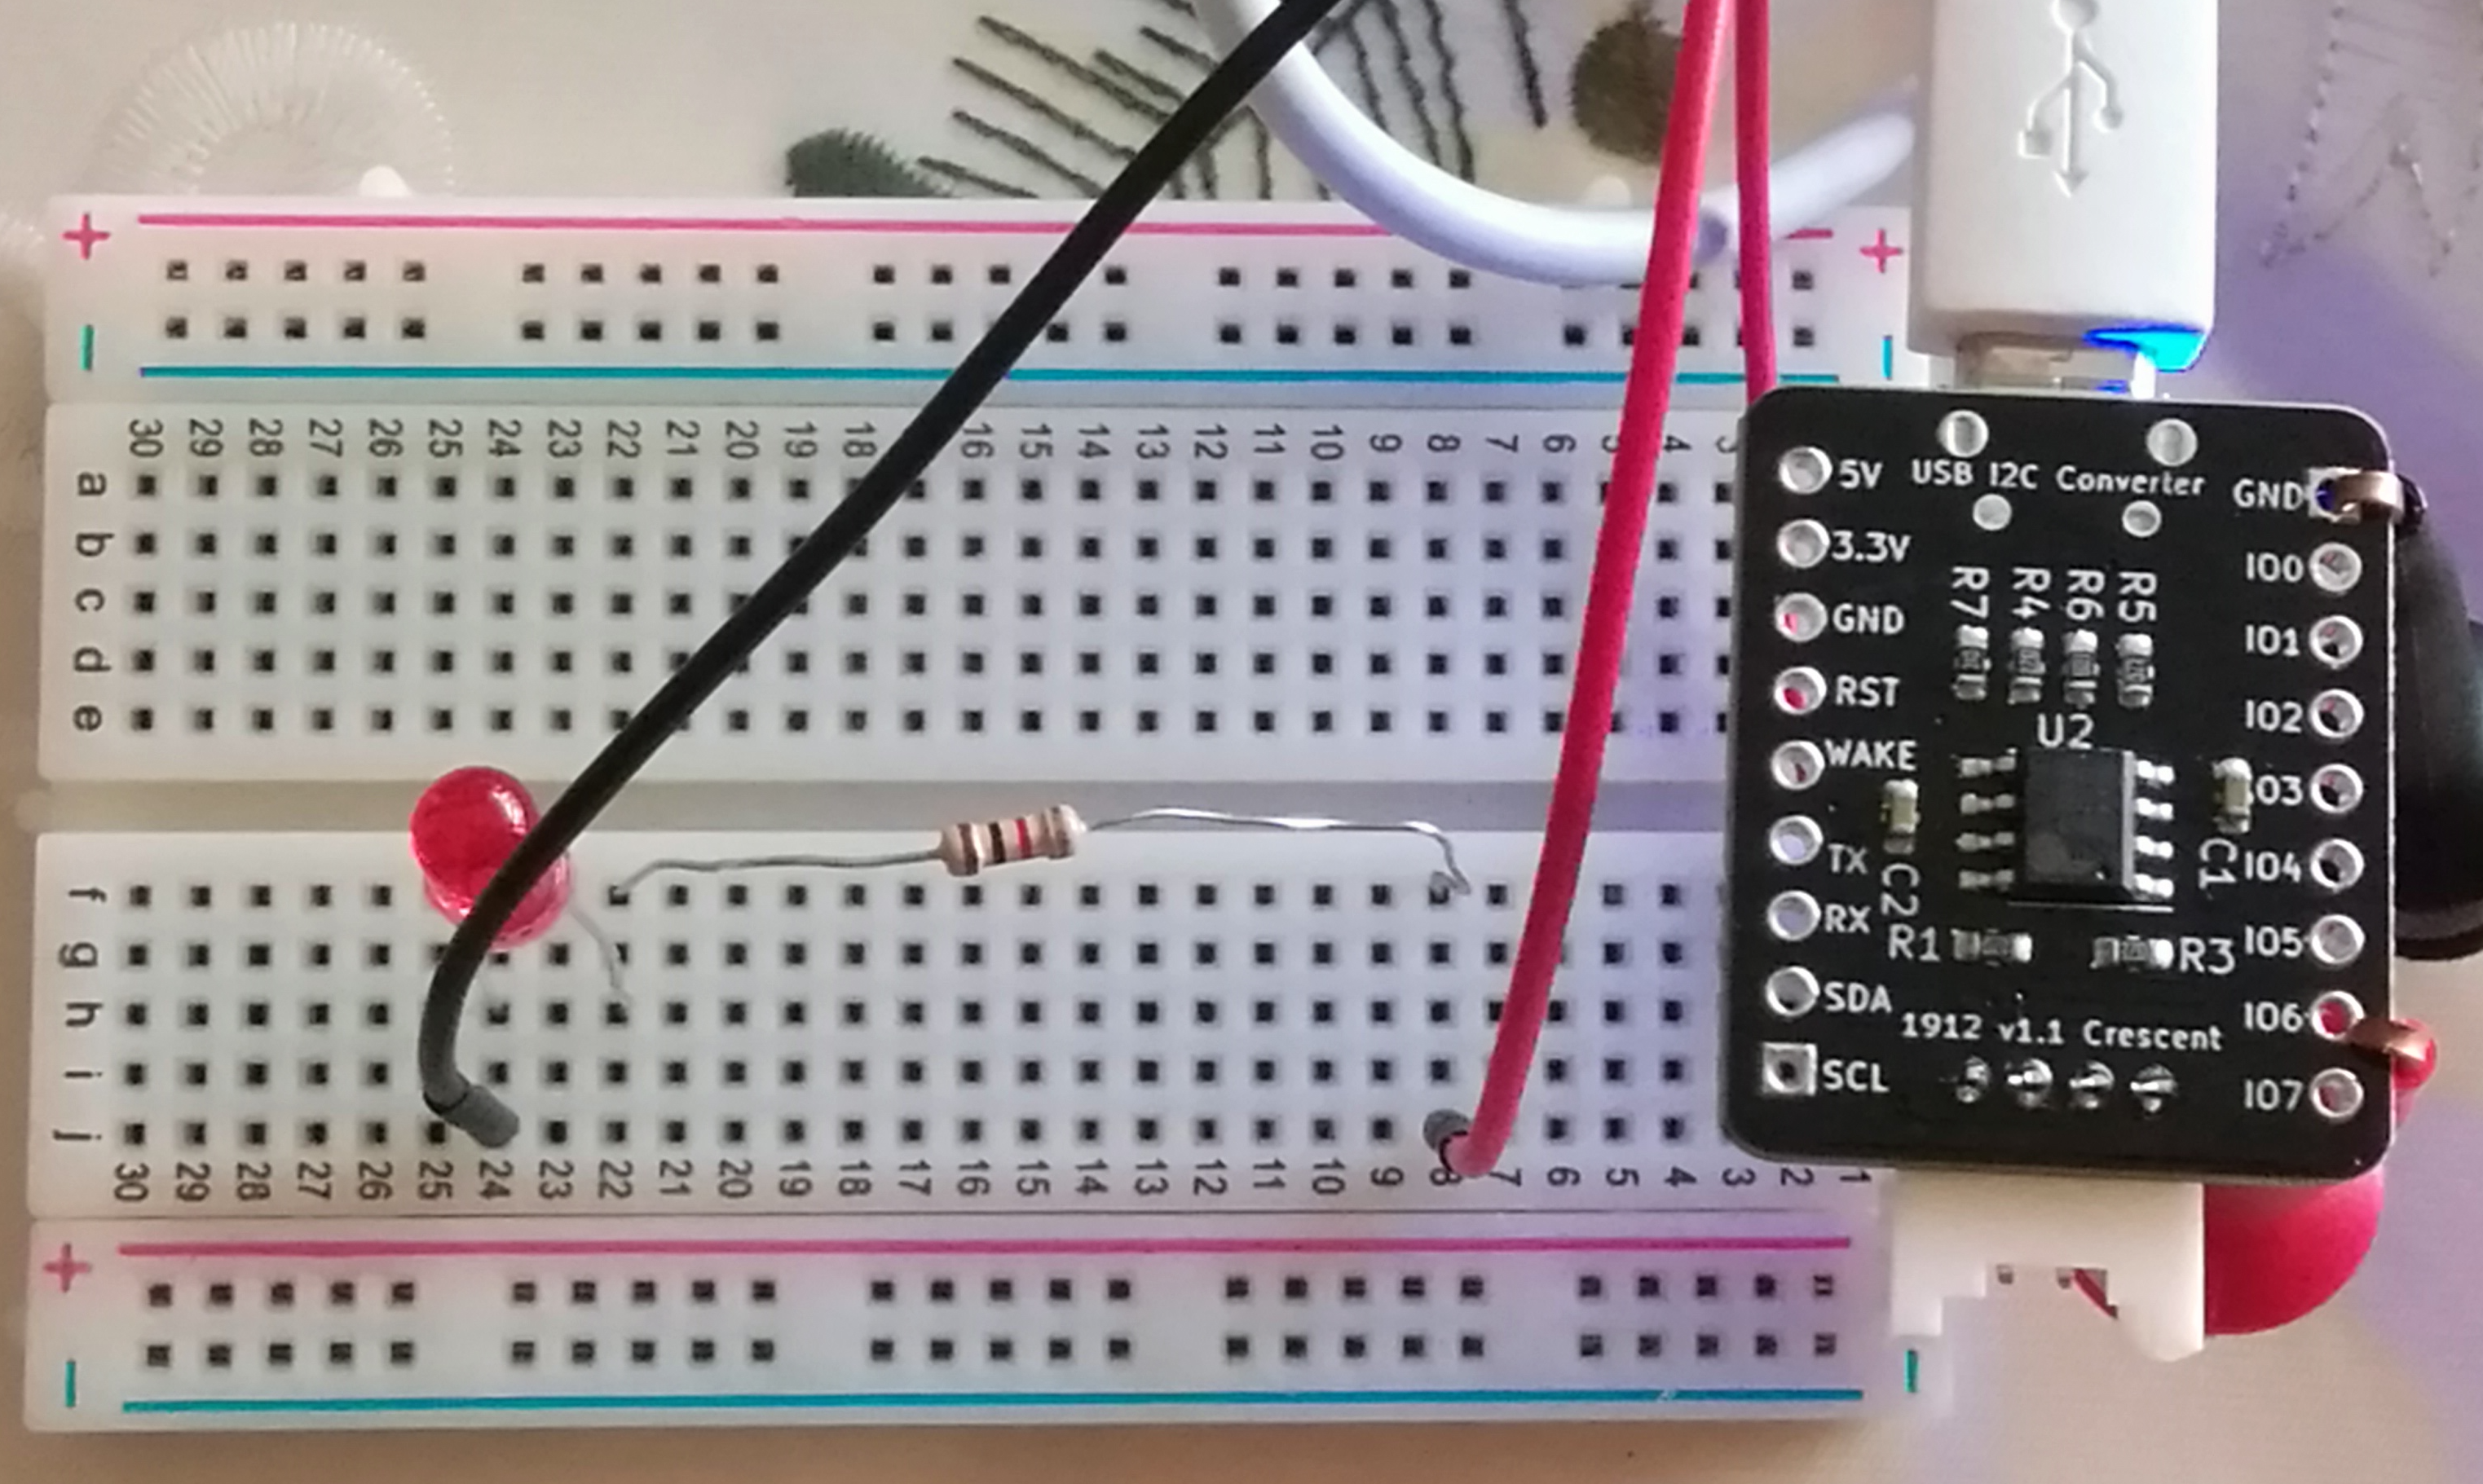
Output(Lチカ)
GPIO6をOutputとして使うため、Port Configurationレジスター(0x03)のBit5-4を'10'(push-pull output configuration)に、IOStateレジスター(0x04)のBit6を'1'(点灯)/'0'(消灯)にセットする。
配線

点灯時コマンド(Hex表記)
570365044050
消灯時コマンド(Hex表記)
540365040050
動作
Mac - USB - GPIO - LED pic.twitter.com/bzuFSuPMpf
— HT (@infinite1oop) May 23, 2020
Input(タッチセンサー)
GPIO6をInputとして使うため、Port Configurationレジスター(0x03)のBit5-4を'01'(input-only configuration)に、IOStateレジスター(0x04)のBit6を'0'にセットする。(おそらく、Input時のIOStateレジスターの設定は不要でしょう。)
配線

GPIO読み込みコマンド(Hex表記)
4950
動作
センサーにタッチした時は'1'が読み込まれる。GPIO6なのでBit5(=0x40)。Touch sensor - GPIO - USB - Mac pic.twitter.com/iQH4w9dd42
— HT (@infinite1oop) May 23, 2020
続き
今度はI2Cも記録に残す。


