今年、MicroPython用に買ったボードシリーズ。
2024年4月19日 秋月電子通商で購入
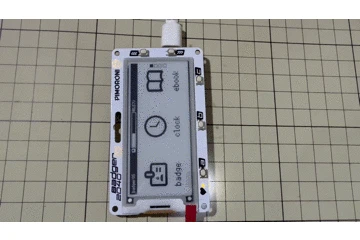
Raspberry Pico W 搭載の 2.9inch 白黒電子ペーパー。

MicroPython で組まれた Badger OS がプレインストールされている。名札、時計表示、電子ブック(この画面の大きさでは実用的ではないが)などの機能を提供。

裏には Raspberry Pi Pico W がそのまんま張り付いている。
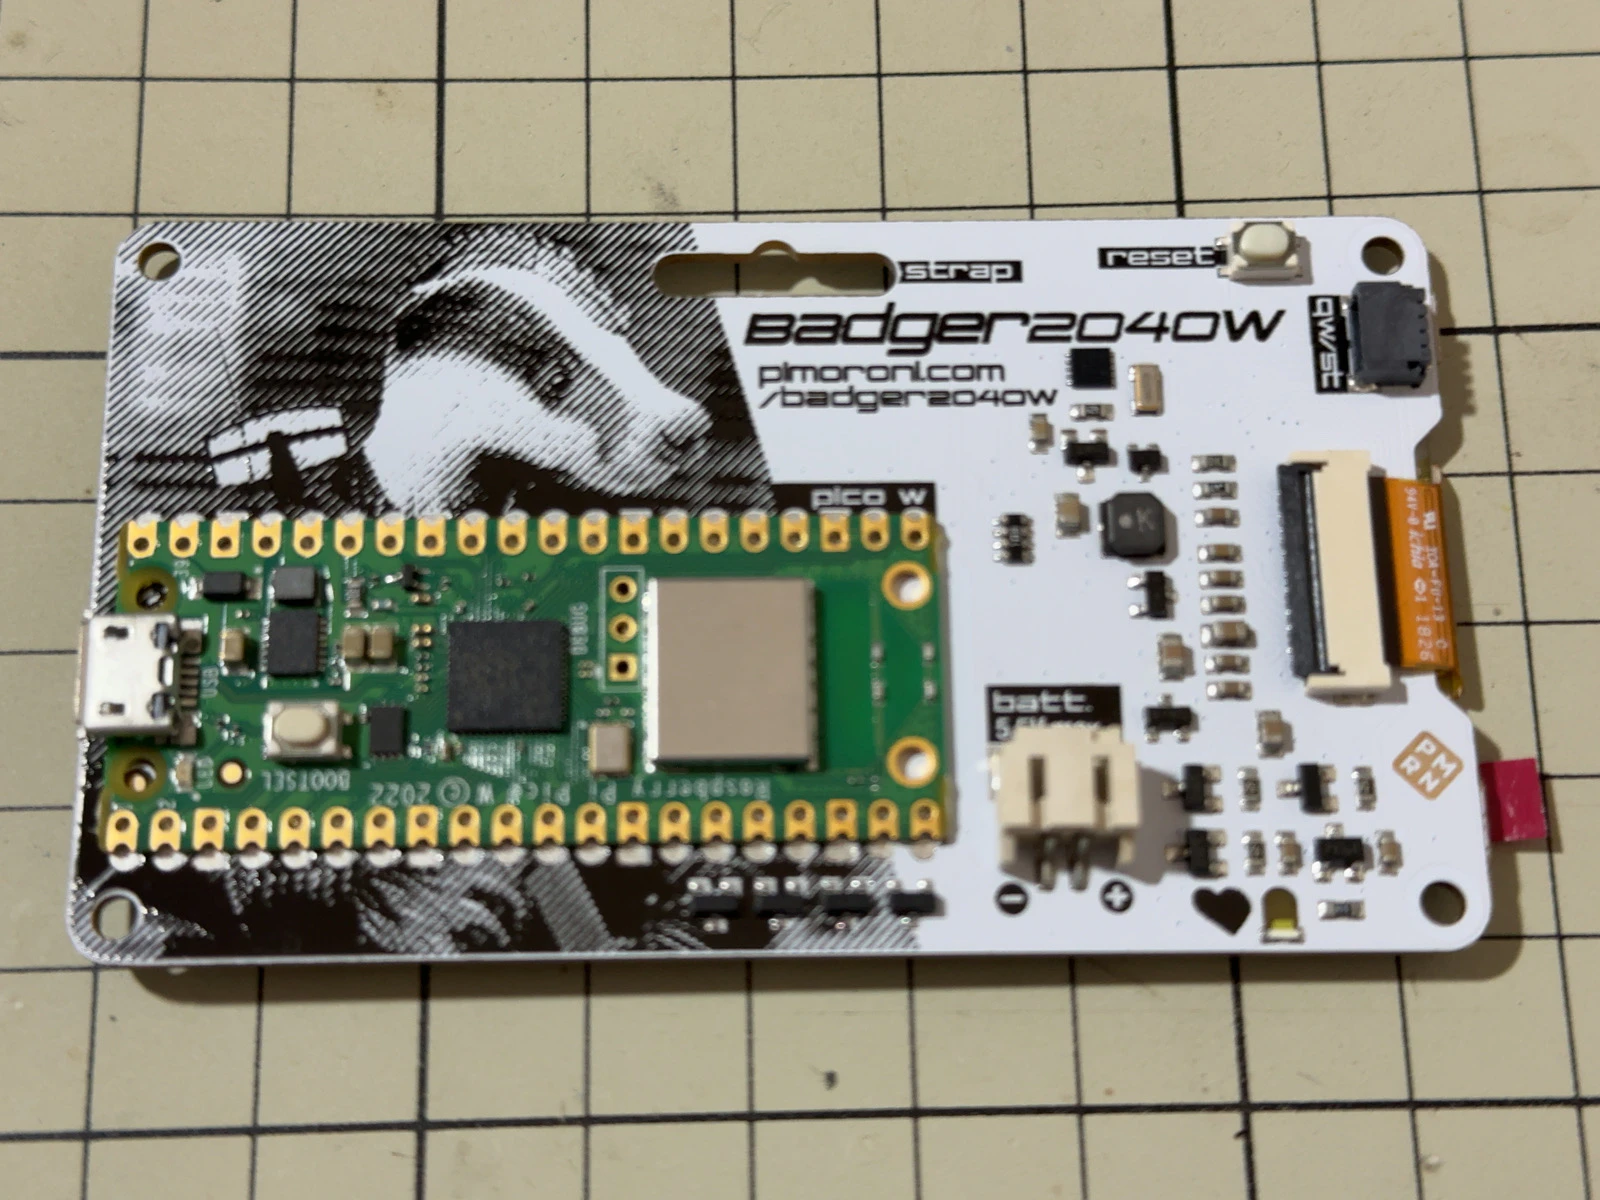
電子ペーパーのコントローラとしては UC8151 というものを使っている。
購入のきっかけ
このボードを買ったのは、以下のサイトを見たのがきっかけ。
製品仕様としては白と黒の2色のモノクローム表示しかできないところ、最大32階調まで表示できたり、フリッカー(点滅)なしに描き変えたりできるドライバをピュア MicroPython で作ったとのこと。
Wifi なしの Bedger 2040 でもよかったのだけれど、この時期には在庫のあるところが見つからなかったので、W 版の在庫があった秋月で購入。
セットアップ
MicroPython は Badger OS の基盤としてインストール済みなので、ドライバーとデモスクリプトを mpremote で MicroPython のファイルシステムにコピーする。
$ git clone https://github.com/antirez/uc8151_micropython
$ cd uc8151_micropython
$ mpremote cp uc8151.py :
$ mpremote cp demo_no_flick.py :
$ mpremote cp demo_greyscale.py :
$ mpremote cp png2gs8/dama.gs8 :
デモの実行
フリッカーなしとフリッカーありの描画
mpremote exec 'from demo_no_flick import *'

階調表示(同じ画像を 4, 8, 16, 32階調で表示)
mpremote exec 'from demo_greyscale import *'
画像フォーマットについて
このドライバで扱う画像のフォーマット .gs8 については png2gs8/README.md に記載がある。
+-------+--------+----------//
| width | heigth |  Image data... each byte between 0 - 255
+-------+--------+----------//
要するに、先頭4バイトに幅と高さ、続いて各ピクセルの階調が 0-255の範囲で格納している。
PNG形式の画像からの変換ツールとして C 言語のプログラム png2gs8/png2gs8.c が付いているが、PNG からしか変換できないのは不便。
ということで、python で簡易的な変換プログラムを作ってみた。
image2gs8.py
import sys
from PIL import Image

width = 128
height = 296
rotation = 0

if len(sys.argv) < 3:
    print("""
Usage: {file} image-file-path gs8-file-path [rotation]
""".format(file=sys.argv[0]))
    sys.exit(1)

iname = sys.argv[1]
oname = sys.argv[2]

org_image = Image.open(iname)
if len(sys.argv) > 3:
    rotation = int(sys.argv[3])
    if rotation != 0:
        org_image = org_image.rotate(rotation, expand=True)

org_image = org_image.resize((width, height))
greyscale_image = org_image.convert('L')

size = org_image.size

hdr = bytearray([width>>8, width&0xff, height>>8, height&0xff])
pixels = bytearray(width*height)

idx = 0
for y in range(size[1]):
    for x in range(size[0]):
        lum = greyscale_image.getpixel((x, y))

        pixels[idx] = lum
        idx += 1

with open(oname, mode='wb') as of:
    of.write(hdr)
    of.write(pixels)
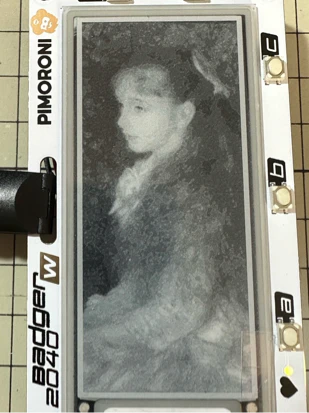
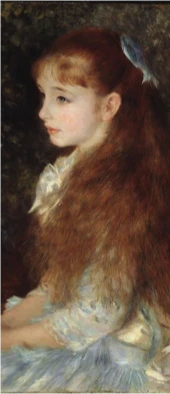
これでルノアールの絵を変換して Badger 2040 W で表示してみる。
元画像:
32階調グレイスケール表示: