概要
elasticsearch のインストールから運用のだいぶ手前までのお試しをまとめたメモです.クライアントはpythonクライアントを使います.これがあれば,データの追加や検索をpythonを利用して行えるため,データの加工なども楽になる・・・と思うのですよ.
環境設定
Elasticsearchのインストール
環境が debian だったので,debのパッケージを持ってきてでインストール.
% wget https://download.elasticsearch.org/elasticsearch/elasticsearch/elasticsearch-1.3.1.deb
% sudo dpkg -i elasticsearch-1.3.1.deb
/etc/init.d/elasticsearch の java を探しに行くディレクトリに,自分の環境の JAVA_HOME の位置を加える (/usr/loca/java を加えました).
# The first existing directory is used for JAVA_HOME (if JAVA_HOME is not defined in $DEFAULT)
JDK_DIRS="/usr/local/java /usr/lib/jvm/java-7-oracle /usr/lib/jvm/java-7-openjdk /usr/lib/jvm/java-7-openjdk-amd64/ /usr/lib/jvm/java-7-openjdk-armhf /usr/lib/jvm/java-7-openjdk-i386/ /usr/lib/jvm/default-java"
起動
% sudo /etc/init.d/elasticsearch start
確認
http://localhost:9200 にアクセスしてみて次のようなのが帰ってくるのを確認.
ブラウザからアドレスにアクセスして確認するか,コマンドラインから下記のようにアクセスします.
% curl -XGET http://localhost:9200/
{
  "status" : 200,
  "name" : "White Rabbit",
  "version" : {
    "number" : "1.3.1",
    "build_hash" : "2de6dc5268c32fb49b205233c138d93aaf772015",
    "build_timestamp" : "2014-07-28T14:45:15Z",
    "build_snapshot" : false,
    "lucene_version" : "4.9"
  },
  "tagline" : "You Know, for Search"
}
plugin を使ってみる
plugin のインストール
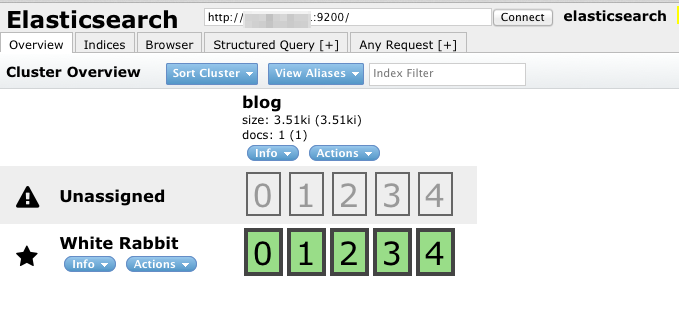
なにもないと不便なので定番のelasticsearch-headを入れておきます.これで最低限のことは用足ります.インストールは elasticsearch についている plugin コマンドを叩くだけです.すてき!
http://localhost:9200/_plugin/head にアクセスできれば成功です.
% /usr/share/elasticsearch/bin/plugin -install mobz/elasticsearch-head
python client を使う
公式:elasticsearch-py
ドキュメント:Python Elasticsearch Client
python の環境を用意する
手元の計算機には python 2.6.6 が入ってました.python 使ったことないので,ググったページを参考にしてパッケージ管理の pip と環境を切り替えるための virtualenv を入れておくことにしました.
curl -kL https://raw.github.com/pypa/pip/master/contrib/get-pip.py | python
pip install virtualenv virtualenvwrapper
vi ~/.bashrc
# 下記の3行を追記
export WORKON_HOME=$HOME/.virtualenvs
export PROJECT_HOME=$HOME/work
source /path/to/your/virtualenvwrapper.sh
python client をインストールして対話的に起動
インストール
pip install elasticsearch
起動
- ターミナルで日本語通したいので,LANGを設定しつつpythonを対話モードで起動
- elasticsearch を import
- elasticsearch のインスタンスを用意
% LANG=ja_JP.UTF8 python
Python 2.6.6 (r266:84292, Dec 27 2010, 00:02:40)
[GCC 4.4.5] on linux2
Type "help", "copyright", "credits" or "license" for more information.
>>> from elasticsearch import Elasticsearch
>>> es = Elasticsearch("localhost:9200")
>>> es
<Elasticsearch([{'host': 'localhost', 'port': 9200}])>
インデックスにドキュメントを追加する
API:elasticsearch.Elasticsearch.index
下記のようなデータを追加します.index と doc_type は必須項目です.指定したインデックスが存在しなければ新たにインデックスが作られます.id を指定しない場合は適当に採番してくれます.
- index: fruit (必須項目)
- doc_type: test (必須項目)
- id: 1
- body (必須項目)
- name:apple, color:red
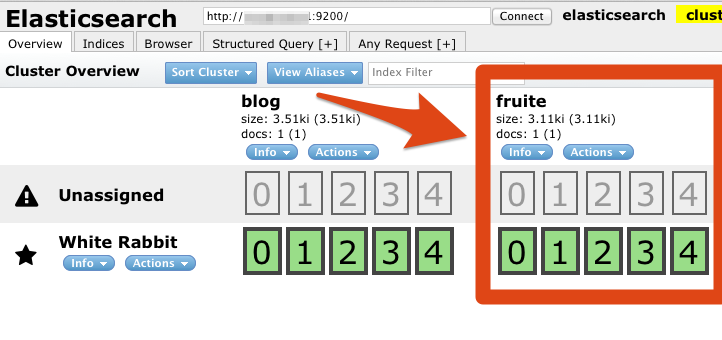
>>> es.index(index="fruit", doc_type="test", id=1, body={"name":"apple", "color":"red"})
{u'_type': u'test', u'_id': u'1', u'created': True, u'_version': 1, u'_index': u'fruit'}
色々操作してみる
変更/追加
同じ id を指定すると上書き.
>>> es.index(index="fruit", doc_type="test", id=1, body={"name":"apple", "color":"green"})
{u'_type': u'test', u'_id': u'1', u'created': False, u'_version': 2, u'_index': u'fruit'}
id を指定しないと適当に採番される.下記では id=dnMiX8ufSiiZC_c8KwykuQ となっている.
>>> es.index(index="fruit", doc_type="test", body={"name":"りんご", "color":"red"})
{u'_type': u'test', u'_id': u'dnMiX8ufSiiZC_c8KwykuQ', u'created': True, u'_version': 1, u'_index': u'fruit'}
データの取得
前提
fruitというインデックスに次のようなデータをセットした状態です.
ドキュメントタイプは test にセットしてあります.
| id | name | color |
|---|---|---|
| 9qsreGQTTMSIsMzlEe0H0A | りんご | red |
| 3MH8LiCNSkOgZMwx_kNebw | apple | red |
| YXAo8TfrQbeF3JQpW6dakw | banana | yellow |
| mz1wlxRUSSWvCuIIh6k4OQ | orange | orange |
| MBEGluC5S-OzNdGoDYavGg | apple | green |
id が指定できるとき
>>> res = es.get(index="fruit", doc_type="_all", id="MBEGluC5S-OzNdGoDYavGg")
>>> print json.dumps(res, indent=4)
{
    "_type": "test",
    "_source": {
        "color": "green",
        "name": "apple"
    },
    "_index": "fruit",
    "_version": 1,
    "found": true,
    "_id": "MBEGluC5S-OzNdGoDYavGg"
}
クエリで指定したいとき
全部持ってくる
>>> res = es.search(index="fruit", body={"query": {"match_all": {}}})
>>> print json.dumps(res, indent=4)
{
    "hits": {
        "hits": [
            {
                "_score": 1.0,
                "_type": "test",
                "_id": "3MH8LiCNSkOgZMwx_kNebw",
                "_source": {
                    "color": "red",
                    "name": "apple"
                },
                "_index": "fruit"
            },
            {
                "_score": 1.0,
                "_type": "test",
                "_id": "mz1wlxRUSSWvCuIIh6k4OQ",
                "_source": {
                    "color": "orange",
                    "name": "orange"
                },
                "_index": "fruit"
            },
            {
                "_score": 1.0,
                "_type": "test",
                "_id": "9qsreGQTTMSIsMzlEe0H0A",
                "_source": {
                    "color": "red",
                    "name": "\u308a\u3093\u3054"
                },
                "_index": "fruit"
            },
            {
                "_score": 1.0,
                "_type": "test",
                "_id": "MBEGluC5S-OzNdGoDYavGg",
                "_source": {
                    "color": "green",
                    "name": "apple"
                },
                "_index": "fruit"
            },
            {
                "_score": 1.0,
                "_type": "test",
                "_id": "YXAo8TfrQbeF3JQpW6dakw",
                "_source": {
                    "color": "yellow",
                    "name": "banana"
                },
                "_index": "fruit"
            }
        ],
        "total": 5,
        "max_score": 1.0
    },
    "_shards": {
        "successful": 5,
        "failed": 0,
        "total": 5
    },
    "took": 3,
    "timed_out": false
}
条件をつけて検索する
color = red のものを検索してみる.
>>> res = es.search(index="fruit", body={"query": {"match": {"color":"red"}}})
>>> print json.dumps(res, indent=2 , ensure_ascii=False)
{
  "hits": {
    "hits": [
      {
        "_score": 0.30685282000000003,
        "_type": "test",
        "_id": "3MH8LiCNSkOgZMwx_kNebw",
        "_source": {
          "color": "red",
          "name": "apple"
        },
        "_index": "fruit"
      },
      {
        "_score": 0.30685282000000003,
        "_type": "test",
        "_id": "9qsreGQTTMSIsMzlEe0H0A",
        "_source": {
          "color": "red",
          "name": "りんご"
        },
        "_index": "fruit"
      }
    ],
    "total": 2,
    "max_score": 0.30685282000000003
  },
  "_shards": {
    "successful": 5,
    "failed": 0,
    "total": 5
  },
  "took": 2,
  "timed_out": false
}
インデックスを削除する
fruit インデックスはきれいさっぱり消えます.
>>> es.indices.delete(index="fruit")
{u'acknowledged': True}


