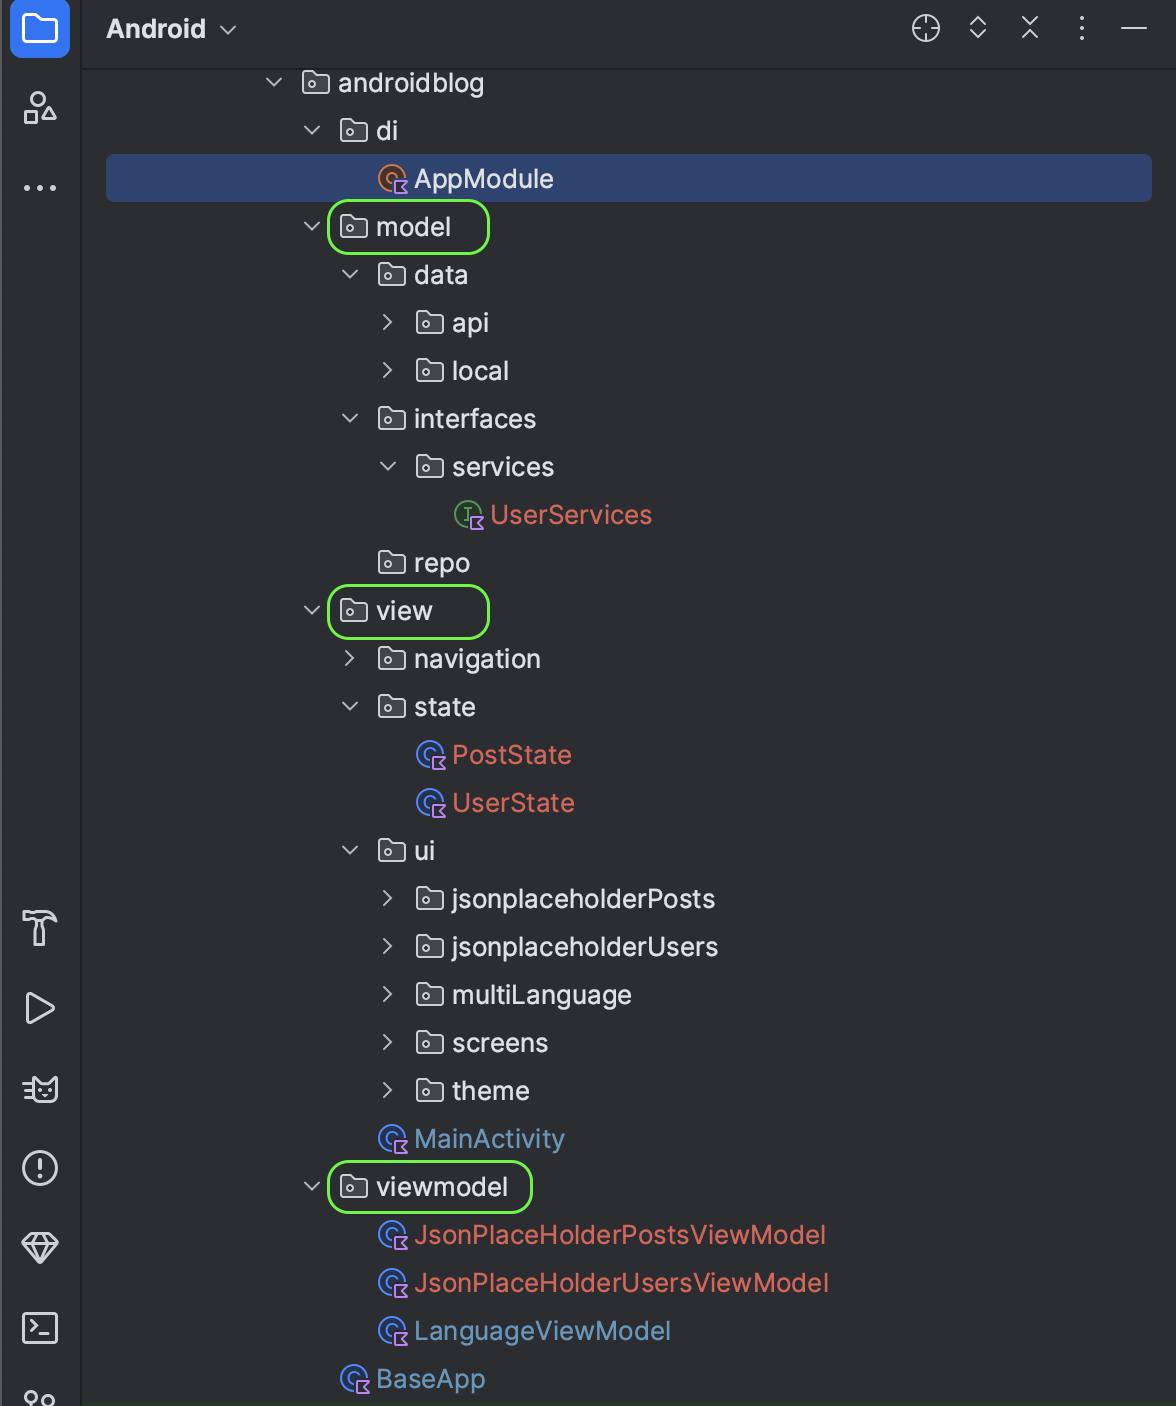
はじめに
はじめまして、Hridoy Chandra Das(リド)(@ihridoydas)です。
Jetpack Compose での状態管理を簡素化する方法と、https://jsonplaceholder.typicode.com/users Web API を使用してユーザーを取得する方法を学びます。
こちらでは、状態管理を簡素化したいと考えています。
1 つの状態変数(UserState)だけを使用して画面のすべての状態を管理する方法をご紹介します。
Dagger と MVVM アーキテクチャ パターンを備えた Jetpack Compose を使用します。
MVVM アーキテクチャ パターン
警告
独自の方法を使用していますが、お好きなように使ってください。

ViewModel を使用して、ビジネス ロジックを UI コンポーネントから分離する状態ホルダー。 ViewModel はライフサイクルを認識するコンポーネントであるため、コンポジションよりもライフサイクルが長く、構成が変更されても ViewModel の状態を保持できます。
今回はこの(ViewModel)アプローチについて学びます。 ビューからビジネス ロジックを抽出し、将来の開発者にとって理解しやすく維持しやすい方法で ViewModel 内に配置できます。
では、コーディングしてみましょう…
Android Studio で新しいプロジェクトを作成し、Composeアクティビティを選択します。
設定:
プロジェクトに使うデペンデンシーライブラリー:
dependencies {
//...Jetpack composeの必要なデペンデンシーライブラリー

    // Use Dagger Hilt
    implementation ("com.google.dagger:hilt-android:2.48.1")
    kapt ("com.google.dagger:hilt-android-compiler:2.48.1")

    //Hilt Navigation
    implementation("androidx.hilt:hilt-navigation-compose:1.1.0")

    // ViewModel
    implementation ("androidx.lifecycle:lifecycle-viewmodel-ktx:2.6.2")

    //kotlin Coroutines
    implementation ("org.jetbrains.kotlinx:kotlinx-coroutines-android:1.7.3")
    implementation ("org.jetbrains.kotlinx:kotlinx-coroutines-core:1.7.3")

    // Retrofit
    implementation ("com.squareup.retrofit2:retrofit:2.9.0")
    implementation ("com.squareup.retrofit2:converter-gson:2.9.0")

}
Jetpack Composeでナビゲーションアニメーションを使用したい場合こちら。。
build.gradle.kts(Project)
plugins {
    .
    .
    id ("com.google.dagger.hilt.android") version "2.48" apply false
}
build.gradle.kts(Module)
plugins {
    .
    .
    id ("kotlin-kapt")
    id ("com.google.dagger.hilt.android")
}
AndroidManifest.kt にインターネット許可を追加
<uses-permission android:name="android.permission.INTERNET"/>
Dependency Injection And Compose View:
Step 1: BaseApp.kt
@HiltAndroidApp
class BaseApp : Application()
Step 2: AndroidManifest.ktにandroid:nameを追加
 <application
        android:name=".BaseApp"
        .
        .
        .
 </application>
Step 3: AppModule.ktに@Moduleをdiに提供する(provideRetrofit)と(provideUserServices)
https://gist.github.com/ihridoydas/f9816487424c325808d684176096ac3c
@Module
@InstallIn(SingletonComponent::class)
object AppModule {
    // Provide Retrofit
    @Singleton
    @Provides
    fun provideRetrofit():Retrofit{
        return Retrofit.Builder()
            .baseUrl("https://jsonplaceholder.typicode.com")
            .addConverterFactory(GsonConverterFactory.create())
            .build()
    }
    // Provide User Services(jsonplaceholder)
    @Singleton
    @Provides
    fun provideUserServices(retrofit: Retrofit):UserServices{
        return retrofit.create(UserServices::class.java)
    }

}
Step 4: User データクラスを作成
data class User(
    val id :Int,
    val name:String,
    val username:String,
    val email:String
)
Step 5: UserServices Interfaceを作成
interface UserServices {
    //今回ユーザーデータを取得する
    @GET(value = "/users")
    suspend fun fetchUser() : List<User>
}
Step 6: UI Stateを作成(状態管理)
sealed class UserState{
    data object StartState: UserState()
    data object LoadingState: UserState()
    data class Success(val users: List<User>) : UserState()
    data class Error(val errorMessage:String): UserState()
}
Step 7: ここに ViewModel があります。
ここ↑では、デフォルト状態 START で画面の状態を管理するための MutableStateFlow を 1 つ定義します
@HiltViewModel
class JsonPlaceHolderUsersViewModel @Inject constructor(
    private val userServices: UserServices,

) : ViewModel(){

    val userState = MutableStateFlow<UserState>(UserState.StartState)

    init {
        fetchUsers()
    }
    //データをフェッチする
    private fun fetchUsers(){
        viewModelScope.launch {
            userState.tryEmit(UserState.LoadingState)

            try {
                val users = userServices.fetchUser()
                userState.tryEmit(UserState.Success(users))
            }
            catch (e:Exception){
                e.localizedMessage?.let { UserState.Error(errorMessage = it) }
                    ?.let { userState.tryEmit(it) }
            }
        }
    }

}
Step 8: UserItemViewとUsersListViewを作成。
UserItemViewを作成
@Composable
fun UserItemView(user: User) {
    Row(
        modifier = Modifier
            .fillMaxSize()
            .padding(8.dp),
        horizontalArrangement = Arrangement.SpaceBetween,
        verticalAlignment = Alignment.CenterVertically

    ) {
        Box(
            modifier = Modifier
                .size(50.dp)
                .background(Color.Black, CircleShape),
            contentAlignment = Alignment.Center
        ) {
            Text(
                text = user.name.substring(0, 1),
                color = Color.White,
                fontWeight = FontWeight.Bold,
                fontSize = 24.sp,
            )
        }
        Column(
            modifier = Modifier
                .fillMaxWidth()
                .padding(start = 6.dp),
            verticalArrangement = Arrangement.Center
        ) {
            Text(
                text = user.name,
                fontSize = 20.sp,
                fontWeight = FontWeight.Bold,
                color = Color.Black,
            )
            Spacer(modifier = Modifier.padding(top = 3.dp))
            Text(
                text = "Username: ${user.username} (Id:${user.id})",
                fontSize = 10.sp,
                fontWeight = FontWeight.Light,
                color = Color.Black,
            )

            Spacer(modifier = Modifier.padding(top = 4.dp))
            Text(
                text = user.email,
                fontSize = 16.sp,
                color = Color.Black,
            )

        }

    }

}

UsersListViewを作成
@Composable
fun UsersListView(users:List<User>) {
    LazyColumn(
        modifier = Modifier.fillMaxSize(),
        content = {
        items(users){user->
            UserItemView(user = user)
        }
    })
}
Step 9: 次に、この状態を処理するコンポーザブルを構築しましょう。
viewModel の初期化では、まず状態を START から LOADING に変更します。 この状態では、進行状況インジケーターがユーザーに表示されます。 次に、IO スレッドでデータをフェッチする呼び出しを行い、結果を待ちます。 API からデータを受信したら、受信したユーザー リストを使用して状態を LOADING から SUCCESS に変更します。失敗した場合は、状態を FAILURE に設定し、問題が発生したことをユーザーに通知するエラー メッセージを表示します。
//MainView
@OptIn(ExperimentalMaterial3Api::class)
@Composable
fun MVVMStateManagementScreenUsers(
    usersViewModel: JsonPlaceHolderUsersViewModel = hiltViewModel(),
    navController: NavController,
    onBackPress : ()->Unit,
) {
    val context = LocalContext.current
    //Collect Data as a State
    val userState by usersViewModel.userState.collectAsState()

    Scaffold(
        modifier = Modifier.fillMaxSize(),
        topBar = {
            TopAppBar(
                title = {
                    Text(
                        text = "MVVM State Management User",
                        fontSize = 12.sp,
                        modifier = Modifier.fillMaxWidth(),
                        textAlign = TextAlign.Left
                    )
                },
                navigationIcon = {
                    IconButton(
                        onClick = {
                            onBackPress()
                        },
                        modifier = Modifier
                    ) {
                        Icon(Icons.Filled.ArrowBack, contentDescription = "Back")
                    }
                },

            )
        }
    ) {
        Box(modifier = Modifier
            .fillMaxSize()
            .padding(it)){

            //こちら、UI状態管理
            when(userState){
                //LOADING
                is UserState.LoadingState->{
                    Box(modifier = Modifier.fillMaxSize(),
                        contentAlignment = Alignment.Center){
                        CircularProgressIndicator()
                    }
                }

                is UserState.StartState->{}

                //SUCCESS
                is UserState.Success->{
                    val users = (userState as UserState.Success).users
                    UsersListView(users)
                }
                //FAILURE
                is UserState.Error->{
                    val message = (userState as UserState.Error).errorMessage
                    Toast.makeText(context,message,Toast.LENGTH_LONG).show()
                    Column(
                        modifier = Modifier
                            .fillMaxWidth()
                            .padding(start = 6.dp),
                        verticalArrangement = Arrangement.Center,
                        horizontalAlignment = Alignment.CenterHorizontally
                    ) {
                        Text(
                            text = message,
                            fontSize = 15.sp,
                            fontWeight = FontWeight.Bold,
                            color = Color.Black,
                        )
                    }
                }
            }
        }

    }
}
ここの↑ MainView() では、画面の状態に従ってビューを設定します。これで、ViewModel が状態を更新するたびに、コンポーザブルは現在の状態に基づいてビューを再構成します。
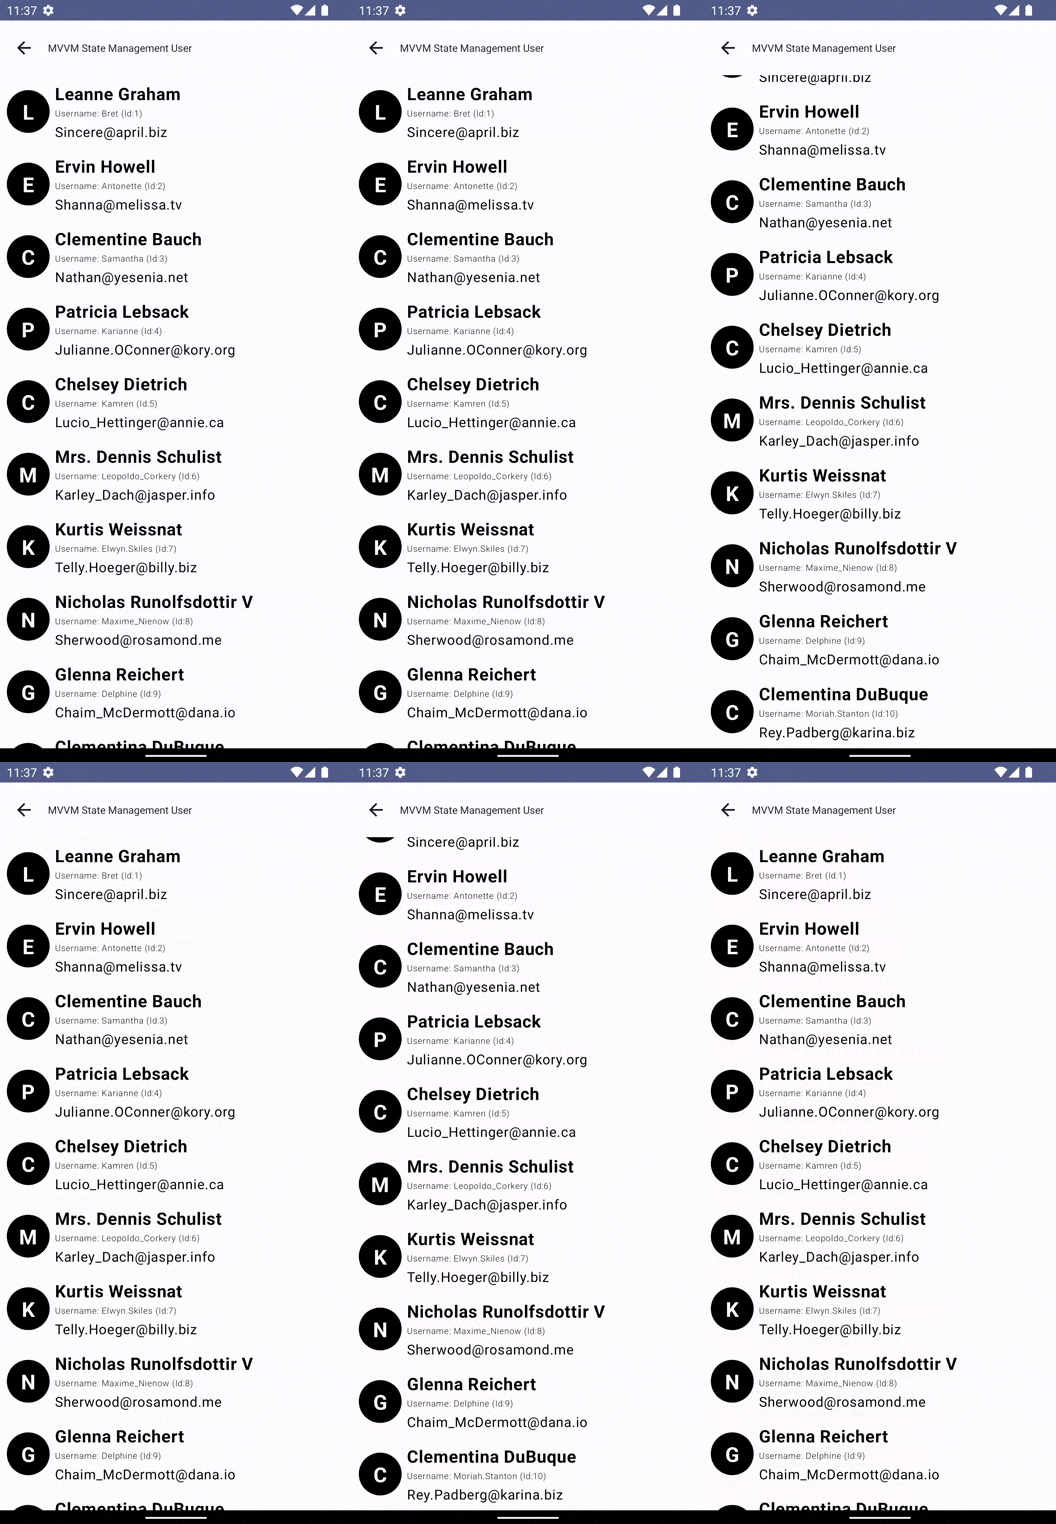
結果: GitHub サンプル
かなりシンプルです…
以上、最後までお読みいただきありがとうございました。
