導入環境
php : 8.0.13
vscode : 1.63.0
xdebug : 3.1.2
XAMPP : 8.0.13
OS : Windows 10
VSCodeの拡張機能「PHP Debug」をインストールする
複数あるが、Felix Becker氏の物をインストールする。
PHP DebugはXdebugとVSCodeを橋渡しするための拡張なので、次にXdebugをインストールする必要がある。
PHPのエクステンション「Xdebug」をインストールする
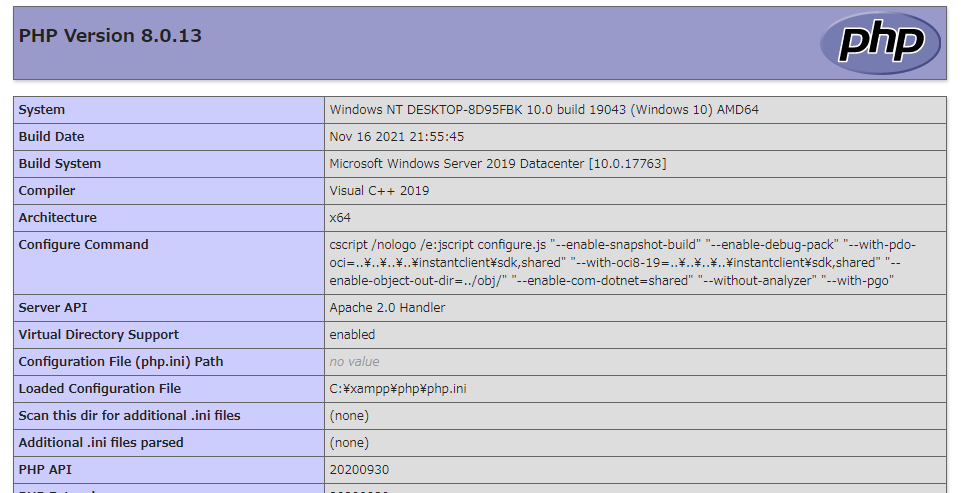
環境情報のコピー
新しくファイルを作成し、test.phpとリネームして、以下のコードを貼り付け実行する。
<?php
phpinfo();
以下のように表示されるので、テキストをctrl + Aを押して全コピーする。
インストールウィザードで適切なファイルのダウンロードを行う
Xdebugインストールウィザードを開き、全コピーした内容をそのままテキストエリアに貼り付け
Analyse my phpinfo() outputをクリックする。
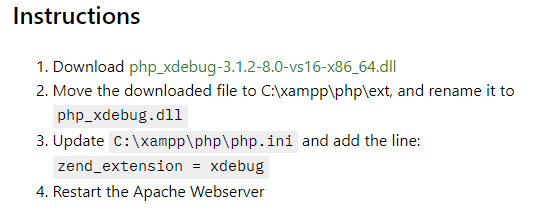
以下のように表示されるので、ファイル(windowsはdllファイル)をダウンロードする。
ファイルのインストール
ダウンロードしたファイルをphp_xdebug.dllとリネームして、
インストールウィザードで指定された場所(上記の画像ならC:\xampp\php\ext)へ移動させる。
ダウンロードしたXdebugのバージョンによってphp.iniに記述する設定内容が変化するので注意する。
php.iniファイルへ設定を追加する
インストールウィザードで指定されたパスにあるphp.iniを開き、以下の設定を追加する。
ファイルのリネームを行っていない場合は値をフルパスで記述する。
zend_extension = xdebug
上記の内容だけだとステップ実行が出来ないので、
Xdebugのバージョンごとに以下の内容を追加する。
Xdebug v3.x.xでのphp.iniへの追加内容
xdebug.mode = debug
xdebug.start_with_request = yes
Xdebug v2.x.xでのphp.iniへ追加内容
xdebug.remote_enable = 1
xdebug.remote_autostart = 1
xdebug.remote_port = 9000
動作確認
Webサーバを立ち上げているなら再起動を行い、最初に作成したtest.phpを実行する。
<?php
phpinfo();
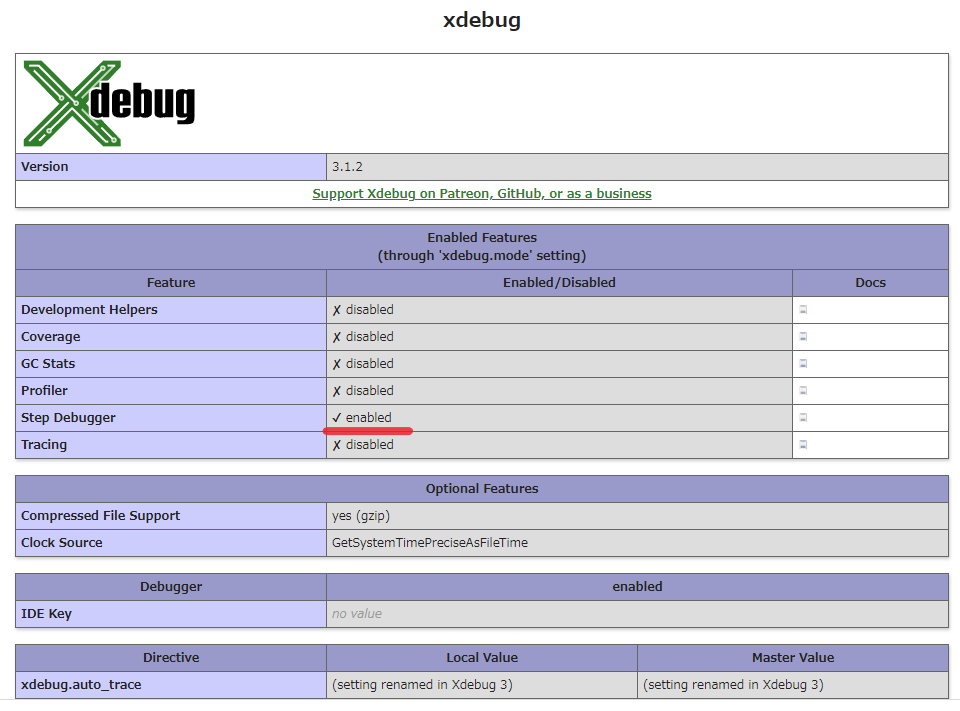
表示されるテキストにXdebugの項目が新たに追加されていて、
Xdebug v3系だと以下の画像のように設定されていたら導入成功!
Step Debuggerがenabledになっている

xdebug.start_with_requestがyesになっている


