概要
- GraphQLの構築を学んだので、復習として記事にしてみた
- この記事では手順のみを記載し、詳細は説明しない
- この記事のゴールとしてはローカル上でGraphiQLを起動し、そこでクエリを実行しデータを取得するところ
- https://github.com/MrFuku/express-graphql-server
環境
- Mac OS Mojave
- docker-compose 1.25.4
- Node.js 14.2
- express 4.17.1
- graphql 15.0.0
- MongoDB 4.2.6
【1】プロジェクトの作業ディレクトリを作成、移動
mkdirでディレクトリを作成してcdで移動
$ mkdir express-graphql-server
$ cd express-graphql-server
【2】docker-compose.ymlを作成、mongoDBの起動
version: '3'
services:
  mongo:
    image: mongo
    restart: always
    ports:
      - 27017:27017
    environment:
      MONGO_INITDB_ROOT_USERNAME: root
      MONGO_INITDB_ROOT_PASSWORD: example
    volumes:
      - ./db/db:/data/db
      - ./db/configdb:/data/configdb

  mongo-express:
    image: mongo-express
    restart: always
    ports:
      - 8081:8081
    depends_on:
      - mongo
    environment:
      ME_CONFIG_MONGODB_ADMINUSERNAME: root
      ME_CONFIG_MONGODB_ADMINPASSWORD: example
# http://localhost:8081 で Mongo Express が起動
$ docker-compose up
【3】expressの起動
serverディレクトリを作成し、server/Dockerfileを作成します
FROM node:14.2-alpine3.11

WORKDIR /server

RUN apk update

COPY . .

# 後にコメントを外す
# COPY package.json ./
# COPY yarn.lock ./

# RUN yarn install
docker-compose.ymlにserverコンテナを追加します
version: '3'
services:
  # serverコンテナを追加
  server:
    build: ./server
    tty: true
    ports:
      - 4000:4000
    volumes:
      - ./server/:/server
      - /server/node_modules
    depends_on:
      - mongo

  mongo:
    image: mongo
    restart: always
    ports:
...
serverコンテナを立ち上げ、コンテナ内で必要なpackageをインストールします
# serverコンテナを立ち上げ、shellを起動する
docker-compose run server sh

# yarnで今回必要となるpackage一式をインストールします
yarn add express express-graphql graphql mongoose nodemon

# コンテナから抜ける
exit
server/Dockerfileを次のように書き換え、docker-compose.ymlにcommandを追加します。
FROM node:14.2-alpine3.11

WORKDIR /server

RUN apk update

# コメントアウト
# COPY . .

# コメントを外す
COPY package.json ./
COPY yarn.lock ./

RUN yarn install
version: '3'
services:
  server:
    build: ./server
    tty: true
    ports:
      - 4000:4000
    volumes:
      - ./server/:/server
      - /server/node_modules
    depends_on:
      - mongo
    command: yarn nodemon app # <- express起動用のcommandを追加

  mongo:
    image: mongo
    restart: always
    ports:
...
server/app.jsを作成し、dockerのコンテナイメージを再ビルドします
再度コンテナを立ち上げ、expressが起動するか確認してみましょう
const express = require('express')
const app = express()

app.get('/', (req, res) => res.send('Hello World!'))

app.listen(4000, () => console.log('Example app listening on port 4000!'))
# http://localhost:4000 を開いて「Hello World!」と表示される
docker-compose build
docker-compose up
【4】mongoDBにテスト用データベースの作成
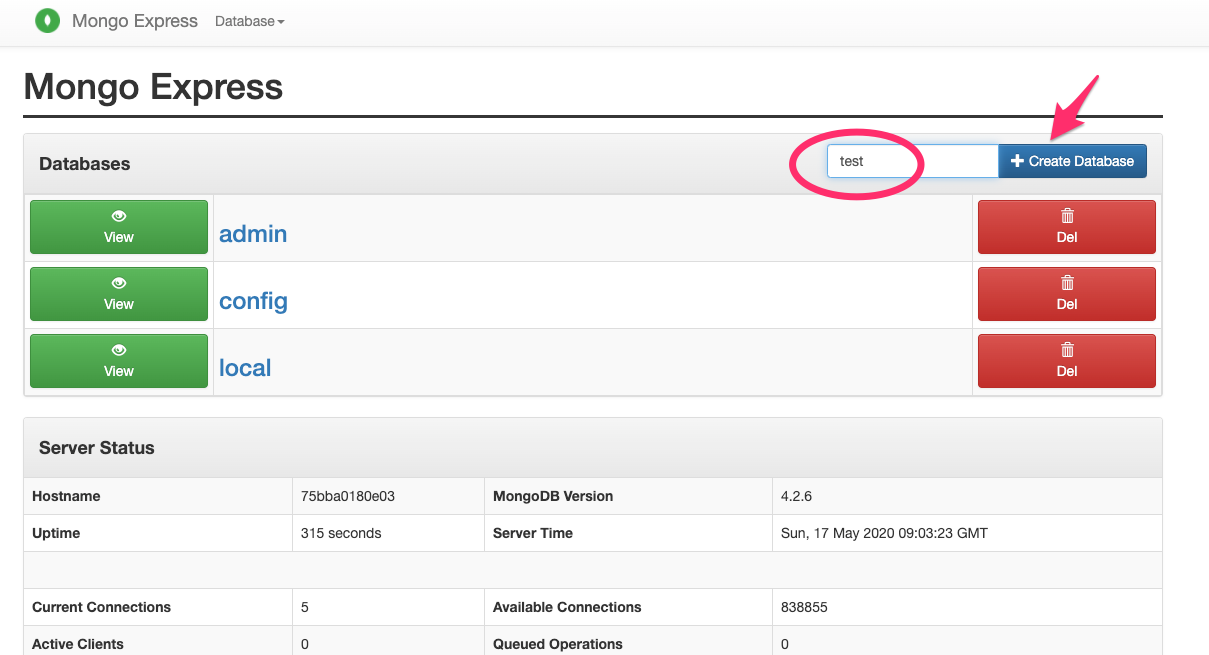
ブラウザからhttp://localhost:8081 にアクセスすると、Mongo Expressが表示されているので、
画像のように入力し、「test」という名前のデータベースを作成します
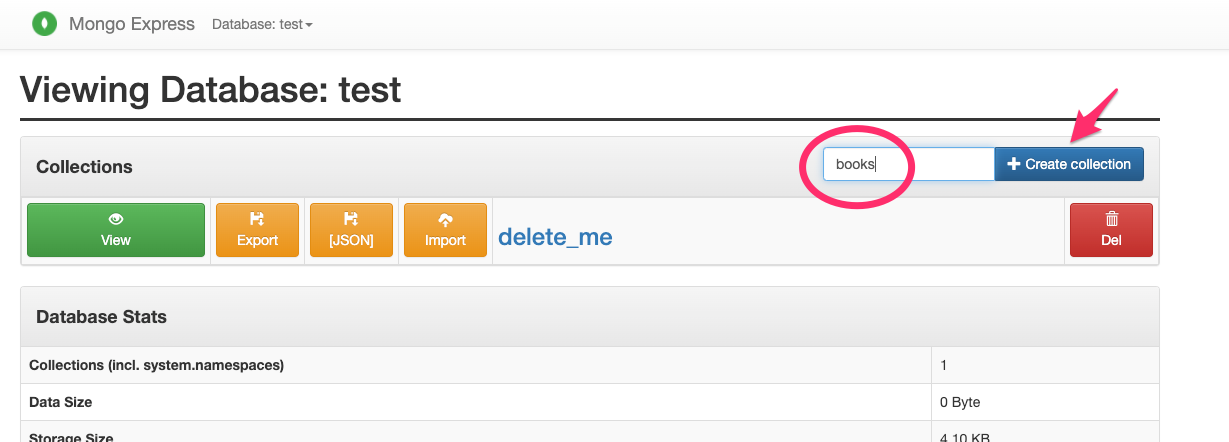
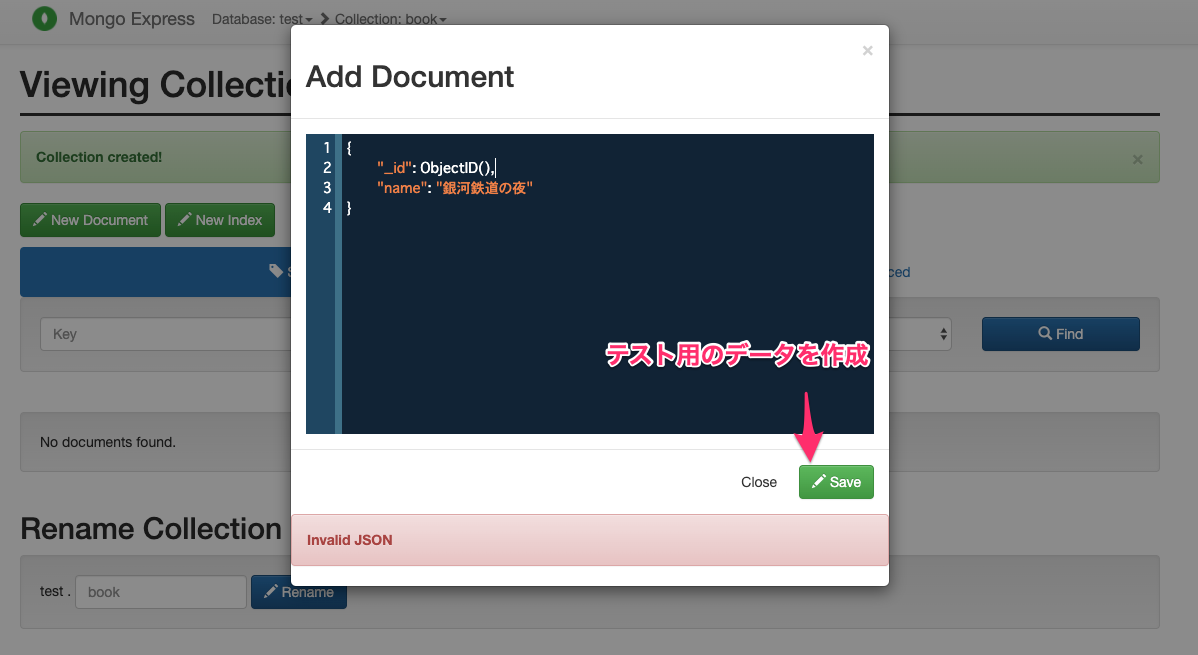
さらにtestデータベース内に「books」というcollectionを追加し、テスト用のデータを一件作成します
そして、testデータベースを操作するためのユーザーを作成しておきます
ユーザー名とパスワードは後ほど使うのでメモしておきましょう
# 起動中のmongoコンテナ内に入り、shellを起動
docker-compose exec mongo sh

# root権限でmongoシェルを起動
mongo -u root -p example

# createUserコマンドでtestデータベースを読み書きできるユーザーを作成
db.createUser({ user: "user", pwd: "password", roles: [{ role: "readWrite", db: "test" }]})

# mongoシェルから抜ける
exit

# mongoコンテナから抜ける
exit
【5】mongoDBとの接続
server/app.jsを次のように書き換え、サーバー起動時にコンソール上に「connected mongoDB」と表示されれば接続成功です
const express = require('express')
const app = express()
+ const mongoose = require('mongoose')
+
+ const user = 'user'
+ const pass = 'password'
+ mongoose.connect(`mongodb://${user}:${pass}@mongo/test`)
+ mongoose.connection.once('open', () => {
+   console.log('connected mongoDB')
+ })
app.get('/', (req, res) => res.send('Hello World!'))

app.listen(4000, () => console.log('Example app listening on port 4000!'))

【6】graphql スキーマの定義
server/models/book.jsを作成し、bookモデルを定義します
const mongoose = require('mongoose')
const Schema = mongoose.Schema

// nameというフィールドを持つbookモデルを定義
const bookSchema = new Schema({
  name: String,
})

module.exports = mongoose.model('Book', bookSchema)
server/schema/schema.jsを作成し、スキーマを定義します
const graphql = require('graphql')
const Book = require('../models/book')
const { GraphQLSchema, GraphQLObjectType, GraphQLID, GraphQLString } = graphql

const BookType = new GraphQLObjectType({
  name: 'Book',
  fields: () => ({
    id: { type: GraphQLID },
    name: { type: GraphQLString },
  }),
})

const RootQuery = new GraphQLObjectType({
  name: 'RootQueryType',
  fields: {
    // idを引数に対象レコードを返すbookクエリを定義
    book: {
      type: BookType,
      args: { id: { type: GraphQLID } },
      resolve(_, args) {
        return Book.findById(args.id)
      },
    },
  },
})

module.exports = new GraphQLSchema({
  query: RootQuery,
})
最後にserver/app.jsにgraphqlエンドポイントの定義を追加したら完成です!
const express = require('express')
const mongoose = require('mongoose')
+ const graphqlHTTP = require('express-graphql')
+ const schema = require('./schema/schema')
const app = express()

const user = 'user'
const pass = 'password'
mongoose.connect(`mongodb://${user}:${pass}@mongo/test`)
mongoose.connection.once('open', () => {
  console.log('connected mongoDB')
})
app.get('/', (req, res) => res.send('Hello World!'))
+ app.use('/graphql', graphqlHTTP({
+     schema,
+     graphiql: true,
+   })
+ )

app.listen(4000, () => console.log('Example app listening on port 4000!'))
http://localhost:4000/graphqlにアクセスするとGraphiQLが起動しているはずです
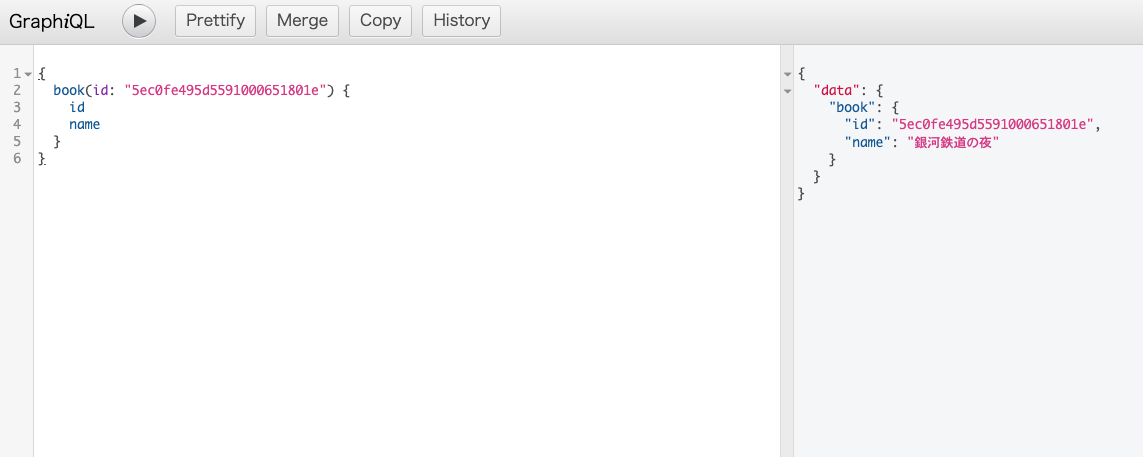
bookクエリを叩いて、先ほど追加したデータが返ってきたらOKです!(お疲れ様でした)
近いうち、GraphQLを使ったカンバンアプリ作成記事も執筆予定です