注意: 2026年1月12日,Void Editorの開発は中止状態(pause)にあることが,Commit f100db9において明らかにされた.Void EditorはTypeScript + Node.jsで実装されているが,既存バグや新規脆弱性に対する対応が現状期待できないことに注意.
Void EditorはLLMによるコーディング支援をネイティブサポートするエディタである.類似機能を提供するプロプライエタリなエディタとしてはCursorがあるが,Void EditorはOpen Source(Apache-2.0 License)である.Cursorの方が先発のプロジェクトであり,Void EditorはCursorのOpen Source Alternativeを標榜している.
Void Editorは以下のモデルプロバイダをサポートする(一部抜粋):
- ローカル/オープンモデルプロバイダ
- クローズドモデルプロバイダ
これらモデルプロバイダの提供するAPIを用いて以下の機能を実現している:
- Chat — 文字通りLLMとの単純なチャット
- Gather — ワークスペースに対する読み取り権限を付与したチャット
- Agent — ワークスペースに対する書き込み権限 + コマンドの実行権限を付与したエージェントモード.Agentic modelのみ利用可能
- Commit Message Generation — 文字通りコミットメッセージの自動生成.デフォルトではChatと同じモデルが利用される
- Autocomplete — Tabキーによる自動補完.FIM(Fill-in-the-Middle)機能をサポートするモデルのみ利用可能
クローズドモデルプロバイダ
本項ではクローズドモデルプロバイダの提供するモデルを利用する方法を述べる.全てのプロバイダを網羅するわけにもいかないので,ここではOpenAIとGeminiに絞る.
OpenAI API
API Keyの発行
まず https://platform.openai.com/api-keys よりOpenAI API Keyを発行する.秘密鍵は生成時の一度しか表示されないので注意.
API Keyの登録
発行したAPI KeyをVoid Editorの Void's Settings > Main Providers > OpenAI にペーストする.

ここにペーストしたAPI KeyはVoid Editorの設定ファイル void-settings.json に平文で格納されることに注意.
モデルの設定
次に Models タブより使用するOpenAIモデルを設定する.使用したいモデルのトグルスイッチをONにする.ここでONにしたモデルをチャットウィンドウで選択して使用する.

各モデルは,コンテキストサイズ,推論能力の有無,推論エフォートの指定方法(budget slider or effort slider)などの設定項目が存在する.デフォルト設定から変更したいなら,トグルボタン左側にあるプラスボタン

より Advanced Settings ウィンドウ

を開いて Override model をONにし,JSONを書き換えるとよい.
モデルの追加
前掲のOpenAIモデルのうち, gpt-4.1* / o3 / o4-mini はデフォルト設定がプリセットされているため,特段の設定なしで利用可能である.本記事執筆現在,GPT-5以降のモデルはプリセットされていないので,手動で追加・設定が必要である.
デフォルトでは表示されていないモデルを追加したい場合は,Main Providersタブの最下部の + Add a model ボタン

をクリックし,モデルプロバイダ及びモデル名を設定する.

ここで,Model NameはAPIエンドポイントに投げるパラメータとしてそのまま使われるので,正式な名称を指定する必要がある.
これによりモデルが追加されるが,プロバイダ毎のデフォルト設定が適用された状態になっているので,手動で修正の必要がある.前述の Advanced Settings よりJSONを適当に修正する.
// gpt-5.1
{
  "contextWindow": 400000,
  "reservedOutputTokenSpace": 8192,
  "supportsSystemMessage": "developer-role",
  "specialToolFormat": "openai-style",
  "reasoningCapabilities": {
    "supportsReasoning": true,
    "canTurnOffReasoning": false,
    "canIOReasoning": false,
    "reasoningSlider": {
      "type": "effort_slider",
      "values": [
        "none",
        "low",
        "medium",
        "high"
      ],
      "default": "low"
    }
  }
}
// gpt-5.2
{
  "contextWindow": 400000,
  "reservedOutputTokenSpace": 8192,
  "supportsSystemMessage": "developer-role",
  "specialToolFormat": "openai-style",
  "reasoningCapabilities": {
    "supportsReasoning": true,
    "canTurnOffReasoning": false,
    "canIOReasoning": false,
    "reasoningSlider": {
      "type": "effort_slider",
      "values": [
        "none",
        "low",
        "medium",
        "high",
        "xhigh"
      ],
      "default": "low"
    }
  }
}
Gemini (Google AI Studio) API
OpenAIの場合と大体同じ流れである.まず https://aistudio.google.com/api-keys よりGemini API Keyを発行し,次に発行したAPI Keyを Void's Settings > Main Providers > Gemini にペーストし,Models タブより使用したいGeminiモデルを設定する.

gemini-2.0 から gemini-2.5 のプレビュー版まではプリセットされている.本記事執筆現在,Gemini 2.5以降のモデルはプレビュー版を除きプリセットされていない.使用する場合は自前で設定が必要である.
// gemini-2.5-flash
{
  "contextWindow": 1048576,
  "reservedOutputTokenSpace": 8192,
  "supportsSystemMessage": "separated",
  "specialToolFormat": "gemini-style",
  "reasoningCapabilities": {
    "supportsReasoning": true,
    "canTurnOffReasoning": true,
    "canIOReasoning": false,
    "reasoningSlider": {
      "type": "budget_slider",
      "min": 0,
      "max": 24576,
      "default": 1024
    },
    "reasoningReservedOutputTokenSpace": 8192
  }
}
// gemini-3-flash-preview
{
  "contextWindow": 1048576,
  "reservedOutputTokenSpace": 8192,
  "supportsSystemMessage": "separated",
  "specialToolFormat": "gemini-style",
  "reasoningCapabilities": {
    "supportsReasoning": true,
    "canTurnOffReasoning": false,
    "canIOReasoning": false,
    "reasoningSlider": {
      "type": "effort_slider",
      "values": [
        "minimal",
        "low",
        "medium",
        "high"
      ],
      "default": "low"
    }
  }
}
ローカル/オープンモデルプロバイダ
Void Editorはローカル/オープンモデルプロバイダとしてOllama / vLLM / LM Studioに対応している.Ollamaを用いてLLM APIをserveする方法は「VS Code + Continue」で開設したので割愛する.
エンドポイントの設定変更
ローカルプロバイダとはいうものの,リモートマシン上にて上記ソフトウェアを用いてLLMをserveすることもできる.Void Editorはデフォルトでは以下のエンドポイントを利用する.これは上記ソフトウェアを用いてローカルホストでLLMをserveした場合のデフォルト値と一致する.
- Ollama:
http://127.0.0.1:11434 - vLLM:
http://localhost:8000 - LM Studio:
http://localhost:1234
リモートマシン上のAPIエンドポイントを使いたい場合や,ローカルホストであってもポートをデフォルト値から変更している場合には,Void's Settings > Local Providers よりAPIエンドポイントを修正する.

モデルの設定
Void's Settings > Models の最下部にあるトグルスイッチ
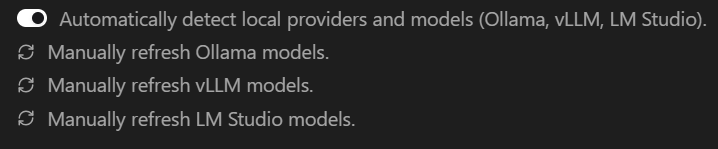
がONになっていれば,前項で設定したエンドポイントにてモデルプロバイダがserveされると,当該モデルプロバイダの提供するモデルが自動で追加される.
ただし,クローズドモデルプロバイダの場合と同様,Void Editorが内部的にメタデータを保持しているものしかデフォルトでは検出・表示されないため,デフォルトで表示されていないモデルは手動で追加の必要がある.
Cons
Void Editorは完全にオープンソースであり,必要なら自分でカスタマイズしたバージョンをビルドすることもできる.オープンモデルを使えば追加費用なしでAI Codingができる.一方で弱点もある.
VS Code拡張機能Remote - SSHとの併用における制限
Remote SSHを利用してリモートマシン上で動作させた際の動作が不完全である.例えばリモートマシン上のファイルを参照すべきところ,ローカルマシン上のファイルを参照しようとしてしまう.
voideditor/void#640 - File operations execute on host system instead of remote system when using SSH
これはVS Code拡張機能Continueと共通する問題である.詳細はContinueの記事を参照.なお,競合のCursorではこの問題は生じないが,これはRemote - SSHをCursor用にカスタマイズしたものを使用しているからだと思われる.
オートコンプリート対応モデルが少ない
FIM(Fill-in-the-Middle)に対応したモデルしかTab補完機能に使えない.大半のクローズドモデルは利用不可である.