背景
React 触ってみたい。
Typescript もやってみたい。
目次
- React のチュートリアルを Typescript でやってみた【環境構築編】← ここ
- React のチュートリアルを Typescript でやってみた【環境構築編2】
- React のチュートリアルを Typescript でやってみた【ソース準備編】
- React のチュートリアルを Typescript でやってみた1
- React のチュートリアルを Typescript でやってみた2
- React のチュートリアルを Typescript でやってみた3
作業環境
今回は docker を使用し環境を作る。
- macOS Catalina 10.15.3
- Docker version 19.03.5, build 633a0ea
- docker-compose version 1.25.3, build d4d1b42b
- webpack@4.41.6
- typescript@3.7.5
- react@16.12.0
開発環境の準備
プロジェクトのディレクトリーを作成
作業するディレクトリを作成します。
ここではreact-tutorialとしておきます。
mkdir react-tutorial
cd react-tutorial
ディレクトリの中に以下のファイルを作成します。
- Dockerfile
- docker-compose.yml
以下それぞれのファイルの内容
Dockerfile
FROM node:13.8.0-alpine3.11

ENV NODE_ENV=development

WORKDIR /app
docker-compose.yml
version: "3"
services:
  webserver:
    container_name: react-tutorial
    image: react
    build: .
    volumes:
      - ./:/app
    tty: true
    ports:
     - 8080:8080
tree はこんな感じ
react-tutorial $tree
.
├── Dockerfile
└── docker-compose.yml
開発環境の作成
とりあえずビルドします。
docker-compose up --build -d
以下のコマンドでコンテナが起動していれば OK
react-tutorial $docker-compose ps
起動している場合以下のように表示される。
react-tutorial $docker-compose ps
     Name                 Command            State           Ports
---------------------------------------------------------------------------
react-tutorial   docker-entrypoint.sh node   Up      0.0.0.0:8080->8080/tcp
コンテナ内に移動する場合は以下
docker exec -it react-tutorial /bin/sh
package.json の作成
まずはコンテナ内に移動
docker exec -it react-tutorial /bin/sh
以下のコマンドで package.json を作成します。
npm init
設定は以下のように設定しました。
package name: (app) react-tutorial
version: (1.0.0)
description:
entry point: (index.js) webpack.config.js
test command:
git repository:
keywords:
author:humi3
license: (ISC)
About to write to /app/package.json:
ワークディレクトリに以下の package.json が以下の内容でされたと思います。
{
  "name": "react-tutorial",
  "version": "1.0.0",
  "description": "## コンテナビルド `docker-compose up --build`",
  "main": "webpack.config.js",
  "scripts": {
    "test": "echo \"Error: no test specified\" && exit 1"
  },
  "author": "humi",
  "license": "ISC"
}
※今回は 1 から環境を構築しますが、以下のコマンドで React + Typescript の環境できます。
my-appの箇所にプロジェクト名
npx create-react-app my-app --typescript
必要なライブラリのインストール
Webpack
npm install --save-dev webpack webpack-cli
Typescript で必要なライブラリ
※awesome-typescript-loaderではなくts-loaderまたはbabel-loaderをおすすめします。
※label-loaderの場合、エラーで動かなかったと報告あり。
npm install --save-dev typescript awesome-typescript-loader source-map-loader
react & react-dom
npm install --save-dev react react-dom @types/react @types/react-dom
ディレクトリとファイルの準備
以下のディレクトリの構成になるようにファイルを作成します。
react-tutorial
├── dist
│   ├── index.html
│   └── bundle.js
├── node_modules
├── src
│   └──index.tsx
├── Dockerfile
├── docker-compose.yml
├── package-lock.json
└── package.json
bundle.js 及び index.tsx はファイル作成だけでいいです。
index.html だけ以下のような内容にしておきます。
<!DOCTYPE html>
<html lang="ja">
  <head>
    <meta charset="UTF-8" />
    <title>TypeScript HelloWorld</title>
  </head>
  <body>
    <div id="root"></div>
    <script src="bundle.js"></script>
  </body>
</html>
tsconfig.json の作成
以下のコマンドでtsconfig.jsonを作成します。
npx tsc --init
設定は以下のようにしました。
{
  "compilerOptions": {
    "target": "es5" /* Specify ECMAScript target version: 'ES3' (default), 'ES5', 'ES2015', 'ES2016', 'ES2017', 'ES2018', 'ES2019' or 'ESNEXT'. */,
    "module": "commonjs" /* Specify module code generation: 'none', 'commonjs', 'amd', 'system', 'umd', 'es2015', or 'ESNext'. */,
    "outDir": "./dist/" /* Redirect output structure to the directory. */,
    "strict": true /* Enable all strict type-checking options. */,
    "esModuleInterop": true /* Enables emit interoperability between CommonJS and ES Modules via creation of namespace objects for all imports. Implies 'allowSyntheticDefaultImports'. */,
    "sourceMap": true /* Emit a single file with source maps instead of having a separate file. */,
    "forceConsistentCasingInFileNames": true /* Disallow inconsistently-cased references to the same file. */,
    "jsx": "react",
    "lib": ["es2015", "dom"]
  }
}
現在のディレクトリ
react-tutorial
├── dist
│   ├── index.html
│   └── bundle.js
├── node_modules
├── src
│   └──index.tsx
├── Dockerfile
├── docker-compose.yml
├── package-lock.json
├── package.json
└── tsconfig.json
webpack.config.js の作成
webpack.config.jsを作成します。
react-tutorial
├── dist
│   ├── index.html
│   └── bundle.js
├── node_modules
├── src
│   └──index.tsx
├── Dockerfile
├── docker-compose.yml
├── package-lock.json
├── package.json
├── tsconfig.json
└── webpack.config.json
webpack.config.jsの内容
const path = require("path");

module.exports = {
  entry: path.resolve(__dirname, "./src/index.tsx"),
  output: {
    path: path.resolve(__dirname, "dist"),
    filename: "bundle.js"
  },
  devtool: "source-map",
  target: "node",
  resolve: {
    extensions: [".ts", ".tsx", ".js", ".json"]
  },
  module: {
    rules: [
      { test: /\.tsx?$/, loader: "awesome-typescript-loader" },
      {
        enforce: "pre",
        test: /\.tsx?$/,
        loader: "source-map-loader"
      }
    ]
  }
};
以上でファイルの準備が完成しました。
動作確認
index.tsx の内容を以下へ
import * as React from "react";
import * as ReactDOM from "react-dom";

export default class App extends React.Component<{}, {}> {
  render(): JSX.Element {
    return <div>HelloWorld!</div>;
  }
}

ReactDOM.render(<App />, document.getElementById("root"));
package.json に build 用の script を追加
  "scripts": {
    "test": "echo \"Error: no test specified\" && exit 1",
    "build":"webpack"
  },
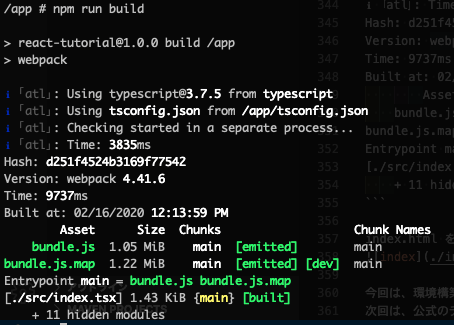
以下のコマンドで build を行います。
npm run build
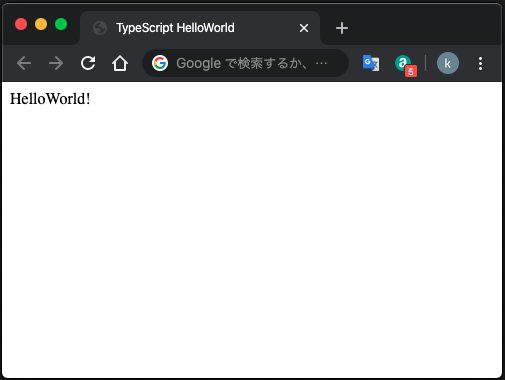
index.html をブラウザで開きHelloWorld!が表示されたら OK です。

今回は、環境構築の部分をやってみました。
次回は、公式のチュートリアルを Typescript にしてやっていきたいと思います。
参考
https://speakerdeck.com/takepo/reactxreduxniokerutypescriptru-men
https://qiita.com/soarflat/items/28bf799f7e0335b68186
https://qiita.com/one-kelvin/items/b810aafb6b5ef90789a3
