2016/9/8
※cssnextに含まれる機能についての記事を書きました。
cssnextから学ぶ次世代CSS
PostCSSを知っていますか?
筆者はどこかで聞いたことあるぐらいで
- 次のCSS?
- またSassみたいなやつ作ったのか
- もうSassで終わりにしようぜ(覚えるの辛い)
といった負のイメージから勉強してみたのですが、だいぶ想像と違いました。
Sassの代替というよりかはCSSのエコシステムを構築するための共通基盤、といったところでしょうか。
本記事はタイトルにもあるようにPostCSSを使ってCSSをモダン化する流れで書きました。
「Sassすら使っていない」「このCSS界隈のライブラリよくわからない」という方こそ是非読んでみてください。
PostCSSとは
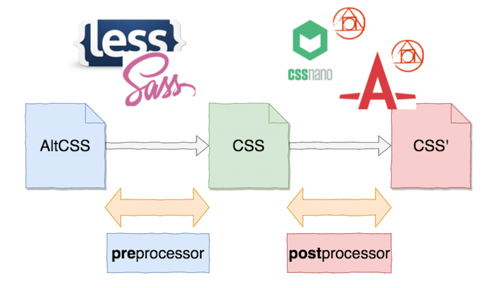
2015年4月頃以前はこんな感じ
SassやLESSを筆頭にプリプロセッサとPostCSSを内部的につかっていたcssnanoやautoprefixerを組みわせて使っていた。(PostCSS自体は昔からあった)
CSSの前に処理するから preProcessor でCSSの後に処理するから postProcessor
PostCSS自体はpostProcessor用のライブラリであくまで裏方。表には出てこなかった。
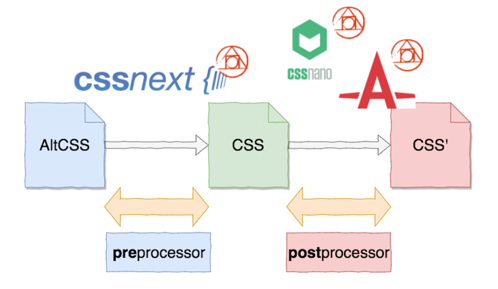
2015年4月頃以後はこんな感じの流れが生まれた
PostCSSいいじゃんと思った人たちがpreProcessorに使い始めた?(AltCSSをそのままパース出来るとは思えないのでPostCSSをpreProcessorに対応させたのが先かも)
そのひとつにPostCSSを使ったcssnextというライブラリ(次世代CSSのためのPostCSSプラグインパック)が生まれた。
※cssNextや他プラグインを組み合わせることでSassやLESSの代わりに使える
可能な限り次世代CSSの標準構文で書こう
SassやLESSの独自構文をやめよう
PostCSSで統一させよう
という流れが湧き上がった感じでしょうか。
これはJavaScript界隈でCoffeeScript(独自構文)をやめてBabel(次世代JavaScript)のに移行しているのと似ていますね。
※SassやLESSから今すぐPostCSS(cssnext)に乗り換える必要は無いと思います。
大きくない新規プロジェクトやちょっとしたページを作るときに導入してみるのが良いのではないでしょうか。
以降からStep by Stepで導入の手順を記載しています。
前提
Nodejs, npmが導入済みであること
流れ
| Step | 目的 |
|---|---|
| Step 0 | サンプルのウェブページを作成 |
| Step 1 | 実行環境の整備 |
| Step 2 | PostCSSを実行 |
| Step 3 | 変数を扱う(css-variables) |
| Step 4 | ネストでCSSを定義する(postcss-nested) |
| Step 5 | cssnextとは |
| Step 6 | cssファイルを分割 |
| Step 7 | ベンダープレフィックスの自動付与 |
| Step 8 | 圧縮・難読化 |
Step 0 サンプルのウェブページを作成
PostCSSを導入する前に動作確認用のサンプルのウェブページを作成しておきます。
以下の構成になります。
.
├── css
│   └── app.css
└── index.html
<!DOCTYPE html>
<html>
  <head>
    <meta charset="UTF-8">
    <title>Sample Page</title>
    <link rel="stylesheet" href="css/app.css">
  </head>
  <body>
    <ul>
      <li><button class="button">button</button>
      <li><button class="button button--large">button button--large</button>
      <li><button class="button button--red">button button--red</button>
      <li><button class="button button--large button--blue">button button--large button--blue</button>
    </ul>
  </body>
</html>
.button {
  height: 30px;
  display: flex;
  align-items: center;
  justify-content: center;
  border-radius: 4px;
  cursor: pointer;
  font-size: 14px;
}

.button--large {
  height: 50px;
  font-size: 18px;
}

.button--red {
    color: #fff;
    background-color: #e23B00;
}

.button--blue {
    color: #fff;
    background-color: #3f526b;
}
Step 1 実行環境の整備
本Stepでは実行環境を整えます。
package.jsonの作成
Node.js(npm)を使ってビルドを行うためnpm initでpackage.jsonを作成しておきます。
質問はエンター連打で問題ありません。
npm init
gulpの設定
本記事ではPostCSSの実行にgulpを用います。
※WebpackやGruntなど各種ビルドツールで実行可能です。他ツールを使う場合はUsageを参照。
npm install gulp --save-dev
gulpfile.jsというファイルを作成します。
これはgulpを実行する際に自動で読み込まれます。
app.cssを読み込んでdistディレクトリに結果を出力する設定です。
var gulp = require('gulp');

gulp.task('build', function () {
  return gulp.src('./css/app.css')
    .pipe(gulp.dest('./dist'));
});
npmコマンド経由で実行するためpackage.jsonを開いて scriptsにgulp実行コマンドを追加します。
  "scripts": {
-   "test": "echo \"Error: no test specified\" && exit 1"
+   "test": "echo \"Error: no test specified\" && exit 1",
+   "build": "gulp build"
  },
以下のコマンドで実行してみましょう。
npm run build
app.cssがdistにそのまま出力されます。
.
├── css
│   └── app.css
├── dist
│   └── app.css
├── gulpfile.js
├── index.html
└── package.json
Step 2 PostCSSを実行
本Stepでは PostCSS本体は何もしない ことを確認します。
インストール
gulpで実行するためgulp-postcssをインストールします。
※PostCSS本体はgulp-postcssに含まれています。
npm install gulp-postcss --save-dev
PostCSSを実行するように変更
gulp-postcssをgulpのpipeに通すようにします。
※実引数に[]がないとエラーになるので注意。
var gulp = require('gulp');

gulp.task('build', function () {
+ var postcss = require('gulp-postcss');

  return gulp.src('./css/app.css')
+   .pipe(postcss([]))
    .pipe(gulp.dest('./dist'));
});
ついでにhtmlのcssリンクを直しておきます。
<!DOCTYPE html>
<html>
  <head>
    <meta charset="UTF-8">
    <title>Sample Page</title>
-   <link rel="stylesheet" href="css/app.css">
+   <link rel="stylesheet" href="dist/app.css">
  </head>
  <body>
    <ul>
      <li><button class="button">button</button>
      <li><button class="button button--large">button button--large</button>
      <li><button class="button button--red">button button--red</button>
      <li><button class="button button--large button--blue">button button--large button--blue</button>
    </ul>
  </body>
</html>
実行
npm run build
dist/app.cssを見てみましょう。
先ほどと何も変わっていませんね。
以下の2点がポイントです。
- PostCSSは本体は何もしない
- PostCSSのプラグインが処理を行う
次Stepからプラグインを追加していきます。
Step 3 変数を扱う(css-variables)
次世代CSSの一つにcss-variablesというのがあります。
名前の通りCSS内で変数が使える機能です。
こちらをPostCSSで実装してみましょう。
インストール
PostCSSプラグインであるpostcss-custom-propertiesをインストールします。
npm install postcss-custom-properties --save-dev
実装
何も指定していなかったpostcssに対してインストールしたプラグインを使わせるように設定します。
また、このプラグインはpreProcessorなのでpreprocessorsという配列に詰め込んでおきます。
var gulp = require('gulp');

gulp.task('build', function () {
  var postcss = require('gulp-postcss');
+ var customProperties = require('postcss-custom-properties');
+
+ var preprocessors = [
+   customProperties
+ ];

  return gulp.src('./css/app.css')
-   .pipe(postcss([]))
+   .pipe(postcss(preprocessors))
    .pipe(gulp.dest('./dist'));
});
cssを修正します。
以下のルールです。
-
:root{}に変数を定義 - 変数名は
--を頭につける - 変数を展開する際は
var(変数名)
+ :root {
+   --red: #e23B00;
+   --blue: #3f52e2;
+ }

.button {
  height: 30px;
  display: flex;
  align-items: center;
  justify-content: center;
  border-radius: 4px;
  cursor: pointer;
  font-size: 14px;
}

.button--large {
  height: 50px;
  font-size: 18px;
}

.button--red {
    color: #fff;
-   background-color: #e23B00;
+   background-color: var(--red);
}

.button--blue {
    color: #fff;
-   background-color: #3f526b;
+   background-color: var(--blue);
}
実行
npm run build
dist/app.cssを見てみましょう。
変数が展開され先ほどと全く同じファイルになっていることが確認できます。
補足:さらにcss variablesを知りたい方向け
本記事のStepの流れからは割愛しますが、上記の使い方は定数の展開です。
preserve:trueを指定すると以下の様に2行が出力されます。
// gulp
customProperties({preserve: true})

// 出力
background-color: #e23B00;
background-color: var(--red);
意味あるの?と思うかもしれませんが、本来のcss-variablesは
下記のようにJavaScriptから変数の書き換えが可能です。
document.documentElement.style.setProperty('--red, 'red');
つまり定数としても使えますが、本当に変数として使えるということです。
※未来の話ではありますがChromeやFirefoxはすでに実装済みだったりします。
以下の解説記事・デモページがとてもおすすめです。
CSS Variables(カスタムプロパティ): なぜ、関心を持つべきか?
CSS Custom Properties (CSS Variables) Sample
Step 4 ネストでCSSを定義する(postcss-nested)
SassなどのCSSプリプロセッサを使っている人はネストというとても便利な機能を多用していると思います。
同様のことがPostCSSでも可能です。
インストール
PostCSSプラグインであるpostcss-nestedをインストールします。
npm install postcss-nested --save-dev
実装
preprocessorsにpostcss-nestedを追加します。
var gulp = require('gulp');

gulp.task('build', function () {
  var postcss = require('gulp-postcss');
  var customProperties = require('postcss-custom-properties');
+ var nested = require('postcss-nested');

  var preprocessors = [
    customProperties
+   , nested
  ];

  return gulp.src('./css/app.css')
    .pipe(postcss(preprocessors))
    .pipe(gulp.dest('./dist'));
});
.buttonが重複しいているのでこれをまとめましょう。
&を使って{}で括るだけです。
.button--large{}は以下の様に記載する

.button {
  &--large {}
}
以下の様になります。
:root {
  --red: #e23B00;
  --blue: #3f52e2;
}

.button {
  height: 30px;
  display: flex;
  align-items: center;
  justify-content: center;
  border-radius: 4px;
  cursor: pointer;
  font-size: 14px;

  &--large {
    height: 50px;
    font-size: 18px;
  }

  &--red {
    color: #fff;
    background-color: var(--red);
  }

  &--blue {
    color: #fff;
    background-color: var(--blue);
  }
}
実行
npm run build
dist/app.cssを見てみましょう。
ネストが展開され先ほどと全く同じファイルになっていることが確認できます。
記述量を単純に減らせますし、一括で変更できるので置換ミスも防ぎやすくなりますね。
Step 5 cssnextとは
次世代CSSのために作成されているPostCSSプラグインをまとめたプラグインパックというものがあります。
それがcssnextです。
本記事の冒頭で説明したようにPostCSSは各自好き勝手に機能を実装できますが、これがデメリットを産みます。
次世代CSSになる可能性が微塵もないプラグインを使ってしまうとオレオレCSSの出来上がりです。
他の人は読めない・書けない・見たくないCSSになります。
※逆にものすごく流行ればCSS標準になる可能性もあるのかもしれませんが。
そうならないようにPostCSSで使う プリプロセッサ系のプラグイン は「cssnextに記載されたプラグインだけ使う」などのルールを決めたほうが良いでしょう。
cssnextはインストールしなくても良い
cssnextをインストールすればpostcss-custom-propertiesもpostcss-nestedも同時にインストール&使用できますが、使わないプラグインも混じってしまいます。
自分で使いたいプラグインがわかっているのならば、1つずつ入れたほうが肥大化させずに済むので良いと思います。
そのため本記事ではcssnextは扱いません。
※cssnextはPostCSSをやっていると必ず出てくる用語なので説明のために記載しました。
Step 6 cssファイルを分割
app.cssに全部まとめていましたが色とボタンを分割しましょう。
インストール
PostCSSプラグインであるpostcss-importをインストールします。
npm install postcss-import --save-dev
実装
このプラグインは@importと書かれたファイルを結合してまとめるプラグインです。
注意点として他のpreProcessor系のプラグインより先にやらないといけません。
gulpのストリームの流れを意識しましょう。
var gulp = require('gulp');

gulp.task('build', function () {
  var postcss = require('gulp-postcss');
  var customProperties = require('postcss-custom-properties');
  var nested = require('postcss-nested');
+ var Import = require('postcss-import');

  var preprocessors = [
+   Import
-   customProperties
+   , customProperties
    , nested
  ];

  return gulp.src('./css/app.css')
    .pipe(postcss(preprocessors))
    .pipe(gulp.dest('./dist'));
});
app.cssは全部消して以下の2行だけにします。
@import "color";
@import "button";
残りはそのまま切り出すだけです。
:root {
  --red: #e23B00;
  --blue: #3f52e2;
}
.button {
  height: 30px;
  display: flex;
  align-items: center;
  justify-content: center;
  border-radius: 4px;
  cursor: pointer;
  font-size: 14px;

  &--large {
    height: 50px;
    font-size: 18px;
  }

  &--red {
    color: #fff;
    background-color: var(--red);
  }

  &--blue {
    color: #fff;
    background-color: var(--blue);
  }
}
実行
npm run build
dist/app.cssを見てみましょう。
これまた先ほどと全く同じファイルになっていることが確認できます。
ファイルを適宜分割していきましょう。
ファイルが増えてきたのでここまでのファイル構成を記載しておきます。
.
├── css
│   │── app.css
│   │── button.css
│   └── color.css
├── dist
│   └── app.css
├── gulpfile.js
├── index.html
└── package.json
Step 7 ベンダープレフィックスの自動付与
ベンダープレフィックスをつけるのって面倒ですよね。
これを自動でやってくれるプラグインがautoprefixerです。
インストール
PostCSSプラグインであるautoprefixerをインストールします。
npm install autoprefixer --save-dev
実装
わかりやすくするためにpostprocessors変数に入れておきます。
postprocessorsは普通のCSSからの変更処理になります。
var gulp = require('gulp');

gulp.task('build', function () {
  var postcss = require('gulp-postcss');
  var customProperties = require('postcss-custom-properties');
  var nested = require('postcss-nested');
  var Import = require('postcss-import');
  var autoprefixer = require('autoprefixer');

  var preprocessors = [
    Import
    , customProperties
    , nested
  ];

  var postprocessors = [
    autoprefixer
  ];

  return gulp.src('./css/app.css')
    .pipe(postcss(preprocessors))
    .pipe(postcss(postprocessors))
    .pipe(gulp.dest('./dist'));
});
実行
npm run build
出力されたCSSを見てみましょう。
-webkit〜などが追加されています。
※インデントずれが気になりますが、次Stepで圧縮・難読化するのであんまり気にしなくてOKです。
.button {
  height: 30px;
+ display: -webkit-box;
+ display: -ms-flexbox;
  display: flex;
+ -webkit-box-align: center;
+     -ms-flex-align: center;
          align-items: center;
+ -webkit-box-pack: center;
+     -ms-flex-pack: center;
         justify-content: center;
  border-radius: 4px;
  cursor: pointer;
  font-size: 14px;
}
.button--large {
  height: 50px;
  font-size: 18px;
}
.button--red {
  color: #fff;
  background-color: #e23B00;
}
.button--blue {
  color: #fff;
  background-color: #3f52e2;
}
Step 8 圧縮・難読化
実際に使用する際には圧縮・難読化をすると思います。
これを行うためのプラグインがcssnanoです。
インストール
PostCSSプラグインであるcssnanoをインストールします。
npm install cssnano gulp-sourcemaps gulp-rename --save-dev
実装
ソースマップ用の処理と圧縮・難読化を実行するように変更します。
var gulp = require('gulp');

gulp.task('build', function () {
+ var sourcemaps = require('gulp-sourcemaps');
  var postcss = require('gulp-postcss');
  var customProperties = require('postcss-custom-properties');
  var nested = require('postcss-nested');
  var Import = require('postcss-import');
  var autoprefixer = require('autoprefixer');
+ var rename = require("gulp-rename");
+ var cssnano = require('cssnano');

  var preprocessors = [
    Import
    , customProperties
    , nested
  ];

  var postprocessors = [
    autoprefixer
+   , cssnano
  ];

  return gulp.src('./css/app.css')
+   .pipe(sourcemaps.init())
    .pipe(postcss(preprocessors))
    .pipe(postcss(postprocessors))
+   .pipe(rename('app.min.css'))
+   .pipe(sourcemaps.write('.'))
    .pipe(gulp.dest('./dist'));
});
圧縮後のファイルを読み込むようにします。
<!DOCTYPE html>
<html>
  <head>
    <meta charset="UTF-8">
    <title>Sample Page</title>
-   <link rel="stylesheet" href="dist/app.css">
+   <link rel="stylesheet" href="dist/app.min.css">
  </head>
  <body>
    <ul>
      <li><button class="button">button</button>
      <li><button class="button button--large">button button--large</button>
      <li><button class="button button--red">button button--red</button>
      <li><button class="button button--large button--blue">button button--large button--blue</button>
    </ul>
  </body>
</html>
実行
dist/app.cssが残っている必要はないので消しておきます。
rm dist/app.css
npm run build
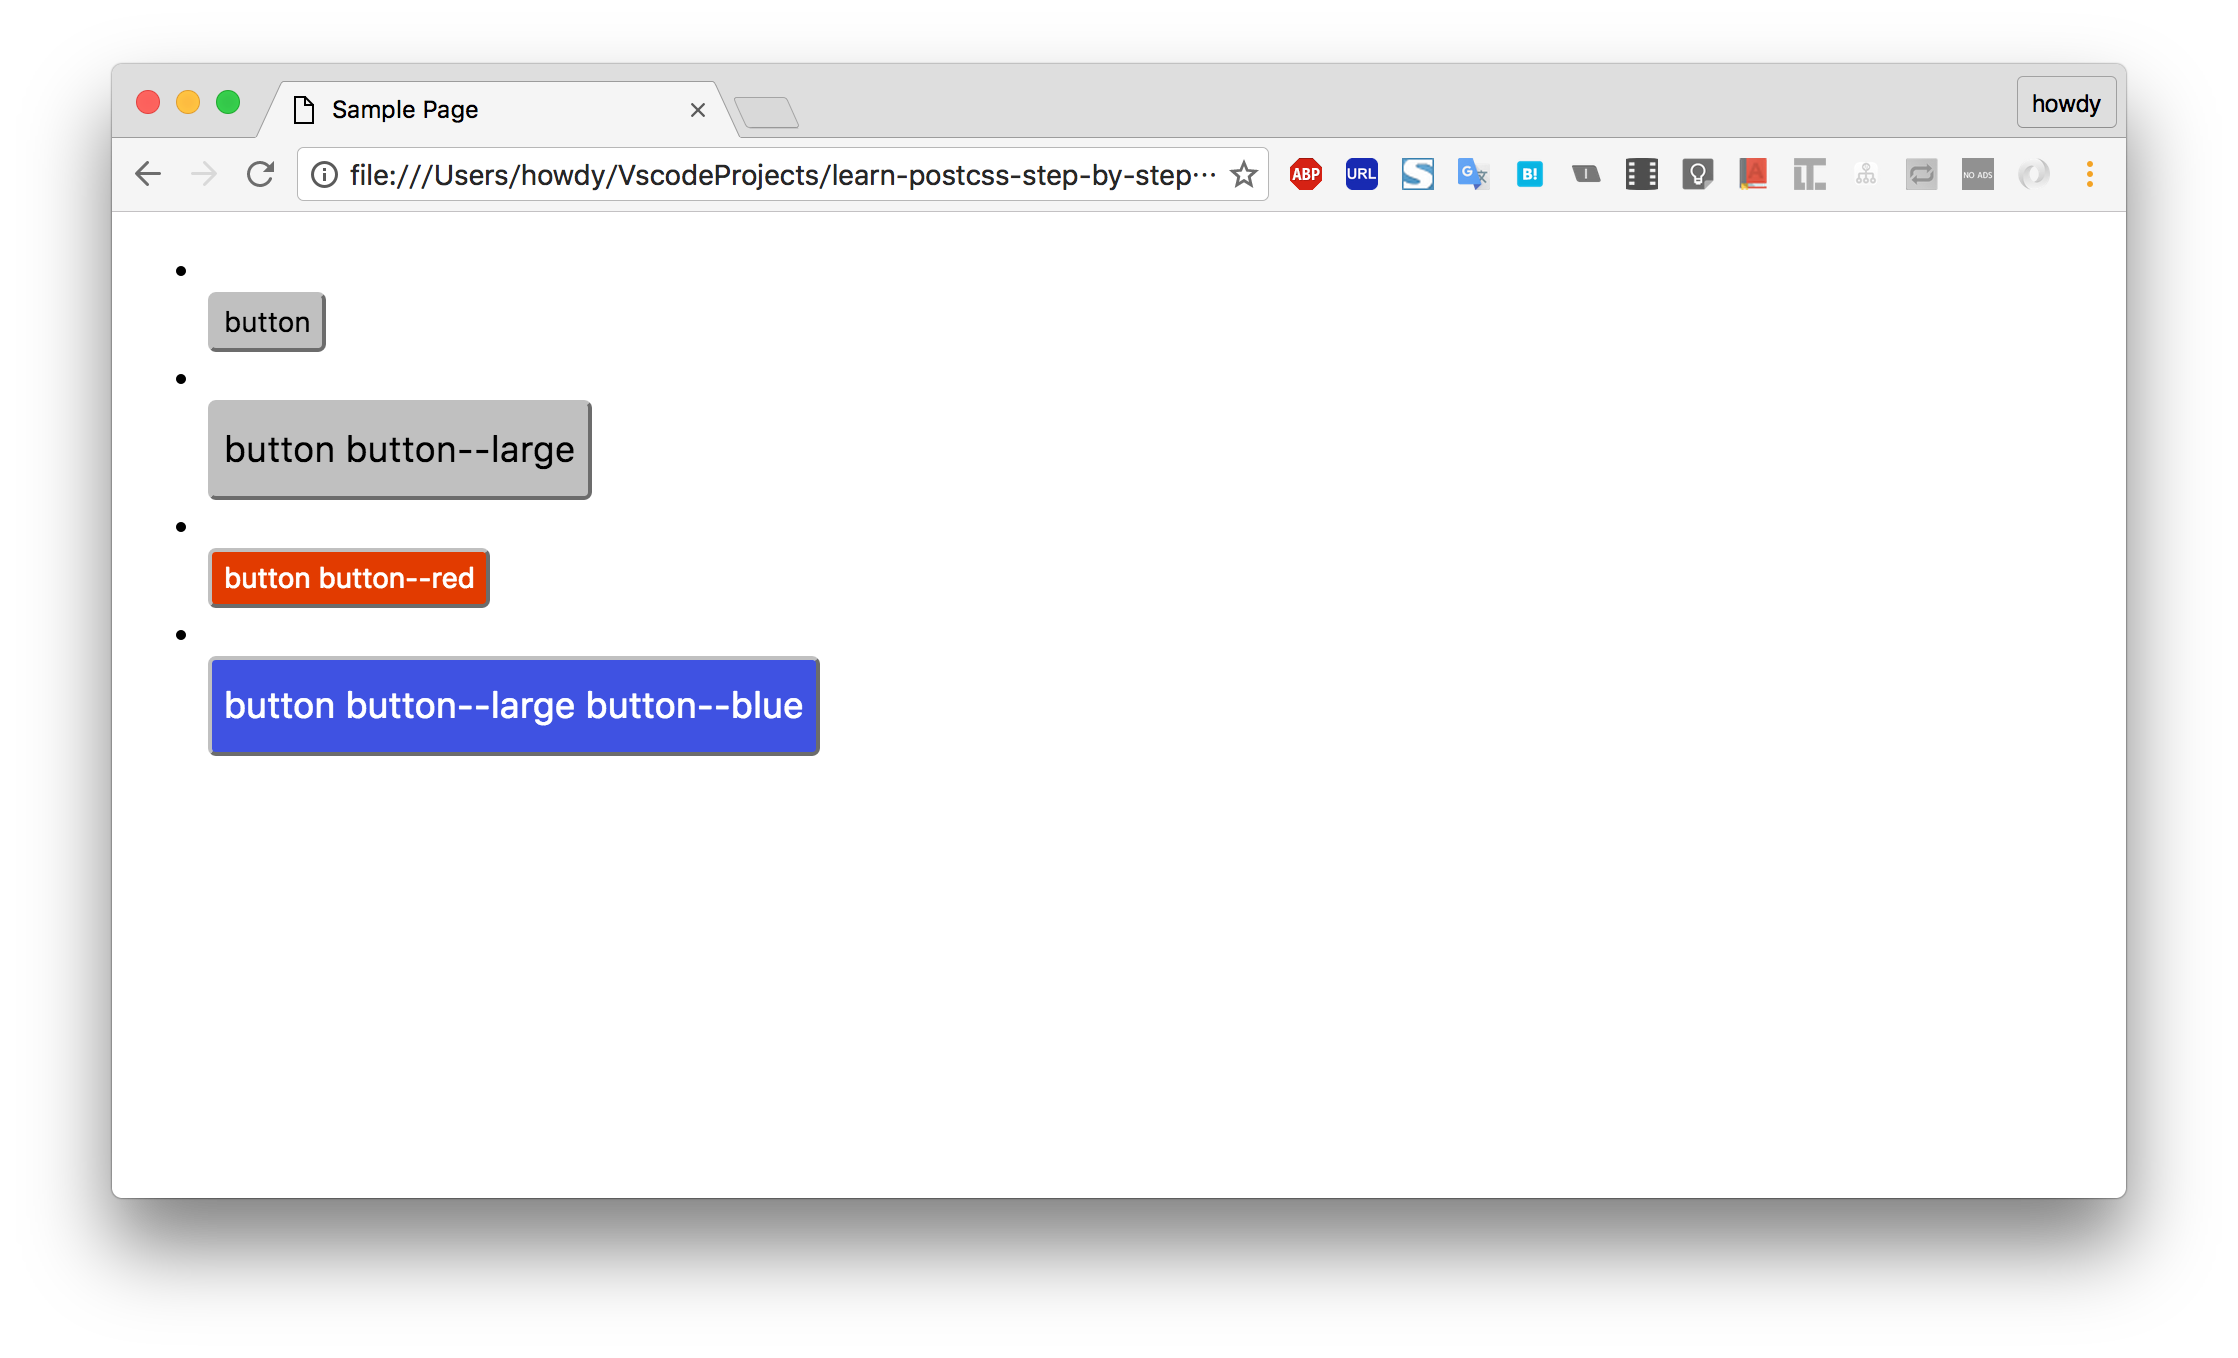
ブラウザで開いてみましょう。
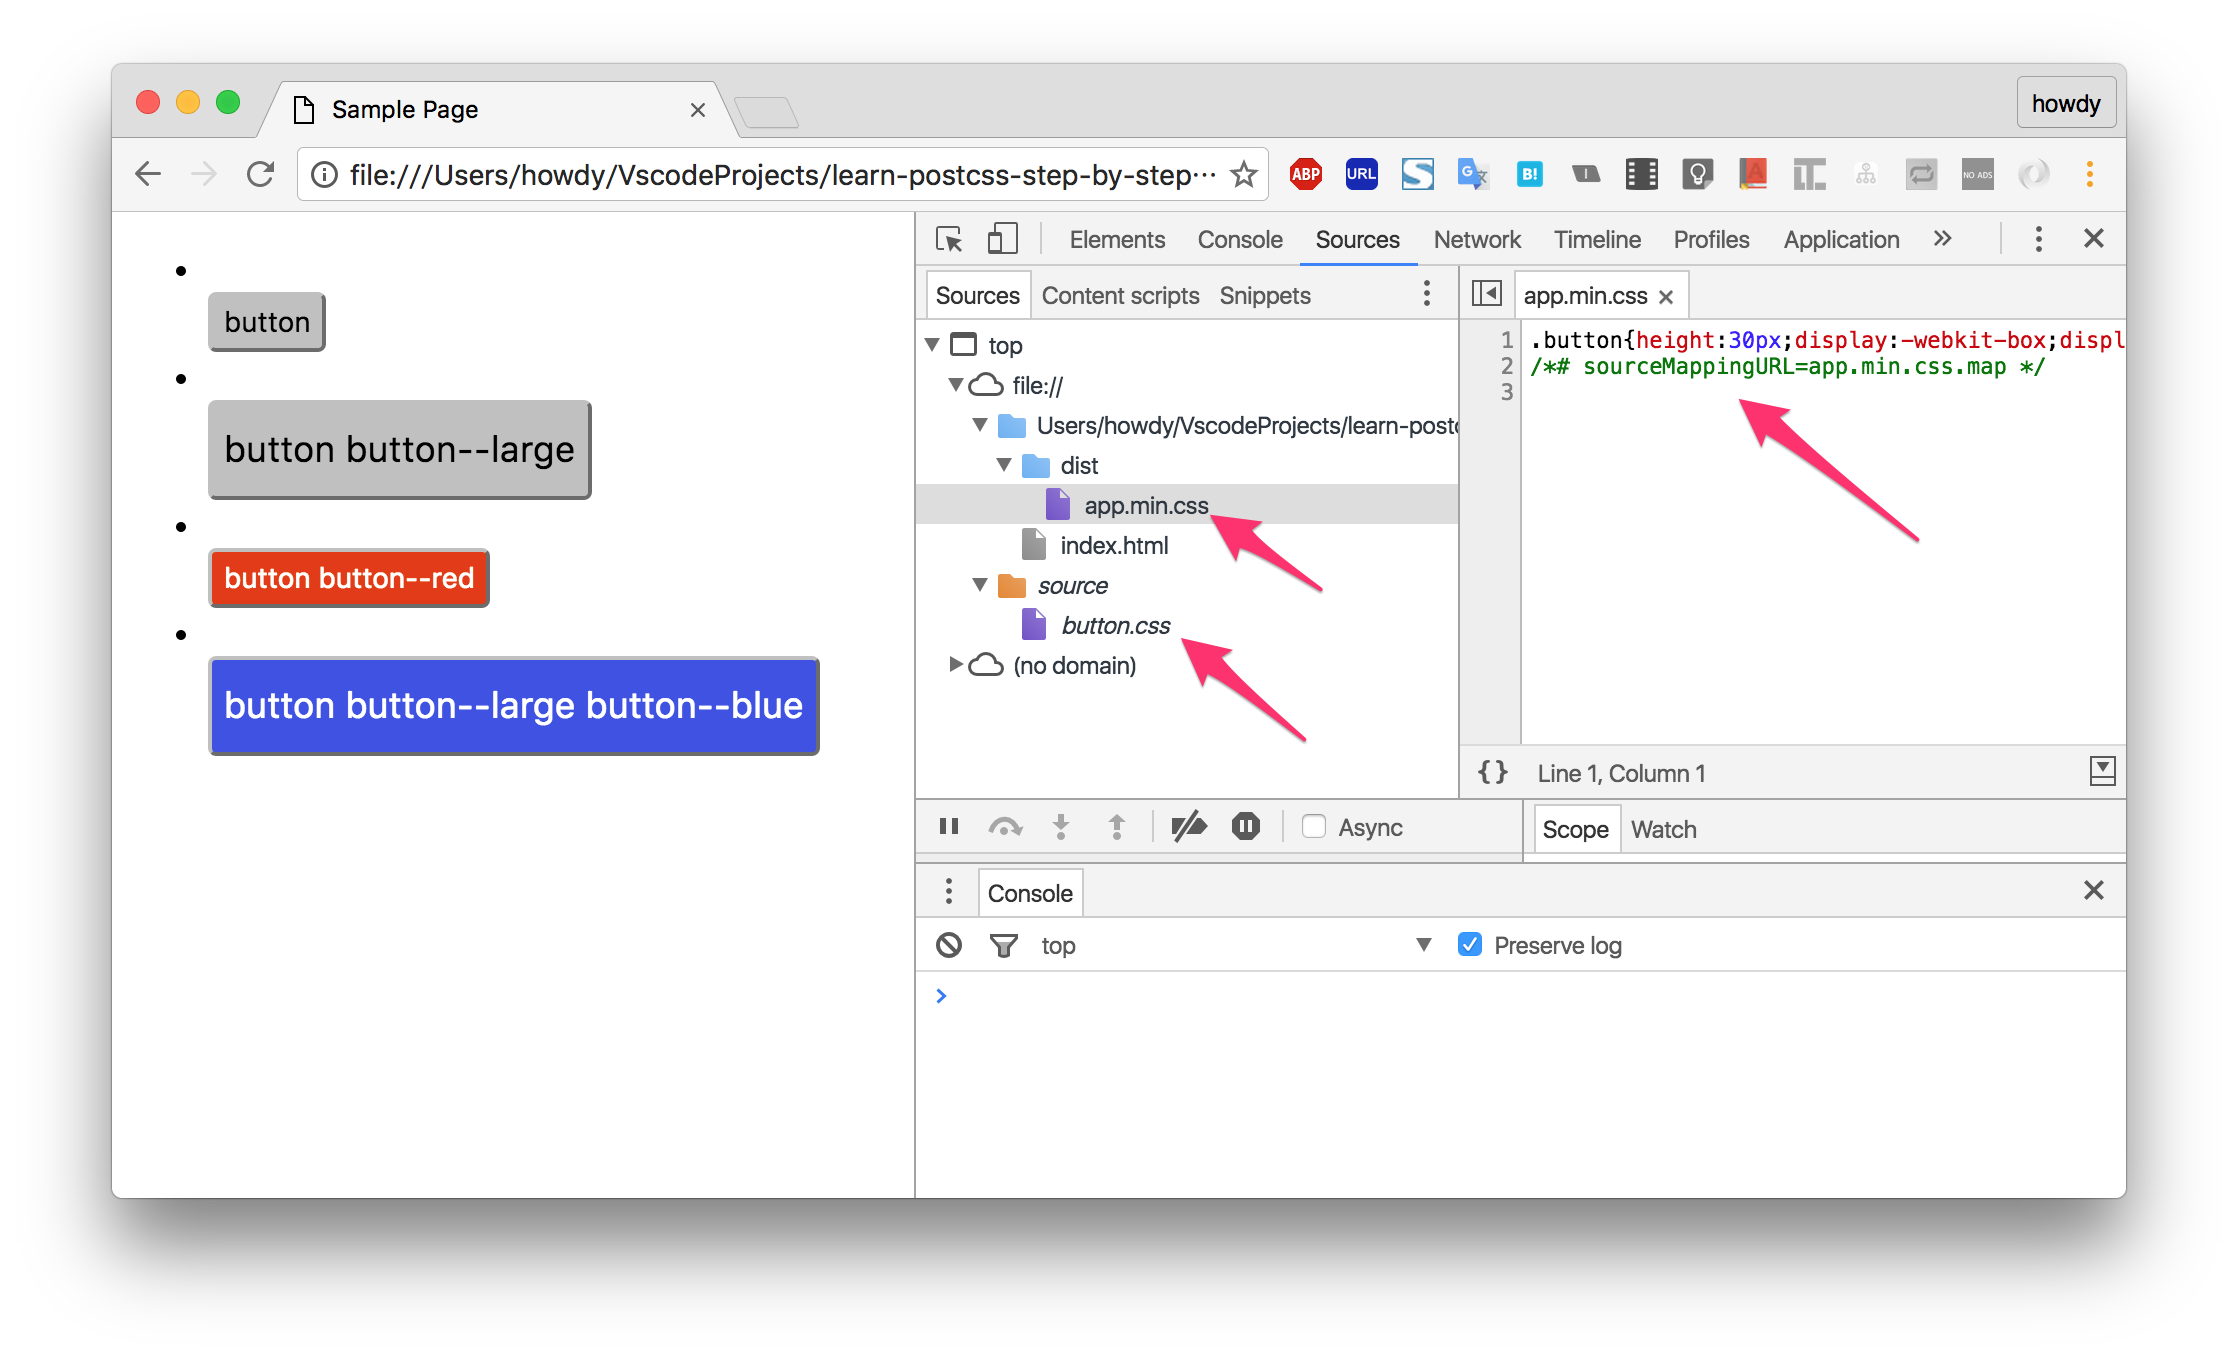
圧縮されてソースマップも有効になっています。
※color.cssがないですが:root{}だけだと出力されない?模様
.hoge{}などを定義すればちゃんとcolor.cssにも貼られるので実運用上はそこまで問題にならないと思われます。

あとがき
本記事で紹介したプラグインは200以上あるうちのメジャーなやつを紹介しました。
他のプラグインの探し方は以下の2つが良さげです。
- postcss.partsでカテゴリから探す。
- npmsで人気のプラグインを探す。
@このPostCSSのアイコンなんか怖いですよね。


