Rustをsvg形式で書き出す。
Rust 3 Advent Calendar 2020 22日目の記事です。
Qiita初投稿です。
Rustを使ってクレート開発とsvg形式で書き出したという話です。
こんな感じの画像を書き出します。
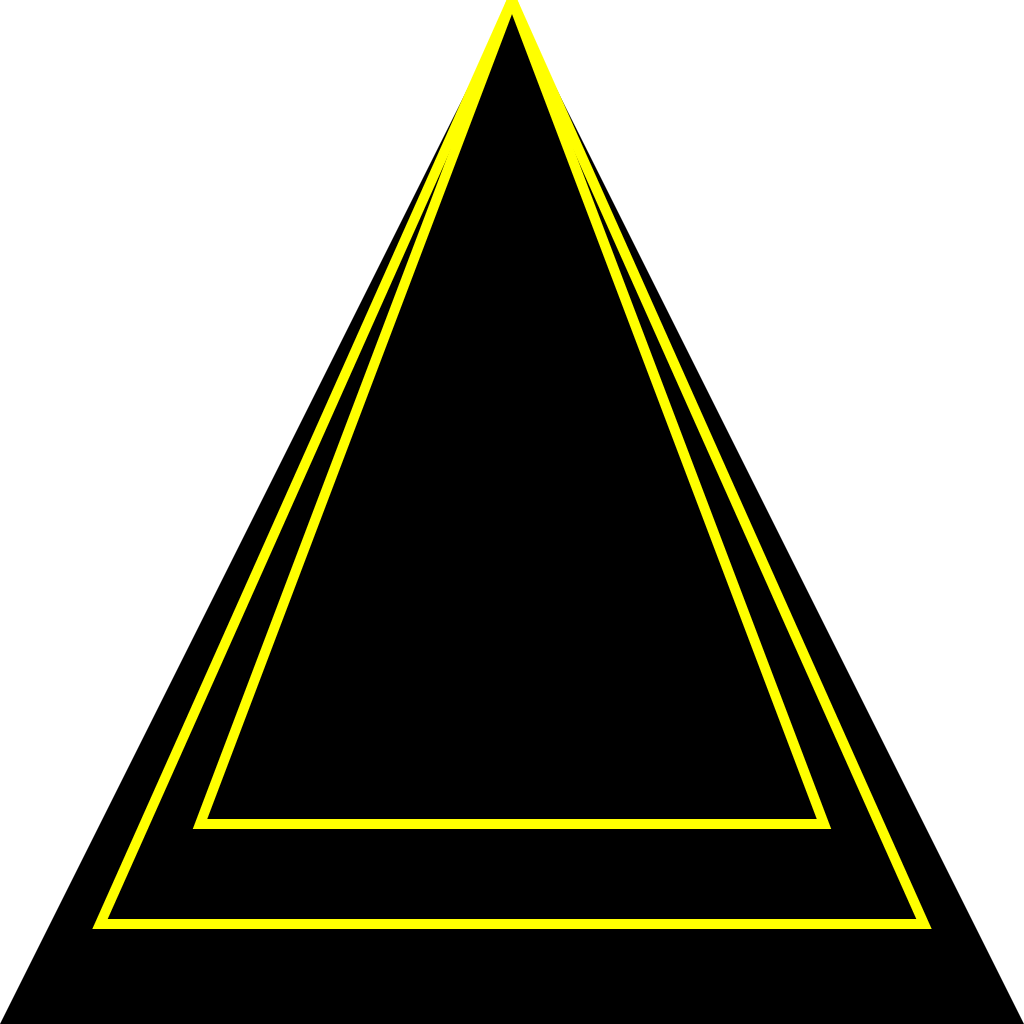
Qiitaではsvg形式は貼り付けられないのでpng形式です。リポジトリにはsvg形式の画像もあります。
なおこの記事ではsvgとは何か?と言うような説明はしません。
リポジトリ
すべてGithubにおいています。
Python versionのほうが開発は進んでいます
開発目的
1.Rustの勉強
2.svgの勉強
3.イラスト制作のため
以上この3つです。
polygonの実装
svgにはいくつものタグが存在しますがpolygonタグ1つに絞って実装しました。
pub mod polygon {
    use crate::point::point::Point;
    use crate::convert_str::convert_str::*;
    ///# Polygonを表す構造体
    pub struct Polygon {

        data: Vec<Point>,
    }

    impl Polygon {
        /// ## 変数の初期化を行う(コンストラクタ)
       /// ### variable
       /// init_data : Vec<Point> ポリゴンデータの初期化
       /// ### Example
       /// let polygon1 = Polygon::new(0.0, 0.0)
       ///
        pub fn new(init_data: Vec<Point>) -> Polygon {

            Polygon { data: init_data }
        }
    }


    impl Polygon {
        /// ## ポリゴンタグデータの取得
        /// 設定パラメータ fill fill-opacity
        /// fill_color: fill
        /// fill_opacity: fill-opacity
        ///
        pub fn render_polygon1(self, fill_color: String, fill_opacity: f64) -> String{
            let str_data = format_one(self.data);
            let start = "<polygon";
            let location_data = format!("points=\"{}\"", str_data);
            let fill_set = format!("fill=\"{}\" fill-opacity=\"{}\"",
                                   fill_color, fill_opacity);
            let end = "/>\n";
            let poly1 = format!("{} {} {} {}", start, location_data, fill_set, end);

            return poly1;
        }
    }

    impl Polygon {
        /// ## ポリゴンタグデータの取得
        /// 設定パラメータ fill fill-opacity stroke stroke-width stroke-opacity
        /// fill_color: String fill
        /// fill_opacity: f64 fill-opacity
        /// stroke_color: String stroke
        /// stroke_width: f64 stroke-width
        /// stroke_opacity: f64 stroke-opacity
        ///
        pub fn render_polygon2(self, fill_color: String, fill_opacity: f64,
                               stroke_color: String, stroke_width: f64, stroke_opacity: f64) -> String{
            let str_data = format_one(self.data);
            let start = "<polygon";
            let location_data = format!("points=\"{}\"", str_data);
            let fill_set = format!("fill=\"{}\" fill-opacity=\"{}\"",
                                   fill_color, fill_opacity);
            let stroke_set = format!("stroke=\"{}\" stroke-width=\"{}\" stroke-opacity=\"{}\"",
                                     stroke_color, stroke_width, stroke_opacity);
            let end = "/>\n";
            let poly2 = format!("{} {} {} {} {}", start, location_data, fill_set, stroke_set, end);

            return poly2;
        }
    }

    impl Polygon {
        /// ## ポリゴンタグデータの取得
        /// 設定パラメータ stroke stroke-width stroke-opacity
        /// stroke_color: String stroke
        /// stroke_width: f64 stroke-width
        /// stroke_opacity: f64 stroke-opacity
        pub fn render_polygon3(self, stroke_color: String, stroke_width: f64, stroke_opacity: f64) -> String{
            let str_data = format_one(self.data);
            let start = "<polygon";
            let location_data = format!("points=\"{}\"", str_data);
            let fill_set = format!("fill=\"transparent\"");
            let stroke_set = format!("stroke=\"{}\" stroke-width=\"{}\" stroke-opacity=\"{}\"",
                                     stroke_color, stroke_width, stroke_opacity);
            let end = "/>\n";
            let poly3 = format!("{} {} {} {} {}", start, location_data, fill_set, stroke_set, end);

            return poly3;
        }
    }
}
1つ注意点なのはpolygonタグでの座標データの取り扱いは1つの文字列にまとめていかないといけないということです。
それほど難しくないですがsvgの仕様を知らないとうまく出力されてもsvg側でエラーが出てしまうので注意が必要です。
ソースコードにある
format_one(self.data);
は複数のデータを1つにまとめているユーリティ関数です。
三角形の描画
三角形の描画するコードの1部です
pub mod triangle {
    use crate::point::point::Point;
    /// # 三角形の作成
    /// 大きさはsvg画像サイズに依存する。
    pub struct Triangle {
        width: f64,
        height: f64,
    }

    impl Triangle {
        /// ## 変数の初期化を行う(コンストラクタ)
        /// ### variable
        /// init_width: f64 画像サイズ 横幅
        /// init_height: f64 画像サイズ 高さ
        pub fn new(init_width: f64, init_height: f64) -> Triangle {

            Triangle { width:init_width, height: init_height }
        }
    }

    impl Triangle {
        pub fn triangle1(&self) -> Vec<Point> {
            let mut data: Vec<Point> = vec![];
            let x = [0.0, self.width / 2.0, self.width];
            let y = [self.height, 0.0, self.height];
            if x.len() == y.len() {
                for count in 0..3 {
                    let tmp = Point::new(x[count], y[count]);
                    data.push(tmp);
                }
            }

            return data
        }
    }
}
まとめと反省点
- main.rsとlib.rsが同じ階層に有る。
- ディレクトリによる分別と管理を行う。
- lib.rsに何か書かれている。
- svgとしてしっかり?出力されている。
など上げたらきりがないのでここまでとします。
クレート開発とsvgの勉強をし直してきます。
アップデート情報
2020/12/27 Githubリンクの修正とrect lineの追加